Lesson Info
3. Retouching
Lessons
Lesson Info
Retouching
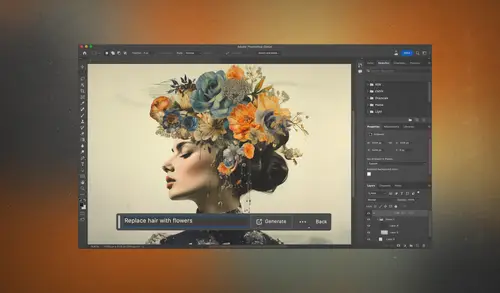
(upbeat music) Let's take a look at how we can perform retouching with the generative fill feature in Photoshop. This is an image that I shot many years ago and I've never been happy with any retouching I've attempted to perform on it. It was just too difficult to get things to look realistic, but now with the new generative fill, I find it to be easy. So before we get into retouching though, I should show you the two methods for accessing generative fill. The first thing you'll need is a selection. Photoshop always needs to know which portion of the image would you like to apply retouching to. So I'm gonna make a selection over here near the right side of my screen, so that it includes this tourist that's over here, holding the camera, and that's the area I'd like to work with. Then if you've just installed the beta version of Photoshop, you should have this little bar. And that bar is going to have the generative fill button within it. To perform retouching, all you need to do is c...
lick that button and then it's gonna ask you for a text prompt, which means it wants you to describe what you would like it to generate in this area. And if you'd like it to retouch something, just leave it empty. And on the right side is a choice called Generate, and then it's gonna think a little bit and fill that area. Well, that little bar is known as the contextual task bar. Some people love it, some hate it. I'm in the second group because I hate anything that covers up my picture, because if I wanna make a selection right here, starting in this area, I simply can't without moving this out of the way. You can move it, you can click on this little bar on the end and reposition it wherever you'd like, but it will usually appear wherever you've done something recently, like if you make a selection over here to select what you'd like to remove, and then you see it just moved over to that area. So this is one way we could do it. If you happen to not like this bar, 'cause you just don't like things covering up your image, then there's three little dots right here. You can click on it and there's a choice right there of hide bar, but you have a few other choices. You can pin the bar's position, so you can move it somewhere on your screen, maybe to the lower right corner of the screen, and then pin it, meaning that it won't reposition itself automatically anymore. But I personally prefer to hide it and then it just won't be visible. If you ever need to access it or you decide you want to go back to using it, all you need to do is go to the window menu. And within there, you'll find a choice of contextual task bar. Choosing that will simply get it to come back. So that's one way of applying generative fill, is the contextual task bar. It does have a few other icons. If you hover over those icons, it will usually give you a tool tip that will tell you what they will do to the selection you've made. And right here, any time you see a tiny little down pointing arrow, it means there's a hidden menu. So you click and hold to access the menu that's there. But for me personally, I'm gonna come over here and hide the bar. The second way of accessing generative fill is to go to the edit menu and there you're gonna find a choice called generative fill. And when you do, this comes up and it wants you to enter a description of what it should put within the selection. If you want to do retouching, just leave it empty and hit the generate button. I'll speed up this progress bar once this one is done, so that you just don't have to watch it so many times. But know, anytime I use generative fill, it does take a little bit of time. Now you notice under my edit menu, when I come down to generative fill, there's a keyboard shortcut listed on the right. That's not there by default. When we talk about tips and tricks for using generative fill, which is one of the last lessons, I'll show you how to assign your own keyboard shortcut. Now we've done generative fill in two locations in this image. Let's take a look in our layers panel. Anytime you use generative fill, it will always generate a brand new layer, leaving the untouched original underneath. Then you could turn off the eyeballs on those particular layers to reveal the original picture, turn them back on to see your end result. Or if you click on the left side of the layer on this little thumbnail image, then you can do more. And that is up here in the properties panel. It always generates three different variations on the generative fill that it produced. And you can click between the three and you'll find the image change to reveal the three different versions it produced. And it depends on what it is you're retouching, it's just gonna be kind of click between them, to decide which one looks best. I can go to the layer that is above, click on the left side of it as well, here where this little thumbnail is. And there I'll also see three variations. I'll click between them and I can see a difference in the shadow that's being generated there. If I hide these two layers and look at what the original shadow was doing, I can see it extending here underneath this motorcycle. And so I think I want it to do that here on the first generation, if I turn these back on, it comes out just a little bit, but to me it doesn't look natural on the end. The middle one here extends quite a distance and then the middle one is a little bit in between. So it's just a matter of deciding which one you think looks most effective there. Then let's apply generative fill to retouch a few other areas in this image. If I zoom up over here near the left, you're gonna find these posts that are here and I want to remove those. So one thing that I often do is I come to the left side of my screen, I'll click just below the lasso tool to get to the object selection tool. If that's not the top most tool within that slot, you can click and hold on it because there are three tools that live in that slot. With the object selection tool turned on, up here in the options bar at the top of your screen, there's a few things you might need to change. The first one is one called sample all layers. If that is turned off, then Photoshop will ignore all layers, except for the one you're currently working on, which will really limit what the tool can do. So I turn on sample all layers. The other thing is over here there's a mode, and I believe the default setting is set to rectangle and I find you can get much more precision and just more useful results if you set it to lasso. What that is, is if you wanna select an object within your image, this determines what shape you're going to draw. If it's set to rectangle, I can only define an area by making a rectangle and sometimes that's just too simple. If I choose undo, if I set it to lasso, I can instead draw free form shape to define the area I would like it to select, and I just find that to be much more versatile. The other thing I'd like to turn on is this choice over here called Object Finder. And when that's turned on is when you're going to see that if you hover over your image, you're gonna see pink overlays, showing it the various objects that it has found within your image. A single click on any of those areas is gonna select that particular object. So here, I'll click on that guy and you'll see that he becomes selected. Not all objects will be recognized though. So if I wanted to select this thing, I notice when I hover over it, it includes not only the pole I want to get rid of, but also the elephant behind, and that's when I'm not going to use that feature that gives me the overlays. Instead, I'm simply gonna click the mouse and I'm gonna drag a outline around the object. It doesn't have to be a tight outline, it can even go a little bit inside the object if you want, and it will attempt to find an object that is near the edges that you drew. Then I could come in here and try generative fill, edit, generative fill, and just leave it empty and hit generate. And I find here it's not looking all that great, especially around the edges. Let's try the other variations. If I notice that all three other variations seem to have issues on the edges, it usually means my selection was too tight and there were some areas that you likely wanted to remove that were not included in the selection. If that's the case, I would usually just throw away that generative fill layer by dragging it to the trash at the bottom of my layers panel. Then I would go to the select menu and usually you'll find a choice called reselect, that'll bring your selection back. Then there's a couple things you can do. You can either grab one of your selection tools, like in my case it's a lasso tool, and if I zoom up on this, I can see that my selection did not include a few areas of that object. So I could hold down the shift key, because holding shift adds to a selection and I could circle around those areas with something like the lasso tool to ensure that they're included in my selection. In here, it doesn't look like the selection completely enclosed these areas that I wanted to retouch. I also see a little hint of the edge here and along here and a bit there. So really you should evaluate your selection after making it to make sure it truly includes what you want. Now when it's a little too tight around the edge, you can either go to the select menu and choose modify, and there you're gonna find a choice called expand. And I could type in a number, maybe three. That means make it three pixels larger on each edge and that's probably gonna extend it out, so it includes all those little edge pixels. Another way of doing the same thing, is if you happen to have the contextual task bar visible. If you remember there was this little menu, anytime you see a down pointing arrow, and if I click here, one of the choices was expand selection, and that's the exact same choice that I used, I just accessed it from the select menu. So I wanted to mention that in case you end up using this bar. But at any time you can go over here and say, hey, I see a little part of this object that's not included, so let's hold shift when we use our lasso tool and let's expand that. Now let's see if it can do a better job. I'll hit the generative fill button. I'm gonna leave the prompt empty and just hit generate. Remember, you're always gonna get three variations. So over here in my layers panel, I'm just gonna click between the three to see which one I prefer. But you're not stuck with those results either because when you're in this area called the properties, there's a generate button and if you click it, it's gonna generate three more variations. So you'll have a total of six. And you can click that button many times. There is a limit, it's something like 60 or 80 different variations. There I think that front leg is much better defined with its little, I guess you'd call 'em toenails. And that one I don't like so much. And that one could be okay if his leg is tilted. So it's a personal choice as to which one you like best. I'm actually gonna say that one for me, but if I don't like it, I just hit generate once again, and I got three more options to go through. There's option two and the new option three and I just need to go through, I'm thinking I like this version. Let's retouch a few other areas. There's another one of these posts on the right side, so I'm gonna go to the object finder and I don't think it's gonna find it, so I'm just gonna draw a shape around it. Now when you draw shape around something, usually the object finder will ignore shadows. But if we're gonna remove the object, we better remove the shadow as well. Otherwise you're gonna see a shadow with nothing casting it. So I'll switch to my lasso tool, I'll hold the shift key, and I'm gonna add this little area here. There's also a small rock I'd like to include. Up here at the top, I notice a little area that's missing. So again, I'll hold shift and I'll drag around that particular area. I see one other spot right here, it's missing, so I'll grab that. And then finally, I'll probably expand this just a little bit because I think I can see little artifacts in the edges that are not included, but I'd like to have retouched, so I'll expand it by three pixels. Now it looks like all those little edge artifacts are included. Everything I really want to work with is there, and it's okay if I overlap the elephant's leg a little bit. It will generate new content there, but it'll usually match and look fine. If you don't want it to, then hold on the option key, that's Alt in Windows, and that's how you take away from a selection. And so I could use my lasso tool and remove that spot. Then I'll hit generative fill, leave the prompt empty, and hit generate. Remember, you get three variations, so don't forget to switch between them. And I'm thinking I like maybe the first one. Now each one of these variations does take up space when you save your file. And so if you leave a bunch of these in here because you hit the generate button many different times, your file size could start becoming a little bit large. So if you know you're gonna use just one of these variations, if you hover over another, you'll see a trash can, and if you click on it, you can discard the other variations that you're not actually gonna use. And by doing so, you are going to make your file size smaller. So I could go to the other layers that are here and I've already determined that this is the version I want to use. I could hit these little trash cans. I'm sure Adobe will eventually add a feature that just says delete all but you know the master one. There are other options. There's three little dots here. If I click there, you can just give Adobe feedback. Was it a good result, a poor result? Or you can report it if something inappropriate appears, something offensive or something else, that you wouldn't want a tool like this to generate. But this is usually more useful when you've used a prompt, which means you've typed in text up here. So I can go to these other layers and simply delete those to get my file size to be the smallest that would be practical for this image. I'm gonna type command zero to zoom out, and let's do a little bit more retouching. Up here, there are some little bars I want to get rid of. There's something can be useful when using the lasso tool to define an area because if I come over here and use the object finder and I hover over here, it can find this guy, but it's finding more the entire building structure that's here and not the pieces I want. So I could come over here and sure, try to draw around them, but if the area is rather complicated, it's probably not gonna deliver exactly what I need. Well, we can find out. That's not too bad. But I think it expanded out much further than I needed. I'm gonna choose undo. Now let's end up seeing how we could use the lasso tool to be more precise. When you use the lasso tool, there's actually more than one version of the tool. If you come up to the lasso in your tools, click and hold, you're gonna find that there's a lasso and there's a polygonal one. The polygonal lasso allows you to draw straight lines and if you were to use it, you could come in here, and if you wanted to get rid of these areas, you could very quickly, with that polygonal lasso, define what you'd like and isolate it. But the problem is you then have to switch back and forth between the polygonal lasso and the normal lasso, but there is a way, using keyboard shortcuts, to actually access both. So let me finish off this selection and then I'll show you how to access this polygonal lasso feature while you're using the normal lasso tool. So I'm just gonna click where I started to finish this selection and I'm gonna go over to the normal lasso tool. Then anytime you're working with an existing selection, as I did before, I have to hold shift to indicate I want to add to my selection. I'll click my mouse and I'll start drawing with the lasso tool. Now the moment you click the mouse button, you can let go of shift. It's only the moment you click that it pays attention. Then if you're going through this and you have no keys on your keyboard held down and you really would like a straight line, check this out. Hold on the option key, that's Alt in Windows. Keep that key held down and don't let go of it, but then let go of your mouse. Now as long as you have that option key held down, you're gonna make straight lines with each click you make. So I'm gonna make some straight lines here and you can at any time just click and drag and you're not making straight lines anymore, you're making a freeform shape. The only thing option does is it means, when I let go of the mouse button, don't finish my selection, wait for me to let go of that option key as well. So right now I'm not holding my mouse down and I'm just gonna let go of option. Now I'm gonna add a little bit more here and here. To do so I first need to hold shift, to say add to my selection. I click the mouse and then I can let go of shift because it only pays attention the second I click. Now I can hold option to say, if I let go give me straight lines, and I could click around in this area to define what I'd like. Then I can repeat the process, holding shift to add to my selection, letting go of shift the moment I click, holding option before I let go of the mouse button. So I can come down here and draw straight lines and only after I let go of the mouse can I let go of the option key and it finishes a selection. It takes a little bit of practice, but it can be a nice way of defining areas like this. So I'm gonna hit generative fill. We'll leave an empty prompt and just hit generate. Let's click through between our three different variations to see if there's one we like and I think I like this one the most. There are a little bit in here that I don't like. And so sometimes I end up supplementing generative fill with other tools because using generative fill can take a little bit of time to wait for that progress bar. To supplement generative fill, I'll click on my top most layer. And in fact, most of the time when I use generative fill, I would have my top most layer active. Therefore whatever I generate can cover up those layers that are underneath. And so I should have had that when I did my previous one. I'm gonna create a brand new empty layer and then the tool I'm going to use to supplement this with, is to come over here to my tools panel and just above the eyedropper tool is this slot, which holds a whole bunch of tools. One of the tools in that slot though, is the remove tool. And the remove tool is very nice for just painting over an area and having it remove whatever's in that area. It's not gonna produce quite as sophisticated of results, like it wouldn't be as good at reconstructing legs and things. But if there's any area in here I don't like, like here's a little blurry spot, I can very quickly remove it or get rid of any of these little pieces that are randomly sitting there. If there's anything that generative fill did that just left a little bit of a residue or something I didn't like and I don't want to regenerate the entire area, then sometimes that's what I'm gonna end up using. I end up creating a brand new layer first and then I use, right over here, the remove tool. In order to make it work on an empty layer though, you'd need to have this turned on, sample all layers. So now let's zoom out. Here is our image and if you want to compare before and after, we have a bunch of generative fill layers here and one layer with that manual retouching in it. And all I need to do is if I go to the bottom most layer, that contains my original picture, I'll move my mouse on top of the eyeball that's there and if you hold down the option key, that's Alt in Windows, it will hide all layers except for this one. So we can see the original image. I'll option click a second time and you can see what we have done. But now let's move on to a different image. I'm going to work on this image and what I'd like to do is actually remove this tan line that is here. To do so, all I need to do is select the area that is tan out here, right where the pale area ends. And since I don't want to change the look of the shirt that is here, I'm gonna go just the tiniest bit of an overlap onto it. I'll hit generative fill and I'll leave it empty and just hit generate. On occasion, you will see the warning that just appeared briefly. And that is mainly when you are working with an area that could potentially contain nudity where generative fill would think that that's what you're attempting to generate. So if that's ever the case, where it simply will not fill it in, then when you hit generative fill, you might need to type something in. And all you need to do is type something in like, tan skin, and then it's telling it what to generate and it knows that you're not attempting to generate any detail in an area of nudity that might be inappropriate. It's just trying to be safe and not have it suddenly show body parts that Adobe doesn't want to be responsible for. So now I've done that over here in my layers panel. Remember you always get three variations. I just need to make the properties panel a little bit larger and here is one and there's a third one. Now this one contains a nipple and that might be something you'd consider inappropriate. If it was, you can go here and report it if you'd like. Or if you don't feel like reporting it and it's not what you wanted, you could just delete it. But here are at least two versions that could be usable. And the main thing I would look at here is what does the clothing do on the edge? And I like the second version in that case. Also, on occasion I might lower the opacity to end up less-ing it a little bit, if I still want to hint of the tan line to be there. And you just click right on the word opacity and drag left or right. Let's go to yet another image. In this case we have scores of tourists. This building is always jam full with them. So I'm just gonna use the lasso tool and I'm gonna go the littlest bit outside the people that are here, so that we attempt to retouch out a minimal amount of space. I'll try not to get rid of these statues that are here and my hope is that Photoshop recognizes that there's a series of statues getting smaller and smaller as it goes further away here and it might generate new ones. And so I'll do something about like, this, go down to the bottom and back across. Then I'll hold shift to add to my selection. I'm gonna add these people that are on the far left. And then what I often will do, is I'll preview my selection in a different way that is often more useful. And what that is, is when I have a selection, I can go to the bottom of my tools on the left side of my screen and there's this icon. This turns on a mode known as quick mask mode. It can also be turned on by typing the letter Q, which is what I usually use. When you type Q, you're gonna get a red overlay that indicates the areas that were not selected. And so now I'm gonna look in the red zone that's out here to see if there's anything that should be retouched that is covered in red. I think this is one of the statue's heads, so it'd be fine to keep that. But right here I think there's a person's head that I want to have retouched out, but it has red on top indicating it was not selected. The same is true here and I see a few other heads. So I'm gonna use the lasso tool and I'm gonna trace around those that I think should be retouched out, something about like this, and then I need to fill that area with white. White will end up removing the red stuff. There are many different ways of filling with white. One is to go to the edit menu and choose fill and within here you have the choice of black or white. Black would add to the red stuff by the way. I can see here also this guy's head is somewhat covered in red, so I'll come over there and again, edit, fill, and then tell it to fill with white. That takes away the red stuff and then I'll just continue looking around. I think there might be a guy's head right there and I'm just trying to make sure I really get all the people outta here. Now I don't like coming up here and choosing fill all the time. Well, there's a keyboard shortcut that can fill with your foreground color or fill with your background color. Here, I'll just make a selection up here to show you. If I want to fill with my foreground color, which is currently black, I do option, delete. That would be Alt backspace in Windows. Or I want to fill with white. White is my background color currently. To fill with my background color, I do command delete on a Mac. That would be control backspace in Windows. And it all depends on what your foreground/background colors are currently set to. But option delete on a Mac will fill with your foreground color. And command, delete will fill with your background and so you can quickly come around here and fine tune this. The other thing that you can do, is you don't have to make selections and fill, you can simply grab the paintbrush tool. And if you use the paintbrush tool and you paint with black or white, black will add to this red overlay, which indicates what's not selected, whereas white will take away from it. So once I've come through here and I've made sure that pretty much everything I wanna retouch is not covered with any red at all, red is the area that's gonna be left alone. I could look on the opposite edge of this on the inner part and say is there any part that's not covered in red, that I'd rather not have retouched? Well, there are some green ropes that are in here and I might decide to come into an area like this and retain as much of those curved green ropes as I can. There's a statue right there, I'd rather have it not retouch out the bottom of. Same with right about here. And so I'm just gonna make a selection approximately like that. I'll then do option, delete, which is fill with foreground color. And I could do these kinds of changes until I'm confident that this is what I want. The one thing I might really wanna do here, is if you look at the area that's gonna be retouched out, it includes the entirety of the floor, with the exception of maybe right in the lower left. What I might want to do is make some selections like this, where I can see just wood flooring, and put red on top of it to say don't retouch that out. And therefore it has an idea of what should be in this area. If I don't include any of that, then it might be hard for it to, you know, really figure out what should be in those spots. And so over here there are different areas of wood I'm gonna get rid of, so that hopefully it will have some sense of what should be there after doing retouching. To get out of quick mask mode, when you're all done, you either click the icon that's right over here, below your foreground and background colors, or type a letter Q. Then I'll do generative fill, leave it empty and just hit generate. Zoom out when it's done and check that out. All the people are gone with one little exception. Remember it always makes three versions. So click between those other versions to see if you prefer one more so than the other. And if you decide you just want to start over, because maybe you think your selection still wasn't accurate enough, then you could always type command Z a few times, until you're back to this point. And you could come in here and modify your selection even further. Maybe it's that some of these statues that are here still have a good amount of selection on top of them and you feel like it shouldn't have quite retouched as much. So you could touch that up. I'll do one more spot over here on the far left, like that. And then you could hit generate again. So you can always decide that you would like to fine tune things by just choosing undo. There, we can zoom out and it really depends on how high resolution your image is and how much you really plan on zooming out, or zooming in, I should say. Here you see how I don't like this being on top of my image? I could always move this by clicking on the left side, maybe get it down to the edge of my image, and then tell it to pin it to that position, so at least then it's not gonna be covering up an important portion of my image. Again, we have three generated fills. Some I might like better than others. Let's say I like this one, but I wish the floor looked different. It's just kind of dark in the middle and I might not like it. Well you can always make another selection, to say now that we've cleaned out everything else, it's going to consider what that looks like when it fills this area. And I'll just do a brand new generative fill right on top of the original one. I'll leave the prompt empty and I'll click generate. And I get three variations of that, decide which one I think looks best. If I don't like any of 'em, hit the generate button again and you get three more. Let's move on to another image. In this image, I would like to get rid of this chain link fence. Well I've already done that so you don't have to wait and watch me make that selection. But I could make a selection of the fence by using quick mask mode and my brush, and just paint over that. I did that in the past and then I did a generative fill. My initial result looked like this and all that was was getting a selection that included all of the chain link fence and do generative fill with an empty prompt. And that's what it did. Initially, when you look at it, you might think it looks amazing, but then if you start becoming critical of it, you'd notice that the RV that is in the distance on the right, when I turn this off and on, what used to be an air conditioner on the roof, became a black blob coming down the side. The side windows that were there seemed to kind of generate into something else. And so you might need to go through and try other variations or you could use the retouching tools that I mentioned to fine tune things. That's what I happened to do down here. There's a little kind of heater or something and I didn't like what it generated. So I used the tool over here on the left side, that I showed you before, the remove tool, and it's usually pretty good at recognizing grids and patterns. And so when I healed on top of it using that tool, it created something that I thought looked better. Then I have another layer up here, where I did the same, trying to retouch some of those areas. None of it is perfect by any means, but here we're not getting into the normal retouching tools as much. We're trying to stick mainly with generative fill to give you a sense of its limitations and its capabilities. Let's move on to another image. With this image, what I wanted to do is to recompose the image, to rearrange the objects that were found within the image. So what I ended up doing is I just made a selection of where my wife Karen was on the right side of the image. And I'm gonna make a very crude selection by doing something as simple as this. Well the only problem with that selection, is it's overlapping the lamps that are there. So I'm gonna end up grabbing the lasso tool and to take away from a selection, you can hold on the option key, that's Alt in Windows, and draw over the area you did not want selected. So I'm gonna remove that area. So now I just have this piece. Then I would like to duplicate this area, copy it to its own layer. So I'll choose layer, new, layer via copy. I don't usually use this from the menu, I usually just type command J because I use it so often. And I think of Command J as jumping something to a new layer, so I remember the shortcut. Watch my layers panel when I choose this option and you'll see just the area that's selected will pop onto its own layer like that. Then what I'm gonna do, is I wanna use my move tool. So I've just chosen the move tool. I'm gonna click on my image and I'm gonna drag to the left, because I want my wife to be on the left side of the frame. But I want those lamps to be over here on the right. So I'm gonna work on the layer that's underneath. I'm gonna convert this from a background layer into a normal layer by clicking on this little lock symbol. And all that's mainly gonna do, is allow me to move this layer and if I move it where it goes beyond the edge of the document, what will end up showing up is emptiness instead of white. And I'm gonna move that over until my lamps are right where I want 'em to be, about like that. And now let's see if we can combine these together using generative fill. Although I'm not sure why I've moved them both downward, where there's a gap at the top. So I'm gonna sneak them back up there. Alright, well all we need to do is go over here and make a selection of this empty area. And it's best if you overlap the surrounding content just a little bit. You don't have to overlap quite as much as I did, but considering what kind of content it is, I don't think it'll harm it. I'm gonna hit generative fill and leave the prompt empty and it should look at the image and just decide what to put there based on the surroundings. Remember you get three versions or variations, so be sure to click between them, because one might look a lot better than the others. I'm fine with that one. And then here I see this abrupt transition right here, where it's just a straight vertical line. I wanna avoid that. So I'm gonna find which layer it's on. I think it's this middle layer. If I turn off the eyeball you'll see that disappear. And what I'd like is to actually get rid of this part that comes over here and has a little shadow and has this little dark area, that thing. And I'm gonna do something, like we'll get rid of those bricks maybe, and I'm just leading from the layer that has that vertical line. And I'll just literally hit the delete key, to say I don't want that portion of it. And then finally I need it to fill in what needs to go there. So I'm gonna make a selection of that area that's now missing. And straight up here, maybe something approximately like that. Now I do wanna work on the topmost layer, because if we do generative fill when we're working down here, this layer that's on top will cover up what's there and it might not deliver what we want. So I always work on the topmost layer most of the time. I'll hit generative fill, leave it empty, hit generate. I'm just not sure what it's gonna do with this vent like area. We have three variations. So let's click between them to see which one renders the vent at the top in a way that is looking good. I'm thinking this one and then one last generative fill over here, 'cause I can see this lens that's here repeated, that my wife Karen was holding. And I could look for any other repeated information, like this little shady area in the lower left, is probably the same as this. So I could hold shift and just to ensure that it's not repeated, I could select an area like this, because I think those portions are also found over here on the left. And then finally one last generative fill with an empty prompt. And let's look at our three variations. Now I'm kind of liking that one. So you can see how you're able to recompose an image. Now there are some limitations to this. Photoshop can get confused if the lighting is not consistent. So here it looks as if the light was coming from the upper right because of the way the shadows are raking across the scene. If you recompose it so the shadows go in directions that would not be natural, then it might not be able to figure out really, exactly how that middle portion should look, but it'll still try. Then we have one more image. Now this is the kind of image it is not gonna do great on because what I'd like to do in this case, is first off, I want to fill these corners, because this one I tilted up when I originally took this photograph. And it made it so the building was smaller at the top and bigger at the bottom. Just like when you take a picture of a skyscraper and you need to tilt up to get the whole building. And then I corrected that perspective distortion to make it straight and that caused these corners to happen. Well I'm gonna do generative fill for that. Empty prompt, so it figures out what to put there, and I'm assuming it'll do an okay job in those areas. It's not too bad. The one area that it really messed up on is right over here, where this particular area should curve, just like it is here, here, and on the opposite side. If we look at our variations, I doubt it will do a good job there, but we can take a look to see which one we like best. But then here's where I think it's gonna completely fail me. What I'd like to do is remove the palm tree on the right. Well if you were to remove the palm tree on the right, you would need very specific information in here. And anytime you need something that is supremely specific, where only an exact kind of information would be workable, then this is not usually going to suffice. So I'll expand that by four pixels. Let's double check my selection just like I did before by typing the letter Q for quick mask. I'm gonna ensure that this, there's no part of the tree that is in the red zone. Red means what will not be retouched. I see part of the tree right here is in the red zone. So I'm gonna make a selection there. I see. I also see part of it here because if it's covered in red, you're telling it not to retouch that area. So when I select those areas, I'll do a command, delete. That means fill with background color, 'cause my background color is white. I see some areas there, command, delete, a little part here sticking out, and a lot of it up here. But since that's just sky in that area, it would be fine to retouch a large portion of it. It's mainly where the building is that I want to have minimal areas with, where I want to be really careful, because I don't want it to have to retouch out anything that is not needed. Up here at the top I'll do a more generic, 'cause it's just a simple sky that needs to be replaced there. Maybe just a little bit in here, A little overlapping of the windows. And one last little area. All right, I think that is relatively good, as far as defining what needs to be retouched. I'll type a letter Q to turn off quick mask mode and let's do generative fill. And I don't have great expectations in this particular case because it needs to be exact material to work for the majority of those areas. First off, it didn't completely remove the tree. We still have the trunk there. Let's see which areas changed. What you can do is in your layers panel, you can see a mask that's here. It's attached to the generative fill layer. That determines how much of the image it can affect. And when I take this, and click on it, there's a way to view it as an overlay. And therefore the overlay will show you which portion of the image is being affected. So with this portion of the layer active, it can just be any part of the layer, on your keyboard, it the back slash key. On a Macintosh, it's right above the return or enter key. And that will put a red overlay on the image where it did not change the image. So all that area that's got red on it is where it did not change the image. And so it actually did a pretty good job. I'm surprised at how good it did generating this little curved edge. But here the window, the Mulleins that were in the windows suddenly don't look right. But I'm gonna turn that off by hitting back slash again. And remember we get three variations. So click on the layer and let's try the three. See if one happens to look better than the other. And if it doesn't, hit generate again, and click through your three new variations. I don't think any of those are better. So I'm gonna go for the one of these that had a thinnest tree and I'm just gonna do another generation on top of it. In order to get rid of the tree, I'm gonna do a more generic selection, where I'm not trying to be close. Instead I'm using that trick I showed you about using the polygonal lasso tool. I'm staying a little bit outside of where the tree would be. I'm gonna go way out here, 'cause wherever the sky is is so simple that I'm not worried about it and make sure that I truly get in there. And if I'm not close to the edge, usually it will be more aggressive. Get a few of these little side areas and one area right there. Let's give it another try. We'll just generate right on top of that one with a brand new generative fill. Now the majority of the tree is gone. Remember we have three versions. So let's click between the three and see if one is better than the other. And I would say the first variation was the best. I might touch this up by creating a brand new empty layer. And remember that tool, the one called the remove tool? Well, I'll just come over here and those little areas that I still don't think look good, I'll just paint over those. This will usually be able to clean them up, as long as it just needs simple content. And there are some areas where it really screwed up over here where this railing is. You can see how distinctly round and it varies from a V shape to kind of a cross shape to a V shape again a cross. So this here should be a V shape and there should probably be another one there, completely messed up on. We can see if this replace tool can do any better. I'm not completely sure that it would. No and so that's where you might need to do some manual retouching. The other areas that would need manual retouching are right here where the window needs very specific information and if portions of this window were included as well. Again, I can try with this tool, but I don't expect it to necessarily do a great job. But if I were to copy this window and reflect it horizontally, I could put it over there. So you get the sense though for kind of how extreme of retouching it can do. I was actually somewhat surprised on this one that it did as well as it did. So now you should have a sense for how to do retouching with generative fill. Main thing is make a selection and do generative fill without typing any text in. But be careful your selection because the sloppier you are, the sloppier it might be in its end results. So think about using quick mask mode, just type letter Q after making a selection to get a preview of really where the edge is. And you might wanna refine it a little bit. Also, don't forget about using the object selection tool. If you use it though, you probably want to go up to the select menu, choose modify and expand it by at least a few pixels, so it gets a little bit of overlap onto the background and you don't have a selection that has any kind of artifacts on the edge of it, like the little edges of an object not being fully included.
Class Materials
CLASS MATERIALS
Ratings and Reviews
Tommy Keith
Highly recommend following and watching Ben's classes to stay up to date on Lightroom and Photoshop. Even if you never watch any other classes on CreativeLive, just watching Ben's classes make the cost of Creator's Pass worth it. He not only teaches you the new material, he is such an expert on Adobe that you learn ton's of short cuts and creative ways to help you in your every day processing. Thanks Ben!
Laura K.
Ben, thank you for continuing to return to Creative Live and to provide update courses here. VERY GRATEFUL!!!!!!
Audrey Agin
Ben is a great teacher, easy to understand. I have watched the majority of his classes, and always looking for his next new subject.