Lesson Info
4. Extending Images
Lessons
Lesson Info
Extending Images
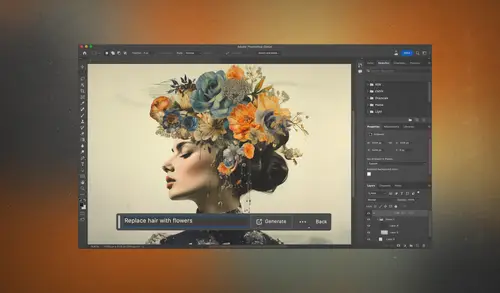
(mellow music) Generative film can be used to effectively un-crop an image that was cropped in camera meaning that the framing of your original composition, your original capture, you're not stuck with. If you want to add space to it, maybe you would need to add space so you can put the name of a magazine in there and you have space for it. Maybe you have a vertical photograph, you need to turn it into a horizontal and it just doesn't work out. You end up cropping into some of the content. But with generative film, you can end up expanding a scene and have new information generated. Let's see how it works. This is a friend of mine, Cassandra here, and let's see if we could expand this because I really don't like that her arm is bumping into the side of the frame here and her body is at the bottom. That's gonna limit how this image could be used. Now if we want to expand this what we could do is come over here on the left side of my screen and choose the Crop Tool. With the Crop Tool,...
you can usually click and drag like this to expand the width or pull down like this to expand the height. And at the top of your screen in the options bar there are some choices and one of them has to do with Generative Fill. Here's a choice called fill and the default is to fill this newly added area with your background color, whatever the lower color is out of these two in your tools panel. But you have two other choices. You can do content aware fill, which is not quite as sophisticated as the one we're going to use which is called Generative Expand. When I choose that option, now all I need to do is down here I'm gonna press the Return or Enter key and there was a prompt by the way at the bottom of my screen. I simply left it empty. And now let's see what it's able to come up with to expand this image. Notice that it simply constructed more of her arm and it gave us more of her outfit as well. Well, remember you have three variations. So over here, let's click on the second one 'cause her outfit will look a bit different. And let's go for a third one. And if you don't like any of them, just hit Generate once again. If it says it violates user guidelines, it usually thinks you're trying to reveal something you shouldn't like trying to retouch out her top and have it generate what would usually be found underneath. And most of the time you just need to type something in and it's odd for it to do that after it's already successfully generated a few variations. I'm assuming it has to do with the look of that last one but I'm just gonna try it again to see if it allows for it and if it doesn't, I'd have to type something in like dress or swimsuit or something similar to that. So I'm going to come in here and just type in. Sometimes it will seem to be stuck on giving you that warning as if it just cannot get beyond it. And when that's the case with something where I'm trying to extend the image, what I'll usually do is just revert the image by going to the file menu and choosing that and just go all the way back to the Crop Tool itself. If I'm still in the Crop Tool I just click and I get a new cropping rectangle. Up here I need to make sure we have Generative Expand turned on and I'm just gonna try it again. And in fact this time, let's see if we can go and get a little bit more of this to show up. I can either press the return key to accept it or down here at the bottom is where it wants me to type something in. But if I just want to expand, I don't have to type something in, I can just hit Generate. That's rather amusing. It looks like she, it thinks she's in a hot tub or something. Let's see if the other variations are any better. There we go. And one more. Again, you can hit Generate to get even more and what you'll find is that it will not be very good at doing hands. Sometimes it does an amazing job with hands but the majority of the time I find it has no idea how many fingers somebody should have, that type of thing. Sometimes you just hit Generate again. But the problem is in this case we're getting such differences in what the surroundings will be that I doubt the hand itself will be useful. So let's come in here and see if any of these are better. I think down here, this is the one I wanted. I really don't like the hand that's here but right now we're talking about extending images and in order to fix things like the hand, we have to be typing in prompts and we have a whole separate section on that. And so I'm going to hold off on that until that session and hopefully we'll run into something similar. Lemme show you a result that I got from this image earlier though that I was amazed by. When I was preparing for this class, I started out with this image and I tried to extend it going to un-crop it,, I got to this point and then I forgot that I had ever done that and I came back to work on this class again. I saw this version assuming it was the original version and I extended it yet again. And when I did, I ended up with this and you can see how much information was added. The hand's not perfect but the majority of it is very usable. Let's switch to another image. When expanding I'm not always using the Crop Tool. In this case, this photo was taken with a fisheye lens that delivers a round result and I want to fill in the areas that were black. So to do so, I'm gonna select these corner areas. There are many different ways I can do that. I could attempt to use that object selection tool and see if it can find what's here on the edge. If it can't, which it doesn't seem to be able to have found, I'll circle around this to see if it will select that middle portion that looks like an image and hopefully just become smaller. Then I'm gonna make this even smaller because I can still see hints of black out there on the edge and it does look like it did recognize the middle portion. It was this outer part it didn't, so I could have clicked in the middle. Let's see what it would produce. I'll click there and it should replace the selection that I had and but still there is some of the little shadowy area included. So I'm gonna choose Select, Modify and this time I'm choosing Contract. That means make my selection smaller and I'm probably gonna type in about because there's a good amount of shading in there. Let's see, I'm not sure if that made it all the way in. So let's go a little bit further. Contract that maybe eight more pixels. All right, now we have the portion in the middle that I'd like to keep. I notice that my wife though is in there and she is not selected. So I'm gonna hold shift and I'll use my Lasso Tool to add to my selection. I'll go around her and then I want the exact opposite of this because right now I have the area I want to keep selected. So I'll choose Select, Inverse. Inverse gives you the opposite. So now we have the outer edge and then I'll choose Generative Fill. Just remember there's two spots to get to it and the other one is under the edit menu and it is right there. Generative Fill. Leave an empty prompt and just hit Generate. Remember you always get three variations. So let's click between them to see if I like one much better than the others. I think I like the first one. And then if you want your file size to be smaller, you might as well hover over the other two and hit the trash can to get rid of them. Let's switch to yet another image. This is the original as shot and I wish that I got more of this. Like we're down at the bottom, I can see the hints of some palm trees and there's a telephone pole and things. Well, let's just grab our Crop Tool. Let's yank it down here. And by the way, when you're using the Crop Tool there's a couple tips you might want to know about. The first one is lemme choose Undo so we have the original in here. If I grab one of these sides and I would like to keep the proportions, the shape of this rectangle consistent. When you grab one of these sides, hold down the Shift key. Shift is going to make sure that whatever shape this rectangle is, it remains that shape. So if it was a square, it will remain a square. If it's a horizontal rectangle, it will remain the same shape of horizontal rectangle. The other thing you can do is if you're grabbing one of these handles, you can hold down the Option key and it means that's all in Windows, pull the opposite handle in equal amount and therefore if you want to expand both sides at once you only need to grab one of the sides, hold down the Option key while you're dragging and the other side will move along with it. But I'm gonna pull this down and see how much we can add there. I'm going to then press Return or Enter then I'll type command zero to zoom out. And we have three variations, so let's click between them and we could even have influence over it by typing in a prompt but we're gonna talk about that in a separate lesson. If we want more than three variations all it is is one click of the Generate button away and you can get even more. Let's attempt to extend this image. I'll go to my Crop Tool and what I'd like to do is just have it add a whole bunch of space down here and on both sides. So when I grab the side here, I'll hold Option to evenly add space, maybe add a little space at the top too. Then I'll just press Return or Enter to get it to generate some content. Pretty amazing that it just comes up with something. But remember we have three variations so let's click between them. That looks like random stuff. Interesting. I would say the first one is the best. Then let's zoom up on the portion that is the original picture and let's look at how sharp it is and just how detailed it is. In fact, let's view it at 100% view, which is about here. Then let's scroll into the area where we added content. And if I come down here you're gonna find a very distinct transition. I'll show it over here where it's more obvious. There are some buckets here with some content and right there it just turns soft. The moment it gets to the area that did Generative Fill. I'll turn off the Generative Fill to show you where the original image ended, turn it back on so you can see where it's happened and you're gonna find that throughout. Why is that? Well, right now there's a limitation on Generative Fill while it's in the beta version of Photoshop. And that is that the largest area that you can fill is 1024 pixels in width or height. This image that I'm working with is much larger than that so I'm requesting it to add, let's just say 10 times that in the width and height and when that's the case, it generates its maximum size which is 1024 pixels in width or height and then it scales it up to fill the area you've requested. Anytime you scale something up, things start looking soft. And so that's an issue we're gonna learn how to deal with. So if you look at this image in the lower left, it tells me the dimensions of the image. It is 6,613 pixels wide by just over 4,000 pixels high. So obviously it had to scale something up to at least six times its normal width of what it could generate and that caused it to look soft. So what can we do about it? Well, let's turn off this Generative Expand that's been applied. So we're working here and the only thing is we don't want white to be out here because if I tell it to fill an area that is small that doesn't extend all the way to the edge of the document it will assume it needs to match this white when it hits it. And what I'd rather do is have this look transparent. So what I should have done is before doing the cropping I should have clicked right here on this icon to end up getting rid of the background layer turning into a normal one. But what I can do right now is I'll use the Marquee Tool I'll make a selection of our image and then I'm just gonna add a layer mask and that's gonna hide everything that's outside the selection. So let's do that. Okay, now here's how we, what I would do. I'm gonna grab my Selection tool and before I end up using it, I'm gonna go to the window menu and I'm gonna open the info panel. Now the info panel will tell me the size of whatever selection I make. If I click and drag like this, you can see a width and height listed right over here. The measurement system that's used matches whatever your rulers are set to but you can change it by clicking on this little cross here and I want it to be on pixels. Then what I'm gonna do is make a selection that overlaps my image a little bit. I'm gonna extend it off to the right and I'm gonna look at those numbers and I'm gonna wait until they get up to around 1,024. It doesn't have to be exact, it could be a little bit less and I'll make it to the height is approximately the same. The main thing is that it's not larger than 1024 in width or height. Then I'm gonna do Generative Fill and we're gonna fill only that area using an empty prompt. Since that's within the range that Photoshop can generate it should deliver a crisp looking result. Then, so I don't have to make a new selection I'll go right up to the select menu, choose Reselect, get that area selected again with my Marquee Tool active, I'll click within it and just drag down a bit and I'll make sure the selection overlaps the both above and to the left. I'll hit Generative Fill and do an empty prompt. Now I'm gonna do that to fill the rest of this document which will take me a bit of time and then I'll show you the end result. Well, I gave up on filling all of the image that I had done before 'cause it just takes too much time. I'll show you a faster method in a moment. But let's take a look if there is a quality difference. I'm going to go back to the original image by option clicking on the eyeball for the bottom layer that's all clicking in windows. Let's go back to that area where we had this tub of what looks like salsa or picanti or something. And remember that's where the transition was where it suddenly went soft. Well, let's then view what the result is when we fill only 1,024 pixels at a time. Well, now I don't, I can't tell exactly where the transition is necessarily there. Down here I can because it wasn't able to know exactly what carrots are and be able to draw them exactly right. But you notice that the image does not suddenly become blurry. It might become something where it's not the appropriate content or something else but let's see where it was on the right side of the image. Okay, it was right in that area. So let's look at the end result. This looks nice and crisp right here. So how can I do that efficiently without being annoyed by having to manually make a bunch of selections and repeatedly do Generative Fill? So to show you, let me first revert this image back to its original as if we have never added any space to it. And then the way we're going to expand this is, we are gonna do it in 1,024 pixel sections at a time to ensure we get the highest quality but we're gonna take advantage of actions. So I'm gonna come up here to my window menu and that's where I'm gonna find the choice called actions. And I have some special actions that I recorded that you can download with this course. I'll show you how to install them after I show you how to use them. And then this should make the process easier. The first thing we need to figure out is how many 1,024 pixel wide areas does it take to make it across the width of this image? And to do so, we have an action here that says "High res, grid count overlay." I'm gonna choose that action and then I want to hit the Play button at the bottom of the actions panel, but this little bar is covering up 'cause that's where I happen to choose to put it and that's one of the reasons why I like to hide this bar 'cause it just gets in the way. Anyway, I'm gonna hit the Play button and let's see what happens. This is gonna overlay a grid on top of your image and it tells you here in some instructions that you can move over to count how many grid squares there are in the side of the image you'd like to expand. If you want to, so this means there's 1, 2, 3, 4 in the width of the image. Then you just hit Continue. So now I can say, here, let's expand this image, let's expand it down and we need to go four across. Remember, the grid told me I need four in the width so I choose this and I simply hit Play. Then I gotta wait a short time but at least I don't have to do any manual work. That might've taken a few minutes but it was just one click for the most part. Now I can go back up to that grid overlay, 'cause now that we've added to it there was going to be more space. So I'm gonna hit Play. And now let's just see vertically how many grid spots we have. We have 1, 2, 3, and there's four total. So I'll hit Continue. Now what I'd like to do is expand four and I would expand towards the right. So here are ones that have the word right on it and here it says four with the word, right. So I'm gonna hit the Play button. Then I want to expand the opposite direction which would be towards the left. So I will find one that has the word, left. I remember that it took four of those grid squares moving down when I was counting them and I'll apply that action and now it is done. Now if we look here in our layers panel, I have it looks like applied approximately a dozen generative fills but that's by applying a total of three actions. So I had to do like three things and it did the rest. And now you can see that we've expanded the image and if you were to zoom up on the result, the quality would be high quality. But just know that these actions, I'm not like guaranteeing that they're perfect or anything. I created them in one evening when I was experimenting and I thought I'd share them with you because you simply might find them to be useful but they have not been extensively tested. The main concept though is to do the grid overlay and then that tells you how, what number to choose here. If you're counting across the image in with that grid overlay, then choose for the ones that say "Across" and you can either expand up or down when you're counting across. And when that grid is on your image if you're counting down instead to figure out how many grid lines there were, how many grid cells, then use the ones here called down and then you could expand either towards the left or towards the right. Now, before these will work, you'll have to load them. There's a few things to do. The first thing you need to do is come up here to the window menu and there's a pattern that's used. So come up here and choose Patterns. And in Patterns you need this particular pattern because that's what's overlaid on top of the image to figure out how many 1,020 pixel areas, it doesn't use four because there needs to be a tiny bit of overlap. Anyway, you need that pattern. So go to the upper right corner of the patterns panel and there you're gonna find a choice called Import Patterns. And with this class, there should be in the downloads a pattern called 1024 grid that you're going to feed to this. Here is the file itself. It ends with the file extension of .pat. Then there's also the actions themselves. To load those, you'll want to go to the window menu and choose Actions to make this actions panel visible. Go to the upper right corner, there's a little menu there and in there there's a choice called Load Actions. And you want to feed it the file that you can download with this course. And if you do, then when you apply this particular action that does the grid overlay, it's gonna have the proper pattern to overlay. That's what this is. The pattern had to be loaded first. You could count how many squares down or how many squares across it is that you're gonna need to fill and then you just hit Continue and then choose the appropriate action from within the list. Once you've chose the action, hit the Play button at the bottom and it will expand in the direction you've told it to. So now you got the idea, I hope, of how to expand your image to add extra space. Just know that it is not always able to insert exactly what you need. If what it is on the shelf in this shop is a can of, let's just say Campbell's soup. Well, Campbell's is a trademark and whatever photograph is on the front of the soup can is something that Adobe doesn't necessarily have the rights to. So instead of generating a can that looks exactly like what was in the photo, it will generate a similar can that will fit in. And so you do need to be very critical of the area it's filled. Oftentimes it will be a little bit more generic than the main contents of the photo, but if it's something like blue sky or other nature related things like trees and grass and a beach, it'll usually be able to do a very good job with that type of content.
Class Materials
CLASS MATERIALS
Ratings and Reviews
Tommy Keith
Highly recommend following and watching Ben's classes to stay up to date on Lightroom and Photoshop. Even if you never watch any other classes on CreativeLive, just watching Ben's classes make the cost of Creator's Pass worth it. He not only teaches you the new material, he is such an expert on Adobe that you learn ton's of short cuts and creative ways to help you in your every day processing. Thanks Ben!
Laura K.
Ben, thank you for continuing to return to Creative Live and to provide update courses here. VERY GRATEFUL!!!!!!
Audrey Agin
Ben is a great teacher, easy to understand. I have watched the majority of his classes, and always looking for his next new subject.