Lesson Info
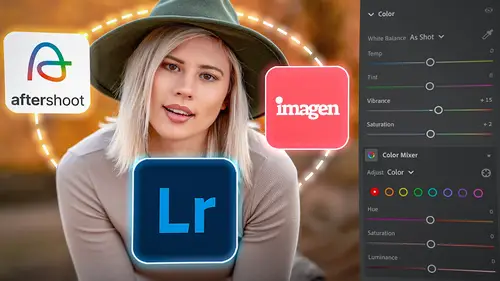
7. Making an AI Preset
Lessons
Introduction to the Course
02:08 2Introduction to the Lightroom Ecosystem
09:21 3Selecting with AI
18:27 4Selecting Best Images
19:49 5Adjusting Images with AI
34:08 6Selective Adjustments with AI
23:34 7Making an AI Preset
10:58 8Tips: Masking Tool Differences and Syncing Presets
09:56Lesson Info
Making an AI Preset
1 And this is the where masking 2 and AI get really, really cool 3 because now not only can we spread all these masks, 4 AI driven across multiple images, 5 but now we can actually create a preset 6 that will trigger the mask. 7 And because it's AI, 8 it will find all of this. 9 So I've created a mask, 10 I'm gonna zoom in and make sure I like the way it looks. 11 Yeah, I do. 12 I knew I would anyway, 13 because I've done that mask before. 14 Now I'm gonna right click this mask and hit rename. 15 And I'm gonna call this skin smoothing 16 and hit, okay. 17 So now I've named the mask skin smoothing. 18 Alright, so I've got my skin smoothing mask done. 19 Alright, I'm gonna make another mask now 20 because I wanna make several masks 21 and then I'll show you how to make these presets. 22 So the second mask that I want to create, 23 and I do this quite a bit, 24 I like to make a really wide vignette 25 that has a very, very small center. 26 So it's like this constant vignette that comes ...
in, 27 kind of draws you into the center of the photograph, 28 but it doesn't affect the person all that much. 29 So I'm going to create a new mask. 30 I'm going to create that radial gradient, 31 go like this, 32 make sure that my feathering is a hundred percent, 33 I have to invert this mask. 34 So invert the mask. 35 You can see that it's all just kind 36 of coming into the center of the photograph. 37 And generally speaking, 38 I'm gonna put it up by the face, 39 but I don't know where the face 40 is gonna be generally in all photographs. 41 So I'm just gonna kind of make this mask fairly general, 42 put it in the middle, 43 and then I can move it around later 44 because it's just a mask and it's just instructions. 45 So now what I'm gonna do is I'm gonna include on this mask, 46 I'm gonna go right click, 47 or sorry, not right click. 48 I'm gonna click on the mask 49 and I'm gonna subtract from the mask. 50 Anybody who's like any person. 51 So select people, 52 select the whole person, 53 and hit create mask. 54 You know what, in this case, 55 notice that it's got... 56 I realize that there are trunks here. 57 And so maybe instead of a person, 58 what we ought to be doing is saying, 59 I want to subtract not the person. 60 So I'm gonna cancel this out and I'm gonna say, 61 subtract the subject. 62 There. 63 So see how this person is subtracted 64 and this trunk, this trunk is still there, 65 but it's fine. 66 But I'm subtracting this entire trunk. 67 And now if I look at this mask, 68 you can see that it's this slow gradation in 69 and it's a little bit brighter in the middle, 70 but it's just slowly getting darker on the outside. 71 And all I'm doing is taking the exposure down 72 and the shadow down just a little bit so 73 that it just gives this kind of tunnel effect. 74 Okay, I like that. 75 And now I'm gonna right click this and rename it. 76 And I'm just gonna call it 77 slight 78 vignette. 79 Okay, so now I have two different effects 80 that I put on lots and lots of photos. 81 And so I'm going to create a preset. 82 And that preset can either include both of these, 83 or it can include one and then the other. 84 So what I'm gonna do now that I've created this 85 is I'm gonna go over to the preset area and I'm... 86 And by the way, 87 all three of these photos have this effect on them. 88 So I can check them by just going in 89 and looking at, yep, it did it. 90 There was a little burning that I did 91 on this one before, apparently. 92 But those two, the slight vignette worked 93 and so did the skin smoothing. 94 And I can go over to this one. 95 And the skin smoothing found her skin 96 and also did the slight vignette. 97 Worked out, it actually chose this trunk 98 that time, which is fine. 99 So these two work. 100 So now I'm just gonna go to the one photo 101 that I like the most. 102 Doesn't matter which one you chose 103 because you just need to know that you have those, 104 the photo selected that has those masks on it. 105 And you're gonna simply go to the presets, 106 click on plus create a new preset. 107 And I'm gonna go and put this in what I like to call, 108 "Adaptive JP." 109 So these are my adaptive presets. 110 And by the way, when you buy this course, 111 you actually get to have this collection 112 of adaptive presets. 113 So congratulations. 114 You are the owner of Jared Platt's Adaptive Presets. 115 So there's a number of 'em. 116 And I'm in the process 117 of building 'em right now as we speak. 118 And so when you're watching this, 119 you get to use all of the adaptive presets 120 that I use during this workshop 121 and the ones that I've created before 122 and after this workshop. 123 So there's just a whole group of 'em, 124 about 10 of 'em in there 125 that you're gonna be able to play with. 126 Okay, so here's my adaptive preset. 127 I'm gonna click none, so I'm checking none. 128 I don't want any of these in there. 129 See that? 130 Not using any of the adjustments. 131 All I'm gonna do choose skin smoothing. 132 That's it, that's the only one. 133 And obviously this one changes on its own 134 because it has to have the process version 135 in order to do masking. 136 And then I'm also gonna make sure 137 that I support the amount slider. 138 This is really important. 139 And I'm gonna go up and name this thing. 140 And I wanna name this skin smoothing AI. 141 And I'm going to put it, 142 I already said I put it in my adaptive presets. 143 And then I'm gonna hit create. 144 And then I'm gonna go right back 145 and create another one, 146 create preset. 147 And this one I'm gonna call, 148 "Slight vignette." 149 Let's call it "Slight vignette without subject." 150 Okay, so I actually, 151 without is too long, no subject. 152 Okay, so adaptive preset, 153 but this time I'm gonna uncheck skin smoothing 154 and I'm gonna check slight vignette. 155 Now you could have checked both 156 and it would put both on there. 157 So that's an option as well. 158 Support the amount slider, 159 hit create, done. 160 Now if I want, I can just go to this one here 161 and I can go in to see how we have no masks right now. 162 And I can go into the skin smoothing AI 163 and it's done. 164 See that? 165 And then I can go into the slight vignette, 166 no subject, click on that. 167 And now that's done. 168 See that it created it? 169 Now the interesting thing is 170 is that the center is over here on that tree 171 as opposed to behind her. 172 So I can grab it and just drag it over. 173 See that? 174 All I have to do is drag it 175 and then I could play around with it. 176 I could darken it and I can still drag it around. 177 See that? 178 I can put all the brightness over here 179 or I can bring it down here. 180 But notice that it doesn't hurt her in any way. 181 It doesn't change her at all. 182 So, perfect. 183 Love it. Done. 184 So that's how you create not only masks with AI, 185 but that's how you create presets that use the masks 186 that are using the AI. 187 And then to add to that, 188 if I have a set of images that I'm gonna work on, 189 so let's say I'm gonna work on, 190 lemme just, oh, here, 191 let's just work on all of these images here. 192 So I've got a set of images 193 where this little girl is having a tea party. 194 She's having a tea party with her unicorn. 195 And I already have one, see that? 196 I've already got one mask 197 that I put on there individually. 198 But the great thing is, 199 is that I can add my other mask 200 presets to this mask. 201 So I'm gonna go in 202 and I'm gonna click on that general vignette, 203 that slight vignette with no subject. 204 And it's adding that slight vignette to all of these images. 205 So it's working on it right now. 206 Keep working, keep working. 207 How many is that? 208 I've got 17 images selected. 209 It's done all the work on 'em. 210 And now I can go into that mask, 211 there's the slight vignette mask, 212 and I can go in and grab the shadows 213 and darken 'em down even more. 214 And I could even go in and warm up, 215 you know, the background or cool it down maybe. 216 See how the bottom, 217 the planks are actually getting kind of cool. 218 I like that. 219 So I think I like cooling it down just a little bit. 220 Not too much, but just a little. 221 That's great. 222 Okay, so that's how easy it is to use AI 223 to do all of the really intricate work, 224 but on multiple images at the same time, 225 allowing the AI to do all of the masking 226 and finding of the objects in the skin and the people 227 and the subject in the background in the sky. 228 And at the same time using presets 229 so that you don't have to keep fussing 230 with all of those settings. 231 So when you're working with AI, 232 remember AI plus auto sync in the develop module 233 plus presets equals incredible efficiency.
Class Materials
Bonus Materials
Ratings and Reviews
Susan
Wow! Great class with lots of helpful information. More than I expected. Some of Jared's information will be particularly helpful to photographers shooting lots of pictures at events like weddings but there's plenty of AI tips for anyone wanting to delve a little deeper.
a Creativelive Student
WOW mind blowing how AI is going to speed up our volume event photography workflow. We photograph indoor sports often high ISO and mixed poor lighting. Been able to apply an AI preset to clean up pixelated skin (ISO5000!) to look decent is a time saver. Add to this ability to use Lens blur to pop the athlete from uninspiring sports hall backdrops is welcomed. All we want next is AI cropping across 10,000 images with one preset (theres a challenge for you Jared)!
Candy Smith
I thought I was pretty up to date on the new AI features, but I learned quite a bit and also got some nice refresher and new tips on what I already knew. Great class.