Lesson Info
17. Finishing Techniques
Lessons
Class introduction
04:35 2Field Techniques, Camera & Lens Choices
08:15 3Selecting Gear for Great Panormas
10:44 4Camera Menu Settings & Exposure
09:58 5Troubleshooting Environmental Obstacles
04:04 6What Contributes to a Great Panorama
11:32 7Shooting Vertical Panoramas
04:57 8Shooting Techniques for Black & White Panoramas
04:59Handheld Technique for beginners
05:10 10Tripod Technique for Intermediate Photographers
07:43 11Advanced Technique for Panoramas
09:58 12Navigating Moving Subjects in Panoramas
04:04 13How Time of Day Impacts Panoramas
13:28 14Workflow in Lightroom
08:59 15Developing Images in Lightroom
11:54 16Merging Images
13:44 17Finishing Techniques
17:31 18Saving Images for Print
05:41 19Controlling Your Environment
05:23 20Profiling & Calibrating Your Monitor
20:54 21Wide Gamet Color Settings
12:37 22Soft Proofing Images
13:49 23Selecting the Right Paper for Prints
08:05 24Sharpening Images
28:33 25Printing with Lightroom
17:07 26Printing with Photoshop
05:46 27Black & White Printing
05:59 28Best Practices for Printing your Image at a Lab
07:10 29Analyzing & Displaying the Print
05:19 30Reviewing Panoramas Printed in Class
10:20Lesson Info
Finishing Techniques
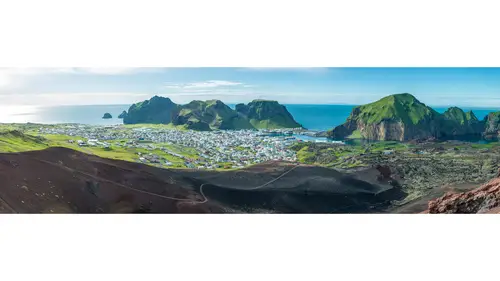
Let's now talk about finishing your photos. Talk about finishing your photos in Lightroom and then finishing your photos in Photoshop. So to do that, I'm going to select an image that we already created, this one here. And we'll go full screen on this one. So that's the huge panorama. How big is this? Well, I'm gonna go back to my loop, I'm pushing my I key, which stands for information, so there we go. That photo is 39,000 pixels wide. 39,000 pixels, I mean, that's just massive. You could print this up to be the size of a bus, the size of a building, there's a lot of data here. And it's 7,000 pixels high, so huge file. And it's a DNG, which is important to us. Let me just describe what happened here. So we had all of our original RAW files and we merged those RAW files into the panorama and the new version of Lightroom gives us a DNG. Well that DNG is a digital negative and that means that I can continue working on it in the develop module with all of my sliders. So even after I've me...
rged it, I can go back in and I can fiddle with the highlights. And I can fiddle with the shadows. On the original RAW images, very very powerful. And that's why I love using Lightroom as my base of operation here. So what do we have to finish? Well, I think most panoramas need a little bit of vignetting in the sky and that basically holds the viewer's attention. So what I like to do is I like to use my graduated filter and darken down the sky just a little bit. And then also, I'm gonna zoom in here. I'm gonna zoom into 1 to 3, not 1 to 1 because 1 to 1, we'd be looking at a little bit too close. But a lot of times some elements of the photo are a little bit dark. So for example, these buildings might be a little bit too dark so I'm gonna use the brush tool to brighten up the building area. Alright, so we'll do two things. Darken the sky, brighten up the buildings and especially those trees on the right hand side. Those need to be brightened up a little bit. And then we do a third thing, too. I'm gonna look for dust. So let's do that. So I'm gonna go Shift-Tab, that brings back all of my panels. I'm gonna go over here to my graduated filter, click on that. And what do I wanna do with my graduated filter, well, I don't want shadows to be up. Really what I want to do is I want to darken it down a little bit. So I'm gonna go minus, maybe minus point seven, something like that. I'm gonna drag down from the the top, there we go. There's my graduated filter. And now I'm gonna make any adjustments there, maybe that was too dark. You don't want it to be overbearing, but just enough. Alright, so it looks like I'm around a minus point six six. And I think that's fine for this image. So I'm gonna go Done. Click. Next, is I'm going to lighten up the buildings and the trees on the right hand side. So to do that, I'm gonna go over here to the upper right. I'm gonna click on the Brush tool. And so what are the things I want to modify here? Well, brightness is one, so I'm gonna use Exposure. But also shadows. I wanna pull out some more shadow detail. So I'm gonna move Brightness up a little bit and then I'm gonna move the Shadow slider up a little bit. And now you can see my brush. I'll put my brush over there. I'm gonna use my bracket keys. My left bracket and my right bracket change the size of my brush. Right there. And before I start painting, the last thing I want you all to know is make sure you turn on Auto Mask. If you turn on Auto Mask, it will keep the brush inside of the middle circle. In other words, whatever I'm adjusting won't go out beyond the middle circle. And it's a smart brush, and so maybe I phrased that wrong. If the middle circle goes something like this, I'll move over here, if the middle circle goes out like this but my pin is still here, it's smart enough to know not to paint out into the sky. It will keep the brush here in that dark area. So, start painting. 'Kay, you can see those trees lighting up, cool. And move over here, left. Click down here on the buildings, brighten them up. I can already see it's a little bit too bright. And that's fine because I'll just go back and adjust it. Alright. I'm gonna type the letter O. O stands for Overlay. And you can see the red areas, that's where I've been painting. O. Alright, go back and make my final adjustments. Maybe brightness done, there we go. A little bit in shadows, cool. And then a lot of times I will click the on/off switch on my brush tools, right down here. I will click that Off and On just to see if my adjustment was fine. And it is, I'm happy with that. And then click down here and go Done. Great. Okay. So that's basically finishing the photo in Lightroom. Let me show you how to finish a photo in Photoshop. You know what? I realize I didn't do dust, but fix dust, you use that, let me just rewind a little bit here. I'm gonna go to the Dust tool, also known as the Healing Brush tool, Spot Removal tool. I click that and then what I do is I go down here and I click this little button that says Visualize Spots. It turns the photo kind of black and white and it helps me find anywhere there might be dust in the scene. So anyone using digital cameras knows that you're almost always gonna get some type of sensor dust. Except for me. My camera is very clean, obviously, so I'm not seeing any dust, lucky for me. But let's say I did and let's say that there just happens to be dust here in the sky. I just basically move my Brush tool down. We'll get rid of that little piece of cloud. Move my Brush tool down to about the size of that cloud, click on it, and then Lightroom just automatically gets rid of the dust in that segment. So there you go. Okay. So let's go show you real quick in Photoshop how to finish a photo in Photoshop. And to do that, I have a special photo for you from my hometown in Gig Harbor. This one has a lot of issues. This is an office building in Gig Harbor and I'm just gonna show you that here's the image that we're going to finally produce. And then here are the images that lead into it. Here you can see my hand, I use my hand as my starting point. And then here are the images that we'll produce. This was taken with my 14 to 24 millimeter lens. I was really close to that building, so there's gonna be a lot of distortion. So we'll take those images, I select them all. I'm going to right-click. I'm going to go to Edit In and Merge to Panorama in Photoshop. Great. And this should just fire up very rapidly. Here we go. I'm just gonna pick all of the things I said earlier. Blend Images, Vignette, Removal of Geometric Distortion. And now I hit OK. And now it's going to do the merge. Let me just take this moment to answer another question. There was a question from someone just a little bit ago who asked about this product called the Gigapan Epic Pro. And what that tool is, is a robot for your camera. It's a robot that controls your camera for panoramas. It basically takes all of your, the human error out of this process. It's a great product. I highly recommend it. And it's not even that expensive, it's just a few hundred dollars for the lower-end model. I think the Pro model's quite a bit more, but basically you use your laptop computer and your program the lower left to the upper right. Use a higher telephoto lens and the Gigapan Pro just basically merges all of these photos together or takes all the photos and then you use their software, Gigapan, to get this super hi-density panorama. It's a great product. I don't purchase it. I haven't purchased it because I travel a lot and it's hard to travel will all of the laptop and all of this big gear. I just like to go a little bit lighter weight, but I highly recommend the Gigapan products. Yeah, question Kenna. Sure, just because we have a little bit of time while that continues to work. There were some questions about what process do you do before and after the merging, so would you ever just merge everything first and then process? Um-kay. Or, 'cause it seemed to do a little bit of each. It's a great question and I totally get what your asking and my answer is there's no right answer, huh. So in Lightroom because we're now working with the DNG file after we do the panorama merge, Lightroom gives us the option to do the individual photo work before or after. Personally, I like to actually do the individual photo work first because it helps me see if I like the photo. Versus having to wait for the panorama merge to go through, blah blah blah blah blah blah. And then I start working on the image and then I'm like, oh, you know what, it's not gonna turn out the way I want it to. So for me, I like to make the photos look pretty initially and then do the panorama merge after that. So it's a preference. Alright, well here we go. We are in Photoshop and you can see, in Photoshop when you do this merge, doesn't give you that slider adjustment that we had in Lightroom. There is another way to do that. I'll get to it in a minute. But, there's a lot of work that we need to do on this image and mostly with warping the image, fixing the edges, so let me show you a couple of ways to do that. Um, first things first. I want to make sure that I don't have any merging errors and it looks like we're good. I'm gonna zoom in a little bit and just use my Hand tool, my space bar, just drag the photo around. I'm looking. Looks good to me. All my lines are lining up, my sky looks good, all these posts coming out of the roof look fine, great. Alright, Command-Zero gets me back to the full view. So now rather than work with all of these layers, what I'm gonna do is I'm gonna flatten the image. So I'm gonna go Layer, Flatten Image. Now I have to fix all of this warping stuff. So there's, I'm gonna show you two ways to do this. The first one is up here, it's under Edit. And what I'm gonna do is, I'm gonna go Edit, Transform. What you'll notice right now, the Transform command is grayed out and the reason why is because I'm working on this background layer and the layer is locked. So make sure that you unlock the background layer. Now, I can go up here, and I can go Edit, Transform, and then Warp. Alright, I'm gonna zoom out just little bit so you guys can see what I'm doing. This is a pretty cool tool. It allows me to actually grab corners of the image and warp them. I can grab up here, grab in the lower right, drag that down. And I can even use it, see how I'm getting a little keystoning going on there? So I can even bring it in a little bit and make my vertical lines vertical. Great, I can drop this down and maybe I need to drop this side down a little bit over here. There's other sophisticated tools that we can use to do this perspective control in Photoshop, but just in the interest of time, I'm gonna skip over them for now. Alright, so let's call that -ish. I'm gonna call it good-ish. There's still some issues. That's right, it's good enough for now. Just to illustrate the next thing I wanna talk about. I'll pull up the sky a tad. Alright, so I'm good. I'm gonna hit Return. Now this is a hard image to work on. A lot of your panoramas won't be this difficult, so this one requires a lot of pixel manipulation. But I'm gonna hit Return, Enter. It will now set that warping, as soon as our spinning ball of happiness, there we go. Now the next thing is I need to crop it. So I want to get rid of all this non-content information, so I'm gonna type the letter C, for Crop, and by the way, the Crop tool's up here in the upper left of your screen as well. Do I want to crop it in a specific aspect ratio? Sometimes people are like, yeah, I like the 1 to 3. A lot of the prints that we're showing here in today's workshop are a 1 to 3 aspect ratio, so we'll just pick that. There's our 1 to 3 aspect ratio. I'll bring this down and now you can see it maintains that aspect ratio. And I'm purposely gonna crop it and leave a couple of segments open, like right there. Okay, so you can see here at the top, there's a little bit of sky and then down here in the lower right, there's a little bit of foreground that we have to address. Alright, so I'm gonna hit Enter. So now the finishing part. So how do I work on these areas? One of my favorite tools in Photoshop is called Content-Aware Fill. Tremendous tool. It has saved me so much time. I think it first came out in Photoshop CS5, maybe CS6, I don't remember. But I use it religiously to fix these issues. So I'm gonna zoom in up here in the sky. There we go. I'm gonna grab my Lasso tool over here on the left hand side. There's my Lasso tool. And I'm gonna circle or just kind of outline the areas that need to be fixed. 'Kay, so now you can see I've got marching ants around that. Now I'm gonna use my Content-Aware tool. So we can go Edit, Fill, and then the pull-down menu here, we're gonna go Content-Aware. And then we click OK. Done. Sky fixed. No other science or technology needed. Just let Adobe do its thing. Grab that one, and now I'm gonna do a keyboard shortcut, which is Shift-Function-F5. Content-Aware Fill comes back up. I hit my Enter button, Enter key. Done. That's great. Let's go down to that lower right segment. And let's just see if Content-Aware fixes that for us. Oh, there's another section I missed, so grab that, Shift-Function-F5, Content-Aware fill, cool. And now for the big one. Sometimes it works well, sometimes it doesn't. Let's just see what happens. I'm just gonna very carefully highlight this area. Alright, Shift-Function-F5 on the Mac, and Content-Aware fill. Here we go. Pffft. I'm gonna go Command-D, or Control-D to deselect. I just made that funky sound because I'm like, oh yeah, go Adobe. Solved all my problems. It just fixed it. So now I go Command-Zero to see the whole image and I'm gonna type the letter F to go to full frame. And there we go. There's our image. You can see that there's still some perspective issue and given, if I had a little more time, I'd actually work on that a little more to fix kind of the curve that we have in the building using this perspective control tools in Photoshop. But, you get the gist, you get the idea. Great, so now, I could go Print from here or I could just go File-Save and it'll bring that back into Lightroom. In fact, that's what I'm gonna do. I'm gonna go File-Save and when I choose that, it then saves it back into the Lightroom environment. And now when I close out of Photoshop, there it is. There's our image in Lightroom. In fact, let me do this, just so you guys can see one that I did a better job on. Alright. The top one was the one we just worked on. The bottom one is where I spent a little bit more time working on perspective control. Um, yeah. So you can see that basic issue, or the basic approach.
Class Materials
Bonus Materials with Purchase
Ratings and Reviews
Fred Morton
Get it, get it and get it. I bought Mike's Speedlight course and this is on the list after watching it on line. The course design by Mike with the Creative Live staff is a successful blend of content and presentation. I absolutely loved how Mike took us on location for several shoots, where we could see the setup and problems that he had to resolve. This is a must have course for photographers interested in landscape work. Another powerful part of this class is Mike's willingness to demonstrate and show us what didn't work. The practical experience in his course was just like being in the field with Mike.
user a5f3c6
Mike combines two characteristics of a great teacher: he's obviously knowledgable and competent about his subject matter and he's relaxed and confident in how he presents his ideas. This class covers everything I need to know about photographing and printing panoramas. But, it is much more. It is a class that shows the essential skills involved in shooting, post-processing, and printing photographs and how to apply them to a specific application: panoramas. I learned a lot! Thanks, Mike.
Sue Sirius
This workshop was terrific! I learned so much about taking, processing and printing panoramas (and photos in general). I found the presentation very easy to follow with great examples and instructions. Highly recommend this!