Shoot: Controlling and Shaping Light
Lesson 4 from: The Starter Portrait Studio: One Light, One ReflectorChris Knight
Shoot: Controlling and Shaping Light
Lesson 4 from: The Starter Portrait Studio: One Light, One ReflectorChris Knight
Lessons
Class Introduction: What are you going to learn?
03:16 2Directing the Eye
03:27 3Light: Hard, Soft and In-Between
12:11 4Shoot: Controlling and Shaping Light
08:14 5Shoot: Position of Light
08:22 6Shoot: Distance From Background
03:11 7Shoot: Contrast
31:01 8Shoot: In-Studio Lighting Demos
18:19Lesson Info
Shoot: Controlling and Shaping Light
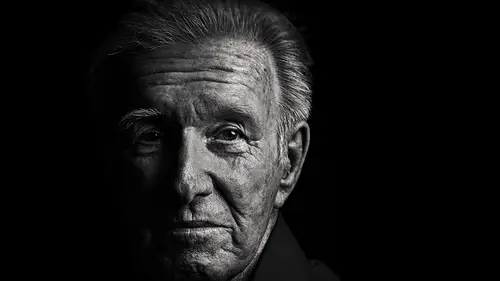
So let's talk about controlling and shaping light, or more specifically, putting light where you want it and blocking it where you don't. Because if we are only using one light, we better be really sure that we're using it well. And we're basically, we need to make that light do exactly what we want and go exactly where we need it to go. And so the first thing that we're gonna talk about is relative size of the modifier. We talked about this a little bit earlier, where if you have something, a small light source compared to a big light source, it will change what that looks like. So we're actually gonna do this. We're gonna bring out one head with a small umbrella, an umbrella we know is a diffused reflected light, so it is gonna be pretty soft. And then I'm gonna switch out, in the same position, and use a large umbrella, and I'm gonna show you the difference in what that looks like on the face. And then, because the placement of that umbrella is very important, I'm gonna take the sam...
e umbrella and I'm gonna back it way, way up and just show you what that looks like compared to it being close. So if we could bring out, Hannah, wonderful. And what we're gonna do is have you come in here for me really quick, please. Just have you stand right about at the edge of that paper. You can come forward just a little bit. And we're gonna start with the small umbrella, and we're gonna put that one on in just a second. Okay, and so, great. I'm gonna bring this in pretty close. And I generally like to use a bit of a downward angle, because what that's gonna do is carve up the cheeks a little bit. And I have this, at the moment, on the side of her face where the part is, and so what that's gonna do is put more of her face in light. Whereas I'm avoiding the hair casting a shadow on the face. And this is not an absolute rule, this is just what I'm doing today. And I'm gonna kind of point this at the face. And you'll actually see that it's pretty close. So this, is a totally acceptable light when you want to light the face. A small umbrella is not a good light when you want to light the body. It's not meant for that. You're basically just creating really flat, kind of boring light. So you want to use it really close. So if you need to shoot a body, and you try to use this modifier, it's not gonna be ideal. Now this is a little bit more of a shallow umbrella, as opposed to that deep umbrella there. So you are gonna see a little bit of a difference in regards to both of those two, if you were to just use same size umbrellas. Basically what that means is the deeper the umbrella is, means the further away from the light source it is when the light hits it, which allows you to fill more of the umbrella, which makes it bigger and softer. So this is pretty small. I'm gonna actually push this back in the head about as far as I can. Oops, maybe. I'll get it. There we go. So the further away you can make the umbrella from, there we go, the light, it's gonna fill more of the umbrella. So when it's really close, it's only using a little bit and it's gonna make it even harder. So I'm directing this kind of at her face, and we're gonna do a little bit of a lighting test. So if I can get you to meter that for me, please. I am an ISO. 100. 100. I'm at one-one hundredth of a second. And I am shooting on the Pentax 645Z, for those of you that are interested. Oops, I have some other lights on. Get rid of that. Okay, let's try that again. I have 4.5. Yeah, four. Four, okay. So we're at four. That's pretty low. Let's turn this up quite a bit, just that we're not messing with some things. All right, let's try that again. 5.6. That's marginally better. Okay, so again, I'm gonna keep this relatively close up here, so that we can see, okay. Disregard the light on the background for now, we're just looking at the face. Okay, and so it's soft. I mean, it's an umbrella, it's also a diffused umbrella, which is gonna be even softer, but you know, it's, I think we can do better. So we're gonna take this away, and we're gonna swap out this one, and it should be, believe it or not, relatively close to the same power setting. Probably lose a little bit because it's trying to fill more. Okay, there we go. Get that all the way around. Great, and again you can already see that directionally it's going to fill, show more of the... Seven one, brighter. That doesn't make any sense. (laughs) Okay, seven one. That's very strange, okay. (camera snaps) All right, so what we've got is a softer light. I'll get both of these and we can compare them. So you can actually see the transitions between light and shadow, are quite a bit more subtle. And this is also giving us a little bit more wrap, as well. Which means that because it's so big, it's coming around the front a little bit more. So if I turn this a little bit, just to give you a little bit of a similar feeling of the first one. (camera snaps) Great. And you can see this just, the transitions are quite a bit softer by comparison, okay. Now this is very, very soft. This in, in truth, about some of the softest light you can get. It is a big modifier. It's bounced, it's diffused, and it's really close to your subject. You're not really gonna get much light that's much softer than this. But if we take this and we bring it way back, and we're gonna go basically... You're clear. Way back to here, something like that. I'm gonna have to turn the power up so it reaches, I think, try to keep a similar, similar setting. 6.3. Okay, we're at six three, so we only lost a third of a stop. (camera snaps) And what you end up with with light, and this is obviously very exaggerated, but it doesn't have anywhere close to the same feeling. One feels beautifully painterly and soft and there's this really great sense of transition of light, and this is just flat. Okay? So I know this is very exaggerated, but be careful about where you place the light, because even a best case scenario modifier for softness can drastically change what it looks like when you pull it way back. Okay? All right, so that's kind of first.
Ratings and Reviews
a Creativelive Student
Chris's style was excellent straight to the point, I picked up what he was putting down and at the end, I loved seeing all of the different looks I could get from one light. This is my kind of tuition. To the point, full of great info, rehashed at the end. More like this, please.
JennMercille
You can never learn enough about light. I loved this class! I recently downsized from a huge studio with multiple strobes and every kind of modifier, to a small home space with one large window and a few reflectors. This class was very informative and helpful with that transition. Chris Knight is an interesting and very knowledgeable instructor, and he was a joy to watch. I highly recommend this course!
a Creativelive Student
You should teach a course on how to teach! This course gets to the point, and gets the job done. I loved it. Thank you.
Student Work
Related Classes
Studio Lighting