Lessons
Class Introduction: What are you going to learn?
03:16 2Directing the Eye
03:27 3Light: Hard, Soft and In-Between
12:11 4Shoot: Controlling and Shaping Light
08:14 5Shoot: Position of Light
08:22 6Shoot: Distance From Background
03:11 7Shoot: Contrast
31:01 8Shoot: In-Studio Lighting Demos
18:19Lesson Info
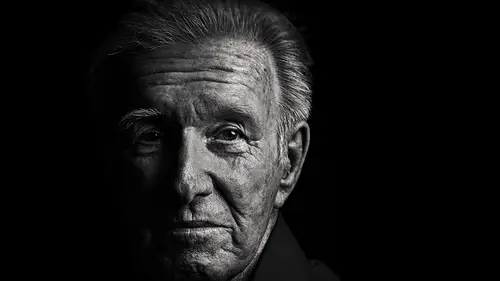
Shoot: Contrast
What we're really talking about here, what we're really doing, is we're talking about this idea of contrast. Let me pull this back. We're talkin' about this idea of contrast and contrast is all about translating depth, right? So we can control it in camera. We can control it via the subject matter. We can control it through the clothing, how the subject is lit. Contrast can be changed in variety of different ways. It's not just the slider that you are changing in your post production. We have a relatively, sort of high contrast image in that her face is bright and everything else is dark. So we're creating contrast. You can choose to have less contrast, you can choose to have more contrast based on what you are trying to achieve. Now, to a degree, contrast is also about mastering the shadows and manipulating the shadows. A: How much shadow do you want and then secondarily, how dark do you want your shadow to be? Now we have to consider both of those things. So we've decided, or we've l...
ooked at placing the light, and controlling the light, and moving the light around. Now we're gonna do the same thing with the shadows. 'Kay? Shadows are all about translating your depth and your mood. And to talk about shadows we actually have to talk about fill. Now, fill can be a second light. I regularly prefer to use a second light to control fill. But you don't necessarily have to. So it can be a second light but it's not gonna be a second light this time. We're actually gonna control fill via a reflector, or a v-flat, or a flag to create negative fill. 'Kay? Examples of reflectors can be things like scrims, actual reflectors, v-flats, white walls, mirrors, flags, the shirts of your assistants very, very close, both for better and for worse. I have been the reflector because I was wearing a white shirt and I was just like, alright, I'm just gonna stand real close and catch it. And that's absolutely happened. But also, let's say your assistant's wearing a green shirt and they're holding a reflector under your subject's face, but their green is also gonna cast light onto them. It's something that you definitely want to watch out for and be aware of 'cause sometimes that fill is intentional and sometimes you don't want it to be there. And it can create problems just 'cause you're just like, ah, I didn't think that the beige walls of the room I'm in were gonna create a color cast. Or the model's red shirt was gonna create a highlight under the jaw. It can come in a variety of different circumstances, a variety of different instances. But you just gotta work with what you have. So let's show this in principle. We can leave this on here for just a second. So I wanna set this back up. And we'll leave this here. Do me a favor, come forward just a little bit. So we're gonna take a look at a few different ways in which we can modify contrast. Sorry, modify the shadows. So we're gonna start with nothing just as a control. So come forward just a little bit for me and turn your face a little bit, great. Let's get a meter on that. (clicking) Seven one. Great. Now something that I like to do especially in black and white work is do a little bit of an overexposure on the skin tones. And so what I'll do oftentimes is overexpose the skin by up to about a stop. Could be more, could be less. And what I do is, in this black and white, I crank the contrast up and it kinda does a similar effect. It smooths the skin out and it ends up creating something that feels like the old like the Avedon, Irving Penn images and that's basically what they would do. They would overexpose the skin by about half a stop to a stop and then crank the contrast up and you can see it actually produces a really beautiful result. So just to show you what that looks like. Turn your body a little bit more for me, please, and face to me just a touch, good. So I was metered at seven one so I'm at five, five oh now, (shutter clicks) and it's gonna feel a little bit higher in terms of exposure. So it does feel, so it's a little bit brighter, right? But what I'm gonna do here is pump this a little bit, the highlights which crunches the highlights together a little bit, removes the detail. You just kinda crank that contrast up. Then you make it black and white and that's kind of more or less how you achieve a similar effect. It looks really nice. Mkay, so we have this very harsh... I'm gonna turn this a little bit more. I'm gonna bring it down a touch. Really harsh shadow, really dark shadow over there. And now we're gonna manipulate it. So it's fine. I don't necessarily (shutter clicks) dislike it. It's just maybe not what you want. Where's my tethering at? Nope. Nope, okay. I should have a tether, nope, all right. Command + T. Thank you. I like same as previous when I'm tethering. 'Cause what that does is it allows me to apply my setting that I'm shooting for as I go. So I usually will develop one so I at least get a general look and feel about what I want this to be. So this is pretty beautifully contrasty, right? So what I can do here is I can bring in the reflector and we're gonna do a white reflector, a silver reflector, we're gonna do a black flag to kind of show you the difference between all of them. I'm gonna show you two different ways to use the flag. So everyone uses reflectors a little bit differently I think. I like to make them as unobtrusive as possible. I like them to just shape the shadow as opposed to being a secondary light source. For example... Can you do me a favor? Can you pull the hair back just off this side, just to illustrate a point? If the light's coming here and it bounces off this, what you're gonna end up with is a light that's very strong on one side. Can you hold that for me really quick right there? Now we're not actually changing the exposure of the light so I get to stay at my same exposure. (shutter clicks) But what ends up happening is you're actually able to see there is a, it goes light and then dark. It's creating, it feels like there's a reflection over there. 'Kay? So it goes light, dark, light again and that's, I don't like that. So what I usually do when I'm doing a reflector is I bring it around a little bit so the angles a little bit less obvious. And so it bounces a little bit more to the front. When I'm using a secondary light, that light is usually right overhead behind camera. It allows me to control fill without looking too obvious. So we're gonna bring that around this way. Angle it a bit more for me. (shutter clicks) Great. And so what we have now is a bit more of a cleaner fill. In the first image, it was too much to the side. It creates that shadowy area near the face, right? Now as we've brought it around, it gives you that beautiful, soft light all the way wrapped around and it feels more even, it feels softer. I don't have to do anywhere near as much to the image. So I was creating problems for myself by putting a shadow through the middle of her face. 'Kay? Now this is a soft, white reflector and I personally almost always like to gravitate towards a softer, white reflector because I think it feels a little bit more natural. The silver reflector is gonna be a little bit punchier. It's gonna introduce a lot more specularity and I personally don't necessarily like the aesthetic. There's nothing wrong with it, but I personally don't like it. Now, with all reflectors, it's an analog system. So that reflector was really close, very bright. If we wanted it to be less bright to control the shadow, we're gonna back it off a little bit. So maybe we do it about right here? We'll try that. Back it off maybe a little bit more. Great. (shutter clicks) 'Kay. So I'm gonna show you both of these. And now you can see we've introduced a little bit more shadow. And if we were to look at this one, we basically have darker shadow, medium shadow, brightest shadow. That's how we get to control what those look like. And we try to do it in a way that's as unobtrusive as possible. Now, let's flip that over to a silver to show the difference. We can bring it in. We'll keep it relatively close so we can compare the two. (shutter clicks) Great, 'kay. And this is a brighter, poppier, shinier reflector. Let's see, see if we can reset this so you can see it a little bit more clearly. There. And so what you end up with is a shinier shine to the shadows. Let's bring it in a little bit closer so you can see it a little bit more clearly. 'Cause this is somewhat of a dull silver, but... Actually you know what, let's back it up a bit. There we go. It's just, it's kind of the most susceptible to creating that shiny edge. Do me a favor, pull the hair back for me again really quick. That's definitely bad. Then we'll bring it to the side, so you can see on the background a little bit. See how strong that reflection is? Yowza. And a good way to gauge it (shutter clicks) is if you can see it in the eye. So you'll actually be able to see the reflection in the eye as you move it and that's when it'll catch. So it's just, it's very bright, it's very strong. You can even see it, here. Nope. Let's see if we can go to a fill on that. You can see there's almost a bright edge under the jaw. It's just, I never liked that, something that felt like a secondary source. I'm always trying to, I think, personally gravitate toward creating a light that feels a little bit more singular. But, again, it's just a matter of personal preference. The opposite of adding fill is to create negative fill. And that's adding in something that's gonna absorb light and make the shadows darker. So if you ever find that you're not getting enough contrast this is what you need. This is a flag, it's just wrapped in fabric, like duvetyne or velvet and it just absorbs light, 'kay. And we're gonna use this relatively close to her face and what you're gonna see is that dark edge is just gonna be even darker. Now, it's already pretty dark, but it's gonna be even darker. So, we're gonna hold that up right there for me please. Beautiful. I'm gonna make this so you can see it on it's own. (shutter clicks) 'Kay. And so it's very, very dark. 'Kay? And if we actually look at, I believe it was this one here. Actually, you know what, do me a favor, just drop it for me really quick. Great, you're fine. And so you can see (shutter clicks) this, and we can look at the difference. It's also great like if you actually happen to have a window or something coming in. It's definitely darker here by the chin. You have windows, stray light coming in, overhead light you can block it. So the flag works amazingly well to deepen shadows. It also works really well to block light. And so I think it's one of the most underutilized tools for photographers because it's very effective. Now, I'm gonna do it a little bit differently now. We're gonna take it, and we're actually gonna block this light from wrapping on the side of the face. And we're gonna cut the light a little bit and so we have to be really careful of it. It's a little bit tricky, that's good right there. And I'm gonna cut it in a couple of different ways. (shutter clicks) 'Kay, that's one. Now bring it, perfect, right there. Come forward for me just a little bit, please, great. Tilt it a little bit for me, angle other way. And bring that in there. Bring it in a little bit more for me, John. And then lean forward a little bit. Come out this way, there, good. Let's see if we can go this way with it. Come forward just a skosh for me, please. There, that's great right there. It's a little bit finicky, but... Lean forward just a little bit. There. (shutter clicks) What you get is this beautiful cut of light on the side of the face. A little bit dark, we lost her a little bit in the shadow, but you can kind of see how that effect is created. So the difference between this and this. Here, let's come and bring this in so we can see it processed. Here it is a little bit darker. And here. And so you can kind of see how we're able to control how that shape of light occurs. Now it is gonna effect exposure if, as you're starting to ride that feather, and softer light is gonna be a lot harder to use here than a harder light source. So it is a bit trickier. But to kind of show you how we can maneuver around it is we can start to use light that is neither hard nor soft. So for that we might want to use something like a beauty dish with a grid. So I'm just gonna grab this here real quick. And we're gonna throw this on it. Great. And then I'm gonna bring this in a little bit closer. And I want you to turn your face a little bit more to me. Right to me, perfect. So I'm gonna get the light on her first. A little bit to me, great. So basically what it looks like is this. Let's angle that down a skosh. There we go. You want to meter that for me, please? Yeah. (machine clicking) Five six. 'Kay, I'm gonna put it at four. (shutter clicks) Great, so. I have this nice, bright light. But I'm seeing, I know it's bright. I'm overexposing on purpose 'cause I'm about to lose a lot of this light. I've got a lot of attention right here. I don't want it there, I want it here. So what I'm gonna do is I'm gonna bring in a flag. And I'm gonna cut the light right off her temple. So it's gonna look like this. A little bit closer. Great. So what I'm gonna end up with is something that looks like this. (shutter clicks) And you're gonna want to play with this to really maximize what it ends up looking like, you really have to experiment around with this. Work with the person, it's very tedious. I recommend putting the flag on an arm, on a c-stand so you have a lot more control over it and it is a lot of finite, very specific movement. But that's kind of the trick to get there with it. It's a very cool effect, but it does require a lot of play. So you can use the flag like I said, to control shadow, to create shadow, a lot of different ways. Alright. Now we're gonna do some analyzing of some contrast. So we actually have to, we're gonna break apart how these decisions were made in three different images. So we can kinda see how that single light was applied. In the first image, I'm using a top to bottom light. I'm using that checkerboard effect, but we're going in reverse. A very famous photographer back in the '80s named Victor Skrebneski used to do this technique quite a bit and he basically put an umbrella right on top of the subject and it would create this very dramatic shadow light across the body. It was beautiful, beautiful light. And so what would end up happening is he would angle that umbrella to feather the light off the background. That would create the reverse gradient. But, of course, the subject's in the light and they're brighter up near the top. So it goes light to dark on the subject, but the background goes dark to light so it creates the reverse checkerboarding effect to control contrast and depth that way. The middle image uses checkerboarding a little bit more traditionally, left to right. You see it a little bit, it's a little bit bright down here. But generally speaking, the idea is just to draw the eye to the face. Put it right there, light to dark. We go exactly where we want it to go. And this was basically achieved by using a large umbrella with a diffusion and just feathering it off the subject's face. That's all there was to that shot. The first shot was just a big XL umbrella, no diffuser, top down, very simple. I think umbrellas are one of the most underutilized tools in terms of modifiers and generally if someone was like, What would you get if you got one modifier? Gimme an umbrella. People hate all over umbrellas. They are so effective if you know how to use them. Because people love parabolic modifiers, like the big parabolic softboxes. Why do you like 'em? Oh, because I can focus the light within them, and they give me a very unique light, and it can look exactly how I want it. You can do that with an umbrella, you just change the focus of the rod. It's doing, fundamentally, almost exactly the same thing but for fraction of the price. And so I think it's like best bang for the buck is a big soft umbrella with a diffuser. I love those modifiers 'cause there's a lot you can do with it. Like I said, the first two images were shot with that. Third image shot with a singular hot light with a, with a softbox on it. Not much, but I think it was like a Lo-Omni or something. And for this we use a lower key, higher contrast image with the dark clothes and everything else and basically what we did to create that checkerboarding effect was I used a v-flat right behind his head and it's angled. So he's basically sitting in a corner, right? And what that v-flat did was I used this one, folded up closer to the light so it blocked the light from hitting it. And so I hid the seam of it in the composition behind his head so you actually get the dark to light a little bit more effectively because this has no light on it and this has everything. Right, and you basically get to achieve the same effect. Alright, now before we start putting this all together and making a lot of different lighting setups, could we field some questions? Hi, so on this farthest image that you have on the right, you said you put him in a corner-- Yes. For that. So is the, I'm just trying to envision it in my mind, is the reflector and the light, are they making an adjacent angle? I'll show you. Yeah, grab me a v-flat, please. I'll show you exactly how we did it. Or, more or less. Mkay, so. And he was sitting down. This is actually one of my photography students. We were doing this as a demonstration and he's just a lot of fun and we were playing around with it. I used a white background and so this, oops, I'm breaking v-flats. I'm gonna do this in reverse just so that we can visualize it from here. You wanna hop in here for me, please? 'Kay, great. This gets blocked by this. But I need to use it so I'm getting light on it so I've gotta figure out what that angle is. Which is actually about here. And I can see it. It's right there. It's blocking it 'cause of the angle. So I'm gonna bring this up a little bit. You know what, let's add a little bit more light to the scene, mkay. So I want light on the background on that side. Come forward a little bit for me, please. Great, and scooch over a little bit, cool. Turn your face this way. All right, so that's my plate. (machine clicks) Twelve point five. 'Kay, again, this is just very rough, but you can kinda see the effect. (shutter clicks) Sort of. Open that up for me, please. (shutter clicks) And so what we kind of have a little bit is bouncing. Open it up for me a bit more, if you don't mind. Great, 'kay, so that's a little bit better. Takes a little bit of play. Now you can maybe see that edge a little bit more successfully. (shutter clicks) That's a bit better. So that's kinda a little bit more, I think we may've actually used the black background, which is probably why it was, I think you were right on that, I apologize. Let's switch that one more time. (flat shuffling) I think you were totally right on that. Okay, one more time for me, please. There you go. Scooch over a little bit, great. (shutter clicks) Yeah, that's a little bit better. So you can see, we have that lighter... Bring that in a bit. There you go, good. I think we used just a bigger modifier so it lit things a little bit better, but you can more or less get the point. Yeah. See that? Basic same concept. And so you can use little camera trickeries to hide what you're trying to do. So like here we go to the right, we bring it in, crank that contrast up, and it's kind of basically you know. That. Yeah. If we can't hire an assistant yet, do you have any recommendations for something to hold the reflector? Sure, 'cause I oftentimes don't shoot with an assistant. But, they make reflector holders for the smaller reflectors. Which can be really effective and pretty inexpensive. If you're looking for something a bit bigger, and a bit more stable, this is pretty great. And so this is just an arm with a knuckle on it. And you can get clamps and all of these things, but you can also just loosen it up and you can kind of fit it in there. And you would be surprised how effective this can be. A lot of times grip and... Effectiveness is just making it work. So, you know, walls and v-flats and pieces of paper, when you have nothing else available, can be really effective. So you can, yeah exactly, you can angle it, you can double it up, you can put two knuckles on two different stands and it's if you need the big one. But they also do really cheap, inexpensive reflector holders for the smaller ones as well and that can be just as good. Alright, great, we'll take one from online if you don't mind. You mentioned earlier that space can be an issue depending on how far back you're trying to get. Is there, this is from Melissa, a kind of approximate, small distance that you could have as a studio if you are just doing headshots and not trying to do full body. Absolutely, so people oftentimes they go, you know it's easy to say, do all this, you have plenty of space when you're demoing it. I get that we have lots of space here. Most, a lot of the images that I shoot are in a small, confined portion of, or at least for awhile, were in a small confined portion of my apartment. And you know New York space is a premium. So we didn't really have a whole lot of space. And a lot of my portrait stuff was probably shot in an area that was maybe eight to 10 feet by six or seven feet. Not big, not big. With normal height ceilings, like nothing extraordinary. So a couple things you wanna be aware of if you are working in a small space. The color of your walls, if you have any color on your walls it will create problems for you. That's just because that's the nature of the beast. White wall, gray wall, black wall a little less problematic. Black wall's gonna absorb your light which is gonna make all your shadows darker. White walls are gonna make all your shadows brighter. Just know that that's gonna be what it's gonna come with. So if you are working in an all white room, and you want to have dark shadows, prepare to use flags. And so what I would do is, I have one of those multipurpose five-in-one reflectors and one of them was black. And in my apartment I had a big mirror on the wall. That obviously creates problems so I would just throw this giant, black reflector in front of the mirror whenever I'd shoot and it would block that reflection from happening. So you just have to be aware of the space. Be aware of what the space is doing to your images and what you can do. In a small space, you're probably not gonna want a giant XL umbrella, right? That's gonna 'cause a lot of problems for you. Large is gonna be tough. I use a large a lot, it's tight. It's really problematic, but you make it work. Especially if you're doing portraits because you don't really have to worry about lighting the whole body in whatever way. So you wanna get the modifiers that are gonna be most conducive to the space you're working in. That's a 2x3, that's a 3x4 softbox. I've got a 4x6, it's a nightmare to use in the space. So I don't ever use it, but that's a whole lot more useful. So just use the modifiers that are gonna be most effective in the space you're in. And there's a lot of lights, what we have, lots of sizes. But it's just about knowing how to control where the light goes and how to block the problems, and knowing how to overcome them.
Ratings and Reviews
JennMercille
You can never learn enough about light. I loved this class! I recently downsized from a huge studio with multiple strobes and every kind of modifier, to a small home space with one large window and a few reflectors. This class was very informative and helpful with that transition. Chris Knight is an interesting and very knowledgeable instructor, and he was a joy to watch. I highly recommend this course!
a Creativelive Student
Chris's style was excellent straight to the point, I picked up what he was putting down and at the end, I loved seeing all of the different looks I could get from one light. This is my kind of tuition. To the point, full of great info, rehashed at the end. More like this, please.
a Creativelive Student
You should teach a course on how to teach! This course gets to the point, and gets the job done. I loved it. Thank you.
Student Work
Related Classes
Studio Lighting