Gear Basics Pt. 1: Cameras, Flashlights, Flash
Lesson 2 from: Night Photography FundamentalsGabriel Biderman
Gear Basics Pt. 1: Cameras, Flashlights, Flash
Lesson 2 from: Night Photography FundamentalsGabriel Biderman
Lesson Info
2. Gear Basics Pt. 1: Cameras, Flashlights, Flash
Lessons
Class Introduction
04:41 2Gear Basics Pt. 1: Cameras, Flashlights, Flash
24:50 3Gear Basics Pt. 2: Lenses, Tripods & Heads, Accessories & Apps
22:43 4Fundamentals of Night Photography
21:16 5Testing Gear
23:05 6The Color of Night
07:49 7Defining Your Style of Night Photography
01:16 8Shooting with Friends
02:42Lesson Info
Gear Basics Pt. 1: Cameras, Flashlights, Flash
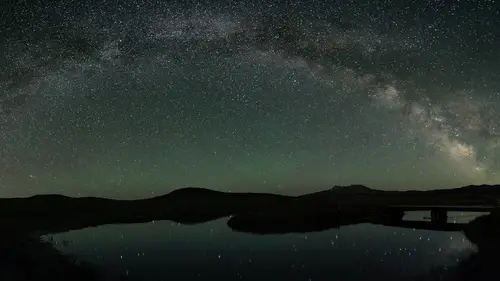
We wanna start with a good foundation and we really need, like any good, good worker, we need the right tools to get the right job done. Okay? The first thing starts out with the camera. The camera is the heart of the image and pretty much, back in the days of film when we started night photography, it was very, very difficult. We'd be writing copious notes in the field and we wouldn't be able to check them until we finished off our roll of film and then we'd have to match up the images to our field notes and it was very difficult. The learning process was very slow. Well digital, obviously with the instant gratification of seeing the image and making the corrections in the field, that has skyrocketed night images so much. The technology also, especially in the last two to three years, has really, really made the higher, especially higher ISO access and just being able to do more time lapses, in camera, out of camera, stronger batteries, cleaner image quality. It really, really has mad...
e night photography accessible and easy to learn for most. So, my tips on, for the camera, pretty much any DSLR or most mirrorless cameras from the last two to three years, that's gonna give you the proper image quality you'll need to be able to get, again, better ISOs. Any camera that also has that manual and bulb mode, these are things that you don't often see in a point and shoot camera and definitely not in your phone. You know, most of us take pictures with our phone, but they really lack once the lights go down. So, again, level up and get into a bigger camera that can have manual overrides, bulb settings, can shoot in raw, and also, you can plug in a cable release, as well. So, we can trip it and trigger it and actually set the time. So, we can take images for not only fractions of a second, which most people in the world are just doing fractions of a second, but in night photography, we're talking about exposing images for seconds, minutes, or even hours and we need that cable release to manually trigger that and to manually set that. Also, having an optical view finder so you're able to see a little bit better in the field, especially when it's dark out. That optical view finder is really, really helpful. So, DSLRs are sort of still the choice and the only camera out there, as of right now, that is a specific night photography camera is Nikon's D810A. Now, this is a very, very unique camera and I don't necessarily recommend you all go out and get it. It has a very, very specialized use. It has a special cut IR filter that plays more to the white balance of distant nebulae. So, this is a camera that you're gonna be using on telescopes, really, that's where it really excels at, is you can really attach it to a telescope and really look at distant galaxies and really see the rich and beautiful colors. However, this is great if you also just like getting out into rural locations and taking some, you know, star trails, star point stuff, it also is gonna do the job there and it has some unique features built into it for doing time lapse, for doing longer exposures. Most cameras will go up to 30 seconds and then they hit bulb mode. The D810 will go up to 15 minutes. So, that's cool that you can get it done all in camera. So, a really, really cool, but very, very specific camera and thank you camera companies for listening to night photographers. I know most of people think that we're just this small percentage, but this excitement, this way that we can capture things like The Milky Way. Boy, those images are making people go wow more than ever. Thankfully camera companies, and lens companies, are really starting to listen and take into account how we can take better images with their tools. Now, I mentioned mirrorless cameras, as well, and there are some really interesting mirrorless cameras out there. A lot of hype, you'll hear a lot of hype and a lot of good things about the Sony A7S or A7S II and this is an amazing camera both for photo and video because it obliterates any ISO that you thought you can get to. Most cameras, they can operate up to 3200 or 6400 ISO, but this goes five, six, seven stops into uncharted lands of ISO. I've tested this camera. It works for some scenarios for me. I think you have to use a different, more manual focus lenses to really make it excel, but it is a really unique camera. Again, built for that low light photographer and videographer. Another mirrorless camera that I like a lot is Fuji's X-Pro2. What makes this camera unique for the night is that it is the only mirrorless camera on the market that has an optical and electronic view finder. So, the optical view finder does operate when we get out into those rural areas, when we get out to those national parks where there's no lights. It's really hard and impossible to see through an electronic view finder. However, we can look through an optical view finder and heres the tip: turn the camera off. When we look through that view finder and the camera is off, the meter light that's in there is not blinding us. You'll only notice this really in, again, rural situations, but when we turn that view finder off, we can see and start to compose a little bit better than just taking pictures blindly in the dark. So, that's one of the favorite reasons why I like that X-Pro2 camera. Plus, it's also a good looking range finder style camera. And then finally, Olympus. Olympus is totally...not many people are talking about the Olympus cameras, but they're also doing some really interesting things with their cameras. For, specifically, for night photographers, they were the first ones, and the only ones to this date, who are offering a live bulb mode and a live composite mode. Now, both these modes will allow you to see the image build up on the back of the screen. It will stop the highlights, as well, from building and just increase the shadow value. So, very, very in camera sort of apps, or Photoshop really, that's going on with these cameras and we do live the digital. I went kicking and screaming to the digital age. I'm a film guy. I've been shooting for over 20 years, but the technology and the things that we can do with these cameras that are like computers, very much, is just amazing. So, we live in very exciting times and what I'll say is, I'm gonna talk to you about a lot of gear. If the gear works for you right now, there's no need to replace it. I usually wait one generation and then, usually, the technology has superseded itself and it's time for me to jump to that next level, but right now if you have a camera that's a DSLR or mirrorless or maybe you have something just working with a point and shoot or a phone and you wanna kinda take it to the next level, then these are some of the few tools that I would recommend. Now, some of you might also have film cameras still in the closet or maybe you're new to it and getting into that and film cameras can be also super fun and still great tools to use for night photography. My recommendation, and there's a lot of different ones, there's not many new film cameras being made, but either getting a toy camera like the Diana camera or the Holga camera, that's a super fun, dreamy camera to use and it costs like 30 or 40 dollars. So, not much of an investment. It takes medium format film. These are two of my favorite film cameras, the Nikon F3 and the Mamiya C220. These are both super manual cameras. The important thing with film cameras to realize is our batteries die quick, whether digital or film. It's like a Herculean effort for the camera to lift up that shutter speed and keep it held open for more than a fraction of a second. So, that's what eats our cameras more than chipping on the back of the screen, is just holding up that shutter. So, our batteries do go quick and especially with film cameras, they were notorious for going quick. So, both the Nikon F3 and the C220, the F3 just has a small meter, a small battery for the meter and the C220 has no battery at all. So, you don't have to worry about it. It's a very manual camera. I do recommend the medium format for night photography film just because it's only 12 exposures and if we're shooting in the night, especially when it's dark out, in those, again, rural locations, you're exposure is probably gonna be 15 minutes, but more likely an hour to two or three hours. So, how many pictures are you gonna get a night? One? Two? You know? So, a medium format camera, you're usually gonna be 12 to 16 shots. So, with a couple night shoots, it's gonna take you a couple night shoots to finish off a roll of film. Imagine that with 35 millimeter which has 36 exposures, it might take you a whole year to finish off that roll for just being exposed for the night. Now, a couple of my favorite films to use are either getting finding, which is rare, or some tungsten color films. Those would be more balanced to the night light. Fuji's Provia is also a very nice slide film that also balances well to the night. That and Fuji's Acros film, which is one of my favorite black and white films, those are probably my two go to and, to be honest with you, if I'm going to a set up with both a digital and a film camera, which is common for me, I can kind of operate very quickly with the digital camera, but then I can also set the film, let it burn, come back and see that in an hour. So, I can be more productive in the field by running two rigs. Film suffers from reciprocity. Okay? It's rated, unlike digital, which we can sort of, it's elastic ISOs we can really stretch them from 100 to 6400 and beyond. Film is generally rated for very specific ISO and if we try to stretch it, it starts to suffer from what is called reciprocity failure and that means we need to add more time to make up for it and to get the rated or the average exposure. So, when I'll go in a scene, I'll go in, I'll meter with my digital, and then apply that to my film camera, every film has a different reciprocity failure or a long exposure chart and then it would transcribe that over to the film and then use the multiplication factor for reciprocity to figure out my exposure. So, commonly, again, I'll be in the field with a digital and it'll be a 15 minute shot. Same shot, same light, same settings with my film camera, and it'll be an hour to an hour and a half. So, that's kind of cool, though, because I can get two different looks of the same scene by using two different cameras, film and digital. Here's an example. This is from Bannerman Island. I lead overnight workshops on Bannerman Island. It's a beautiful historic site two hours north of New York. Who would have thought a castle in New York City? So, two hours north of there, we lead these overnight workshops. This was shot with my Mamiya C220, or actually my Mamiya 7 camera, with a wide angle lens and this is an hour and a half exposure and again, I was just gothic setting for my digital, applied it to this, and I got that epic star trail image that we're gonna get when we use those longer exposures. Now, the camera's, like I said, just the heart of the image and we really need a good piece of glass in front of it to really make it excel. Now, lenses come in different sizes and often times I'll tell people to find your focal length. How do you see the world? And a good way to do that is walk around with a zoom lens, and all in one zoom lens. Where are you stopping? Where are your favorite shots? We can look at these, when we kind of pick and choose our favorite shots, really look at them in Lightroom or any other programs and see where you're frequently stopping with these zoom lenses. That's your focal length. That's how you see the world and you should probably pick up a fixed lens of that focal length. I used to be a 50 millimeter guy and that's a nice, common, average how we see the world like kind of with blinders on, not much peripheral vision, but in recent years, I rediscovered my love for the 35 millimeter focal length and that's really just one step back. So, a little bit wider. It's a wide without distortion, but really play with the lenses you have. I tend to suggest wide angle lenses for night photography just so we can take in more of the scene, especially if we're talking about incorporating big night skies. The more stars we get, the more dramatic it can be. City scapes, it can vary. We can go telephoto tight detail shots or again, that wide expressive shot as well. So, play with your lenses, figure out which is your favorite, and then also, flip it. Try something new, try something different. You never know until you do it. The important thing I'll tell you about lenses, don't forget your lens shade. Most of us think of the lens shades are just a way for us to help block out the sun when we're kind of angled towards it and pointing and that's where the shot is, that'll help us prevent flare. But guess what? There is plenty of flare at night. Streetlamps, the moon, cars coming by, all those can flare into your lens. So, don't forget to put your shade on and make sure it's also on the right way. Most people have it the reverse way. So, you wanna make sure you put your lens shade on the right way so it's not flaring out. So, my favorite camera right now is the D750. To me, this is one of the best night photography cameras out on the market. It has really good and reasonable high ISOs. I can easily get to 3200 and definitely I feel comfortable shooting it at 6400 and Nikon also has, for me, the best lens for night photography, which is their 14 to 24 lens. This combination right here, this'll get you great star trails, it'll get great city shots. It just, it's a night photography beast. And you see how I have it set up here? I've got it set up and this is my trusty Gitzo Traveler tripod. This is the GT2541, sorry the Gitzo 2545 Traveler Tripod. This tripod is super compact, easy for me to bring with everywhere I go. The legs flip over in a 180 degrees, so it can fit in a tote bag, it can fit in your luggage, and it can even fit on like a messenger bag and everything like that. It's lightweight. It weighs about three pounds, yet it will hold over 15 pounds together and I love this ball head, too. Gitzo, you know, has kind of, I think, struggled with ball heads in the past, but this one just really is amazing and one of the coolest things that I don't hear many people talking about it is right here. See how I have this L bracket on the camera? This allows me to easily switch between horizontal and vertical in the field without going off access. Now, I often do shoot vertical and again, if I shoot vertical it allows me to get more sky in my shot. Why not? The problem has been is that you see right here this connection? This is where our cable release often connects to the side of the camera. Most other, whether it's a ball head, or most other heads for tripods, they are wider and will interfere with this connection, but this ball head right here, this specific one, the Gitzo here that comes with the traveler tripod, it's small enough where it'll bite your L bracket and hold it steady, but also allows room for you to plug in your cable release. You can see I have my cable release tucked in over here to my tether tools case relay system and this is my preferred way to power the camera. So, now we can use our batteries that we want and batteries for DSLRs especially, those work well in the field. You'll probably get at least an hour or two with a battery. However, if we're gonna do those longer exposures, like I said, it's a Herculean effort to lift up that shutter speed. So, I wanna use, instead, I take the battery out, they have this piece right here which fits in, and with most cameras you can still fit that cord in or every one that I've tested you can still fit the cord in, and now this is powered to, again, the case relay system, which is this piece right here and you match that with a USB battery pack. So, I have, instead of a battery, again, that might only get about 200 shots, I have a 10,000 milliamp USB powered battery that I can probably get six to eight hours of shooting on it. This one in particular by Tether Tools also has two USB connections. I was shooting out in the field last night and my phone was dying so, guess what? I just plugged in my phone and was able to keep multiple devices charged in the field. So, this is a really powerful way to keep on clicking throughout the night. Now, this is the Sony A7S. This is the low light buster right here and I have this attached with a Metabones adapter and a manual focus lens. As much as I love the Sony cameras and the quality they can do with low light image quality, their lenses don't have an infinity point, or infinity markings, on most of them. I would say three fourths of them. So, however, I can adapt manual focus, I can adapt my Nikon lenses, or this is a Zeiss lens right here, which has beautiful manual focus markings on it, or hyper focus markings on it and you can see this little line right here, I used a grease pencil there to mark my true infinity. Finding infinity is hard to do in the field and I marked my own infinity. It's not all the way where it should be, it's a little bit in front, so that also allows me to find focus in the dark. This is the Fuji X-Pro2. New to the market, and again, like I said, has that optical view finder on it and I'm matching it with one of my favorite night lenses as well, their 10 to 24 F4 lens. This is an APS-C camera, so that 10 really means it's a 15, it starts at a 15 millimeter, but again, I love those super wides and this goes almost to 35 millimeter here on it as well. So, reverse little zoom lens, a little slow if I'm doing Milky Way shots I'm gonna need a faster lens, but is sort of my go to lightweight system in the field. Filters, we're gonna use filters often times for city shots, especially when we wanna do those car trails, we need those neutral density filters and you can see the neutral density filter right here and it's filter holder. This is the filter holder by Hitech. There's also Lee Filters. They're probably the two most common filter companies and we can stack them to get longer exposures out in the field. I love this little filter case by MindShift. I can keep all my filters organized and it's great in that it's color coded so I know which one's which. It's a great way to keep them from breaking and keeping them safe and organized out in the field. Flashlights and flash, these are our tools for painting in the field. I'm a big fan of Coast flashlights. You can see every one of these is a Coast flashlight. They have been making flashlights and field equipment for many years. I have a few different ones. Once you get hooked on flashlights, you can just have one. Every one has got a different use. This one right here, the Px20, this is my go to, sort of, my red light in the field, very important. I'm not a big fan of headlights because when we put headlights on, we forget to turn them off and when I talk to someone with a headlight, they end up blinding me. So, I really like to, instead, use red lights. It helps us keep our night vision clean and this one has a nice little red button that we can turn on and off and we can kind of look at, this is a great one for looking at our camera settings on the back. You know, most of our cameras are black and it's hard for us to read those camera settings in the dark. So, if you're not familiar with where your buttons are, I'll use this to look at my camera at night or walking around from place to place, I wanna keep my night vision clean. Now, this is one of my favorite small Coast flashlights. This is the HP5R and 30 or 300 lumens. It zooms as well and we'll have either a wide beam or a tight beam, even illumination throughout the field. You can see I've got this gaff taped up with a color temperature orange, CTO Gel. This is about a half stop gel and most of these flashlights and most flashlights out there are LED, which tends to be a blue or a blue white light. I like a little warmer light, so often times I'll gel up these lenses to give a warmer light in the field. This is another Coast light. What's cool about this one is this one has a couple different colors that we can either use red, blue, or white, so that's a nice one and this is one of my big guns. This is the HP7R. The R series for both, for the Coast HP5 and 7 means it can also take rechargeable batteries that they have. They have their own sort of battery packs. Again, it can zoom and do a high power or low power, even beam, and just a really, really nice powerful and easy to carry light. The flash system of choice is right here. It's my Bolt battery pack and my Nikon SB-900 flash. I used a battery pack a lot in the field because it helps me get a quicker recycle time and more power. If I'm just using alkaline batteries or lithium batteries and I need a full power flash, you know, I might only be able to get 50 to 60 shots off on those batteries. Plus, it'll take a little bit, it will take sometimes two or three seconds to recycle. With a Bolt battery pack like this, I can get over 1,000 full power flashes on it and I can, again, stay productive and keep shining a light in the field. So, I like these two setups for a big burst of light. Again, we talked about gels. Here's my CTO orange gel. I usually get a sheet of this, cut it up and have a bunch of pieces in my bag whenever something happens. So, I can wrap it around, I can put it over my flash, I can wrap it around a flashlight, or anything else. These also, I like also having a, kind of, a set of gels and these are by Rogue and they have color temperature as well as color gels. Maybe we just wanna do a splash of red or blue or a fun color at night. These, again, these gels right here are more made for the flash and they go with a rubber band system around your flash. However, again, easy to hold, easy to hold over a flashlight as well. So, very versatile flashes and these are always in my camera bag in case I need to switch up the color. I love having, kind of, cable organizing bags and this one by Timba is a wonderful, wonderful bag. You can see I have about three to four cable releases in here. When I teach workshops, and it's inevitable for someone's cable release to go down in the field or maybe their batteries go out or someone forgets it or brings the wrong one, so I always have a surplus of cable releases, cords, some other extra flashes in these and this keeps them organized and organized and ready to go whenever and then finally, for visiting out national parks, get a passport. Get your passport stamped and visit and have fun having an adventure.
Class Materials
Bonus Materials with Purchase
Ratings and Reviews
Christiane Menelas
This class was perfect in preparation for my trip to Zion and Bryce Canyon next week. I can't wait to put all this great information to good use! Very easy to understand, and fun to watch. I thoroughly enjoyed it!
user-56b1ca
This class was super helpful in what to buy and then how to get the pictures you want. Loved all the other stuff that I knew nothing about. I knew very little about light painting. Thanks for sharing this class with us. This class was one of the best I have seen.
Berus
This course is fairly comprehensive, and offers a good intermediate/advanced intermediate examination of night photography (NOT just astrophotography, which is only one form of night photography.) I don't necessarily agree with everything he's saying here, but that doesn't make it wrong - it's just a matter of preference. He is fairly equipment-centric, but getting into many forms of night photography DOES require some specific equipment. There's a lot of useful information contained here, and I can see myself consulting this course in the future to help solve and understand certain situations and problems that are unique to night photography. Recommended.
Student Work
Related Classes
Outdoor