Lessons
Lesson Info
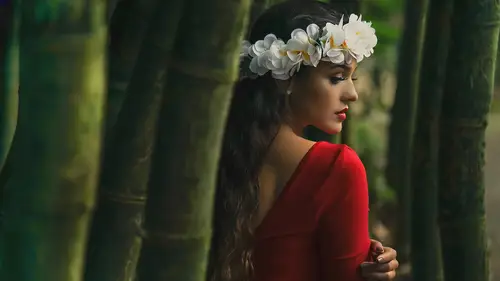
Natural Light Tools
What do we need, and it's very minimal type of stuff when you're using this. And so what, camera, right? Usually for me, the larger the sensor, the better. And the reason is, the larger the sensor size that you use, the more of that shallow depth of field will come into play and we'll get like a real blurry background. So if you want to use a large, a full-frame sensor will give you more of a blurred background than something that's using a very, very small sensor. For example, your smartphone. Smartphone is, without software manipulation, taking a natural picture with a smartphone, you can't get a blurry background, why? That sensor size is so small. Okay, so I like cameras, larger the better. Here's my portrait lenses that I recommend. At least 50mm, okay? So, also the higher in millimeters that you're using, the blurrier the background gets. So, I like using the 85, that's kinda like my staple, what I love using, so I use an 85. And I don't go much below 1. because if I go really sh...
allow, if I use 1.2 or 1.4, if I'm close to my subject, one eye might be in focus, and the other eye might not be in focus, right? Has that ever happened to us, that happens to me all the time? So I was just like ah, let's be safe. Let's just put it on 1.8 and then go for it. Alright, a lot of people use 70 to 200, because you can really compress that imagery when you're out at 200mm. What happens is when you're shooting at 200mm, you're causing that background to get bigger and closer. So the longer the lens that you use, the background becomes closer and closer. So you notice if you shoot with a wide angle lens, that background's gonna look like it's forever out there. But that's why people use long lens, and sometimes 70 to 200 is their favorite because now they can really compress that image and make something that's in the background really big, okay? And, look it, for wide angle shots, let's say you're on a budget, nowadays, your iPhone or your smartphone, they're pretty incredible, you can just do all your wide angle shots with a cell phone, with a smartphone. Because the imagery is just getting that big. Okay, and so try to use a fast lens. At least 2.8 I would say, if not 1.8 or below 2.0 is great. And so that's where you're gonna get a nice, blurred out background which natural light just looks very organic, it has a great look to it. And a reflector, and that's it. And so a lot of times, I'm using a 42-inch, 5 in 1 reflector. And so a lot of these times, what they come with is a reflector side and then you can unzip it and then underneath it, it's a diffuser also. And so really these are very inexpensive, I think they're less than $30 that you can get. And this is very effective for using natural light. And that's about it, there's nothing else other than that. You can get going and taking some great pictures in any situation.
Ratings and Reviews
Margaret Lovell
Scott is a passionate and engaging instructor. He's hilarious. I like a side of humor when I'm in a class. I have a preference for shooting in natural light, so I'm glad that I took this course. I learned more effective tips than what I had been doing. I know I'll be re-watching this course in the near future.
Phillip Tour
Great course!!! I learn a lot about natural light, im very good with natural light but I can't wait to get out of my studio and start shot again with natural light! Thank You Scott!!!
a Creativelive Student
Excellent Lesson from Scott. Easy to understand. One of the best CL Lessons I have ever watched. Good job
Student Work
Related Classes
Natural Light