Digital Post Processing
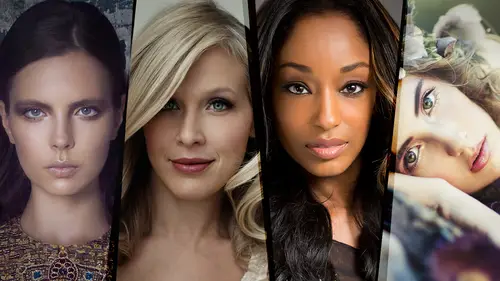
Lesson 22 from: Modern Women's PortraitureSue Bryce, Lou Freeman, Lara Jade, Emily Soto
Digital Post Processing
Lesson 22 from: Modern Women's PortraitureSue Bryce, Lou Freeman, Lara Jade, Emily Soto
Lessons
Day 1
1Marketing with Sue Bryce
44:27 2Marketing on the Periphery
29:13 3Marketing Q&A
13:36 4Mentoring with Sue Part 1
35:20 5Mentoring with Sue Part 2
28:43 6Mentoring with Sue Part 3
22:03 7The Birth of a Fantasy Concept
29:02Inspiration and Motivation
34:25 9Lou Freeman's Creative Team
38:29 10Shoot: Birth of Venus
27:23 11Shoot: Fairytale Goddess
11:40 12Shoot: Moon Scene
40:35Day 2
13Lara Jade's Background
22:52 14Ten Steps to Success Part 1
30:32 15Ten Steps to Success Part 2
44:45 16Shoot: One Light Setup
26:02 17Shoot: Two Light Setup
40:13 18Emily Soto's Keys to a Successful Career
21:25 19Shoot: Digital Camera
21:11 20Shoot: Film Camera
26:50 21Film Q&A
13:10 22Digital Post Processing
23:00 23Emily Soto's Photoshop Actions
19:16 24Polaroid Post Production with Q&A
23:09Day 3
25Shoot: Fashion Posing Part 1
24:54 26Shoot: Fashion Posing Part 2
30:40 27Model vs Non-Model Posing Comparison
33:16 28Posing Multiple Body Types Part 1
21:19 29Posing Multiple Body Types Part 2
43:47 30Posing Multiple Body Types Part 3
36:10 31Shoot: Portrait Posing Part 1
22:55 32Shoot: Portrait Posing Part 2
34:17 33Shoot: Portrait Posing Part 3
15:33 34Boudoir and Glamour Posing Part 1
33:33 35Boudoir and Glamour Posing Part 2
17:13 36Shoot: Bourdoir Posing
25:45 37Go Forth and Conquer
14:37Lesson Info
Digital Post Processing
So I'm going to show you guys first the digital images that I took earlier today somewhere with the constantly and somewhere with using the einstein I'm goingto I'm bringing these in the light room that's why import all of my photos then I go through and sort through the photos and decide the top images that I wantto I wanna add it I'm usually looking for different poses I want to get some some photos of the model looking away, some usually full body of portrait it really depends on my client if I have if I'm doing it for a magazine, I really wanted to tell a story, so I like having a different kind of expression in the face and different kinds of look, so I'm so I imported all of these into the light room first today I'm going to go ahead and show you guys how I would add it one of my digital images, so I'll show you start to finish of my techniques and then afterwards I'll show you run a couple fashion actions that I have given to you all and then then I'll be bringing in some of my ...
film photos from today I also want to show you guys a couple of outdoor images, so I believe about piper won today to show you how the actions run with him as well, because it's a little bit different then what? The studio images so go ahead and get started over here, so the first thing that I do is I bring in all my images until light room, and then I sort through and and I rate them off one to five one or the kind of the ones that I'm not going to look at five, I'll look at again later today didn't take too many images, and I also was shooting through tool and at a very low apertura, as well as the low shutter speed for more dreamy, ethereal, kind of look, so so you guys will see they are super sharp. For me, it was more about the art in the image rather than then really focused. If I got up on my shutters, peter gone up my aperture, it would be a little bit more in focus, but I was shooting low on both of those, so I'm going to go ahead, and I would sort through these I'd be looking for a hand, softness is hands different poses tomorrow will be, we'll be doing the opposing segments all share a little bit more about what I'm looking for during that segment, so I have chosen it an image here that I'm going to go ahead and show you guys I took the exposure of just lightly, so I'm going to bring that out just about about five point zero five and then I'll go ahead and bring that into photo shop and start editing usually I use light room after I added my photo on photo shop I'll bring it back in I might add a little bit of clarity maybe change the color temperature a little bit I don't use too much and light room but I do have light room process as well so I hope to have time to share a couple of those with you too I'm going to go ahead and bring that in the photo shop sameness right clicking at it in for a job so I brought my image in here the first thing I do whenever I bring a image in a photo shop is I create a separate window so that I can see this same it's the same image in two different windows the reason I do that is so that I can zoom in on one image and really see what I'm doing if I when I'm doing skin retouching and then in the other image I see how it's affecting the overall image this really helps me whenever I'm playing with colors our baby and doing too much to the skin so I can kind of look back and reference although it's exactly my image so I'm going to go toe window arrange and then I go to a new window so I just have two windows open here and like I said, the reason for that is just so that in this one I can zoom in a little bit more and really go into the skin and go into the details and be able to reference right here to see how it how it's affecting the image so I'm going to go ahead and pull this out and the first thing that I always do is my skin retouching I did that before I do any of the colors because that's what I always have that my on my bottom layers so so I'm going to go ahead and it's very important to go ahead and duplicate your layers so I always have my background layer if I need to go back of anything if I've gone too far with anything I always have that to go back tio so I'm going to go ahead in and open that and start with my skin rita jane the first thing that I'm looking for a shot my model today shawnee she had very good skin so she doesn't have too many blemishes also it's a softer photos so so I don't see quite as much of the skin d telling this image since I was shooting through the material so I'm going to go ahead and look zoom and really far into the image they see a couple little blemishes so I used my spot helling brush you'll notice go through here just take those out pretty soft another thing whenever you're shooting with low aperture is one point two works great for this if I'm doing a really close portrait say something for the makeup artist a beauty shot I'd go up to maybe one point six or one point eight because it does it'll soften the entire image so I'm always focusing in on the eye but I don't want it to look like it was over overlea process but gonna go through with this one I'm going to show you guys in a minute as well away to sharpen the eyes so after I use my spot healing brush tool if there were any image any areas that I wanted to remove I could also use my patch tool and I would just go through any flemish says any areas that are taking away from the from the image I would just remove those little areas another tool that I use this frequency separation I know a lot of you guys are familiar with that there a lot of youtube's and different resource is online tto learn that techniques I use a little bit of a different technique with it so first I'll show you guys if I was doing shiny skin her skin was really nice there's samantha did a great job with the makeup so there's not that much that I need to do is I probably wouldn't use frequency separation for this image instead I would lighten up any darker areas using lighter and darker color with paintbrush, so I'm going to show you guys that technique I'm going to go ahead and duplicate my layer and go to my paintbrush tool and what I would be doing say, like right here there is a little bit dart so I would select a pig man just a little bit lighter than the darker area that I wanted. Teo, lighten up. And the nice thing about this is it'll lighten up anything darker from the pigment you selected, but it won't go won't lighten anything further than that pigment so it stays at that stays at that level, so I'm gonna pick us select a color, my motives that normal, my capacities, I usually go between maybe five and fifteen, depending on the skin, this one, I'm going to keep it at eleven, and then I would just paint it and you guys can see what it does, so so I don't have a lot of retouching to do. This is a great method, teo, do something quick to go quickly through it if you just want to lighten up certain areas so you have a lot of skin retouching to dio you, probably frequency of separation is better because you can't lose just a little bit of these hell, but I would like not just any areas another thing that you could do, you can reverse it so you would change here. Basically a lot of places where people can get caught up is with the mod layers. You would change that, too, you know, lighten or darken, or you can even go to the er the motel heirs of the individual layers and change it to lighten and darken and base sickly would add, like a za clip to that pigment that you choose. So it's um, it's throughout photo shop, and you're able to use it in many different ways, just clarifying that so another way that you can use it is if you wanted to dark in an area right here, it's just a little bit, right? All you would do was change your mode a darker color. I'm going to go ahead and switch it right there and change my a pass ity I'm going to leave that at around eleven and do the same methods, I could just darken up any hot spots or any areas that are too bright. And, like I said before, it's not goingto darhk in any area that that it won't dark and anything that you from the pigment that you chose so I would go through and look over, look over a skin and dark in the lane, different areas next I'm going to show you guys frequency separation and how I used this method and frequency separation, so I'm going to go ahead and create two layers one is my highlighter one is my low so I'll go ahead and rename those there's my high there is my loe so with the low layer I'm going to go ahead and blurt that out I goto filter blur god's ambler and depending on how far the model is is the radius you want to go. So if the models really close to the camera if it's a portrait shot maybe around ten ifit's further away around between two and four is usually how far ego you just want to make sure it's florida blurt out but you still see see the skin color so for this one said it was a softer image I'll go round around to someone and press ok for that then this is my high layers, so this is where all the detail is, so I'm going to go ahead and say goto and then apply image I gotto layer and I make sure that it's on my low layer and then I am going to the blending of the track my capacity is one hundred my skills to an office it's one twenty eight go ahead and okay and then I'm going to change change the motive here tto linear light so right there so then I go ahead and I groupies to it tio layers together so it hasn't changed anything and with the high the high layer it's just affecting the detail of the skin and the low layer and affecting the colors so then the next thing that I do I go into my lows and what what I would do with the low layer is change any kind of colors using the same technique I just showed you guys so it paint with lighter color and pay was darker color and the reason I would do it this way as if I didn't want to lose any skin detail it all I still have that high layer that has all the skin d tell us I would go through, I would grab my lighter color I would leave it in the same posse and say wanted to lighten up under the eyes I would just go through here and just lighten up those kind those areas and see with this with this method you still see all the detail on the top they go through here, just lighten up areas so then with the high layer that has all the details, so what I do is I go over to my patch tool and say she has a little bit of acne right here I can just kind of move that out of the way and I still keep the same color, so I'm on ly affecting the detail and not the color, so this is it, this is what I would do like they said, if I had a model that had a lot of acne or had a little bit of, I didn't have a great make up artist or maybe he had no makeup at all, I would go through and edited this way otherwise, like I said with shaunie, ali would do with lighter pay with lighter, darker color because her skin was really nice to begin with. So the next thing, but I would teo is go over to my I'm going to go ahead and show up in my eyes, so I'm gonna create a new layer, so I'm going to coffee all that my layers together, emerge them and pay since I have a brand new layer to work on and then I'm just going to sharpen her eyes up a little bit. So how I would do this? I goto filter other high path and the radius I is usually around twenty you guys comfy here is just sharpening a little bit, so it really depends on the images. Well, so I'm going to press, okay, I'm going to change my mode of soft light and you guys can see how much it sharpens the image so what I'm going to do though, is for me, I really prefer more soft images that's why I shoot alot averages and shoot through all these different materials, so I'm going to go ahead and I'm going to create a mask and then I'm going toe in burnt my mask and then I paint in that area just so that it's on the eyes and not the other areas, so I'm changing my a passage he appeared a one hundred and I'm just going into the eyes and the eyebrows, anything that I want to show a little bit, but marty tell on, so maybe then if it was for a designer and I was shooting it, a little appetite might go into the dress because pretty grainy around there since I was shooting through the material it's again, so I'm gonna minimize that just a little bit so that I can see a little bit better my image, but I mainly like this kind of area, so you guys could see how much that sharpen. So the next thing that I'm going to do with my contract, I'm going to go ahead and create a curve layer we goto adjustment tools create a curve down here, I have my darks and here is my life, so I just go in and just change that just lightly for mine images, I don't I prefer them to contrast c sometimes we'll even bring the dark out just a little bit and take away some of the black with a curve. You can also go in and change colors around. I'll show you guys my actions later, but if I wanted teo, chaim, teo, make the image a little bit more blue or last leg could go in here and just play around with my colors for me. I prefer selective colors, which I'll show you guys in a minute, but you can't do some really creative, different colors with the with your curves, so next I'm going to go ahead and show you guys how I use selective colors, so I'm gonna go to my adjustment told you, go ahead and pull up selective color what I like about selective colors, aiken, you saturate the skin, I really like it for outdoors when I'm shooting and a lot of greenery, aiken, diese saturate the greens are for me. I don't like a lot of red in my images, so I take red's out in different colors, so everything that I'm teaching you guys today, it was really depends on your liking, and you're a personal preference, so you can go in and play with these colors and get it to your liking, but there's no set formula of why what color you should use for yourself because it's all based on your creative I so I'm going to go ahead first dog start, I'll start with my red because they see a lot of red in her and I just slide it around. I like to do saturate a little bit, so I'm going to take away a little bit of this. This is a good way, though if you want to de saturate your image, I'll show you another way in just a second, but I can take away a little bit of those reds for studio shots, usually since I used calvin, but white balance, I'm able to get kind of close to the color that I like, but when ivory mouth doors I really liked like I said to de saturate the greens or de saturate the sky, that kind of thing, so I used collective color a little bit more when I'm in I'm outdoors than rather than indoors, but I could also go through here. I could change the blacks a little bit if I wanted to change the whole image and make it cooler warm where I could go through through these layers and change out the colors the next thing I'm going to show you guys how I use hugh saturation, the the hugh saturation technique it's pretty similar to shooting through fabric shooting through flowers or anything outside so this is the way that I would add in any kind of flair to my image I go over to my adjustment told they go to hugh saturation and what I do is I bring up my lightness I'll bring it up kind of far if I go to cull arise I can change the colors and the light so say I'm shooting outdoors I really like natural color, so I would like yellow or orange and I would so change it to something like that for an outdoor photo and then I can show you guys in a minute an example of this I could make it look like the sun's coming through where I'm shooting through a different kind of fabric for this particular emissions that studio I'm going to take off color rising just goingto brightened this flare up a little bit and then I'm going tio created radiant so with the grady in tool, I always have it on radio and it's important to have it from black to white so that you just have a flair coming through so I'm going to go ahead and with o'grady and I'm going to pull it over so you see there's just a really pretty flair it's always important to change rapacity, so so I put that in there then I can change it to exactly my liking I also like doing this for stupid for a studio like having one that just goes up and down, so I'm going to create one more. I'm going to go to hugh saturation once again, I'm just going to turn on my lightner and I'm going to change this over here so that it's just, uh just have ah line coming up, so just kind of that kind of as that ethereal look to the image that I really like and that I'm usually going for in my images so that's pretty much how I would edit this photo. I want to show you guys another outdoor photo, so I can show you a little bit more about how I do the eyes, but I'm going to go ahead and save this image, and then I'm going to go back my light room and I'm going to pull, go ahead and pull up. One of the photos I did shoot was shiny last week before the creative live event, so I'm going to pull up one of my outdoor photos and just show you guys the same tools that I use with an outdoor photo it's pretty much the same technique, but I want to show you how how I would add I glance in a couple of things, so I'm going to go ahead and bring this in tow, photoshopped and I would go through all that my skin retouching first and then I would start adding playing around with my colors so I'm gonna accepted the finished I'm going to go ahead and duplicate my layer by just creating a new I'm going to create a new window and then I'm going to duplicate my layer so that I can work off of that rather than the original image and I would do men I'm going to show you guys right now of course I would go through I would pay with lighter color change this area take care of some of this acne and do all of my skin retouching then I would go ahead and I would add just soft island under the eyes so I'm going to show you guys how I do that since the other image her I was closed her eyes were closed so I can show you that okay so so what I would do is create a new layer so I have a layer right here then I go over to my circle marquis right here I create a circle underneath her eyes so I'm creating kind of like a crescent moon shape and this is the way just the highlight the eyes I'm goingto put that right around her eye then I hit the for the mac you guys conceive the shortcut I used the lp and I go ahead and I shape it right underneath her eye let go of that and then what I dio is goto my paintbrush fool I paint and paint with white paint right here then I'm going to create a mask and blur that area out I'm gonna blur it then I changed my I changed the motive here too soft light or overlay a little bit different sometimes overlay makes it a little bit a little bit brighter for this one I do overlay and then I'm going to change my a positive down and this is a good way just kind of add a little bit of highlight to the eyes and then what I do after that I just duplicate my layer and then I drag it over to the other eyes they don't have to go through go through it again so you guys conceive the effect that so for my outdoor images this image is a very white sky I'm going to show you guys again how I did hugh saturation it works really nice as well if you're in the forest or somewhere where there's a lot of greenery you can do a really nice sunlight coming in but I'll show you guys the flare that it gets I'm going to go to my huse go to hugh saturation again this one I'm going to make it a little bit more warm so I'm gonna go ahead and press colorized and brighten it up and then I'm going to change my hugh too maybe between yellow and orange after that, I go over to my grade ian's hole. I'm going to change, change it again over here so that I have. I wantto change it so that it looks like the sun's coming through so I can change it over here. This is, they're a very similar effect, a shooting through material because it just adds a little bit of haze to the image, and it works really nicely. Like I said, if you're shooting, you want to add, like, a sunlight coming through where something if you want to recreate, just like a really whimsical forest kind of show is that works great ad ad the son in there. So with this, when I could even duplicate it and you guys could see it even more than I could, I'm going to duplicate it again and bring it over to this area. So these air just just for you, your preference if you want to create a more soft ones, uncle phil, I love using these.
Class Materials
bonus material
Ratings and Reviews
william mazdra
Occasionally, things fall into place, and you end up with the kind of event that we just watched. It was marvelous to see these four amazing individuals contribute their own perspectives and content and to see them interact with one another. It was honest, brilliant and a must have to view many times over. One of the best courses on Creative Live and further evidence that Creative Live is going from strength, to strength and is worth every bit of our investment and time.
a Creativelive Student
This was such a great 3 days! Each one of those women are so inspiring in a different way. Sue Bryce is my absolute role model and it was a great experience to get to watch and listen to her. She makes her lessons relatable and very easy to understand and remember. So many small tips and tricks that will make a big impact on how I shoot as well as how I market! Thank you Sue. I had never heard of Lara Jade and Emily Soto before this started and I can say thank you to creativeLive for the opportunity to be inspired by two other amazing women in the photography business. The unique style and confidence they displayed was great to watch. I don't shoot fashion, but I was able to take good bits and pieces from it all. I am stepping out of my box... starting today! Thanks again to each of the women and cL for putting this all together. Kristin Campbell Journey Images, Alberta, Canada
Kim Sleno
As a participant in the live audience, this is a fabulous course, from Sue Bryce's honesty in helping a person to look within themselves to find your own motivation, her wonderful real examples of posing women, to Lou Freeman's posing for boudoir this is a course that will help a person learn a craft and where they might want to go. I loved Lara Jade's vision of fashion and how she has arrived at such an early age. Emily Soto brings a different dimension to fashion photography that is inspiring, from her use of vintage cameras to her editing skills. This is a course for anyone wanting to learn about photographing women. I highly recommend. Thanks CreativeLive !!
Student Work
Related Classes
Portrait Photography