Lesson Info
8. Lightroom Mobile Modules Overview
Lessons
Class Introduction
06:11 2Equipment
10:44 3Shoot Differently
10:59 4Capture Apps
03:01 5iPhone Capture
07:20 6Lightroom Mobile Capture
11:59 7Post Production:Editing/Processing
06:10 8Lightroom Mobile Modules Overview
11:29Lightroom Color Module
16:04 10Lightroom Light Module
06:15 11Lightroom Geometry Module
05:46 12Lightroom Effects Module
03:41 13Lightroom Versions Module
04:01 14Lightroom Profiles and Presets Modules
05:43 15Lightroom Selective Edits Module
17:13 16Lightroom Mobile Organization, Sharing, Exporting
08:43 173rd Party Apps
14:52 18Wrap Up
00:51 19BONUS: Premiere Live Kickoff
27:43Lesson Info
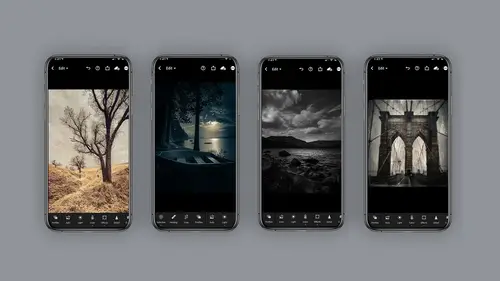
Lightroom Mobile Modules Overview
diving into light room processing. So there's a few things we need to clarify here about doing your actual editing and processing labor. Um, so first of all, there are two different kinds of light room. There's, like classic, which was the original light room and more for desktop editing. And then there's light room, which is now for desktop. Well, you can use it on your desktop. You could use it through Web or on a mobile device, and they're very different, and it could be a little confusing. Heck, it could be a lot of confusing. So these are a few of the differences between the two programs. There's light room and then light room classic. I am strictly speaking about light room for our particular workshop. I'm not discussing Light Room classic. I just want to be really, really clear about that. So when we are editing or during this boot camp or doing editing, we're talking about light room, and even within light room, there are multiple devices you can use. You can use it on your mob...
ile device. You can use it on your IPad. You can use it on a desktop, literally download the light room application. This is not classic, and you can use it on a Web through a Web browser at light room dot adobe dot com. So all of these are connected through your adobe account. The same image could be worked on on each one of these, However, not all the same functions are available. I just wanna be really clear about this. So the way the editor works on the mobile devices a little different in some areas on the desktop or Web version. And there are a few items that actually don't work on the desktop or Web version yet. So just for clarity's sake, I just wanna let you know there's these different ways of accessing the same thing. And we're talking about light room slash light ra mobile. Not classic. So in addition, there is one more thing you have to worry about or be concerned or aware of is that there's a free version that you can get on your mobile device. And then there's a premium version, and there are different. There are three different items, three editing functions. You cannot deal on free, and I'm gonna point those out. But listen, you guys. The free version is a cup of coffee. It's five bucks a month for 99 I think after this boot camp, you're going to see it's absolutely worth its weight in gold. So in light room mobile, we're gonna be using the editing modules to do our post production or editing. And you'll see here that in the free version, there are three things that are not available for you. That would be selective editing, which is where I do a majority of my heavy lifting and the hell tool and the geometry tool. So those three things are not available on free version and the premium all of those air available now for full disclosure. Look, these modules are really intensive. There is so much you can do in the so for this boot camp. I'm just gonna touch on each one of these to give you an idea. And then I encourage you to dig deeper on your own. So the first thing we're gonna talk about is the hardest one or the most complicated, which is selective edit again. I'm gonna tell you this is not available on the free version and in the selective edit, you actually can create your own masking to selectively choose where you're going to do your adjustments. Now, if you shoot with the depth capture camera, the program will actually try to help you make a mask on its own. Based on the photo you took using the two lenses on the camera. Uh, I love this is very complicated. I think it's kind of a shame that it's the first module that shows up because it is so sophisticated. But it's amazing. We're gonna look at this later on in a live demo. The healing tool healing tool in light room works very much like it doesn Photoshop, so it is really hard to do on the phone with your finger. Let's just be real about that. Where I like to use this is on an IPad and IPad with a stylist. This this really works well. However, it's good for things like power lines or little bird. You need to take out or let's say you took a picture of a beach and there's a can stuck in the sand. This kind of thing is pretty easy again. Not available on the free version. Crop tool pretty basic. It's got aspect ratio. You can set it up to do a square. If you're doing instagram, you can lock a crop. If you want to keep the ratio of the same, you can even rotate it so that little curvature dial here on the bottom will allow you to rotate the image. Here's the key about this light room Mobile is nondestructive, which means you can always go back to your original frame. I absolutely love this about this program profiles. Now profiles are interesting thing. They're actually kind of a starting point. You can choose black and white color. Artistic, modern. There's a gazillion of them in here, and these do not affect any of those editing buttons in light room mobile, which means you can add on top of it. So it's kind of like putting secrets House on top of a base recipe. I like to think of these is kind of giving a film look. So if you want it to look like Fujifilm used to look like they'll via, for example, or a black and white image, this section the profiles is very, very deep. So I have a whole other course just on this, and it's long, but it's pretty in depth. So we're not gonna talk about this for the boot camp. But I do wanna let you know that they are available and we're looking at the light panel, the light panels Fantastic. There's not a job I do that I don't use this panel. It's pretty standard you do. Exposure contrast highlights shadows, whites and blacks very much like camera raw, and in addition, it's got this fantastic ability. Use a tonal curve so you can actually use a curve. If you'd like to make your adjustments, we're going to talk about this later on. But it's pretty fantastic. This module. I use it all the time. Color color module on light removal is phenomenal, and not only do you have your standard temperature tent vibrant saturation, but you can also create a black and white image here by just clicking on this black and white button. And they have color mixing color mixing is phenomenal. Also, I'm going to say phenomenal ah lot, uh, in the color mix. You could individually click on each color you want to separately adjust either the hue saturation or the luminous And then there's more. If you click on the little pizza pie here, you can go to something called targeted image Adjustment and that will allow you to select a section of color and make adjustments. I'll do a demo on this later on, but fantastic, Phenomenal. There I said it again. In addition, they have, ah, fantastic system of color grading now available in Nitra Mobile. This has taken the place of Split Tony, and what you see here is you could individually change the color and tone of highlights, shadows and mid tones. And in addition to that, you can adjust a global. There's a global change. Pretty amazing. Lots toe unpack here. Just know that it takes this place of what used to be called split Tony effects. All right, you gotta be careful here. Effects are pretty amazing. You could do clarity. D hes texture. It's where you really take those macro shots and make them pop. However, like any good thing, it could be done to too much. So when you see someone's photo that's like an HDR and it's over crunched. This is where they've done that. So please, please proceed with caution effects are great to use, but just don't overuse them details. So details are very similar to the effects in that you can control sharpening. And you can also control noise reduction, which is really handy if you move the noise reduction sliders too far or far. I don't wanna put a judgment on it. The image will start looking very painterly. It's a pretty cool little section. Optics optics. I think folks don't think to use this, but it's really helpful. Chromatic aberration is where you get that hot color fringing from your lenses so you'll get like a purple or green halo around an object. This is where the camera or the light mobile automatically fix that as best it can for you and, uh, enable lens correction. I always turn that on, especially when I'm going to use the geometry module. So maybe just trust me, but I'd leave these on geometry. I love love, love this filter or I call the filter. It's not really filter. It's a module, and what this allow you to do is straighten your images, your horizon lines, your verticals. If you have key stoning. I'm sorry this is not available for the free version. But if you could imagine, I'm shooting images off the back of that motorcycle with that lanyard, and even just when I'm shooting regular because of these glasses, I often find that the reflection off the face of my IPhone means I can't quite see exactly how I'm framing, and I can correct them with the geometry module. I'm gonna show a demo on this later Presets. Now presets are very interesting. Presets are when you have saved a recipe of maybe some shadow information, some lighting controls, color, maybe some sharpening and even geometry. And some folks like to use presets that could buy from other people. Some people like to save their own presets, so this is kind of like a recipe. I think I'd call it a saved recipe. You can also, if you're light room classic user, you can save your presets from light room Classic and use them in light room light room mobile. However, if you have a preset that use something like split toning, for example, well, that's no longer available in mobile, so that code won't work. A little caveat there, but presets just think it's a way to save your versions. Hot diggity dog. Do I love versions? So what versions allows you to do is save multiple versions of your image? Why I find this really handy is twofold. One. I just like to experiment a lot, and I don't want to get rid of what I did, and you don't have to have multiple picture copies. Light room will save them for you. And in addition, what that I could do with versions is I conceive an instagram version or a Facebook version or be hands version, and I can still, at any moment, all the way back to the original raw image. So versions are a huge asset to have in this program. Reset resets pretty obvious to it's almost like previous, so previous will allow you to copy what you did on a previous version and apply it to another one. Reset is quite literally starting over, starting over from scratch, so I don't use it very often, but I'm glad it's there just in case. Since we've looked at these editing modules very quickly. Individually, I would like to tell you that just for managing expectations, there is so much more to each one of these, But for time purposes, I can only touch on them. So the next section we're gonna look at actually, how some of these modules work and do live demos on the editing. But please, when you get a minute, go into each one of these and really dive in deep, you're gonna be amazed.
Class Materials
Bonus Materials with Purchase
Ratings and Reviews
Tiffany
I LOVED this class sooo much! Lisa did an amazing job of supplying a large amount of information balanced with a pace and teaching style so it wasn't overwhelming and so FUN to learn! Lisa helped me unlock so much potential in my device I didn't know was there. Everyone can learn from this class! Lisa is fun and real and you feel like you can connect with her. I am having so much fun with photos and have taken my images up a level with the education Lisa provided. TAKE HER CLASS, you will be so happy you did!!
Amy Vaughn
Lisa, your classes are wonderful and inspiring. Even though I already have a fancy DSLR, I love experimenting with mobile photography and have just been getting into using Lightroom a lot on my mobile devices. There were many cool ideas in this course that I wasn't aware of. I'd highly recommend it to others interested interested in creative mobile photography. Thank you so much for providing the slides as a pdf download - they are thorough, well organized and easy to reference when it isn't convenient to open a video file.
Thomas Hübinger
This course is a step-by-step guide on how to create better, more impressive photos with Adobe Lightroom. In her charming and unique way, the lecturer explains the content in an easy-to-understand way so that people like me who have never used Adobe Lightroom before can achieve very good results. The course is rounded off by a very extensive and detailed workbook. Thanks to the lecturer for this wonderful course!
Student Work
Related Classes
Beginner