Pattern Draping: Working with Muslin
Lesson 7 from: Making Fashion: Draw, Draft and SewJay Calderin
Pattern Draping: Working with Muslin
Lesson 7 from: Making Fashion: Draw, Draft and SewJay Calderin
Lesson Info
7. Pattern Draping: Working with Muslin
Lessons
Intro to Making Fashion: Draw, Draft and Sew
07:10 2Why Start with a Sketch?
07:11 3Drawing: Draw Your Muse
35:41 4Drawing: Sketch a Figure and Define a Silhouette
19:07 5Drawing: Render Color
10:56 6Drawing: Add Texture, Patterns, and Details
12:58 7Pattern Draping: Working with Muslin
06:14 8Pattern Draping: Drape a Basic Form
25:44Lesson Info
Pattern Draping: Working with Muslin
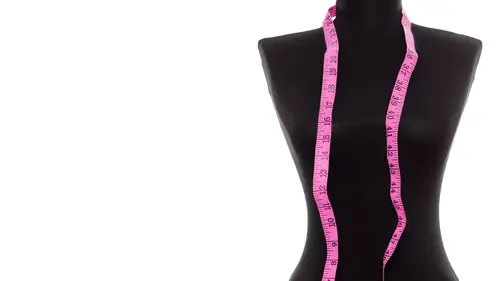
One of the big questions around all this because we feel like we can just jump right into creating a garment is to have a real plan for your production and understand all the different elements of it. So one of the keys to that is your fabric. And when you're starting to create the actual pattern we are normally using an inexpensive cotton fabric called muslin and the thing about it is that you want to have muslin that reflects the weight of the fashion fabric that you're gonna use to make it. So if you're using sort of mid weight, this is really good, but if you're using chiffon, you might wanna use a much lighter version of muslin, sort of a more gauzey fabric. If you're doing a heavy coat, you might wanna use something that feels a little bit more like canvas. So this is usually the first step. Some designers will work with paper, but a lot of designers like to work with muslin, I mean, with the draping aspect of it. So one of the first things we wanna do is cut off a piece here and...
you wanna test your fabric. I mean, most cotton fabrics have a basic weave that you could do this, but you don't wanna cut it all the way across. You wanna snip it and tear. And you can't do that with every fabric, fair warning, I have tried and have made some horrific mistakes. But if it has a basic weave you can do that and one of the reasons for doing that is that fabric can get warped and we wanna make sure that the fabric stays on grain. So often we'll take a piece of fabric like this and if we feel that it's warped we might sort of twist it by pulling it back into shape until we get an actual true square. So this is the starting point. Now the muslin has some important things you need to consider. Going across is the cross grain and then going along the selvage is the lengthwise grain. Most garments are created on the lengthwise grain because it has a little bit better drape. It hangs down better. It's more fluid. And then there's another element of the fabric which is very important. And if we create a true bias, which is that perfect angle if you have a square, so I always do it by going from the corner and bringing it over. This would be the corner of a square, the shape right here. This line that we're seeing at the fold is true bias. That perfect, that center cut. And one of the nice things about it, although this is a woven fabric, on the bias, it will give. I hate to use the word stretch even though it is technically stretching, 'cause stretching implies sort of a knit. But this is the bias and it gives. It kind of conforms to the body and we spoke a little bit earlier about Madeleine Vionnet who was sort of a master of working with the bias and she wanted clothes to drape and hug the body and the kind of knits that are available now weren't available then and she was able to manage that effect by using the bias. So one of the first things I'm gonna do just so that I have something to work with, I'm just gonna cut myself a basic square. So you want to take this and you want to press it. If your muslin has creases in it, it will actually affect the size of your garment, of your pattern because when you transfer this it'll be to paper, which doesn't have those creases and every little crease is sort of grabbing and it could be a fraction, a fraction of a fraction of a fraction, but when you're working especially in the industry on large numbers it can affect the patterns in a big way. So we're just gonna take a minute to press and it also helps kind of... The pressing also helps kind of make it a little bit starchy 'cause there's a little starch in muslin before you wash it. Okay, almost there. And this is our first plane so to speak. Plane on the body. We're gonna do one section at a time. There we go. And I know that I wanna work with the lengthwise grain so it's my selvage. So I'm going to automatically fold in about an inch. Actually a little more than an inch. And I can do this by eye, but you wanna measure. Sonya had a wonderful pattern making instruction teacher in high school and she used to see me doing things by eye and she'd go crazy. So when she said, if the measurements aren't right you're failing that project and I was so happy that the measurements were right. But I don't wanna encourage that because teachers all over the world will get very mad with me. But you want to measure and check and make sure. And it could be whatever measurement you decide. I just give myself that much. Sometimes with fabrics that are woven tightly here at the selvage, you might wanna clip, to cut into it so that it's not too tight, you know, just to release it.
Ratings and Reviews
Jacquelyn Bradley-Nelson
I love this class, I'm glad I found it. This what I want to learn or add to my knowledge. JayC you are awesome! I need more learning on rendering coloring for illustration for that is. I can't wait to see what's on the other class I will take. Thanks! Signed: rm515jb.
Andrea Leggett
I really enjoyed this and the draping really opened my eyes to what can be achieved. Jay made it look easy so I plan a shot at draping later and will post my effort on Instagram with thanks to him! Thank you Creative LIve for bringing this to me (in the UK) and special thanks to Jay. When I'm in Boston in August I"ll buy you a beer!
Susan
Loved the draping information. It was logical and clear enough to make me want to try it.
Student Work
Related Classes
Fashion Design