Lesson Info
5. Student Shoot: Library
Summary (Generated from Transcript)
The topic of the lesson is location, posing, and execution in photography, specifically focusing on a student shoot in a library setting.
Q&A:
What is the goal of the student shoot in the library? The goal is to create a clean and structured framework for shooting in any location, regardless of skill level.
What elements will be discussed during the shoot? The instructor will focus on small details such as hand placement and weight distribution, as well as breaking down the location and applying the principles of composition.
How will subject emphasis be created in the photos? Subject emphasis will be created through lighting, size, and selective focus.
What tools can be used to create subject emphasis? The window light, reflectors, diffusers, and ice lights can be used to create subject emphasis.
How can the distracting elements in the background be addressed? The instructor recommends cropping or adjusting the angle to eliminate distracting elements in the background.
What is the purpose of using a reflective surface or a painting in the photoshoot? Reflective surfaces and paintings can be used to create interesting reflections and add depth to the photos.
How can the lighting tools be used creatively in the shoot? The instructor suggests experimenting with different angles and distances to create unique lighting effects.
What is the importance of posing? Posing helps to create a desired mood or story in the photograph.
How can the chair be used creatively in the shoot? The chair can be used as a prop or a background element to add interest to the composition.
How can the photographer make the most of the location and create different moods in the photographs? The photographer can use different lighting techniques and experiment with angles and composition to create different moods in the photographs.
Lessons
Day 1
1Class Introduction
49:22 2Location Vocabulary
28:42 3Posing Anchor Points
23:46 4Student Photo Review and Demo
43:36 5Student Shoot: Library
51:19 6Student Shoot: Patio
17:32 7Shoot: Outdoor Location
20:27Student Shoot: Outdoor Location
42:17Day 2
9Roberto's Wedding Evolution
12:15 10Posing Principles Discussion
23:55 11Image Review
14:27 12Posing Example Images
25:12 13More Posing Examples
41:38 14The Posing Chart
34:04 15Student Shoot: Individual Portraits
33:11 16Student Shoot: Facing Each Other; Him Behind Her
22:59 17Student Shoot: T Pose; Foreground/Background
22:54 18Student Shoot: Photojournalistic Style
24:49 19Student Shoot: Kiss Anticipation
09:06Day 3
20Roberto's First Photos
14:29 21Image Review
21:46 22Morning Q&A
13:28 23Light & Shadow
23:26 24Self Dialogue Game
15:51 25Beauty Through Angles
14:36 26Shoot: Creative Lighting
36:41 27Student Shoot: From Bad to Good
09:54 28Student Shoot: Portrait with Lens Flare
18:01 29Student Shoot: Perspective Through Angles
13:35 30Student Shoot: Transforming a Location
21:13 31Practice & Application
29:17Lesson Info
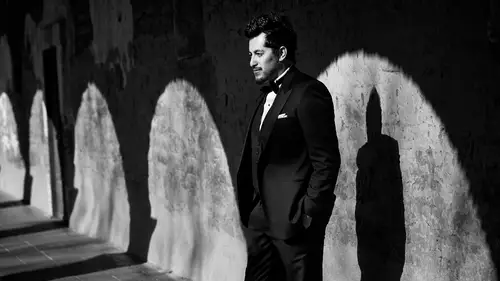
Student Shoot: Library
this is the part were probably a lot of people like to go to but it's no good unless you build a framework which we did for the first two sections this is not that type of photo shoot where we just tried to make pretty photos we're going to have a very clean structure that will help everyone out there no matter what level you're at be able to make sense of any place so that's what we had to spend so much time building that framework so we can all make sense now I have my six awesome audience members which they're going to get totally picked on on dh we're gonna have a lot of challenges for them we're going to start fixing them based on the stuff that I spoke thus the seven seven seven uh elements always discussed uh we're gonna be looking at small details that hands the way how the weight is distributed we're going tow especially focus on breaking down locations in this segment but we're still going to apply all the practical the principles of potion that I spoke about tomorrow we're g...
oing to focus on posting more heavily but they were still gonna implement this also repetitive and it sticks in your mind um we're also going to create uh subject emphasis through lighting through size on through focus selective focus on I'm not going to let any students take a photo unless they have one of those three in their mind or two of them in their mind because from now on they're going to take solid photos nothing where they blade there with environment the bride and groom are the fashion model whatever are you going to stand out and they will be no doubt we're inside this library so I don't know if you can pan the camera around but there is it's a liar a so we have wood carpets floors we have a couple of windows we have some paintings with some glass with frames we have these stools to sit to lay on our set and we have all these chairs um we have a bunch of books way have small little lamps windows chairs on this little don't like going on in the ceiling there wasn't why I say that is because if you're listening at home I want you to start looking around the scene and tried to see if you can find three color elements or less seemly scholars if you'd tried to find balance symmetry if you try to um find a way to make shadows creep find patterns repetitions balance symmetry you name it on especially the lighting tools we have our window light we have my six hundred hundred six hundred flashes we have jerry geonosis ice flights available for us to light up the the models on we have reflectors and diffusers so to my awesome audience members your tools to create subject emphasis is going to be your window light you're the diffuser and you had after you you're gonna have to use it creatively somehow and I'll help you reflektor ice lights and flashes okay um so we'll get out go ahead and get started do you guys have any questions no all right way have matt coming out so here's matt we're gonna have ki should come out and join us in a little bass you're still putting on makeup so I'm going to basically big on my very first student is going to be david I want you to um you have matt you have window light the future reflector ice lights flashes the lance isn't under canon gary I want you to start by giving using the rooms items to create a photo that has contrast okay contrast so somehow he has to be let in a contrasting way there has to be elements of contrast in this location which there are plenty off uh if you're watching online take a lot stick around look at the room on dh see what could you do for yourself if you were looking for contrast ing situation okay so take a look david and see what you want to do study the light study what you have available to you on uh I can help you okay don't worry about it just trying and already what I want to do go ahead and put him in that chair okay look my window like ok it's um kind of strong window light so it should be quite contrast okay let's try that so the camera is right there now you just can't okay so we're gonna have to use your gonna have to use this one for now okay that's um focusing points in the middle right this is your capture this is your shutter speed right there that well okay khidir shutter speed all right the focus right now it's through the shorter but okay so if you wish is halfway we'll lock it and then you can recompose alright okay you go put this down from for a moment yeah take a look just pose him yep so man david I'm just gonna move the chair a bit just to get the light in your face let's see what happens when we move this trip backwards down again let's see what happens all right let's space could you turn that way a bit chin down a little okay okay can I get some help with a reflective please yeah uh I'd like to get white just to bounce balanced a light on that side a little bit about what so I want to get some late a little bit of phil it's not we can try the other one maybe this silver right yes okay can I get you to lean forward to sit forward in the chair a little bit all right on dh I like the way I like his expression and the way he's looking so I'm just gonna go with it before you shoot right before you shoot what it's gonna happen in the background take a look at the background and tell me what could be a potential problem for you the lamp could be a distraction okay depending on what angle you spending on an angle issue from you okay um I'm going to go from above so that my plane of focus my my your imaginary play gin every plane gets his eyes for good job also okay I liked the way his his elbows are bent we're not we don't have a ninety degree angles ok and um strike yeah let's try it let's see pictures right here what is there a three point five ok that's going maybe try to change the shutter speed made me right here right here yeah just keep going so make it there you go oh yeah right to break a go ahead okay okay so you can go ahead and put the camera down nothing's great thank you so much okay um let's go ahead and discuss how we can arrange how we could have turn this into a more dynamic cleaner background okay the first thing is if you're gonna go for the contrast that feel light was good but it evens out the light okay right it would just even it out which is fine my biggest concern is the back of the chair is completely pretty much almost blown out by the sun right which would compete with his face I mean on their body positioning is a little bit awkward because he's sitting too far back on the chair so your angle you shot it from was right on the money but this time try to bring his body on the edge of the chair so go ahead and sit on the edge of the chair all right and forget that armrest because he's putting his body and where position here go ahead and lean forward and rest comfortably there you go now he looks more confident that doesn't have the side view going on right now the challenge is there's a stripe of sun going right through his face right right on we have these tools this is the this is the tool choice that would have really helped you out is this guy right here but this guy could you do me a favor put this guy look att the way cleans up that light on him so like right there aunt tried to make sure I don't if you can get that chair there too on let's see what he looks like so what we just did we just evened out the scene in terms ofthe luminous levels in terms of light his face if you bring that diffuser closer to him he's going he's going to get brighter and brighter you see how it gets brighter and brighter on the chair still pretty bright but he's not full of sun okay so now this is this is the short side of the face this is the part that I'm going to illuminate this is the longer side off the faces the broad side of the face I'm going to shoot from I'm really going to shoot from this angle on the same angle that you were right and see if we can fix it so one thing we see here all right um where you looking at right now take a look at let me see let's try a different high positions are you looking at you you can't see can you see that light switch right there right there stay where you are just took a look at the light switch on lean forward just a tad more now let's see looks quite good lean forward just a time or I'm gonna focus on that eyeball closest to me and then I mean on the eyeball the brightest and then I'm going to snap this good straight one more time okay we're not really necessarily need to show the whole body right no way don't need to show the whole body weaken just show the part that we like okay if we do this it's putting way too much context on the photograph that was just putting way too much context now you have bright spots all over the place it's just not gonna work but I will actually like to see that the back of the chairs got that wouldn't our train that's gonna be a problem because it's going right the second for rice online and is going right over his head okay that makes sense so if you do stand up to try to get a higher vantage point you can eliminate that issue can you smile at that light switch yeah it's very good take a look at me turn your camera chin down very good now going on look at the diffuser a little less right there right there nothing I could do is turn the camera to monochrome put it in black and white and then you can really get a reading of what the light looks like which is pretty cool and created really cool photographs either portrait now you see that sun spot right there that's causing me problems so you don't want to show that anymore so I'm going to crop that sun spot out and then you have something like this going can you bring your no slide into the right that way that nose doesn't cross over the cheek and he doesn't alan get it tilt your head for your forehead down a little right there right there right there is good no one more time last one okay so I don't if you can see this but you can try this is a very contrasting situation here the monochrome really helps you have to see the light better on we got rid of a lot of these distracting spots like for example you see all this complete competing elements you're going to get rid of this all this is competing with your with your groom see what I'm saying you just when I couldn't get something more like that along door flynn's gotta fill from the side you can do that but if you wantto remove the contrast right now there's like a contrasting situation the only thing that's not that's not helping is thiss this the wood part of the chairs going right over them went over him but that's why we switched angles by getting a higher vantage point andi you can put that above his head you see what I mean yeah and it looks a lot interesting so good job thank you thank you uh let me see next uh uh let's see who wants to go next any volunteers nicky come on mcgee take a look around the room try to identify where you can create some sort of reflection okay you're going to create some sort of reflection with the elements that you have to help you you have ice light reflector kind of thing okay good I mean I'm seeing reflection we could use here in the glass or even some of the artwork if it would be bright enough I might need your help with this uh where would you go first if you were going to go for a reflection in the most obvious would be the glass but what's wrong with that glass um it's not uh there's a lot of patterns color's different colors but they're all part of the same family so that's ok ok um what else is going on look look at other areas of the room there's really not a lot of places right you have two choices you can do this bookcase or you can use which is what I would do you can use the painting right now the painting's not gonna cause a very good reflection but that's on ly if you point at the painting directly on right so what I mean is if you put matt here and you point at it is going to give you the boat right right but if you point this way if you point this way we'll be able to give you just a glass on the glass reflection does not make sense so you can you can try that so right now I can see you see on a reflection of you because I'm going at it from this point of view makes sense yeah okay now of course to get this to work perfectly which if you were doing this I would have to uh turned tone down the window light and then use a nice light to illuminate you actually see we get a nice light out and uh we can get a nice light and then you could go ahead and put matt over here feel free to move the bench too like you can move the elements around you to make it work can you see the reflection that so completely closer okay so relax your hand yeah that actually looks really nice right now waits his weights on one if you want to like um the problem now is I can see the reflection of the light so we'd have tio move it around so I just have to go on a date yeah right right and I can still I wonder if we could turn that light off because I can still see the reflection of that light way be possible if you can if you do this without help it no would you remove background oh yeah if I cropped him just you can do whatever you need to do to make it work we're so this needs to be oh can you hold it for me for a second let me see something exactly exactly okay so obviously the white side is going to get a better reflection in the both part right so you can shoot it from here on you'll have a coffee now what is he doing with his hands nothing okay so they're just in the market maybe he's tying the button maybe he isthe santa's cufflinks or something see now that he's looking not just looking at the light the reflection looks a lot better if you turn his face this way what I mean I can't see that you can but it just not you always gonna want to turn your body towards the light right so he would have to be adjusting his tie or something you don't have to show his I see that you can just crawl from the live down you can be creative when your crops you don't have to say here's my that I'm going to show the whole matter you know we don't obviously we don't need to show the feet because this is the only place we can actually get the reflection okay so go ahead and take the shot let me see okay I've never used a cannon before okay so here's your I can help you release the shutter speed okay this is your opportunity here's your shutter speed shutter speed on this you're just focusing on the shutter button okay be creative when you're crop make sure there's nothing bright brighter than him in the background on I'm going to turn this around because of this little flap you see this so right there okay so look towards the light if you say look like they're gonna look at the light and it's gonna hurt the rice come to look in the direction of the light so I turn to look at the baker's or something so that in case I school through the light but they're not looking at the light okay and yet that's perfect with your hand actually you could relax your fingers a little bit and bring it up about two inches yeah that right there that's another grand going there almost oh yeah that's already is arm so actually don't don't fund his jacket with one hand just use weapon using one hand but yeah see how he was a geek you know you think yeah he looks like he's got this tryout crop from the lip down okay I'm just I'm looking at your light meter here and I'm trying to it was different mother I'm sorry it's just so foreign it's okay if you don't like the hand put it down in the pocket that's fine yeah okay I'm sorry bear with me with this okay can you um till here actually we're just trying to kind of cut off his face can you tell your chin down just a tiny bit it's pretty cool try uh try another one of those crop crop is ice out mary star from the underneath the nose level try it so show his face equally so you balance the reflection on the edge of the I c crap both of them balance the balance him on the reflection so that's pretty balanced right but this time actually show show more of his eyes again go ahead then let's try that also without the diffuser in the back and see what that looks like yeah that's just yeah that try that if that works that's a very balanced that's cool I mean you see how he's the brightest part but you're adding a little early so it's startinto you're startinto make something that's not normal for most people think about you just take a painting and turn it into something your reflection or how don't take a step forward so the frame is not in the way now you now you can try that again and you can lean your shoulder all the way against but don't put too much weight on that shoulder otherwise yeah take a picture of him and just maybe add a hint off the reflection this time take a vertical so I'm so used to back out and focusing and every time I hit it you know it's like real memory how do I just toggle right here just to move talk just recomposed instead of moving and I was not so complicated okay you have the brightest part of him is him right you have that lamp that's distracting on that window's introduced right but try to get a little bit of that reflection on him and see if you can increase it or help peter or you can back up a little too and zoom in okay so one of the first just you had you had a little bit of his reflection but it was more like a portrait of him all right and I looked really good you're using the painting which two people it's just a painting and you turned him into an element to create interest in the photograph okay on with some finessing that can look really neat see what I mean so really that's awesome let's go ahead and step down let me see wei have ki should kiss you now right there on my goodness transformation also weigh just a lot of people are not familiar with the ice light oh sure could you just talk about that so by the way uh everybody that's watching you're going to get one of them one of your guys is gonna win one of these ice lights this was designed by jerry joni's as you well know is basically very probably the best light I've ever used for indoor lighting it's white it's ah they like balance perfectly so it's like carrying window like everywhere you go on that's why I like it so much it doesn't have that tungsten yellow field to it it's got a very window like clean field away so you can go anywhere indoors and this will make you look like you have a window next to your subjects selves great great be mounted on anything you can mount it on the tripod you can put an adapter and put multiple together you can do whatever you want I have two of these and I use them religiously I use them all the time okay okay so let's see the mallory uh come over here for a sec okay we're going to transform this room a little bit for you we're gonna turn this into a moody night shot okay do you still have your necklace you okay a movie night shot so what I want to do it I mean you're gonna use the element off this little lamp I'm going to make the audience members I'm sorry the viewer of the photo think that this lamp is the light source for her but he won't be it will be the isolate okay uh so so obviously we're not going to use this on the picture think that out we're going to try to transform the room so you can use it at its best okay he doesn't have to be all window lets you can create other kinds of looks mean now if you want we can start out with this with this chair or we can put another of these chairs in here which might be good because maybe lower um but we can try with this first if we don't like it we can switch the chairs okay now remember about the spinal cord and all these different things you're going to pretend you consider up here so she's got this really straight really morally look to her if you sit on the couch is in a slouch okay so choose something hard so I think this will be a good spot or the very edge okay now this guy he's gonna have to be moved so it appears as if a city was lighting her okay um let me see okay we should go ahead and take a seat now we can have the ice light toe post so I mean to light her up but right now that lights obviously not doing anything we were goingto help it okay on you might wantto maybe even turn that seat that way so she can angle herself from the camera can I put it can I move it back yeah of course where you sit now where will she said yeah edge chair okay on the very edge like that very nice okay stand take a look at the angle so you're going to shoot from because if you shoot from there you're backlighting right right if you shoot from here from where I'm at you have that green curtain which is a softer tone so make sense that's more balance if you shoot from here if you should this way you can still turn it down because of that so choose the angle that you want don't go for the first obvious which is the front okay uh keeps you well you look yeah before me okay um back maybe you can I try don't forget her hands right I do need a let's try to isolate on this side yeah um okay so will you look at me just a tiny bit yeah I like that I think that's pretty there is some shadow right here on her cheek which I'm not sure if I like or not can you move over a little bit that's too much a little less right there yeah like that would stop you for a second now using the chair to sit on but the chair has other uses to you congee use a chair you can use the chairs are back as a back rest for her back so instead of sitting on the chair she could sit on the floor on her back is up against the chair and that's a backrest that way the light is on so right now the lights like right at the same time try that without the ice like okay yeah let's try sitting on the chair thanks for now you can use this on try to balance it somehow right e so it will look like that people will think that this is what's lighting her up right you see how you can really get into it okay okay all right can I get the camera I'll let you go uh up a tiny bit higher and got right there over a little bit yeah that's good she's got a necklace I just want to mention it on that necklace could also be used to give her hand something to do that looks more natural will you take your right hand and kind of hold your necklace yes so we can see the term well of it stop you one more time that she's facing against the life of a patient towards the light so if you want the light to be this way I would photograph forever either from here or you would have to stand over there so go ahead because you want her nose to be pointed towards the light right you want her face to be the brightest point way turned up the volume on this now her fingers are not soft so we can work in a love that's probably because thie angle as you're sitting at is too straight for the young to be so far back some accents now you don't have to use the necklace I was saying it's a tool that you can use to give the hand something to do okay you try looking down at your necklace I dishonesty no I don't like that as much okay and then try putting your left arm down um yeah just perfect actually well you kind of like it on the ground like that there it was too dark you can't own a gun I use a nikon so this is all backwards to me so here you can here's your shutter speed it's snowing down see that okay here's europe but you could get the two point eight if you want we can make your s o twelve fifty's that was a lot brighter ok go ahead you might want to speed up the shutter speed that's gonna be too weird right are you happy with how it looks yeah I think so said the lamp gets in the way and you know I don't know well you're back lighting her and it looks really nice right you have the lamp in the limited in that side right you don't show the lams funeral with a light sources from and if you could you could add that it's an element so you could come this way you could come this way stay like that keep your arms like that you're playing that's fine now we're going to turn your face towards the light right so she actually is already stay just like that don't even now you see the ratio of the eyeballs on the iris is a little too too much too much weight so bring your eye iris a little bit there you go and then down a little bit see right there or you can try chin up a little to get that light to really like fill her up and then close your eyes good on put your hand over the other hand and strain your back right so put her hands over like your like this protecting it or something chin up to the left I'm sorry to your right right close your eyes now can you put uh let me see something here go ahead and look down look a hair up on then look more that we like come across this way right there right there karan put more light on this side of her look straight at the camera straight at it yeah chin down now look past to this unrest reiter kind of bring your hands down slightly soft in them and with your hand grab the left side of your head and just strain it a little bit the other side I'm sorry yeah that's it yeah that's it slowly chin up and turn your chin this way a little more there you go just keep looking in that direction okay uh let's see okay that's very nice I'm gonna probably the one more here okay let's look at this real quick when I introduced so first she's definitely the brightest person in the thing in the place right did you see that chair's distracting actually point when the person is distracting uh this part of the chairs pretty bright but he thought his brother's horse takes away okay but it's fine if I introduced the light bulb which is something I tried it becomes a distraction and it doesn't work does it make sense this whole room was transformed by turning off the lights and using that video lighting okay now that lamp is given her like yellow beautiful tone but the ice that's given her that window light so it looks really nice and contrasting right but this photo is obviously not working because of that um this for us this far was definitely more in the attractive side just because I had to put her chin down and I got rid of her eyelids altogether right and you have all these contrasting rooms now because she's sitting on the floor it's what makes this supposed to look like that if she was sitting on this chair she would be to have to hire an angle on you wouldn't it wouldn't look the same can you sit on the chair for me for a sec thank you if you want to do that turn this way and chin down someone actually speed up this is not gonna work it just changes everything about it you know I mean I don't look at this compare it to compare it to the portrait right there okay so give me tiger give me tiger okay good all right so what you learned from this it's probably that the chair is a chair yes but you can use the chair in so many different ways like it was used to sit on look at the way she's standing now her arms arresting you could use it on the floor and rest your back on it remember to look at the objects no for what they are like a chair means you sit on the chair but it doesn't have to mean mean you sit on the chair right you can do something else with the chair uh the lamp doesn't have to illuminator it could give her a contrasting light source to give that orange feel to it so you can just paint with light you know I mean this book cases here are all part of the same color tone right there's also a sense of balance because there's three pull cases so if there's three bookcases this would not be distracting at all because the colors are all pretty much the same family so it's not like you have some random right bright red somewhere their you know uh let's have this could be a guy cool backdrop for the groom if we can have him sit here but then it's a little too low actually so maybe we can do it through not sitting down so let's have okay come this way um all right giuliana come over I don't you know you want to come over I wanna be like why didn't you call me first high okay you have matt you have books you have bookshelves you want him to be the focus point right you do not put everything in focus because it's gonna throw off the whole photograph um what do you think you should do you have reflector you have diffuser you have ice light I think you should be could it come back on this of course any angle just like take a picture on the book case exactly just focus on your job doesn't have to be facing you uh you could be facing that way that way it right okay so that's like okay go ahead and try it there's a camera way have ice like it's not back but right now it's not bad but you're okay are you okay they were quick looks really good so you notice that he is the brightest part of the photo so their subject emphasis to light the background is not distracting because all the colors of the books are part of the same color palette there not like some crazy yellow red green blue or something that it's all pretty tongue down um let's try to finish that pose a little bit we can try a symmetrical posts which we look pretty cool do we have to isolate symmetrical symmetrical posing so standing from the middle of this book it's right here actually let's stay in the middle of this one let me move this now I don't want the books in focus right now the books are just gonna be like this dark rustic colors that are going to be appearing so I need him to come forward about right there and then now go ahead until the eighty five millimeter let me see if I've there is why I'm going to eighty five is to really get those books out of focus or some expense because I could go to one point two here although I'm not going to use one point don't wanna go to point out okay so okay stand with your weight totally even so we're going into symmetrical post tilt your body forward and take one step this way put your hands in your pockets really your pockets like don't tell any shoulder this way or that way totally straight on let me see let's put one nice light over here kind off kind of behind him and then another ice light over there I don't know how many can you help with one of them can help you this one so now by putting the light behind him I'm actually taking light away from the books again and into his face for some accents yes but you need to actually go behind him really behind him so it's going to illuminate that side only those books are not going to be nobody else turned the lights so you don't you don't have to put it off now bring your chin down I lean forward a bit chin down more and ice up there you go okay let me see here okay guys take us you know illuminating take a step away from him this direction bring that shoulder more this way that right there and chin down a bit on just the right there for a second good let a second world war actually julie and take a step this way so those lights and toby equal distance from him almost chin down just a tad more later and we can do a black and white version of this and go back to color and I'm going to come in a little closer to down a bit on one more no it's not supposed to have done a little more let's see he has no sense eliminated on this side but not on that side so bring that light over here that we can get his nose equally more doing anymore right there bring that light further back more and closer to him now do the same further back closer to him right there on dh stella mason was fine very nice there right there chin done of it on dh bring that light just for a little bit back more right there's a little more a little more right there now that went to back a little bit right there stuff little more top backed away there you go I'll explain what I'm doing here I'm explaining when I bring the light closer to him but same distance there you go so keep it further back but it books on closer to him okay there's two close I'm sorry too close now ok thanks I want a nice light okay come in if you guess what I don't know how we look at this but um I did a bunch of photos that were making his nose bigger so what does that make it snows look smaller I tilted his chain down to give it that really intimate look into the ice I didn't want his eyes to be further back from the invisible focal plane so come on take a look at this for a real quick excuse me so you see all these balance and stuff it's just like really working and even those crossing his head it's so far in the background and it's so continuous that you see it it's a pattern if that was the only line over his head and you wouldn't see the other ones it would be a problem you have a pattern so it's ok look what happens if you look at if you illuminate too close to his nose now you look at his nose he looks humongous okay uh guys I don't think I look at this real quick if your audience member you see the notice is pretty large it's not working right when you're shooting don't freak out about shooting and your chute away look carefully and ask yourself what the heck is wrong with this photograph and then fix it slowly that no need to freak out just fix it when I saw that I said do you really want the nose illuminated that strong me I mean you went emphasis to light right but no emphasis on the nose through light so as I was photographing him by the way they explain what I was showing see the shelves are all horizontal rain and one of them is crossing through his head but because you see the rest of the car off the bookshelves it becomes more like a pattern and it doesn't bother us much if that was the only one that was visible it would be more bothersome now that four of even meeting with two ice lights looks pretty cool in the same room we're using the same room to create all kinds of moods and lochs and stuff I mean we started out this is ah pretty interesting photo for him we started out with we started out with photos like that using son we moved to photographs like this using combination of light sources and using the chair as a way to have her sit down now combined this photo with this photo for the album you start to get for us the people hire you for no matter what the economy looks like you're still in the same room way haven't even used it from so it's not even close maximum potential like just looking around it just keeps on going
Class Materials
bonus material with purchase
Ratings and Reviews
a Creativelive Student
Im a freelancer and have studied photo school several years ago and also been working as an assistant for a few years. I think you always have things to learn and keep you from getting stagnant in photography, and i find creative live is a great source for that. Been taking some of Lindseys classes and watched several others from Sue Bryce as well as other classes for equipment and about shooting people in general. I always read what others have said before to avoid any classes that are not informative etc or have a teacher that leave out too much, i was drawn to what people said about Roberto walking the students through the shoots and that he had this great system you could use and take with you when you go forward. I actually never heard of Roberto before but were mainly interested cause of what he was teaching here. I have now watched almost the whole course and first of all let me say i do recommend it a lot. Its a great system to use in my opinion, and i have learned some great stuff to think about that will enhance my own photography, and its a great reference to go back to when you need it. Roberto as a teacher is relaxed, intelligent and has great humor that i can relate to. So you you are not "bored" which is also very important, he keeps it interesting. Some things that i did not like about his way of teaching was that he was a little too impatient at times when the students tried shooting themselves , he reminded me of other photographers i have worked with in past. They were also very impatient sometimes when people around them were moving to slow for the shot to get done etc. I understand during the course the students had limited time to get every shoot done. But many times i was frustrated with that Roberto almost always stepped in too early to "help" them out but instead kind of took over telling them what angle would work best or what light that should be used. It was almost as he wanted his system to show up as flawless and felt as he was scared letting the students try it out on their own because that would somehow show a flaw in his system. I would rather have had him let them try first and later he could come in and suggest the different angles and light. But now many times he would take over and also take his own picture and pointed to the strengths of that picture and why it worked. Still, you learn because he explains at the same time, and walk you through everything. I just find that you would learn even more letting the students fail first or do it right on their own. Also sometimes he would choose a location and say: You can use this wall and these props etc, then when the student would start he would suddenly limit them and instead tell them what to use and how they should crop so that the location itself would not make much difference. Otherwise though, great course. I think i would buy another course from Roberto as well if it was something i needed from it.
a Creativelive Student
I have seen many of the creative live workshops, and attended many great workshops by photographers, including Jerry Ghionis. It was Jerry's wife - Meliisa Ghionis who suggested that Roberto's course on creative live should be a must see. This course was by far the best on creative live for improving your photography of couples, it is just brilliant and has improved my photography in leaps and bounds. There are many great photographers, but most do not know how to pass on their knowledge to others - Roberto is the exception I would consider this course a must see for any wedding photographer, no matter what your experience.
user-334342
Love Love Love this class!! The way Roberto integrates class participation into his teaching is such an amazing teaching technique! CreativeLIVE has some amazing teachers, I have learned so much from many of them, but Roberto's "hands-on" approach put's the on-line audience in the moment. Very captivating teacher! By far I would say this is one of the, if not the best photography class I have watched!! Thank you!!
Student Work
Related Classes
Wedding Photography