Lessons
Lesson Info
Posing and Balance
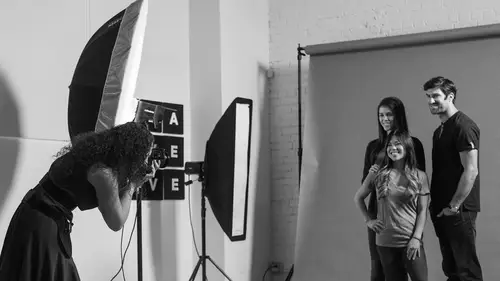
So our last section here before I go over to demonstrate these things is going to be on posing and balance. So I'm doing a self plug is because I genuinely believe it's helpful. I wrote my fifth book, it came out earlier this year and it is on posing. I have a whole section on posing families and small groups. I worked really hard on it. And I think you'll find it really really useful. And so some of the things I talk about are in fact balance as well as building group shots cause my recommendation is not to say, hey everybody stand there and then you fix one. If you fix them one by one, it will be chaos. What I do is I take each person one at a time. And I build them in step by step. And so I show that in the book but I'm also gonna show that to you guys here. If you want signed books, you can get them at my store. And if you want just regular ones, Amazon, they have it at bookstores, things like that. So, let's take a look. Alright, creating balance. When you are posing group shots. ...
What I mean by creating balance is when you have a group shot, your composition is actually the placement of the people, where you put them in the group. And so if people are clumped on one side or some are really high and some are really low there's not balance. And especially if you're trying to put people as a group, it actually psychologically says the opposite. These people are not united when one person is low or off to the side. So not only it's important for your photography but it's important for what you're saying with your photography. So let's take a look at what I'm talking about. So this is an example where everybody is lined up in the top. But because grandma has to sit, grandma can't stand long, she doesn't look like part of the family really. She got cut off at the bottom and so that doesn't work. And here's another example, same thing. If you say, okay, you know what, I don't like about this one, it's also ... Not only is it there on the top and bottom, but it's also heavily weighted on the left hand side. So I'm like, you know what, I'm gonna center them. I'm gonna make it symmetrical. But even when I make it symmetrical, she still doesn't fit. So what I'm trying to do is I'm trying to have balance to the shot. So maybe balance would be she comes down and sits next to grandma. And so it balances out because it's two and three. And so it actually builds into a triangle. That might be what makes the balance better. I'm gonna give you tips for this. So, let's see. So this is what we end up with for their family portrait. Significantly much more balanced and it looks like psychologically they're together as a family. Here, it's not. And so what we did is we bring everyone closer and we build triangles which I'm gonna show in a second so don't worry. So you wanna create balance but not the prison line-up balance. Like symmetry is a thing but not too symmetrical and not to lined up. So for example, you see there's a lot in group shots. This has everything wrong with it because first of all, look at the positions, right. Everyone's hunched and the arms around each other. Okay, that doesn't work. Also something to be aware of with group shots. And I talk about these types of things in the book as well. Our hands, be careful of the little fingers peeking out from over shoulders or wrapped around the body when you just like can't tell where they come from. And it's just kind of weird floating hands. It's not actually unifying them as a group. It just looks kind of creepy. So, also, my eye gets stuck here in the the massive body. It's like it's so not working for me. So, a better solution is if they're still lined up and they're still close to the family but I brought the composition in and it's balanced from left to right. And here I can go, (humming a tune) like it keeps your eye moving and instead of, in the previous picture, (zooming sound) right out the frame. So I like to create triangles or circles that hold you in over and over again. So let's look at more examples. I lined them up here, this is the totem pole pose. And also the freaky fingers coming out of nowhere. So watch for those things but a much better solution is ... If you look at the girl on the top, she's kind of just leading you out of the frame. I think you start personally. You come in to her face, you pop up to mommy, you pop to her, and then you leave forever. So what I actually wanna do is I wanted to do something where I can move her so it brings her down but I don't want to bring her down here. It's same totem pole thing. I wanna bring her here so it would create a triangle or circle where you follow over and over again. So here's a solution. In this case, the girl in the bottom, sitting on an apple box. The mom is sitting on a stool and the daughter, she's leaning, but can you see how she's leaning? Not hunching, okay. Question would be, alright, you say this like you say have balance, you can have symmetry but not too symmetrical but where the heck. Like how do you figure out where to put these people to make it better. So I'm gonna show you how I use triangles. And I don't just put everyone out there. What I do is I build one by one. So I'm gonna show you a group example and how my brain works for how I plug people in. And it becomes a formula so you actually, I promise you if you do this and you practice this, you'll actually see the triangles like floating in the air. As you set it up, you're like, oh, so that's where they can go, that's where they can go. It's kinda just a plug and play puzzle. So let's take a look at this. And before I build it one by one, I just wanna show you what I'm talking about. I'm talking about this. Their heads are not just totally lined up, they're in so many different triangle but it's keeping you in a circle. And also the whole thing is a triangle as well. Usually the shots I like best for group shots have lots of triangles through them. But let me tell you how to build it cause that's the hard part. So we're gonna start with grandma. The reason that I start with grandma is because, I know what her pose has to be. She can't stand for a long time. I need her to be comfortable so I start with her because we're going to build around her. The other thing that I will do is I don't pose children first. I bring them in at the end because they're not going to sit still but I'm also thinking ahead where am I going to put that parent that they can hold the child to hold still for later on at that point so I plan those things. Grandma is so cute, she's so sweet. For the first person on a triangle, the first person I'm just bringing someone in. And for a group, I bring in her grand daughter but I don't want her to be standing really high above her grandma because then they're not unified as a group, it's the whole psychology thing. So I recommend apple boxes and I have so many apple boxes in my studio. Let me grab one one here. Here's an example of an apple box. They come in different sizes so might see something that's a quarter apple, a half apple, a full apple box. For posing, I usually use full size apple boxes, gives me a little bit more. And then we turn it on their side or you can sit like this. These are nice and sturdy. But they're not the cutest ever. So what you might consider doing ... Seriously if you do groups, you gotta get apple boxes. Like you have to have something like this. But what you can do is you can cover them with fabric, that's fine. Or if you'll see in mine, see I have those super cute vintage apple boxes. I've gotten them on Etsy before. And I've also got them from like vintage shops that are selling stuff and you can expect to pay 30-60$ a piece. But if you do that, just know, I usually still put an apple box inside of them because they're old and I don't want people to crush it and then they get hurt so it adds up but it's super useful. Alright, so I stick her there. And then the next thing I'm thinking is, okay, where can I stick the next head that will give me a triangle? So can you kinda picture in your head where I could stick people that would create a triangle with their heads. So I actually have two options. One place, I could put someone standing behind them. Or I could sit someone on the ground. And either way, it'll give me the triangle of the heads. And it doesn't have to be all the way down here. You know I could put someone on a single apple box or can have them kneel. Or if the person is really tall, I could have them lean forward. So it's roughly where they're going to be standing. Alright, so let's introduce the next person. Okay, so I decided to put mom there. So I have mom there, creates nice triangles and ... By the way, just so you can notice, I add the hands because they pull you around the group. For this particular with family shots. If everyone's just standing there like this. It's totally different body language of what it's saying. But notice this as well. With these hands, is you can usually see where they're coming from. There's usually some contacts to the hands and the floating fingers. Alright so now, got my first trangle. So where can I build other triangles? There are actually many different places I could stick the next person. But I'll show you a couple examples. I've got it done there so I can do those. I could sit someone down below still and that would create nice triangles or I give you somewhere to the left and somewhere to the right. The downside with the left and the right is it might be slightly asymmetrical but I mean, just don't have them standing to right over here. Remember, nice and close and it won't feel too unbalanced. So let's take a look. And I so I say I put the second daughter there. And so I've got triangles, I've got two rows but again the hands are bringing them all together. So I've got the triangles, movement, uniting everybody and it's not just kinda lined up but I can also put her down there. And so I could elevate her if I want her a little bit higher but that's still giving me all those nice triangles. Alright, so, last person here. As the last person, where can I plug in and play them. And it would be either top left or top right. And so in this case, I added the dad to the top right. So that's how I think of everything. And then from here, I'm not gonna build beyond this because I think they got the point. But then from here I could go okay so maybe the dog. I wanna add the dog into the frame. The dog still counts. I could put the dog on grandma's lap, right here, there's another triangle, okay. Or let's say there's another family member, another sister, I could put her here. Or I could put her here but I would have to rotate her away so her legs were out of the way but I could still put her here. And so I build like that, and say, where are my triangles? How can I build people into this scene? Going back a little bit, when we're talking about the lighting gear, someone had asked for the umbrella with diffusion, do you usually use a white or silver inside for groups shots. That's a great question. Umbrella's come in in different textures in the inside and typically, if you use an umbrella without diffusion, the silver does is it gives you more contrast and more specularity. So what it means it's gonna give you little brighter highlights, little more contrast, a little darker shadows. And it actually throws light farther. So if you know you've gotta have your umbrella really far away then maybe silver works great. And then the white is gonna be a little softer, little more flattering. It shows less texture. However, once you added diffusion, I see negligible difference. The diffusion cuts down on the extra texture that there was for silver in the first place. So my recommendation is this. Pick inside that you would use most often without diffusion and once you put a diffusion on it, it doesn't matter like there's a tiny difference, not in practical use. Great, alright, I have a question from Shadi who is joining us from Iran which is pretty amazing. Cool! And the question is, do you ever use a reflector for shooting groups? Would there be a case depending on the size of the group? Sure, so for a small group, you could definitely use a reflector but a reflector becomes a light source. You have to think of it the exact same way as you're thinking about this umbrella. If I bring the reflector and a small group of people really close on to the right hand side, there's gonna be a lot of fill on the one person that's really close and then not on the rest of people. Or if I'm using it where if you've seen maybe a family portrait later in the day, the beautiful backlight on their hair and then you wanna use a reflector to light the family. Or you'll gonna catch the sunlight and bounce it back to them. Same exact thing if you have the light off to the side close to one person, it will be the exact same thing as if the umbrella was really close to the right hand side to one person. And then also the sides same thing. If it's really small, and not gonna have as much spread. It's not gonna throw as much light. So bigger and a little bit further away, will give you more even illumination. And usually for groups almost always white's not gonna work cause there's not enough bounce to actually light multiple people. If you're talking about natural light, usually it's gonna be silver to actually bounce the light back in. But know that silver is a little bit harder and more specular. So it's your balancing things but you can totally light groups with natural light. I have a good tip on this. When I use to shoot weddings, and I would want to shoot the natural light shots of the whole group right after the ceremony. And let's say you don't want to use strobes and you don't want to bring lot of extra gear. The first thing that I would look for is if the church for ... If it's a church and it's white. If it was a sunny day and the sun was hitting the church on one of the white walls. Basically the side of that building becomes a gigantic white reflector. Because the soon as the sun hits it, the entire 24 by 60 foot wall is a giant reflector. So if could place the group across from that, it was beautiful soft light. However, that wasn't often the case. So the next thing that I would look for would either be open sky. So what that would mean is placing them in the shade of the building. Or if you could, some sort of overhang. Cause here how's it works. If you place a group and if you look up and there's nothing above them and but they're in the shade. Basically, the source of light is the open sky above them like this. And so usually what you run into the problems is you get the shadows in the eyes. Cause the light source is above and therefore you get that kinda skulling effect. But if I could have a porch above or like something above their heads. It blocks off the overhead and then the light source is nice and flat, everyone becomes super evenly lit and nice light in their eyes. So I try to look for the natural light situations but I always brought strobes just in case cause can't always control. "Oh, we want a picture in front of this angle of the church ..." With like the most terrible light ever. You know, that kind of thing. Great, okay, couple more questions. We have from Jane Aims who says, how far does the group, or how far does she have the group from the background? How far if you were using a background? Okay, so when you're photographing groups of people. The whole background distance, first thing is how much space do you have. If you don't have a lot of space, here's what happens. If you guys have shot with, let's say, a bigger group, and you're using a wider angle lens. If you have them really far from the background, and then you shoot wider, you see, they don't even close to fit on the background. And so basically their heads on the sides of their bodies are not even close on the background. You see your walls and you see your ceiling. So what's actually helpful to make them fit on the background is to move them much closer. And if you can backup and use a longer lens. Cause if you ... Think of it this way. When you shoot a wide angle lens, you increase your field of view. From shooting a wider lens, I'm seeing to the left, I'm seeing to the right. But if I use a longer lens, it compresses what I'm seeing which this is how it actually makes it so they fit on the background. Problems with all of these things are when you're closer to the background, you're more likely to get a shadow. But how you decrease shadows in the background would be big soft light sources which is what we have. Harder light sources or smaller light sources cast more defined shadows. So we don't have to worry as much with the soft light source and if your light is a little bit higher and they're really close to the background, it actually kicks the shadows down out of the frame. So it's actually hidden behind their bodies. So I will kind of balance between those things. I would say, in this shot, like this one right here. I'm lighting them with a large umbrella with diffusion on the right hand side. And if you notice, it's to the right a little bit which gives them that sculpting on the face. But it's not like it looks uneven, right. It's soft light. So if this is the group and I'm photographing them, the umbrella's here, like right ... Somewhere around here, okay, when I'm shooting them. And of course higher up. The distance that they are from the background in this shot is about seven to eight feet. Doesn't have to be that much though. It just depends on if you're, how much space you got to work with. Alright, maybe one more question before we head into the demos. And this is from Gildas who is joining us from Gabon, Africa which again so cool. Do you use the same technique for wedding groups? So any tips for those big wedding group shots. So for the wedding group shots, the triangles that I'm talking about are not as exaggerated. It just more means if you have like I could say steps and you have the people lined up in the steps, just means you don't want person's head above the next person. It just means you stagger just a little bit. But it's not like I'm saying okay huge wedding group, you sit and then build here and you ... I don't do that, I still line them up but I just make sure it's not lined up for the ... You know like I said the totem pole or the prison line ups. They try to vary it just a little bit. But all the rest of it still applies. So last note that I wanted to make is I've actually eluded to this before and this is before we jumped over to demo is that body language is important because groups have different purposes. And how you use body language determines is this say, corporate groups? Or is this a family? Or are these two people side by side brother and sister or are they dating? Like your body language makes a difference. And so with families, there's less personal space. People are leaning in a lot more. There's a lot more arms around each other. And for families, I always turn their head in or lean them in. For the group shots, I don't ... You know if corporate or whatever, I don't need to do that as much. And so let me show you a demonstration. Okay, so this might be okay if these people were all ... All of these women worked at a law firm. These are, they all work here. I would pose mom better but basically it would still work. Everyone's flattered, everyone look strong. You did not see them as related to one another except for that they all look the same. The whole family looks so cute, they all look the same. So, I gotta do something with my body language to show that they're together. So hands on shoulders, hands on arms. And then the last thing that I usually do is have everyone lean in and tilt their heads. Ready, they lean and tilt just like it's subtle. It's not like it's like ... It doesn't have to be all the way in but it shows for sure that this is a family compared to this first shot. So your body language is kind of the finishing touch on your group photos. If you're like, oh yeah, it's a family, I want to get everyone close. Remember, close shouldn't be the hunching thing. So when I wanted to get them close, instead I kinda sat them and overlap them. So they're leaning on mom's legs. She's wrapping the arms around them and so being close without being smooshed. There's a difference, smooshed first is close, okay. Alright, so that's everything then I'm gonna demonstrate these things. So lens choice, depth of field, modifiers, light position, posing and balance. Now, one final thing, if anyone has any questions, probably the best place to reach me is Facebook. But if you wanna see my new work and what I'm up to, Instagram is where I post all my new fun stuff.
Class Materials
Bonus Materials with Purchase
Ratings and Reviews
joanne duncan
I got do much out of this course, not just for shooting, but posing myself! I’m getting old, it’s hard to get a good selfie! Seriously though, this starts with epuipment, goes through settings, clearly shows what doesn’t work and why, and what does work and why. This is the second Lindsay course I’ve watched this week, and I’m anazed by what I’m retaining. Lindsay spells it out for anyone to understand, I highly recommend this class, and any class Lindsay teaches. I already have another lined up to watch! Simply brilliant, value for money even if it wasn’t on sale.
Rebecca George
What a brilliant, fast, well-organized, packed-with-useful-info class!! Lindsay is amazing.
Dave Hogan
I have several of Lindsay's course and was lucky enough to see her at the Photography show in Birmingham (UK) earlier this year. I think this course is one of my favorites and has so many "group" shot tips & explanations that it's a no-brainier to any photographer to buy this it. It's great 10/10.