Common Uses of Softboxes
Lesson 12 from: Light Shaping Tools for Professional PhotographersTony Corbell
Common Uses of Softboxes
Lesson 12 from: Light Shaping Tools for Professional PhotographersTony Corbell
Lessons
Class Introduction
05:22 2Categories of Light Shaping Tools
07:59 3When to Use Different Light
10:50 4Softbox and Octabox Overview
25:55 5Beauty Dish, Reflectors & Collapsible Reflectors Overview
27:55 6Pros & Cons of Small Light Sources
08:10 7Shoot using One Reflector
12:24 8Shooting with Two Standard Reflectors
08:53Shoot Using Grids with Reflectors
14:37 10How to Use Beauty Dishes
28:24 11Pros & Cons of Softboxes
12:30 12Common Uses of Softboxes
21:24 13Subtle Elements of Controlling Softboxes
20:33 14Different Techniques with Softboxes
29:32 15Pros & Cons of Umbrellas
07:25 16How to Control an Umbrella
12:25 17Uses of Umbrellas
08:27 18Different Techniques with Umbrellas
19:55 19Group Shot with Umbrellas
19:37 20Differences Between Collapsible Reflectors
25:36 21Shooting with Black & White Collapsible Reflectors
15:07 22Shooting with Silver & Gold Collapsible Reflectors
13:49 23When to Use the White Translucent Collapsible Reflector
33:18 24How to Use the Large Octa Softbox
20:50 25Shooting with a Large White Deep XL Umbrella
18:59 26Shooting with a Large Silver Deep L Umbrella
07:19 27Shooting with a 4x6 Softbox
17:05 28When to Use Specialty Light Shaping
04:40 29Shooting with a Hard Box
15:29 30Shoot to Incorporate a Fresnel Light
09:32 31Shoot Using Ring Flash
10:23 32Studio Lighting Photo Critique of Student Work
1:05:41Lesson Info
Common Uses of Softboxes
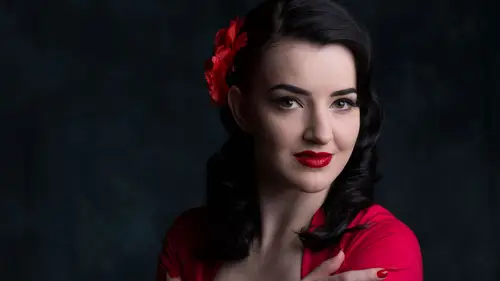
Alright. So John, let's start with the lovely and talented Mona. Mona, Mona, Mona. Let's put the three by four up and let's put it right about here. We're trying to get into a habit here of lighting over on this side. In years past, when I was young and foolish. You guys were there, the camera's over there and I always put up the softbox over here. And I've got everybody in here on headphones going. He's got softbox. Move it. Move it. Move it. Quick. Move over. Move, move. I've learned. So we're gonna line. Sorry Jamie. So we're gonna move it over and light shift. We're gonna light shift from that side because it makes life a whole lot easier for these guys that are now laughing and the camera's are all shaking. Okay. Oh brother. Alright, let me get all this back on. Let's make sure that we are reconnected. Okay. And I'm gonna go back to. I'm in the develop module, so we're gonna go back to start tether. We are tethering. We are tethering. We are tethering. We are tethering. It sees my...
camera, so we are good. Okay. For those of you that don't shoot tethered, it's a pretty nice way to work because it really does save a lot of time than downloading stuff obviously. But it also is great for the instant gratification if you've got client on set, like you're photographing the kids and mom is in the room. Let mom sit back there with the monitor. Let her see what you're doing as you're doing it, instead of wondering what's he getting in there. Or if you don't wanna use tether into light room if you're not a light room user, than use the cam ranger. Cam ranger is a new product on the market that wirelessly transmits your files and it flies them over to your iPad or your laptop and it work really, really well. And you can control things from your iPad or your laptop or you iPad. So for example, I'm gonna commercial shoot and I can't reach my lights, from my iPad I can power that light up or down. I can change the aperture. I can change ISO. And I can fire off the shot from my iPad. So the cam ranger's a cool thing. It's about a $300 product but is a very very useful tool. So something to be aware of. Hello. I'm gonna move her a bit John. I'm gonna back up a little bit and bring her just a little bit further away from the background. This background, I like this kind of a tone. It's kind of a medium brown, which I think is a pretty good tone because what's great for me about background is I can make a background almost any brightness I want. You know I get these catalogs in the mail from background companies and they've got 20 different gray values of a background. Well just give me a middle one. I can make it lighter or darker. And with gels I can hit just about any solid color background that's made. So just give me a neutral and I'll change it to blue and yellow and green and everything shade of fuchsia. Fuchsia, does anybody use fuchsia for anything. That's a dead color, isn't it? Is it in the crayon box? I don't know. So interesting thing about softbox, I'm gonna turn this horizontal and let's just take a look at one thing here. That's kind of an interesting thought. And I'll show this again and we'll reveal this with the big box when we get to the four by six. But there's an interesting thing if I stand opposite of where the box is in this position, if I stand opposite over here closer to Kena. She's kind of right about in the middle of the box and somewhere along the path we've all kind of determined, she's gonna look a little bit better. I can improve the look just a bit if I got her at the back edge of the box. If I do then all of a sudden I'm getting a little bit more information inside on the shadow side of her face, in the corner of her eye just a little bit. It just helps a bit. And I think what's it doing. Some people say oh, it's wrap around light. Well, light doesn't wrap. Her eye doesn't bend unless it hits water. It's the only time light changed its direction. So don't let anybody get caught up in wrap around lighting style. It doesn't wrap. But I think what's happening is I do think that this front quarter panel right here, which is at a 45 degree and it's silver mylar on the inside. That now light is coming out of the box straight out but it's also from this edge coming towards her face from this 45. That is what's helping open up that off side eye. Does that make sense? It's just a nice thing to know. But it looks you're not even gonna hit her. Oh, we're gonna hit her. She's gonna get plenty of light as we're about to illustrate. Okay. So John. Oh John, what number is that? Yeah, I have two. 1.1. Okay, why don't you put it on about six maybe. We'll see how that works for us. Great. Okay. So John's testing that. I guess I should turn this on if I'm gonna take the test thing. Here we go. Nobody move. 16.2. 16.2. Why don't you pull it back down there. Let's pull it down one full stop. You can push in and turn. The way that the control is on the back of the prophoto hits if you push in the knob, the main controller and you push it in and turn it, once click is one stop. If you leave it pulled out and turn it, one click is one tenth. So it's one tenth accurate. So if the meter say F8 and 3/10, you can just go one, two, three, tenths and get it that fast. Real clever. Real simple. Does the (mumbles) need to be dumped? Nope. Nope, we're good. Ready. Go 11. Woo hoo. Joey's laughing at me. Once again. Okay, here we go. Here we go. here we go. Oh that Mona. She's all smilies now. Look at her. I love the way you're sitting I think it looks pretty darn cute but I want to make you just a little bit just turn your head to the light just a bit. A little bit more. A little bit more. There you go. Okay. Just a little bit. You're seated perfect. Your hands are great. But I just want to bring your hands up higher on your leg. Right. A little bit more. Why'd I do that? Two things, arms. What else? Base. And? I can see now through her arms. I can see the background through her arms. I just knocked five pounds off of her. Bring your hands a little bit to the side and lift at your right arm come higher. Yeah, bring them both up a little higher. That's it. You did it right there. Great. Hang your head a tiny bit that way. In fact, let's bring your shoulders this way just a bit. That's it. That's it. Now bring your head back. Yep, perfect. And your eyes right at me. Woo hoo. Nobody moves. Good one. You did good. So this is again a go to sort of size source and you know if you look at it, look at her eyes, we've got catch lights and you know a pretty good position. The light on her face. That's a little close. Let me back up. She's going please don't make it that big. Let's do it about like that. But there's good depth and shape and form and texture and dimension. I think it can be a complimentary light for most people. The light wraps around. Now if the shadow's a little too dark over here on this side that's a subjective thing and that's an easy thing to fix. We fill that with a reflector and it goes away. I used to use a fixed fill light in the studio. When I started everybody used five lights. Everybody that I know worked with five lights, a main light, a fill light, a background light, a hair light and an accent light. And one day I got from Washington, D.C., named Clay Blakmore. Clay said, "You know God let the whole planet with one light. Why do we need five?" (laughing) And everybody cracked up and he's right. So we started trying back off in the number of lights that we used. So what's interesting about this is that as you change the range of contrast here with one light, what you see is what you get first off and number two, it's such an easy thing to make the adjustment and no change and exposure. If I bring in a reflector here it changes from an eight to one ratio to a two to one ratio or about a three to one ratio here or about a four to one ratio here. Get the idea. But it doesn't change my exposure. My exposure won't change at all because she's not getting any more or any less light. I'm just making the adjustment in the shadow. That's all. Okay. With a fixed fill light in the back of the studio, which a lot of people still use, the fixed fill light, it is a stationary light usually behind the camera and up high in the back of the studio somewhere and that fills in and that is the light source to take care of that shadow sight. Well the problem with that is by definition is non-specular and non-directional but because it's so far away from her it's always specular. It seems like no matter what you do it's pretty shiny, pretty specular light source. So maybe not so great, you know. But at least it's something to think about. I like working with one light and reflector. Yeah. I have a question about the light height. Do you have a preferred height for this sort of photograph? I'll almost always start up high enough to give me a pretty close to a 45. Not always but almost always. And then just to suit taste. Some people you can't go to 45. You need to be higher or some people you need to be lower because of eyes, noses, foreheads, things that protrude and things that recede. Not everybody's normal. There isn't a normal. Well, not around me anyway. I don't know anybody who's normal. I so would hate having normal friends. I'm just saying that. Okay, so let's take a look at this. Now I've got her at the back edge. So we've got this great light quality and it's all opened up there. Let me hit my key to bring that back. You guys know that about the light room. Just hit the F key, it goes full frame. You probably know that. Okay. So John. Yeah. Let's put that medium size strip light in that accent position back there. Let's just see if we can't open up this side of her face a bit. With her face being open on this side what I'm gonna try to do is give a little effects. With this strip light I just want to open up her hair, a little bit over here, this arm and give a little bit of a highlight down her arm and I wanna open up her cheek just a little bit but again as with Jason earlier I wanna be sure that I don't hit the tip of the nose. So, placement is pretty important on that. But again the placement of her relative to the box is pretty important to making this all kind of make sense. I can probably get that a little bit higher but I don't wanna go too much higher than I am right now. One thing I will tell you is get into the habit of making sure that you have a leg on your light stand under wherever the direction is of the softbox, just to help hold that weight. The bigger the boxes are, the heavier duty the stand you need, including and using a C stand, especially if you're gonna use one with an arm you really need to make it. It needs to be pretty hefty. And you need some weight bags left. We got weight bags on things around here. So it's pretty helpful to have that. Yep. Question. I notice when you just raised the softbox you also tilted it down a little bit. I did. And I was actually also wondering about that even when it was lower. To what extent is the tilt play into what you're doing? 'Cause before it was pretty flat to her and now it's got a bit of a forward tilt. Depending on the size and in this position it's pretty big. The only thing that I did just then when I tipped it, the only real difference that I'll see is that I maintained that the lower half of her is getting the same light as the upper half of her. If I want to create that natural fall off I could've left it flat and the light would've just started off down her arms. It would've started getting a little bit darker. So, it's just kind of a subjective things on what are you trying to show, what are you trying to show with the light. John let's check that for brightness. And we just want to make sure that that light isn't getting away from me. So in this case we're shooting at F, on at 11. So I want that to read. Anything eight or below I'll be okay with but I don't want anywhere close to 11 than that because it's gonna be too bright I think. Five, six. So, let's power it up. Why don't you take it up seven tenths? Oh, it's gonna be a beautiful thing. About six, seven. Five, six and a half. Okay, that's good. Right now I'm at a minus one and a half accent. So don't get caught up in losing. Don't lose yourself in the numbers. Lose yourself in the plus and minus value. Plus one, minus one. My assistants that work with me know if I say okay I need. They always will ask what are you shooting at? I'm shooting a 16, three. which is at 18. Okay, great. Shoot 16, three. What do you need in the background? I want in that upper corner I need a burst and that needs to be about a plus one fall into a minus two and across there I want the accent to be a minus two to start with and over here. It's all plus and minuses. Then they just go in and go about setting the power levels to output based on what I need it to be below or above the main exposure based off the key light or the main light. Okay. So, let's shoot that. Let's take a look. Placement looks great right there John. Good, good, good. Good, good, good. Don't look so mad at me now Mona. Come on. Chin up a tiny bit. Right there. Great. Good. That's nice. Okay. So now let's add another strip. Let's use our big strip light and let's put it on that corner. And we're gonna take the one by six and I'm gonna make a strip of a background light and just open up the background. You want the grid around her on or off? Oh, it's got the grid on, doesn't it? Yeah. Well let's use the small one then. Okay. Lets use the small one. So again take a look at this and if you notice look at her arm and her shoulder, so we got a little bit of a decent separation there. Even when we add light to the background that separation is pretty important. I think it helps to do two things. It helps give you additional depth and dimension for one thing but I think it helps in terms of just giving you a look of a little added quality. And I think that's part of this is you're working hard for your client. You're trying to make this stuff look the best you can. Give it some quality. Take the extra time to do it right. I think that's a pretty importation part of this. And I think most of the people that are at the top of their game right now they work hard. You won't know how hard people work. McNally. I think McNally's one of the best photographers alive, honestly. I don't know anybody on this planet that works as hard as McNally. That guy worked so hard for this work. He works hard. He and I were on a panel of discussion in Santa Fe a few summers ago. And the question from the audience was what's your biggest fear? And I had a smart Alec response in my head. I thought oh, I got a response. And Joe said, "No, let me take this." And what he said kind of sucked the air out of the room. He said, " My biggest fear is that I don't have anymore good pictures in me." He's like, "I'm afraid I'm out of good work and I fear that everyday and I chase the work the best I can every single day because I'm so afraid that I don't have anymore good pictures left." Oh well now, I can't say a word now. I'm just okay, goodnight everybody. You know, and I'm out. That's the kind of guy that he is. Every job is that Babe Ruth home run thing. Babe Ruth knocked them out of the park every time he got out there or he struck out. He's trying every time to knock a home run. Okay, so let's read that real quick. Let's set that at. In fact, you can probably pivot it a little bit more to the right. Towards the backdrop or towards us? Yeah, to the right. That way. Yeah, like that. (mumbles) And I'm thinking number wise you're gonna probably be up at about seven or eight with it. I want this-- Six and a half. Six and a half. Oh, that was pretty close. I want the middle of this to be fairly close to eight and a half or 11. Right about where John is standing. 11. Yeah, like that. So what does that tell me? If the incident meter is indeed my reality meter what it says. I just had a conversation with that meter just then and it goes, hey Tony, if you shoot at I'm gonna give you the real brown color of that background and the real density of that background right where you held that meter. Now over there where it's closer to the light it's gonna get a little bit brighter. Over there where it's further away it's gonna get a little bit darker but right here where John stood with that meter it's gonna give me reality 'cause that's the only thing that meter knows. Does that confuse? Because it's also what I'm shooting at. If I were to shoot at 16 it would be a minus one, but I'm not. I'm shooting at 11. It's reading 11. I've got myself a picture coming up. Can you see it in your head yet? Right. Can you see the gradation? You bet. John read around where you standing too. Let's read the far right edge of the frame. Right there. Here we go. Here we go. Here we go. This is going to read eight and a third. No, eight and a half. I hate being wrong by two tenths. Go to the other side and let's check the other corner. I'll get out of the way. Right about there. Oh, this is gonna be a 16. 16. Okay. Let's take a picture. Shall we? Okay, here we go. Good, good, good. Way to go and here's Mona. Woo hoo. That was good. Can you see her? She all of sudden went. Hubba hubba. That's funny. So what's gonna happen is now we're gonna have some separation back there. And at 11 this may too sharp for you. You might want that background to be out of focus. Great. Then you're just gonna take all the same relative numbers and we're just gonna drop everything down and open up for the loss. Get closer to five, six or four. That's all we'll do. And that's how you blow out that focus on that background. Or I move and I move her further away from the background. Okay. While we're talking about the background let me give you one other tip that this is a game changing tip. You need a nugget. This is a great nugget. Everybody viewing at home this is a nugget for you. Everybody that has the roll down mat on the wall background systems as of a bit of advantage because they've got five backgrounds at their disposal already hanging all the time. But here's where they fall a little bit short. By having portable background stands right now my background is lit from one side and I've got a gradation of fall off. Now I can put a light behind her and go flat into the background but not if I'm shooting full length I can't 'cause it'll be in the picture. But what I can do in order to flatten out that gradation so it doesn't fall off any longer all I have to do is grab that side over there and bring it forward like this and make an angle out of that background. And keep bringing it. Keep bringing it. Keep bringing it. 'Til I even out the light across. When you're shooting with a white background you're trying to get a nice clean white high key. If you're lighting from one light only from one side you're gonna have a gradation. And it's hard to get it good and crisp and clean and white without really overpowering it. Stop trying to just move your background to where your background turns flat right into the light source, so where my background is right there at this angle. And now it's flat into the light source. I got myself even brightness corner to corner on my background and didn't cost me a thing. And I didn't have to fix it in post production later. And miss diner with the kids again. That's the key you guys. I love light room. I love Photoshop. Making my pictures better. But I don't want to fix stuff that's not right. I want to fix that here at this time.
Class Materials
Bonus Materials with Purchase
Ratings and Reviews
Stefan Legacy
Bought this class on sale for 19$ and it was a great buy considering it was my first class I purchased on CL. Tony is an excellent teacher and demonstrates extensive knowledge on lighting and different uses of modifiers. Overall this is an excellent course for any one who is interested in learning studio lighting, this will give you a great detail of information.
a Creativelive Student
Important information if you want to be a photographer. Great teacher, good pace!!
a Creativelive Student
This is my first time watching Tony Corbell teach and work he was great! I am a natural light photographer and this class made me think about picking up some lights and umbrellas! You can tell he absolutely loves what he does. Thank you for sharing your knowledge!