Lessons
Class Introduction: What is Light Painting?
06:02 2Camera Considerations
29:54 3Camera Settings and Initial Exposures
22:09 4Light Painting Accessories
09:29 5The Color of Light
10:40 6Focusing in the Dark
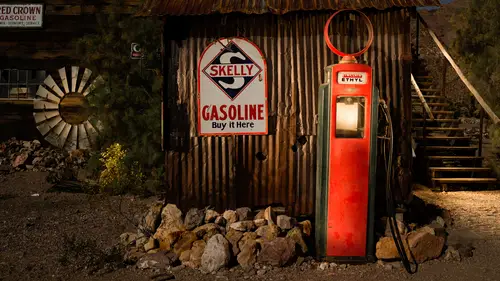
24:38 7Light Painting Techniques
28:30 8Light Painting Techniques: On Location
24:42Lightroom: Basic Panel
29:29 10Lightroom: Presence Panel Adjustments
10:39 11Lightroom: Hue, Saturation, Luminance
07:47 12Lightroom: Local Adjustments
27:53 13From Lightroom to Photoshop
18:14 14Photoshop: Lighten Blending Mode
07:00 15Photoshop: Star Stacking
05:39 16Photoshop: Layer Opacity
05:50 17Photoshop: Selection and Masks
13:33 18Photoshop: Mask Adjustments
09:48 19What You Get With This Class
01:12Lesson Info
Photoshop: Star Stacking
If you've been following us here on Night Photography Week, I'm sure, and I'm hoping, you guys watched Lance. Lance was talking about all kinds of different things you can do with stars. One of those things is to shoot star points, or smaller exposures. So in this case, this is-- well, not too short of an exposure. That's actually three minutes long at f/8, but that gives me that amount of star trail. But if you're looking for that whole big long star trail, that's gonna take a lot longer. That could take a half an hour, 20 minutes, half an hour, even an hour. So a three minute exposure is just gonna be really super short. But you guys can see here, this is a full moon night. So I could not expose any longer than three minutes or I'd start blowing out the canyon walls in Zion National Park. So three minutes was my limit. But what I did do was shoot that for three minutes and then that for three minutes and then that one for three minutes, and you can see how the stars are moving throug...
h this photograph, and you can see how many of these photographs there are, and they were shot back to back using an intervalometer and all these techniques you can discover by watching Gabe's and Lance's and Chris's videos. So what we're gonna do now is we're gonna stack these all together. So once again, to recap, I've made many short three minute exposures over a long period of time, back to back, and... What I'm gonna now do is select all of those images, and I'm not even sure how many that is. 18 images here. And I've turned these into JPEGs just so we won't get bored staring at my computer chewing away on these if they were actual RAW images. So these are a little bit smaller and they're JPEGs. And we're gonna go Photo, Edit in, Open as Layers in Photoshop. We'll click on that, and at this point you can click, or kick back a little bit, grab yourself a cup of coffee or wine, depending on what time it is and where you are, and let Photoshop chew on these images for a little bit. It's gonna open up each one and throw them into one single file. At that point, once all the images are in the file, the process is very, very straightforward. Very simple, very easy. Okay, so we've got 'em all opened up here. And we can see we've got a whole bunch of different layers inside of Photoshop. The first thing we're gonna do, people, is click on the top layer, scroll down, depress your shift key, and click on the bottom layer. What that does is it selects all of the layers. Now, very simple. With all the layers selected, all I need to do is go and change the blending mode. And I want y'all just to keep an eye on this image when I change the blending mode from Normal to Lighten. Boom, that's it. And you are finished. That is how easy it is to stack star trails. Now there's a couple of other little things that you can do, but that's the bulk of it. The idea is that that lighten blending mode has been applied to every one of those, which has allowed each star to come through, and that's gonna give us that nice, beautiful, solid line going through the sky, wrapping right around that North Star. So one step that you can do, and this may not be necessary in every single image, but if you let's say, bump your tripod or the wind is blowing or somebody else bumps your tripod, then these images might not be perfectly aligned. In this case, they are perfectly aligned. My tripod didn't move a hair at all. But if you thought there was some alignment problems, the first thing you would do, after you selected all of these layers, is go to Edit, Auto-Align Layers. And when you get the Auto-Align Layers box up, just choose Auto, and then click OK. And then what will happen is Photoshop will go through and it'll look at each layer and it'll transform and twist and morph all of them so they're all perfectly registered, that way, when you get going and you do your lighten blending mode, everything should line up perfectly. But beware, sometimes even... Even if you haven't moved anything at all and you do that, it may foul up your star trails. So keep a close eye, always magnify to 100% and zoom in and make sure that it does look really perfect before you go on. So Edit, Auto-Align Layers can be just the trick, maybe exactly what you need. In other cases, it could foul things up. So, what I say, is try it without it first, if it doesn't look good, then go through the extra steps. Alright, so creating a star trail image can be that simple folks, if you do the heavy lifting out in the field. Set your camera up properly, shoot two, three, four minute exposures using your intervalometer, keeping it going for 15, 20 minutes, a half an hour, or even longer. You do the hard work out in the field, and look what it takes. Five minutes back here in Photoshop and you're done.
Class Materials
Bonus Materials with Purchase
Ratings and Reviews
DiDi Hendley
The BEST class ever! Learned so much--Tim is a great instructor. I highly recommend to the creative photog looking to expand his/her arsenal of tools, talents and products. Appreciated the patience and thoroughness that Tim offered students. Great pacing and information. I can see how I can very easily take his instruction out at night and produce something. I also appreciate that this session demonstrated images that weren't created in total darkness.
Gene Chamberlin
Tim is an outstanding teacher - I love his style, thorough and basic without being too elementary or condescending. I will be looking for other classes by Tim in the future. I'm am excited to apply the things I have learned from Tim and create my own style from the tools he has given. I never would have give much thought to light painting in the past. I have already notice a change in the way I scout my shots, now that I have added light painting into my tool box. Thanks for sharing your experience with the world Tim. Gene
Andrew Gow
Really enjoyable course. Clear instruction and surprisingly easy to put what I learnt into practice, which I did for the first time last night. This is also my first exposure to Photoshop, which initially put me off buying the course. However, Tim is a great instructor and explains his approach very clearly, so as well as an introduction to light painting it's a great introduction to what Photoshop can do.