Lessons
Lesson Info
Atmosphere and Shadows
Once you've started to think about how to compose a picture, how to create depth, and maybe started to think a little bit about the types of artists that you like to look at, it's time to get outside and draw. And that is sometimes a daunting thing for people to think about drawing outside of your apartment or your home or your studio. There are a lot of things to consider, the weather, onlookers who have opinions about your work, and all of that. So there are, it just takes some bravery, and sort of just a sense of humor in a way, because I can't tell you how many times I've gone out and set up, and it just starts pouring rain. Or people come by and give me, like, a pretty thorough critique on my work. And it's okay, 'cause they can have their opinions. And it's actually kind of, in a way, really nice to be able to communicate with people. And it's also, I think, really important for people to see people out making art and to maybe gain a little bit of an appreciation of that. One of ...
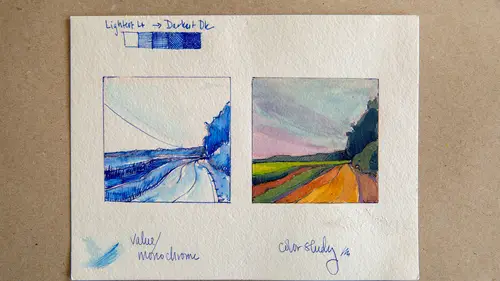
my favorite things about being outdoors is just starting the drawing. And I actually have a really important practice that I do and that I introduce my students to about kind of just arriving and centering on where you are and what you're about to draw. So I've chosen this spot here. I love this sort of meandering path and this big tree in the foreground. There's a lot of things going on in this view that I think are really teaching points, but also just really beautiful movement. And so I'm gonna work up a bit of a drawing of this. But I first want to start by talking a little bit about a preliminary sketch. They often call that a thumbnail sketch. It's just like a brief, little glimpse at maybe where you might be going with the drawing. And it also helps you figure out your composition before you make a larger sketch. So I've got my handy viewfinder. The first thing that I would do setting up, I'd choose obviously my setup. I often hike for a while before I really make a choice. But the reality is you could almost set up anywhere and find an interesting composition. But I've walked the park. I've found my view; I've got my chair. And the first thing I work with is I sort of take my viewfinder, and I pull it in really close where I'm seeing a lot. I push it out so that it's, I'm seeing very little. And I'm choosing kind of really what I want to draw. Once I do that, I take that shape, which is a rectangle. It could have been a square. It could have been something much more panoramic. But I've chosen a horizontal rectangle, which is a common format for landscape work. And before I go on to my big paper, I'm actually just gonna put that same rectangle in my small sketchbook. And then before I do anything else, I'm just gonna sit here. I'm gonna sit here, and I'm going to just take a moment to awaken my senses to what's going on around me. Because if you just jump in sort of blindly and have that sort of, some people feel anxiety when they start their drawing. If you just jump in without centering, I think it can be really, it can be detrimental to the process and to the drawing. So this is what I do. I sit, I look out in front of me, and I journal a little bit. So having this small sketchbook like this is a great location to journal and just put notes down. So the first thing I do is I look, and I say, what are three things that I see, three primary things that I see? So here I'm gonna write "tree, bridge, grass." Then I'm going to close my eyes, and I'm going to ask myself, what are two things that I hear? (birds chirping) (cars driving by) I hear the birds, and I hear the highway. Now I didn't notice I heard the highway earlier, but I hear the highway, birds and the highway. And then I close my eyes and say, what's something that I smell? And I smell the earth. So what I see, what I hear, and what I smell. I suddenly feel much more aware of what's around me, and I feel like that's actually part of my warmup to drawing. So thumbnail sketch, I've arrived. I feel like I'm kind of loving the scene. And the thumbnail sketch can be super small and really free. Like, I see, I like this big foreground tree. I love the bridge coming across. I love how this path is sort of really bringing me into the picture, sort of thinking about my entry point. I have a smaller tree back here. I like this road in the distance. It's kind of bringing me back. There's an even smaller tree here, so I'm knowing, like, this is big, this is small, that's smaller. There's a bit of a horizon back here. But you see how, like, this is, I'm not, I'm not drawing every single rock. I'm just sort of giving myself a sense of the movement of the piece and also some of the geometries that are happening, some of the motion and some of the movement. And quite honestly, like, as a thumbnail sketch, I'd be pretty happy with that as a statement. So I've done my centering. I've done my thumbnail sketch. I feel, and that took all of, what, a couple minutes to do? But in doing that, I can then start to play a little bit with a larger, more sort of, I guess, formal scenario. So I've worked up a little bit of this linearly. It definitely echoes what I just did in terms of the thumbnail sketch. And before I move into showing you actually a really cool technique with a water-based pencil that moves something from linear to painterly, I first just want to reiterate some of the ideas that we touched on earlier, so that we can be reminded of some of the things that you might consider setting up in a place like this. So remember, we talked about the movement of the eye. And here I feel like there's a lot of eye movement. There's an entry point of the path. I go over the bridge. I come down this path. I come around that tree and then kind of back into this other path and maybe out this side. So movement is definitely something, movement of the eyes, I just definitely feel that in this view. And then the other thing that I really want everyone to think about is how your image really creates a sense of depth by the way that you've made choices around placement. So in this image I have perspective with this path kind of converging, these lines, diagonals. I have perspective on the top of the bridge here. I also have scale change. This tree way in the distance is probably a similar circumference to this tree, but in this image, this width, it could fit about six times across this front one. So scale change for sure will help with depth. And then finding little ticks and overlaps where for instance this little river goes behind this tree. This tree is clearly in front of that. So depth created by perspective, overlaps, and scale change. All right, so I considered all those things as I started to work up this drawing. What I want to show you now is sort of moving it from linear to painterly. And I know we're not doing painting, but some drawing media is dissolvable by water, and it really actually, it's something I really love to do. Start with line, and then maybe bring in a little water and dissolve the pigment to help create a little bit more atmosphere and tonality. So the two things I'm gonna be using, one is that this paper is a multimedia paper. It's a little thicker than an average sketchbook, so it's built to receive water. This pencil looks like an innocent graphite pencil, but this pencil actually has a little symbol of a brush on it. And that means it's water soluble. So it goes down dry. You could totally use it just to make a regular sketch. But then if you add water, and I happen to have this little Aquash brush. It's like a paintbrush, actually, but it has a little chamber which you can fill with water so that we're actually gonna be putting a little bit of water on top of the pigment to dissolve it to create effects like that. So this is a really awesome portable tool. It beats taking a big cup of water and a bottle of water and a lot of extra brushes. You can just travel with these two things. It makes it super efficient. So let's talk a little bit about texture and a little bit about building some tonality, and then we'll dissolve it with the brush and see what happens. So I've created, you know, an overall plan for this drawing. I started to move into some of the detail of the rocks. Now squinting is something I know I talk a lot about, but you know, I'm personally as an artist not interested in putting every blade of grass into my picture. Some artists really work very, very detailed. When I'm working outdoors, the light is fleeting, things change, shadows come and go. So I'm not fixating on, you know, oh, is that blade of grass moving to the left or the right? Like, it's more of an attitude of an energy. So in this foreground here I see that there's some grass and some leaves growing. I'm just gonna put some of that in. And as we saw earlier, you know, sometimes in terms of, like, detail in the foreground, that can be kind of a nice thing, whereas in the background it may be much more vague. So I can start to put in a little textural detail. This tree is right up in front of me, so in terms of building texture, I can start to play with some of the, you know, and I'm actually working kind of with a gesture of the texture. I'm not going in for every single little divot and crack in the tree, but I want to sort of create a symbol of mark-making that can help this really feel like bark and can help this feel a little bit more like the tree that I'm looking at. And you can be playful with this. Look at your line quality. Look at how, you know, the light's falling on the tree a little bit. But primarily right here I'm really trying to work with building pigment. Because without enough pigment from this particular drawing tool, you won't necessarily get enough of a tonal effect when you add the water. So I'm putting this down. I might go in and put a little hatching on the side of the tree that's facing away from the light. Sometimes when you're working outdoors, and you see the shadows come and go, you also have to sort of pair what you remember that's happening. I remember a shadow on this side, and when the sun comes out again you might also notice that the shadow is coming off the tree and being cast across the ground. So I might lay in a little bit of pigment here as well to sort of show the shadow coming off that tree. This tone and texture I'm building on this front tree, a tree way back here I might put a little bit of tone on it, but I'm not gonna have the same kind of detail, because that helps that tree fall away. And then back here in these bushes, I might, I'm looking at some of my darker darks, which are definitely happening back behind here. By laying these in, it starts to push foreground things forward. And then in terms of the overhang of leaves, I can also sort of kind of tap in a little bit of tone, and then on the side of the bridge as well. And I'm being a little bit general here, because in a minute you'll see what starts to happen as I dissolve the water and start to dissolve some of these things. I'm also looking at moments where there's some darker darks in some of these trees and maybe putting some darks into the distance as sort of a destination for the eye. This bridge has this really dark sort of curve under here. So I'm just laying in some of the tones. All right, let's see what happens when we start to add the water, 'cause we can start to work a little bit with a little more pigment later if we want to. But I'm excited to see sort of what's gonna happen to this foreground tree in particular. So I've got some textures up front. I've got texture in the trees, some more general things happening in the distance. We don't really get much sky here, but that is the destination for the eye. The sky sort of is in this region and that region. Okay, so let's take this out and see what happens. This, sometimes if you squeeze the chamber of water, it'll make, like, a little pill of water on your image. And you can do that to sort of tap into it to hydrate the brush. And then you can take it and start to work at dissolving some of the pigment. And you can see as you do that, I mean, you you have to kind of watch how much water you lay in there, but you actually retain, you can retain a fair amount of the linear mark-making, but you also start to fill in some of the tone. Like the side of this bridge, for instance, sort of starts to get a little bit darker and unified, and you can drag some of these out. And then what's happening back here with the sort of understory of the branches, you can get a little softer, because these are leaves, and start to lay in, like, shades of gray. These areas are darker, so I might want to lay into those and dissolve that a little bit more darkly. Cast shadows can get a little softer. And then, like, the side of the bridge, for instance, can also get a little bit more dramatic as you go along. So this is a really fun tool to use to sort of, and you can see how quickly the drawing can evolve by just starting to lay in this water-soluble media, and also how loosely you can start to develop it. So I challenge you to experiment with new materials and try new things and do it out in nature. Don't do it in your home from a photograph. Like, really get outside, because the looseness of what you do outside, because you sort of have a certain timeframe, I think is really what often gives drawings done outdoors their freshness and beauty.
Ratings and Reviews
Diane Boland
Amy is an excellent at teaching in a clear and concise way and getting exactly to the point. A good brief introduction to get you started in landscape drawing. I'm not sure it was exactly as I expected but the information presented is important for any beginner. Class was fairly brief but I still need to learn to put what I see down. My tree looks nothing like hers. This is where i need help next and was not really covered. I could easily take more of her classes if she had them.
a Creativelive Student
I cannot understand the few people who were critical of this class. She gives dozens of excellent ideas for the beginning landscape artist. Especially helpful was the explanation and use of the viewfinder to focus your drawing. Five stars fom me to her. Thank you! Extremely helpful and inspirational.
swright1
Good tips on relaxing and enjoying the outdoors before you begin drawing. Great course.