On Location Pre-Visualzation Sutro Baths
Lesson 6 from: Landscape Photography: Start to FinishMatt Kloskowski
On Location Pre-Visualzation Sutro Baths
Lesson 6 from: Landscape Photography: Start to FinishMatt Kloskowski
Lessons
Course Introduction
08:52 25 Things Every Landscape Photographer Should Know
23:32 3Camera Gear
11:26 4Gear Q & A
33:04 5On Location: Weather & Safety
18:55 6On Location Pre-Visualzation Sutro Baths
07:29 7On Location: Camera Settings
21:59 8On Location: Composition
27:09Matt Klowskowski - My Story
06:28 10On Location: Bracketing
15:15 11On Location: Artistic Choices
16:12 12On Location: Pre-Visualzation Marshall's Beach
06:09 13On Location: Long Exposure
15:05 14On Location: iPhone
17:31 15On Location: Wrap Location
02:15 16Location Challenges: How to Shoot in Open Sun with No Clouds
01:52 17Location Challenges: How to shoot Cloudy, Stormy, & Blah Weather
01:50 18Location Challenges: How to shoot Beaches
01:27 19Location Challenges: How to shoot Waterfalls
01:40 20Location Challenges: How to shoot Panorama Vista Scenes
01:38 21Location Challenges: How to shoot Lakes
02:11 22Location Challenges: How to shoot Mountains
02:24 23Location Challenges: How to shoot Deserts
01:29 24Location Challenges: How to shoot City Skylines
01:44 25Location Challenges: How to shoot Snow
02:53 26Location Challenges: How to shoot Backlit Situations
06:56 27Outdoor Landscape Workflow & Organization
31:38 28Basic Editing in Lightroom: Part 1
44:17 29Basic Editing in Lightroom: Part 2
26:52 30Lightroom and Photoshop: Intermediate Techniques Pt. 1
30:35 31Lightroom and Photoshop: Intermediate Techniques Pt. 2
12:31 32HDR for Landscape Photography
07:54 33Panoramas for Landscape Photography
18:14 34How to shoot Landscape with Adobe Photoshop in Mind
21:14 35Sky Replacement in Photoshop
18:48 36Processing Project: Stormy Mountains
09:12 37Processing Project: Crashing Waves on the Rocks
10:01 38Processing Student Raw Images
41:03 39Final Q&A
14:17Lesson Info
On Location Pre-Visualzation Sutro Baths
Visualization, so coming up to the spot, what do you think of, what am I looking at? What runs through my head as far as, I'm looking at the location, what kind of things do I wanna shoot? So we were out there at Sutro Baths, got a quick video for ya. Alright Justin, so we are kind of up on top of the hill at Sutro Baths. Real popular spot that I think a lot of tourists and photographers come to. I think it's time to talk a little bit visualization. I was gonna kick it off by asking you, like you get here, what's the first thing you see? Sure yeah, the first thing I'd probably get the shot that everyone would try to get which is, big wide scene. But, next thing I see, is I'd probably want to go down there and catch a reflection with those rocks in the background. And then I also see little bit of a waterfall way down there. Yeah. I'd love to try an figure out if that's a doable shot. What about you? I'm feeling that. I think the first thing, I'm thinking, like Justin said, I ki...
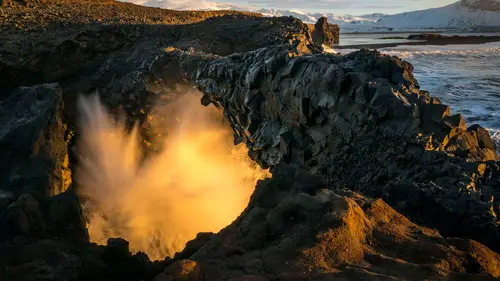
nda call this the hero shot. Sutro Baths, if you googled it, what would you see a picture of? You'd see a picture if I turned around and took this photo. So, what I would suggest is, you start there. It's almost like the warmup phase. Yeah. You gotta warm up for everything. So, I pull up here, get my camera out, check my settings. You know, making sure my ISOs not on 64 hundred. 'Cause I was doing a night shoot or something like that. But to do a little bit of the warmup. And then get the hero shot, it's almost like going to Paris. Get the shot of the Eiffel Tower. Don't try to make the most interesting, crazy, different shot of the Eiffel Tower right away. Get the shot of the Eiffel Tower. This is our panoramic stand up shot that we get from here. I can tell you from experience that it's almost never gonna be my favorite one. 'Cause personally, I'm not a guy that likes to shoot up high too much. But, I'd say get this shot. Then if I'm looking, if I'm starting up high, I'm looking over there at some of those trees and I'm thing, if I get into those trees I can use them to frame water and rocks and things like that in the foreground. What do you mean by framing it? So, basically stand back in the trees and actually use the branches to make a natural frame. Oh, very cool. Maybe coming from the top, maybe coming from the side to maybe frame up a rock that's out there in the water. I don't know that it'd work so great today with more atmosphere. You now, it's like you either want a lot of fog, or you want, sunny. This in between stuff is kind of difficult. Because, with more atmosphere and more fog there's definitely some cool shots you could get. Especially in those trees. But, I'd work my way down. I saw exactly what you saw which was the reflections in the baths over there. So, I'm gonna get down low, get right up to those reflections, see what we can do with that. Probably shoot them from both sides. 'cause I think it'd be cool to put the reflection inside of the wavy water and then kind of reverse it. And then, I'm gonna go right where you said which is way off in the distance there, there's like a little waterfall cascading water coming out of the rocks. And if a wave comes in, and you do a little bit of a longer exposure on a tripod you'll get the water flowing in, you'll get the movement in the water, you get that little water flow and that'll be a pretty cool shot to. Sounds great. So at this point I think it's time to go off and make some photos. Sounds good. Let's do it. Cool, so, I'm gonna go back to one of the things that Justin had asked about a frame. You know, if you look when I took this photo, rather than zooming in, I used part of this cove that I was in as a frame for the photo. You can it on the top and on the left hand side and even on the bottom. It's a little bit of a frame for what we're looking out for. So, that's an example of what I was looking for. We weren't really able to get up there in the Sutro Baths and do it, but I wanted to show you guys a quick example of it. So, take a look here. Kind of a re-cap. You know, start big and warm up, alright. I really honestly, truly believe you have to warm up with photography. Like, you have to. You go out there, the first photo you take is probably not gonna be the killer photo that you have from that scene. So, I think leave yourself some time. Get there and warm up, start shooting a little bit. What catches your eye? Especially if you come up to a bigger place where you're gonna travel down deep or into it. What catches your eye? It sounds like a silly exercise, but literally stand back and look at the place and be like, "Okay, what's interesting?" You know, what am I looking at? What's interesting? So that was exactly what we did there. The first thing I saw, reflections in those pools at the bottom. That looked interesting. We could see a little bit of a cascading waterfall down at the rocks in the far corner, that looked interesting. So, you're gonna start to move yourself down into those places. Start big, it's okay. Starting big helps you get into the scene and kind of think about it a little bit more. And then, the 50 50 rule. So the 50 50 rule is, if you've got most likely a finite amount of time somewhere. Most of us again, we're not gonna be on assignment in, you know, Machu Picchu doing whatever for however long we need to. Most of us are gonna be on a trip somewhere and so, what's our finite amount of time? Well my finite amount of time at that place was gonna be sunset. You know, what time do I get there? How much time do I have before sunset, because that's about when it's gonna stop. So, take half of that time, shoot the big stuff. You know, shoot the big view, shoot the water, shoot the stuff that immediately catches your eye. And force yourself for that other half of the time, take your camera off the tripod. Walk around, don't let the tripod rule you. You put the tripod where the camera needs to be. Walk around with your camera. Try to figure out something different. And that way you can satisfy both needs. Remember that quote I showed you, you know, I don't need to photograph something new. We have that desire, we're like, "Well, I gotta make my own mark on this place "and I don't wanna take the shot that everybody takes." And first, take the shot that everybody takes, but then force yourself to go off and do something different. That'll kinda help satisfy both and that way, when you leave the location, and I'm pretty sure we've all been guilty of this. Where you just drop your tripod down and you keep shooting. And what happens when you leave? You got one photo. You've actually got 367 photos of the same thing. You've shot it at every aperture, you shot it at every ISO. You've maybe zoomed in a little bit, you maybe zoomed out a little bit, but you have 300 photos of basically the same exact thing. So, force yourself to get up and move around a little bit.
Class Materials
Bonus Materials
Ratings and Reviews
Christian Ruvolo
Mat Kloskowski class is really amazing, full of very useful tipps and inspiration. Wonderful pictures by him help to understand the explanations an I am learning A LOT from him!!! Thank you for the class!!! TOP!!!!
Louie
I love Matt's teaching style, humor, honesty, friendliness. I love On1 and all the other demos and critiques he does. He makes me enjoy the craft/art of photography much more and is a great inspiration.
a Creativelive Student
This class was for beginners and I believe Matt did a great job of giving students an great introduction to landscape photography. More on the practical than technical side, but that seems appropriate for an intro class. He comes across as a "real" guy who loves what he does and is eager to share his knowledge. Those new to photography will get a lot of helpful information and tips in this course.