Lessons
Course Introduction
08:52 25 Things Every Landscape Photographer Should Know
23:32 3Camera Gear
11:26 4Gear Q & A
33:04 5On Location: Weather & Safety
18:55 6On Location Pre-Visualzation Sutro Baths
07:29 7On Location: Camera Settings
21:59 8On Location: Composition
27:09Matt Klowskowski - My Story
06:28 10On Location: Bracketing
15:15 11On Location: Artistic Choices
16:12 12On Location: Pre-Visualzation Marshall's Beach
06:09 13On Location: Long Exposure
15:05 14On Location: iPhone
17:31 15On Location: Wrap Location
02:15 16Location Challenges: How to Shoot in Open Sun with No Clouds
01:52 17Location Challenges: How to shoot Cloudy, Stormy, & Blah Weather
01:50 18Location Challenges: How to shoot Beaches
01:27 19Location Challenges: How to shoot Waterfalls
01:40 20Location Challenges: How to shoot Panorama Vista Scenes
01:38 21Location Challenges: How to shoot Lakes
02:11 22Location Challenges: How to shoot Mountains
02:24 23Location Challenges: How to shoot Deserts
01:29 24Location Challenges: How to shoot City Skylines
01:44 25Location Challenges: How to shoot Snow
02:53 26Location Challenges: How to shoot Backlit Situations
06:56 27Outdoor Landscape Workflow & Organization
31:38 28Basic Editing in Lightroom: Part 1
44:17 29Basic Editing in Lightroom: Part 2
26:52 30Lightroom and Photoshop: Intermediate Techniques Pt. 1
30:35 31Lightroom and Photoshop: Intermediate Techniques Pt. 2
12:31 32HDR for Landscape Photography
07:54 33Panoramas for Landscape Photography
18:14 34How to shoot Landscape with Adobe Photoshop in Mind
21:14 35Sky Replacement in Photoshop
18:48 36Processing Project: Stormy Mountains
09:12 37Processing Project: Crashing Waves on the Rocks
10:01 38Processing Student Raw Images
41:03 39Final Q&A
14:17Lesson Info
On Location: Long Exposure
Alright, Justin! You know what that is? That looks like a neutral density filter. That's a neutral density filter. We're gonna do some long exposure in this one here. You can make the water look like it's moving, you can make it look like it's blurry, there's a lot of fun stuff we can do with it. Awesome. Pretty cool. Alright, so here's the idea. Whenever I get around a beach, one of the first things I'm gonna look at is the water and what is the best way to photograph that water. And we're gonna talk about this a little bit more as the class goes on, some of the different ways that we can smooth water, there's waterfalls, there's beaches, there's lakes, there's all kinds of things, and the way that we capture that water has a lot of impact on our photos. Sometimes we wanna make it blurry, and sometimes making it blurry helps a photo. Sometimes we don't want to. Sometimes we wanna freeze it. This is one of those cases where it's a lot of rough water, it's coming up around these...
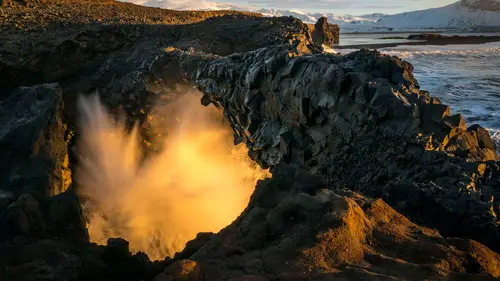
rocks, and we can add some motion to this shot, where I have these rocks sit up in the foreground, it leads back into the Golden Gate Bridge, and if I just take a photo right now, where I don't even have a neutral density filter on, it kinda just freezes the water where it is. But if I put a neutral density filter on, or sometimes if it gets late enough, and it gets dark enough, you don't even have to use a filter. But if I put a filter on, what I can do is slow down the shutter speed, and it'll actually capture some movement as that water wraps around the rocks. So we're gonna shoot a shot here, but later on, I'm actually gonna move up, because I think the closer I can get to the rocks, and the closer I can get to them and the lower down I can actually get to the rocks, it's actually gonna make it look better. This is a three-stop ND filter. So what it's gonna do is basically just block light from the center, and it's gonna naturally give us a longer exposure. So I'm just gonna slide it into the front. As far as my camera settings go, everything's the same. Okay? My aperture, I'm still in aperture priority, I haven't changed a thing other than put that filter on, and because it's dark, but it's not so dark the camera can't see through it, it's actually naturally gonna make the shutter speeds longer. So now I'm gonna take that same photo. And you can see I'm getting some five and six second shutter speeds inside of there. And when I'm in this situation, here's what I do. It's gonna sound bad. I just keep shooting. Alright? There's really no trick to the magical shutter speed for water, because every tide is different, every wave is different, every body of water is different. So I can't say, a quarter second is it, or three seconds is it. I keep shooting. Alright? I shoot a lot of 'em, and a lot of times, I'm looking at a 100 photos and post, I'm just picking out my favorite photo of how the water patterns happen to kinda shape up, I guess I should say. So the secret to it is, once you dial in your composition, once you get everything dialed in, just keep shooting. Wait for a wave to come up, get ready, shoot. Let it go. Again, wait for another wave to come up, maybe wait an extra second, and shoot a little bit after that, and just get a feel for how the water looks as it's comin' in and out of the photo. So Justin, I know you shoot long exposures too. I do. Actually, you pretty much just touched upon one of my main questions, which is: How long can maybe be too long? 'Cause I shoot a lot of waterfalls, and sometimes you can make it overly silky? Yeah. And, uh, you kinda touched upon it already by saying that you really just gonna have to play with a lot and there's no magic number for each circumstance, but do you find that there is a too much where you lose some of what you're going for? Yeah, there is. I'll give you my personal feelings. And then we can go from there. Personally, I don't like water that is so silky, blown-out, there is no detail at all. I want some texture to it. So if I'm shooting a waterfall, I'm gonna wanna see some of the lines in the waterfall. I don't want it to be frozen, I don't want it to be all white that we don't see anything. I wanna see some texture in there. Again, every waterfall's different. So it's hard to say what that shutter speed is. It's not gonna be very long, though. It's usually gonna be less than a second. Waves and what we're shooting here, you'll see a lot of different photos. You'll see people that'll do 30 and 60 second exposures and the water looks ghostly. Looks like a fog. Yeah, it's like a foggy mist coming up off of the rocks. And then you can freeze it. My preference is somewhere in there, it's gonna be maybe one to two seconds where I get just enough motion, just enough texture, just enough blur in the water to show some of it, but it's not gonna get that smooth, silky, misty effect to it. Got it. Okay. Got one more for ya. Sure. So I noticed, we're shooting some long exposures here, and you're not using a shutter releaser mode, or a timer. I'm curious, does it not affect your photos the way that you would think, or what are your thoughts on that? No, I'm just lazy. Okay. (laughs) Sounds good. You know what, it's just, I didn't pull it out for this, usually when I'm kind of really getting serious about it, I'm actually gonna get down and start shooting, I'll pull it out. A lot of times, what I'll do is one of two things. I have a shutter release that I'll use, and then the other things is, is if I don't have the shutter release, I'll set it to a two-second timer. So you just hit the button, it counts down two seconds, basically gets all the vibration out, and then it'll take the photo. So either one of those, but yeah. Got it. I'm kinda considering this almost warming up a little bit, but yeah, when you get serious, and you want a sharp photo, you need that cable release or you need to get that timer, because-- Does the timer work for all three practice shots, or is it just gonna be the one? No, the timer works for all three. Okay. It sets for two seconds, and then it'll take all three shots so I don't have to worry about it. Perfect. Cool. Long exposure fun. Cool stuff. It introduces a whole, kinda new area in photography. Jim, you look like you wanna say something. I do. Matt, speaking of long exposure, this is a beginner class, right? We're focusing on folks that are just getting started in this and of course, you are gonna get them to a really significant level after the fact, but we're only really touching on these more minute ways just a bit, but you had a full class mastering long exposure photography here at Creative Live. Folks, if you go to Matt's instructor page, you can find a link there, and it'll take you right to it. And of course, Matt, all of Matt's classes are on sale today so, and that's a great class. It's like a whole day on just long exposures up in Seattle. Cool. I might check it out. Check it out. (laughs) Also, Jim mentioned, I've been kinda telling you guys I made these little PDFs for you, there's the long exposure cheat sheet too, it's different from the other one. They're free, by the way. Somebody mentioned that on Facebook, how much-- they're free. You can just download 'em, put in your email, it'll send you a link to 'em right away. There's a long exposure cheat sheet, basically step one, you know, do this, step two, do this, step three, do this, put it right in your phone. I see a question right up here too. I know you're using a mirror-less camera, but those of us that have a mirrored camera, do you suggest using a mirror lockup? Good question. So, mirror lockup. If you're not familiar with mirror lockup, it is-- the camera will flip open the mirror, and lock it so that it removes the vibration of when that opens and closes each time. It's said to reduce vibration and to give you sharper photos. I've done tests, and I can only see the difference at like 400% zoomed in, so I have done tests. I can see a tiny bit of difference, but I gotta really, really be zoomed into it. So it wasn't enough that a little bit of sharpening in Lightroom and Photoshop didn't make the non-mirror lockup photo do it. But there's a setting in your camera, you can look it up, look it up in your camera guide, there's a setting in there that basically lock your mirror up and then so what happens is you take the photo and it's not opening, it's not coon, coon and, uh, makes that sound too, by the way. So for what it's worth, I have seen a tiny bit of difference but I had to pixel peep to see it. The other thing is so we talked about the neutral density filters. One of the things I've realized, I didn't really get to show on the beach there, so I used a three-stop. I slid the three-stop in there. I usually don't have to do any camera changes to that. Your camera will still be able to meter and focus through it. So it's fine. This is a ten-stop. And so, you guys, you can't see through it. So I don't know how much the camera is able to bring in on it, but you know, like, I can't see you guys through it. Where a three-stop, if I held it up, I can see everything through it. So once you get these darker ones, usually a six-stop and above, that's when it really becomes helpful to slide it in, slide it out, 'cause you'll wanna focus, your camera won't be able to focus with this in there, but you wanna slide it in and slide it out and do that, 'cause it'll definitely help out. But then again, with your low, with your two, three, four, five stop filters, you don't usually have to worry about it. Cool, so let's take a look at some photos, some long exposures. Here's one that I made down at Sutro Baths, so I did what I talked to you guys about before. I zoomed in a little bit, and just let it go. See that misty, foggy type of a setting? Again, there's a little bit of longer exposure, I mean this is, probably only half of a second. We saw that one before, that was about three seconds. Again, this is gonna be half of a second, but it just kinda worked out perfect, it's like this wave was just comin' up, and just, kinda formed this beautiful pattern. Half-second. Just little side story, so this was in Hawaii. Most intimidating place to stand. So you see that edge of that wall? On my left hand, on the left hand side? I'm able to get in there and tuck back in there. I wish I thought to pull the video up. The reason why there's so much water on there is because, look at how low the water is below the cliffs, is these monster waves were comin' in. And it's like, I had to stay there, stand back, and watch this spot for like 10 minutes before I felt comfortable that I wasn't gonna get washed out to sea, 'cause you really are. You're back behind a wall, nothin's touchin' it. Man, there's these monster waves comin' in, you're looking at it, oh my God, I'm gonna get killed. And then I set my camera down, and just kinda snapped away as soon as the water crashed on top of it. But it's a big wave. Same thing there. Although this part was interesting 'cause the tide just kind of rose and fell. It wasn't a wave that came in and did it, it was just like this rising and falling. So that's probably about a second. But it just worked out perfect, the way the lines. Remember how I talked about what I do? I just shoot away? This is luck. The only skill involved here is just picking the right photo when it's done. This is all luck. I probably have 50 photos of that before this happened. It's just picking the right photo, but I love to tell you that I have this, oh yeah I can tell, you know, I just wait until the wave crests and does this, it's crap. I just sit there and I just keep firin' away, and I hope when I get back one of those photos is gonna have a cool pattern to it. Um, so, lakes, bodies of water that tend to get ripply and whatnot, for an example like this, I don't think it helped. So what we can do is we can use our ND filters to do like a thiry-second exposure, and you get something like that. See how it just calms the scene? Any Sony shooters out there, Sony has apps that you download for your camera. There's one called Smooth Reflection, and what it does is it takes a bunch of photos, and it, in camera, merges 'em together, and it gave me that. So that actually was not a filter. Coulda done it with a filter, but that was actually just an app in camera that took I think 28 photos and gave me the same effect. And it gives you a raw file, too. So it's not even like a processed jpeg, it's pretty darn cool. Yes. So, the ones we're seeing before this too, are you bracketing for all those? These I did not bracket for, 'cause it was-- 'Cause this was the app, right? Yes. It's kind of forward, moving at marketing. Yeah. The tones were so flat in this one. I didn't bracket it 'cause I didn't have to. Right, but the one before at the beach, like with the lines, were you bracketing when you were doing all of those? That one? Yeah. Yeah, I was bracketing like crazy on that one. But neat little app. It's called Smooth Reflection. That's not an app, that's an actual ND filter doing probably 30 second exposure. So waterfall, maybe this is, I think, about a second? And this is like, you saw this one earlier, this is like three or four seconds. See the difference in the water. We have some texture, we have some lines, or we go all white, no texture whatsoever. It's personal preference a lot of times, all I can say is I like a little bit of texture. This is the ghostly effect that Justin and I were talking about toward the end of that video. So it just gives you this ghosted, misty type of a look. I don't personally care for it, but I see it done quite a bit out there. But this is like a 30 second exposure, so what's happenin' is waves are comin' in and goin' out, comin' in, crashin', goin' out, and you're getting that hazy mist.
Class Materials
Bonus Materials
Ratings and Reviews
Christian Ruvolo
Mat Kloskowski class is really amazing, full of very useful tipps and inspiration. Wonderful pictures by him help to understand the explanations an I am learning A LOT from him!!! Thank you for the class!!! TOP!!!!
Louie
I love Matt's teaching style, humor, honesty, friendliness. I love On1 and all the other demos and critiques he does. He makes me enjoy the craft/art of photography much more and is a great inspiration.
a Creativelive Student
This class was for beginners and I believe Matt did a great job of giving students an great introduction to landscape photography. More on the practical than technical side, but that seems appropriate for an intro class. He comes across as a "real" guy who loves what he does and is eager to share his knowledge. Those new to photography will get a lot of helpful information and tips in this course.