Lesson Info
25. Merge HDR Images
Lessons
Day 1
1Class Introduction
23:23 2The Nature of Landscape Photography
29:02 3Finding Your Eye
28:36 4Gear Bag
23:02 5The Creative Trinity
11:15 6Scale
39:20 7Light and Timing
29:26The Technical Trinity
15:06 9Metering, White Balance, and Depth of Field
32:17 10Shutter Speed
10:24 11Focus
15:04 12The Vocabulary of Composition Part 1
32:20 13The Vocabulary of Composition Part 2
36:58 14Techniques in the Field: Scouting
16:23 15Pre-visualization
25:41 16Bracketing
28:11 17Tilt Shift Lens
26:47 18Long Exposures
26:49 19Post Processing: Importing into Lightroom
20:39 20Lightroom Catalog Setup
17:43 21Color Correction
23:35 22Develop Module
31:40 23Basic and HSL Panel
23:35 24Filters - Regional Dynamics
27:46 25Merge HDR Images
17:26 26Stitching Images and Manual Blending
24:12 27Converting to Black and White
27:41Day 2
Lesson Info
Merge HDR Images
The next thing we're gonna do is go and merge some of these bracketed files. And I have, just like a good cooking show, have created some JPEGs because the 32bit, 36 megapixel, Nikon files take a couple minutes to run through this particular plugin. Alright so, what you've done is you've gone to these places and you've bracketed, and you have created these five files. And so, we're gonna just take a quick look at 'em just so we know we're on the same page. Here's the one on the far left, which is two stops underexposed, one stop underexposed, and then normal. And then in the opposite direction, one stop over, and two stops over. So because we changed the bracketing order of our camera, it's really easy to identify when we're editing through a bunch of these pictures, it's just simply the darkest to the lightest. That's your group of pictures. What you do, is you select all of 'em, and as you're editing you can do this then, in either the library, at stage one, two, or three, but I typi...
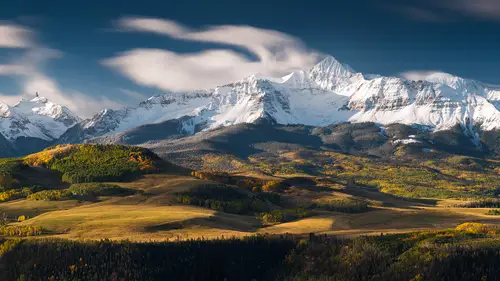
cally wait until I get to about two, and I select them with the darkest one chosen, and then I hit Command G, and that groups 'em all together. And so that gets rid of the preview of having to see them all. Then once you've done that, you can use the S key, which is a shortcut for clicking this little tiny box, in the upper left hand corner. And that pretty much just opens and closes that group of pictures. So I'm gonna open 'em and what I'm going to do is I'm gonna create that input profile right now, 'cause I wanna make sure those things are done to these files, before they go off into the merge program. And so if we go in here, we go into Develop, the most important things in your input profile that you wanna apply to absolutely every image taken, are you wanna get this profile correct. So make sure you have the Adobe standard, or whatever camera profile you've made, chosen. That's one. The next one is lens correction. Come over here to the Basic panel and check Enable Profile Correction and Remove Chromatic Aberrations. Again those are in the Basic panel, right over here on the left you wanna check both of those. Next you wanna go into the Detail tab, and this is where the sharpening is, okay? I'm gonna bring this down so you get a little better picture of what we're dealing with here. Now this is dependent upon your camera, especially the camera resolution. So if you have an Iphone, you're not gonna sharpen it the same as a D800 or D810. The magic is that you want to get to a point where you sharpen it enough so that it's acceptably sharp for the edits. Then, before you send it out to either reproduce if for a print, or send it to the web, you're going to sharpen it again. Now this is not going to do both, what we call input sharpening and output sharpening. Now you could, but typically I don't handle it that way. I handle this and look at this as if it's input sharpening. Because this is sharpening to the size of the picture. Once you change the size and the pixel value of any digital file, you have to resharpen it. If you make the file small, and then sharpen it too much when you open it up and expand it or extrapolate it up to a larger file, then everything is extrapolated including the little tiny lines between the darks and the whites, which is all sharpening is. So you wanna make sure you do your input sharpening here, and we're gonna just do a default, I'm gonna tell you these numbers to continue on the workflow of creating this preset. For my D810, I go to 80, change that to 80 right now. For the amount. The Radius is .7, the detail I don't change, that stays at 25, the Masking is at 6. Luminance Noise Reduction. This is where I leave it 10, and then the rest are default. The way Lightroom comes. So those are the edits that I make to the Detail panel inside Lightroom for my D810. Now, we're in the Develop module, we wanna come over here, so that on the far left panel under the navigator we see the presets. And here there's a little plus mark, right next to it. And we tap that, and up comes a dialog box. And what we're gonna do is we're gonna call this the name of our camera. In this case, I'm gonna put D810. And what we wanna do is, we don't have to really... As long as we haven't changed anything else in the Develop module, we can leave these all checked. But just to make darn sure, I'm gonna say check none, and all we wanna change is Sharpening, and we wanna change Noise Reduction, and we wanna change Lens Correction, and way down here is Camera Calibration. So those are the things that we want to be preserved and that we want to be applied to every image when we import later on. Hit Create, and there's already one existing, all you have to do is hit Replace, if you want, or create another one with a different name. So what you end up with is over under the presets, is something that you can apply while you import it, but if you forget to do that, you come back inside Development, and you go up to Presets, and you come down to it, and boom, you can apply it just by clicking it once. So if you forget on import, you can always do it later. And now, again, when you go to import, that's one of those options on the far right hand corner. You just have to remember to choose it, so that you get it in there when you import it. Okay, so all those edits, the ones that I just mentioned, are already imported and are already included in these five files. And that's key, 'cause you wanna remove those chromatic aberrations, you wanna sharpen it to some degree for your input sharpening, you wanna select these files, and just to make this go quicker, I've got these JPEGs. And what you do is you go up to... you can either right click on them and go to Edit In, Or you can go up to Photo, Edit In, and then you wanna come down here to Merge to HDR in Photoshop. This is the way you would do it without the plugin. So I'm gonna show you the plugin next. And thankfully, for these JPEGs, otherwise we'd be here and I'd have two cups of tea. (laughing) It used to be when these computers were a lot slower, I could have a whole cup of coffee, but not anymore. Alright so, Remove Ghosts, I'll talk about that in one second, but here's the button inside the dialog box that makes the most difference. First of all you have, I think, the default, which is mode 16 bit or 8 bit. But you wanna come up here and make sure that you change this to 32 bit. That's the key here, because what you're trying to do is create a new file that has all those bits. Alright, you don't worry about this at all. And you want to uncheck Complete Toning in Adobe Camera Raw. You don't wanna worry about it going into Camera Raw. If you wanna remove ghosts, that's a personal preference, no I'm just kidding, that's when something's moving across the sky a bird or branches, and you wanna choose one of the files for it to reference when it's blending these together. Then you would check that box and then click one of these images down below. That's what it will do. But what I'm gonna do right now, is I'm gonna uncheck that, just with the two most important edits made. Again this is very simple. Make sure you have the mode to 32 bit and uncheck Complete Toning in Camera Raw. And then you click OK. It goes through, and what it's gonna do is it's gonna open this file in Photoshop. Don't look at it. Don't even think about editing it at this point. Just save it. File, Save. File up here, and then go to Save. And then close it. I'm not gonna save it because I have one already saved. Come back to Lightroom and this is where you're going to have this Photoshop file, right here, that is now the same file, but... it looks the same as it did in Photoshop, with that first preview. And it looks the same as almost the normal exposure did, right, so that you're not done yet. This is where, oftentimes, people get confused and they'll call me up and say "Mark I tried that method, but it really doesn't seem to work." But what you're doing is at this stage, you've just run it through photoshop, you've compiled all these bits, and now you have a new RAW file. The difference is though, it's going to be named a .TIF. It's not a RAW file or an NEF file, it's actually a TIF. But it is a 32 bit file. And if you go... I won't even grab the Basic panel, but if you come up here to the histogram, and you grab the highlights and you move it over, you can see you have just all the information in that sky from the darkest exposure. And the way you can tell it's 32 bits, is if you come up here to the exposure tab you can now go to ten, instead of four. Normally on a 16 bit file this goes to minus four. Well you can move that slider all the way to ten. So you've just done the Spinal Tap move. That's really cool because now you can go totally black or totally white. But the reality is you have all this bit depth to change, and so the moves that I typically make is I grab the highlights, I crank 'em all the way down. And the first look I make is to make the shadows all the way up. Now you've taken the extended data from both ranges at both highlight exposures and shadow exposures and you're looking at all of 'em. And so from there you can just simply make a couple edits. I'm gonna make this darker. And go through a couple of the motions here. I really like making that mossy rock brighter down there, so I grab the radial tool and I'm just making a nice little circle around it. I'm gonna add a little clarity to it. So that you can't quite tell as much the difference between the luminance. And then I'm gonna come to the middle, actually I'm gonna stay in that tool. Move this slider back a little bit and make a change to the middle of the picture. Again I'm making it just a little bit brighter. I'm gonna add a little bit of clarity as well. And I'm gonna come to the top of the graduated filter. I'm gonna come over here and reduce the exposure, add a little bit of clarity, and then bring this down over the sky. Just like that. And as I'm editing these, you can see, it's not affecting the histogram too much, so I don't really have to change that. I might wanna add a little bit of color, because that's the benefit of this process is that it doesn't over-saturate. Typically when you run these things through the HDR mill, you can get some pretty odd colors. So in this case, I'm gonna add some vibrance. A tip, when you're adding saturation, if you add too much saturation it's a good way to see any color casts you might have. So you can come back up here when the saturation is way up, and change it to what's more pleasing, and then bring the saturation back. Kay, 'cause it's exaggerating that cast. Alright, so, in a nutshell, that's going to Photoshop. I do wanna show you the very same thing, but going to, I think, just a program that does another variation on the same theme, which is called HDRsoft. And the website you can go to is called hdrsoft, and they make Photomatix. And the software here is Merge to 32 bit Plugin for Lightroom. And I think it's under the products page. If you scroll down you'll see it towards the bottom. I believe it's 30 something dollars. Now if you own Photomatix Pro, I believe, you have to read carefully on the site, I think it includes this plugin as well. But, if you only want Lightroom and you don't wanna buy Photoshop, but you wanna do this, it's only 39 dollars, I think's what it is. Now you can make HDR files look realistic. Again, I'm gonna come here, I'm gonna right click with the same files selected. I'm gonna come down here to Export this time, because it's a plugin, and I'm gonna choose, Merge to 32 bit HDR. And I know that on their website is a great description of exactly how to install it. So that'll all be explained on the website. But what I wanna show you are some of my preferences. This is the first and only dialog box that comes up. And in there you wanna align the images. And I typically choose to crop the aligned results. And I want to align them by matching features. So this is where you start getting into the aid of the software if you're hand holding it. It's gonna look at that little ridge, remember in the example I showed earlier where the iceberg was moving and I was in a boat. So it's actually gonna make that decision to align those five files or three files, by that iceberg, the edge of the iceberg. Again it has Ghost Removal. And that's, I set to high. I haven't seen any reason not to do that, so those are my settings for the preferences here. I do not choose Reduce Noise. That's something I can do, and I've already done in the RAW file, if that's what I'm worried about. And then, Name Merged File. So these are Combined File Names, which is what I leave it at. And I'm gonna choose that right now, and that's what I recommend. It's gonna basically show you the name of these files and then how many there are. And that helps you find the file when it's back in Lightroom. Stack With Selected Photo also helps you find the file when it's back in Lightroom. And don't worry about the other two, just leave them where they are. I haven't seen them make much of a difference. Click Merge. And then it goes off in the distance. But the good thing about this plugin is that it does it's magic and then it imports the photo back into Lightroom and there it is. And that's this one right here. This is the original file, sorry. This is the original file. And here you can see it's says Scotland 3982 3 4 5 and 6. And that's a TIF. And again, to check whether it's the 32 bit or not, you drag this all the way over as far as it goes and you can see it goes all the way to ten. You know you're on a 32 bit file. And then, with all that data you can edit it just as I showed, add in the masks, add in the graduated filter, the radial filter, the brushes, all those different edits that we've been talking about in the Develop module. Same way you'd edit a RAW file. So, couple things to point out. Oftentimes, if you have just imported, kay, and the way Lightroom's set up, you are brought to that previous import collection. That's how Lightroom's set up by default. And you're looking through your pictures and you haven't made folders or collections and you all of a sudden get excited and you wanna merge one of these and you do, and you choose your five files and you send it out, and then it comes back and you're wondering where the heck did it go? Well, it's because you're looking in that collection. You have to go back down to the actual folder where it's living, and there is where your new file will be. So just a tip to point out, because sometimes that happens. And it's frustrating to not know where the picture went. Alright, just another example here on Merge to 32 bit. You can see here my workflow is, I've taken a tilt-shift lens in order to create this picture here. I've taken a tilt-shift lens and I've shifted it all the way to the left and I've actually taken, I think it was five files here. Or three files, let's see here, one, two, three, four. I don't know, three or five. A bracketed set of files. And then I've merged those from each of the three image scenes in that tilt-shift scene. Then I've taken those three and then I've stitched them together to make this final picture.
Class Materials
bonus material with purchase
Ratings and Reviews
Jeff McPheeters
This was my first class with Creative Live and also my first exposure to landscape photographer Marc Meunch. I've been a photographer for many years, an educator in science and technical fields for more than two decades, and a lifelong learner of the craft of making photographs. I am pretty picky when it comes to educational resources and when it involves recommending something that I want to reflect my own standards of excellence. That said, I came with an open mind, with some expectation that I would learn a few tricks, but also with the understanding that after spending thousands of hours in books and online courses as well as direct workshop and tutorials from a range of photographer workshops, Adobe training, KelbyOne and other professional organizations, that some of what I'd hear would be stuff I'd already known. My first impression was positive, as I think Creative Live did a good job explaining the purpose, intent, and scope of the workshop, as well as giving me a good idea of the speaker's credentials. As the session begin on Day 1, I was immediately impressed with the quality of the technical aspects of the live feed. It was like I was there. The sound quality was outstanding. The video streamed effortlessly and I only have wireless access to the Internet. I'm not on high speed wired cable. The bandwidth can fluctuate, yet it worked extremely well. The speaker, Marc Meunch, was relaxed, engaging, professional, and possessed such a comprehensive and deep understanding of the topic that I felt extremely lucky to have been told about this workshop. I don't think I've ever been able to watch someone who was so masterful in their presentation, so thorough in their organization and outline, so enthusiastic about their work, so passionate about the craft of landscape portraiture, or so articulate and engaging with the audience; at least in the realm of Photography. I'd jump at any chance to listen to Marc Meunch again; and especially to attend one of his outdoor workshops. One of the unique aspects of this workshop was that Marc uses some video clips from his outdoor workshops to illustrate what he's talking about in the classroom. Very effective. And the slides he chooses to share are effective and easy to understand. It's very inspiring to watch Marc present ideas and illustrate them through his own work, showing before and after and alternate compositions to demonstrate the point he's making. Day 1 was so good that before it was over I'd already purchased the two day workshop. I was that certain it was worth the cost. Frankly, I'm not sure I'd find a class like this for under $100/day. This is a pretty good deal. Day 2 was equal in usefulness and inspiration as Day 1. The discussion of gear selection and scouting techniques along with the introduction to his Lightroom and Photoshop workflow was very helpful and would be especially apropos to someone getting more serious about their landscape work but not very experienced with Lightroom or Photoshop, even perhaps a little intimidated by the prospect of needing to learn those two software giants, because Marc shows the power and easy of learning them. I was pleased I was able to attend and even more pleased I can watch these over and over and study points I didn't quite grasp the first time through. I highly recommend this course. The viewer will be inspired and encouraged as a result. Marc doesn't make it look easy; rather he makes landscape photography look fun and exciting and worthy of the effort and time to find ones own style and vision, clearly imparting the practical how-to's to aid each person in their own journey to make it more enjoyable and satisfying.
a Creativelive Student
I don't like writing reviews. Seems like everyone just wants to hear that everything was... awesome. So, let me try to be specific about what I liked: I thought that the concept of the creative trinity was brilliant. I thought that Marc's presentation on composition was the best I've ever seen. His ideas on having a theme for shooting was inspiring because it was simple. He also had some great tips on light. The other thing I appreciated about Marc's presentation was the wide variety of locations shown and his knowledge of them. I also am always interested to learn more about the people that have inspired presenters. Sometimes, it feel like CL classes are aimed at the lowest experience levels. But, as someone else said in review... there is always a nugget or two and review is beneficial. I wish Marc was more animated. He's obviously very self contained and reflective -- gotta be who you are, right? I have purchased Marc's class, the Shive class, and Art Wolf's class. All have had different benefits. I wish they would do others and take complexity up a notch -- specifically, helping others understand the planning necessary... how they find reliable contacts to guide them and what those things cost. How they are transporting all the gear they carry. More specific information on permits, camping gear, dealing with adverse conditions, etc. And, more information on how they get different images of frequently photographed locations.
Sitka
I happend to stumble upon the course by an email. I clicked on it and realized that Mark had come to my town (Sitka,Alaska) to do a trip with my good friend. So I thought I'd watch a bit. After awhile I realized this is good, way good. So I shot a lot of that day just eating it up. The director would come on every bit and say there was a show price. I thought well I'll just watch. Then on the second day he did some things that the announcer said he had never seen. I thought the same thing. So I bought. I have been shooting for 40 years and I still LOVE to learn. A noted psychologist said "We are happiest when we are learning" and I couldn't agree more. Thank you Creative Live for offering these courses. I live on an Island in Southeast Alaska with 14 miles of road. BUT I can be a front row student with some of the best teachers in the world. Thank You! Also a Huge thank you to Mark. It takes a ton of time to do this, and Im sure you get tired of the same questions again and again, but it truly changes the lives of us who love this type of life.