Essentials for Shooting Video Part 2
Lesson 7 from: Keep it Simple: Video for PhotographersLindsay Adler, Jeff Rojas
Essentials for Shooting Video Part 2
Lesson 7 from: Keep it Simple: Video for PhotographersLindsay Adler, Jeff Rojas
Lesson Info
7. Essentials for Shooting Video Part 2
Lessons
Day 1
1Class Introduction
12:21 2Video for Photographers Part 1
33:22 3Video for Photographers Part 2
19:39 4Gear Basics
18:24 5Gear Breakdown
32:55 6Essentials for Shooting Video Part 1
30:24 7Essentials for Shooting Video Part 2
23:04Gear for Lateral and Vertical Movement
32:34 9Gear for Staying Mobile
24:47 10Focusing Techniques
21:42 11Audio Overview Part 1
16:54 12Audio Overview Part 2
24:05 13Audio Recording Accessories
18:28Day 2
14Introduction to Setup
14:32 15Lighting for Video
09:52 16Shoot: Boudoir Lighting Part 1
30:23 17Shoot: Boudoir Lighting Part 2
29:57 18Shoot: Boudoir Movement Part 1
18:17 19Shoot: Boudoir Movement Part 2
29:13 20Shoot: Boudoir Movement Part 3
11:06 21Three Point Lighting
17:35 22Shoot: Noir Lighting Part 1
24:25 23Shoot: Noir Lighting Part 2
14:50 24General Q&A
24:29 25Shoot: Noir Audio Part 1
33:59 26Shoot: Noir Audio Part 2
25:43 27Shoot: Noir Audio Part 3
22:08Day 3
28Gear Essentials
32:23 29Video Storage
15:56 30Editing Video in Photoshop Part 1
35:57 31Editing Video in Photoshop Part 2
36:34 32Editing in Premiere
29:58 33Building the Sequence in Premiere
20:16 34Editing Audio
33:28 35Editing Video to Audio
20:42 36Video Delivery Options
13:35 37Transitions
26:23 38Using Presets
29:00 39Exporting Video in Premiere
20:46 40Bonus Video: Kiss Video Presentation
45:01Lesson Info
Essentials for Shooting Video Part 2
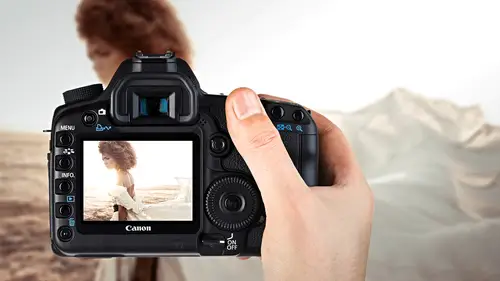
what we're gonna do right now is talk about picture styles okay so what you may be familiar with picture styles and when you're shooting stills is for example you could shoot monochromatic which makes it black and white or you're shooting portrait or standard usually for my picture styles I shoot on standard but it doesn't actually I'm talking stills actually don't matter because I'm shooting wrong so it's mean it puts the settings roughly but I can change anything and video your picture styles we'll make a difference um there are long discussions about the correct pictures now because here's the thing what looks best on the back your camera already has contrast added already has saturation added and so you don't really have much range like once the contrast is added if that highlight went blown out you can't get it back where if that shadow losses see till you can't get it back so an alternative is to shoot something that looks incredibly flat and really crapping in the back your came...
ra I mean honestly it will look crappy but when you take into posting of a lot more flexibility so there's two schools of thought on this so when it comes to the flat style neutral neutral is what it's called you have a lot of playroom in regards to editing you can put a cz much contrast as much color as much tonality is possible but the workflow process is a little longer you have to sit there and color grade every single individual clip to match each other which is extremely tedious so if you're a person that needs a fast turnaround time for what everybody work that you're doing it's really not feasible to shoot in a neutral style again that's something that videographers are going to hate me for but I'll go ahead and say that again you have other options okay like she said out of the camera it's the most contrast the image possible out of any any dslr that you're shooting they want to give you the christmas clear picture that you could with a love that's what we love visually and starts to still photography that's not always the case in video because you want to edit you want a color great you want to tone things that you'd like shooting something in a different motel help so if you plan to edit video and you plan to spend hours and hours and hours and hours editing on and you have the time to color great by all means shoot in a neutral standpoint have a fast have a fast turnaround time try portrait style it's one of those that I worked with a couple colorists it gives the cleanest image for people in general and kind of softens the skin a bit but it makes it nice and it's not totally contrast it just pulls out a little bit information so you have a nice colored rating to the skin and then you can do your color grading your actual post colored rating from there so that's my recommendations and we'll discuss that a little further let me let me give you some thoughts on this are so most of the time it's simple if you pick something and stick to it consistently especially a certain multiple cameras um for those of you that are truly here for keep it simple video keep it simple and don't add extra work for yourself to have to go into premiere go into photo shop and make it look like it has nice color make it look like it has a nice contrast were so not used to his photographers seeing a flat picture style out of here and getting a good chat nineteen percent of time ninety five percent of time that you shoot a flat style it's completely underexposed or over exposed it's not the shot type that you were looking for because we're so not into into seeing it in a flat disposition shooting something contrast they helps but your blacks are completely black you went completely white shooting something in a portrait kind of condenses all that and you have some wiggle room it's just not the way we learn that you have with with the neutral style what she mentioned was shoot if you shouldn't say if you're working with somebody on set make sure your picture cells are exactly the same every single camera setting that you have make sure it's exactly the same does not your color grading two different cameras more work extremely tedious you don't wanna have to do with that consistency is key and video everything that you have in camera replicated on any other cameras use I'm not sure the back of the camera and just so you guys can see something all right so if you don't mind I guess I'll set it right eyes that all right that good okay so you guys can't exactly see e like this that's great all right so you may have seen that there's like a bunch of different numbers when you go into picture style you can actually customize things so what they are is its contrast in its saturation thank you perfect for so if you look right there okay so for example a lot of these will have you know the contrast pumped up because it looks better in the back of the camera it'll have the saturation pumped up so let me just show you the options you have their sharpness contrast saturation and tone if you go into the neutral picture style sharpness is turned down contrast is turned down saturation has turned down so it is very very flat but then it's not pushing the levels for example too far either extreme so in for true cinematographers are for people who really want to do a lot in post to make something dramatic and this is what they do in the movies they don't not only stick with neutral okay they go further and you can actually put custom profiles on your camera to make it even flatter even less contrast and so one of them so you can actually set your own writing camera or you can download picture cells which downloading update your cameron create picture cells that way yeah so one of them that if you're a little more advanced okay this is the stay tune out people that don't want to hear this or not if you're a little more advanced something that we've used is called technical or sinise style which is is basically going to give you them for in our experience the most information you can get out of that video file when I have it set on technical errors in a style like I'm focusing and I'm looking back on my view finder I find it very difficult to focus and shoot because what your eyes looking for is contrast and there is no contrast your eyes looking for caught there's no color it is just flat but that's what they'll do for the you know that kind of grungy look that they use in films because it's it's flats they can add as much contrast they wanted change the colors so just so you know there are benefits if maybe you want to treat the actual it's called color grading like changing the levels and changing the colors if you want to treat that as part of your creative process then maybe you want to look into this maybe you want to look a little further but if you just wanted like okay I want to set up my camera and I want to make something work and I'm going to just put it in a photo shop for premier and export it then don't mess with it too much but let me just see unlike view real quick how this will go again you know a lot of videographers like what are they talking about to keep it simple approach I'm really just trying to get you guys to get in shoot get out the door at it as quickly as possible and get done the quicker we do things the more money we make right tio more clients we have all right so I don't really know how much you'll be able to see this but right now we're in something this is the neutral picture style and so I'm gonna go if you got that okay so I'm gonna go back and switch it to standard and I don't know if you'll be the kind of go back and forth between the two but it is significantly more contrast e the red pops there's there's more contrast in general so I just wantto kind of demo for you guys and that's what you can try on your own cameras it's all the same so if you want to take it to an extreme download a custom one learning to your heart's delight but don't stress yourself nightgowns picture control way that was looking for thank you two again if you switch the pictures that's permanent for the second you go black and white goto monochrome you're never getting color again so it's easier to do it in post production and add that black and white in post production and that we have a wheel room but if you're shooting you know photos initiating j peg grog raw excuse me if you're shooting rockets just j peg interpretation in the background video you can't do that so all right so just to give you an idea this is just a breakdown so you understand um I usually shoot standard he usually shoots portrait and I shoot neutral or sent a style when I know someone else is doing the post processing um and this is a point that my people don't want a dress right now I don't do most of my own editing what I usually do now is I bring it into premiere I bring into photo shop and I make it look like what I wanted to look like and then I said that is a reference file to an editor don't get me wrong this is not how I started I didn't have if you're not making money from video you can't pay someone else to do it so I did it all myself originally started in final cut but I found that because premieres and adobe it was much easier for me so photoshopping premiere is where I'll do but nowadays I just color great it's in photoshopping we all know how to make a picture look pretty and photo shop so I'll do that and then send it off and fires template itself it's really it's less sophisticated than it was before has it's more sophisticated than it was before it's easier to use but they have a bunch of other tools like he used to have speed grade you still have it but a lot of the tools like a three what's called three point color curves and stuff like that world in premiere now so you can do all that in premier just great yeah so since down neutral when someone else's editing it and they have to deal with the hassle of it is that someone else did it jeff no it depends a joke you know but you know sometimes our work is like this if it's something that's like two minutes and I don't feel like paying somebody an exuberant amount of money because colored rating can take forever and if somebody's charging by the hour by all means it could take hours and hours and hours to color great something I'll do it myself I don't care that's why shoot the portrait style just for me I just my work flow I doing premiere I create a bunch of presents for specific lets a key shot said I'm shooting and just lay my presets work on brightness and contrast and that's it that's literally my easiest way in and out I don't want to have to deal with color grading every single individual neutral file because it's tedious I'll create something that the end result that I'm trying to shoot create my my pre set just loaded that prisoner across everything until I again changed the brightness in the contrast to look simple and related to that though what I would would pass have to mention the whole job was like mmm mmm please review the footage and select the best like dump it on here like the part that kills someone's nice so you get stuck with that he's very helpful alright so click your gonna go like to the end of the presentation okay okay so we talked about this already right guys understands he already got there so this is just to give you an idea and break it down to the appropriate isos uh what frame rates and shutter speeds to shoot at and the resolution that way didn't put seven twenty the reason that we put ten eighty is because you have more wiggle when we discussed that before for editing purposes well means if that's your limitations that's the limitations you're only limited by the technology that you have presently available to you so what's good about these is you can you set it and forget it kind of thing like if you know you want twenty four frames per second and then you just know ok that's s o I want that's the shutter speed I want and just very replicator and I'll say it one more time make sure every single camera on set is completely in sync ok it's already good so this is when I intended to tether to show the back of my camera do you want you know how to set that up instead of the the all those settings sure but I'm here to make it easier for you ok okay so first on a mark three push the video amongst everything else we're completely out of focus right now I'd personal care cause we're just switching settings so if you scroll over let's see I'm gonna start on the first page scroll over to have my white balance obviously can switch my weight balance I'm not gonna go ahead and do that for this specific segment picture style I can select set picture style depending on what I'm trying to find for today we're just going to switch to let's say portrait okay I can also select let's see next frame we have movie record size I can switch my science and this is what we talked about the palaces him out in the uk and outside the united states you can select your your settings based on what you're trying to shoot so the can in front of the mark three is shooting nineteen twenty twenty four frames a second twelve eighty it sixty frames a second what it says on here so that's seven twenty at that point but at least you guys can see the difference is that I'm gonna go back after I said my settings to nineteen twenty oh I can actually switch my sound recording levels will discuss that a little later I keep everything in manual silent life if you want to go and switch that but that's basically the controls that you want to stick with is the nineteen twenty ten eighty from there I'm gonna try to turn this upside down okay for everybody I hate to say this you this is one of those read your manual kind of everybody's cameras different like I can't it won't do any bible all that much good I've selected twenty four frames a second so want to be it fifteen regards tio my exposure I have my s o set to twelve fifty which is an increment of one sixty and then my amateurs what really what I'm going to use to judge lighting so that's perfect moving your camera and stuff to start off with don't move your camera seriously don't have a camera if you were just trying to like get your settings right what you would do instead is move your subject you interject movement through subject movement whether it's them moving across the frame or somebody's dress blowing in the wind something so you can start off like that start off walked down on a tripe on shooting on a model hod with whatever you have you don't need anything you really don't most of the films that I've done most of them are trifon and this that is almost all of them if it's not the tripod anus it's the tribe or it would be the slider in this we'll just rephrase we want to make sure that you get a video try but because any time you say that correct anytime we've used ilia an actual tripod again it goes out we can show you guys that a little later when we talk about sliders yep and this particular one we're gonna we're gonna break this down right now but this is the atlas uh synovate atlas f lt so wilbert will show you that so anyway video tripod a slider that's it so it doesn't need to be complicated so let's take a look at a couple of things you took over this part so cameras in subjects they don't physical plane a three dimensional plane right we see them in two dimensional on a flat screen on the flat service but there's really three dimensions there um which is you have your x y and z a plane I'm looking at the the next screen I wait so we have any plane that we're working on you have up and down which is your why access this goes back to basic algebra so anybody who's here and your inner just like I am and you liked algebra for whatever reason this is your cousin but not so okay so your ex access left and right and here's the access which is frightened back so you have all these planes that you can use using motion any type of emotion to replicate excuse me any tools to replicate motions so I can move with a vertical slider we'll discuss that in a moment up and down the y axis I can use a slider to move left and right I can also use a slider to move towards in away from the subject so when most people think about this they think about okay I slide it left to right but what about just putting it forward it creates now a uh an interesting effect where you're just going pulling away and towards the subject you kind of get a a dolly shot that way all right I want a little lovin in film school this is why I say the videographers that bountiful film school gonna hate me there's um there's a bunch of key terms that they used they talk about total pans oon pedestal dolly and truck each of these has their own uses in cinematography when you're using one of the cameras that using a video set percent tilting is basically nodding your head yes it's dis motion so when I'm using this this'll ahead here as I'm unlocking ongoing actually set the whole thing this is tilting just that motion of yes panning is same thing not in your head no so if I go ahead and unlock this this is the no no way so I can do that slowly but that's more or less how do that zoom we talked about the illusion of movement you mentioned don't zoom especially if you're first starting off and you're just tinkering it's very jarring to your specific subject it's more of an advanced move pedestal moving your camera up and down so like the slider that excuse me vertical slider that we have here it's an up and down motion exactly so just lifting above and below your head so I don't work out I think she's tired at this point she's like yeah same one day we'll go over the vertical slider and a bit dolly which we talked about moving forward in a way from your subject just there and trucking is going to be moving your camera left and right physically so moving across the plains to the actual spiderman vs panning would be turning the camera you guys has just gone to film school um in about five minutes in a few minutes two minutes okay so deep it where is it um so the important thing to know is you don't need to know what they're called dude listen it would need to know what that's called and I've actually run into this is let's see you get more into directing and filmmaking communicating with people that get up hiring that's what I sound because I ended up getting hired for bigger jobs and so I would want to describe the move that I wanted and just be like you know when it goes like this instead of like having the correct terminology other than that just knowing the different moves you can dio and the tools that you need for that that's what you really need and well that again it gives you production values do you show that you you're legitimate in a certain sand points in a video world but you don't need every single time you don't need to do every single one of the shots to create a great video by all means you can select one week until like two or three or whatever you decide don't overwhelm yourself on the project just choose what you're great at a lot of these are the tools are great but you have to learn the technique in regard to the tools themselves because you can have something like a slider and if you're not doing it right is completely jarred jarring video and completely swooping everywhere we discussed how we made that mistake one for a start off so as we've practice and had time to practice like right now this thing's not level on the table you know if I would have used this you'd see that in the video so those little things that you want to kind of remember everything is physically balance and that's not the slider that's actually so if you were doing the tilt would you do it on a mono pod or just a tripod either yeah it seems to be steady enough even on the mono perfect officially I'll show you guys a clip a little later that was the first tool ever used was ahmadabad with its help I put the mono pod I think like eight feet in there not letting teo was like holding them off but I think this is fun like I thought video and putting a three thousand dollar camera above my head in a tree was fun so so I'm gonna go ahead and uh annotate everything and make it just completely simple panting and trucking he's gonna goto lateral movement left or right uh tilting and pedestals going verdict movement up and down and dolly and mixture is going to be mobile all around this is why I say videographer so hate me because I really want you guys to focus on the tournament is if it is a photographer learn as easily as possible I'm going to speak about lateral vertical in mobile movement it's fine that you guys know the technical terms for other things but these tools do those exact things I think a lot of the other terms were glorified because they've been used in uh in films so this is going to really cheesy and you guys were laughing is it's so well when you get a fire that's lateral movement left to right motion so it doesn't just have to be your camera in other words if you were like I don't have any of this stuff you can your subject can actually track the screen and that's what we're discussing if your if your subject is in a mid ground and they walk left to right that's literally lateral movement you don't only have to move your camera it's still video of your subjects crack tracking the shot itself which is great because that means you don't have to invest in a ton of equipment you just shoot what you need to get shot and if you are a little more advanced than we want to do narratives when we were talking about the actual having storyline just an interesting new when you're doing a narrative you're supposed to actually have your subjects always move in the same direction like left to write continuously so they're moving forward because all of a sudden if there have the moving walking whatever and another walking in the direction it it seems like they're backtracking like mentally to you so if you watch lord of the rings for example you know they're always traveling the same direction on their journey but when they're in trouble sometimes they had the other way because it's like they're backtracking getting stuck but usually would be left to write the entire time so that might be something you would do narratively so vertical movement seven concealed travel of knowledge journal it much in life is going to move that far up so you're talking about like basketball players something basketball players that would be great as a matter of fatso if you shave any basketball players at any given point vertical movement and we talked about across the sea access moving towards you or away from me which is mobile movement you also have if you turn this whole set up side down or right side up and you're looking at a top view of the city this is also considered mobile movement so anything that's moving around so if you guys are using something like the dj phantom and the little quadcopter and your recording video that way all your subjects if they're below you that's still considered mobile movement cause they're moving across your screen so there's a different things that you can use even with a stationary camera to capture and it's still considered movement so it's subject movement in camera movement interpreting are making two to work together to create your piece
Class Materials
bonus material
Ratings and Reviews
a Creativelive Student
This great workshop helps me to start a new experience with video, Lindsay and Jeff are so clever with a teaching very easy to follow, now I know the basics to work with movement, I got a new vision on how to take advantage of many years of photography experience, this is a new medium but image itself is the same, I recommend this to any newbie interested on getting a solid base to start.
Elly Alenka Dream
Fantastic class! Watching it in 2019 - and still finding relevant. Excellent way to ease photographers into the scary waters of video footage and production... and perfect for somebody who already has some basics to take it up a notch and challenge themselves quite a bit! Loved this class, very helpful.
a Creativelive Student
I bought this class because, I recently bought my first DSLR with filming capabilities. But when I start looking at it and after watching a couple of instructionvideos on YouTube I kinda got overwhelmed. This class broke it all down into clear pieces for me. Lindsay and Jeff have nice and clear teaching style. They covered everything but didn't get to far into the nitty gritty details. They always told how important something was and if you have to do it in a certain way or that is your artistic choice. I certainly can start off with making video with a lot more confidence now. The course is packed with information. It took me much longer then 3 days to watch and take 37 pages of notes!