Lesson Info
8. Share-Worthy Food Pictures
Lessons
Class Introduction and iPhone 6s Overview
04:50 2Quick and Hidden Tips on the 6s Camera
15:17 3Light, Composition, and Camera Angle for Your iPhone
14:17 4Using Outside Light to Your Advantage
02:28 5Composing Beautiful Dog Pictures
04:17 6Creating Memorable Group Pictures
06:01 7Tips to Taking a GREAT Selfie
02:54 8Share-Worthy Food Pictures
05:57Lesson Info
Share-Worthy Food Pictures
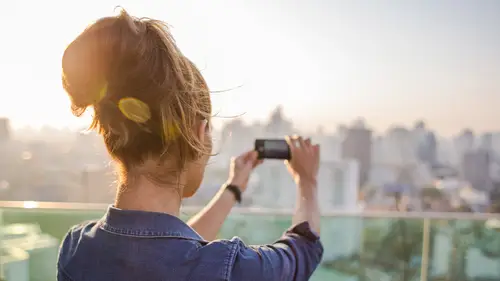
If selfies air the number one image that people take with their iphone food is probably the second any time you're in a restaurant and you've got an amazingly appetizing meal in front of you the first thing you want to do of course is snap a picture with your iphone and posted on instagram or facebook or somewhere where everybody can be jealous of what you're eating that night well, there are ways to make the food look even better than it tastes so I want to show you a couple tips and tricks for photographing your food because we've all done it who doesn't want to and you have a beautiful sunday desert in front of you make all your friends tell us that this is what you're eating tonight and I see so many food images on my instagram feed some of them are done well and some of them were not there's a couple simple things you khun dio tio you know up your annie for making it a better image first of all put the food on a pretty surface and clear the clutter you know? So even if it's on the...
dinner table at the restaurant where you're at you just make sure you set other things aside or place your your fork and knife in a pleasing manner around another composed the shot make it look don't just randomly take the image without planning a little bit secondly make the food look, now we've put together this little fruit plate with the different colors to kind of give that rainbow feeling of color, and I've also placed the plate of food very strategically on the table, so between the two cracks, so he creates some nice, even in very symmetrical composition. Secondly, or thirdly, I should say, really, keep in mind, you're lighting direction. I have this big window right here, and I want to back light my food almost all commercial photographers with autographed food for a living. If you look at magazines that you know bona petite or food and wine magazine, you'll see that most plates of food are what we called back lit, meaning the light is behind the food what's put it this way, the light the food is between the light and the camera, so I'm going to shoot it from in this direction, okay, so you can just buy influencing your camera angle, you can create some pretty interesting images. You know, I could just shoot this from above nice and clean like this to create a simple image that's, very square and symmetrical of my food. With the light coming from behind or I can kind of come down to this camera angle here, my lighting begins to change a lot, you can see that how cool that is that all of a sudden everything's backlit we start to see highlights and shadows and it makes for a much more interesting shop. Ok, so back lighting your food is one way to make it look really appetizing and textured. Another thing you khun dio is make the light more even by using things that are around you, so for example, I can take this piece of paper, so obviously you're not going to have an eight and a half by eleven piece of paper in you know you're with your self in the mill of restaurant that you do have a menu, so if it's a light colored menu meaning light bright, it acts as a reflector, it'll bounce the light off of it so I can literally bring the sheet of paper in close to the food and you'll start to see the shadows go away. So for example, if you look at it without it and then ad in the paper, you'll start to see the shadows kind of disappear a little bit and the light begins to fill in over here because it's bouncing off the window off the paper and onto the food. Now you want to make sure it's a light colored paper because if this is read it's going to bounce red light into your food, which could be really cool but just keep note of that that the color of the paper will definitely impact how it looks, but I can take this piece of paper, bounce some light on my food, take the shot and then I'll show it to you without the paper and you can see there's definitely shadows on those grapes and with the paper keep things fund symmetrical and backlit you can even see the highlights on the dark blackberries there this but you know how you could see the white highlights and how it gives it texture in three dimensions so backlighting your food is a really great way to make it look beautiful other piece of other food it works the same way so it doesn't matter if you have fruit or for example, a cupcake and we have two cupcakes here one that matches its background and another that pops off of it I kind of since we use the fruit before, which really popped off of it like I want to use this caramel colored this looks so good I want to eat it and I'm gonna go ahead and cover there's a knot right here in the woods is going to cover the knot with the wood and just again back light it to create an interesting image and I don't really like that um line in the woods, so I'm going to go ahead and get rid of it but you can see by backlighting I'm creating the shadows in the front that create kind of dramatic look. Now I could shoot it from the side and create another interesting look with the lines on the table. But I think the most important lesson I want you get out of it is lighting direction, color. I have a very monochromatic scheme, but it still looks delicious because it all works together and makes a pretty image and also camera angle. Are you going to shoot it with a light from the side, the light from behind over the top? How are you going to create something interesting that that keeps in mind color, composition, camera angle, texture, all that stuff to make the food look more appetizing, so more texture and highlights. You can give some food, the more yummy it looks on the board. Jealous. You're going to make your friends that you got a date night with your hubby or spouse, eating out someplace wonderful, and they didn't.
Class Materials
Bonus Materials with Purchase
Ratings and Reviews
user-83baf3
I loved this...Julia was awesome, the quality of the course was amazing and now I'm going to go upgrade my iPhone 6 to 6s b/c I loved this so much
user-df9be0
Julia did a great job covering more than just the basics about iPhonography and the upgrade to 6s. I shoot professionally and was able to glean many great tips from her. Her suggestions on lighting, composition, etc are outstanding and well worth the time to watch this video. Thanks, Julia! I'll look for you on social media and begin following your work!
a Creativelive Student
Easy to understand, clear descriptions of iPhone capabilities, settings, and examples--and invitingly presented. More than just a description of the phone, etc. I feel excited and capable to take more and better pictures because I am more equipped to try new ideas rather than just point and shoot as usual. Lively and fun to watch! I watched the entire class!