Lessons
Class Introduction
02:51 2Gear: Camera, Flash, and Triggers
27:05 3Gear: Modifiers
11:03 4Camera and Flash Settings
20:12 5Building Exposure For Outdoor Photography
22:12 6Shooting in Direct Sun
23:32 7Shooting on an Overcast Day
18:28 8On-Camera Flash
15:23Lesson Info
Camera and Flash Settings
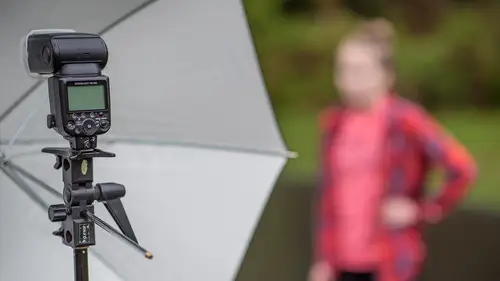
So, the next, the next segment here is I wanna start showing you some photos. Now, that we've talked about the gear and the tech, I wanna start going through the camera settings. What do we need to know about ISO, shutter speed, aperture? So before this class, actually last week, we spent some time outdoors and we did a bunch of pre-shoots out in the field, and throughout the rest of the day, we had these pre-shoot videos to show you. It's basically me saying the same thing I say here in the classroom, but I'm doing it outside on location. So, let's go into our first one, which is all about camera settings and flash settings, and then, when we come back, we'll ask questions, and I'll answer those questions. Here we go. You can see we've got a cloudy day, so what's going through my mind is I'm trying to understand what ISO I want to be at, what aperture I wanna be at, and what shutter speed I wanna be at. So, in the studio a lot of times, you're maybe trying to exclude the ambient light...
, you know, you're trying to exclude the fluorescent lights or, or the incandescent lights in the studio, but out here, when you're shooting outside on location, a lot of times you want to incorporate the ambient light, and because it's a cloudy day, I might wanna actually use a little bit higher ISO. So, before I go into the, all of the settings of the camera, let's set the ISO, and on this camera, this is a Nikon D500, I'm just gonna push the ISO button here, and then rotate my thumb dial and you can see I'm changing my ISO between 100 to 200. I think outside right now, I'm gonna go with an ISO 200 as a starting point. As we shoot later on today, I might go up to 400. We'll see how it goes. Okay, so let's go through and talk about the other camera settings. One of my favorite things to do is basically go around the camera body, pushing the buttons that pertain to my exposures and my, my shots. So, I usually just start down here in the lower left and work my way around, let's do that. Over here on the left side, there's really nothing on this camera to adjust. On some cameras you'll find your ISO button, you'll find your white balance button up here actually. So, let's go and push the mode button. The mode button changes between program mode, shutter priority, aperture priority and manual mode. For most of my location work, when I'm on, when I'm outside, I like to shoot in manual exposure mode. It gives me full control, it gives me the ability to, to say, "No, I just wanna adjust aperture now "without shutter speed changing," or vice-a-versa, okay. So, next is white balance. Well, it's a cloudy day, so I'm probably going to choose cloudy white balance if I'm concerned about the ambient light, but you know, this is a flash class, and we're thinking about flash, the color of flash. So, I'm actually going to choose flash white balance, in fact, let me show it on this, on this screen here. It's a little bit bigger. So, white balance there, and there's a little icon in the lower right hand, it's a part of the screen. It's a little lightning bolt that stands for flash white balance. Okay, next, I'm gonna go back here on top because that's where the button is. The QUAL button, well that's the image quality. I like shooting raw. Raw is where it's at, as far as I'm concerned. It gives me a lot of flexibility later on in software to adjust my exposures. The next button here, is my metering mode. For most of my metering, I use matrix metering or multi-pattern metering, and I'll use that today, and I'll explain as the day goes on why that's important. Alright, next, we have this, this dial here. This is my shooting, shooting mode dial, in other words, how many frames per second. Right here, I'm gonna set it for S for single frame rate. This camera shoots at 10 frames per second, and there's no way, if I was in continuous high, there's no way the camera could, or the flashes could keep up with me. So, I'm gonna save in single frame rate, in other words, one shot, and then kinda reframe, take another shot. Alright, now let's go back over to here. ISO, we already talked about that. That's a very important one, we'll be changing ISO as the day goes on, and then, here we've got exposure compensation, and this basically, this button here, adjusts the brightness of the background, but I'm gonna be in manual exposure mode. Well how do you adjust the brightness of the background in manual exposure mode? Well, you just adjust your shutter speed or you adjust your aperture. So, I don't really need to be using the exposure compensation button, rather what I'm doing now is I'm just checking to make sure it's actually zeroed out, and it is, it's at 0.0. Alright, now, the next things we've gotta be thinking about is aperture and shutter speed, and to show those, I'll go to the big screen on the back, so it's a little bit easier to see. Here you can see I'm at f5 and I'm at 1/80th of a second, and you can also see on my exposure line, it says I'm really over-exposed. You know, I'm at one, two, three. I'm three stops over-exposed. So, I need to adjust my shutter speed and aperture down to where it's kinda zeroed out, and now you'll see I'm at f5 at a 640th of a second, and that doesn't make sense really for flash photography, as we'll explain in just a little bit when we talk about flash shutter speed synchronization. So, for now, maybe if I go something like f/8 at a 250th, or so, that's about, that's about right for a starting exposure. A lot of people want to start with the flash when we're talking about flash photography. It's like, "Oh, I'm outside, I'm doing flash work, "I'm gonna start with the flash settings," but that's the wrong approach. Really what we need to do, is we need to start with the camera body, get all of that squared away, and then, once that's ready to go, then we start going to the flash. So, let's do that now. Alright, so I'm using the Nikon System, but what I wanna point out here is that everything I'm gonna show you is really translatable to Cannon, or Fuji, or Sony. Most of these technologies that I'll talk through have analogs in other camera, in, with other camera gear. So, this here is a Nikon SB-5000, and when I turn it on, I'm gonna turn it on to the remote setting, alright? And today, I'll be using a mixture of different types of triggering technologies, but for this example, I'm just gonna show you that I'm gonna trigger it with the Nikon Creative Lighting System or the Nikon Wireless System. So, this button here, when I push this, this toggles between different wireless, remote modes, okay, and for this situation, I'm just gonna go here to remote, and it says, Remote TTL. The next thing I need to be concerned about is the channel and the group, okay? So, you can see here I'm in channel five, Group A. So, in my camera body, I also have to set my camera body so it's speaking to channel five, Group A. The next thing I'm gonna check is make sure that it's linked up, that's what this little green light is here on top, it's linked, and if I pull my camera up, you can see that the transmitter here also has a green light. So, I'm linked up, everything's synchronized, and that's it for this flash. You know, just make sure you have full, full batteries, and you're ready to go. All of the other settings in these wireless remote systems happen from the transmitter, and in this case, the transmitter is the camera body. So, let's go now into the settings in the menu to talk about the flash set up. So, I'm here, I'm in what's called the Photo Shooting Menu and then, I scroll down here to Flash Control. I go into that menu and I set it for, for the Wireless Flash options. You can see I've set it for Radio Flash Control. Remote Flash Control, this guy, the Remote Flash, where do I want that to be? Well, there's a couple of different options. In this case, I want it to be in the Group Flash Settings, okay? So, this will be one flash in a group. Next, is the group flash options. So, remember here, we show we're on Group A. So, Group A, and here it says I'm in TTL mode for this flash, which is fantastic. This is where I wanna be to start off, but as we'll see throughout the day, sometimes I wanna be going down to manual flash mode, and then, to change the power of that flash, I can go up or down with my multi-selector. So, like, this will be manual output at 1/8th power, okay, but for now, we'll leave it at Group A TTL, and then, if I need to change the compensation or the brightness of that flash, I just basically go up and down from here, and then, to set that in place, you push the OK button, and the OK, pow, we're good to go, and then, Radio Remote Flash Info, well basically it just says, "Hey, that's an SB-5000," and if I had more flashes in the set up, it'd show me different flashes and I can kind of control each of those independently. So, anyways, when you do flash settings, the flash settings are very limited. Really, what's happening is you're just telling that flash what you want it to do. Do you wanna go manual output, do you wanna go TTL? And that's it, the flash just kinda sits there and does its thing. So, there's camera settings and flash settings. Well, let me just summarize the most important aspects. All flash photography begins with the camera, okay, so even though we go out and you buy this $29 flash or this $500 flash, it doesn't matter. You should always base it with the camera. So, the important things are setting your ISO. Most of the time we're dealing with a little speed light, one single speed light, and we don't have a lot of power. So, I would bias my ISOs, in general, a little bit higher, okay? 200s, 400s, somewhere in that range, but you're gonna see it throughout the other videos that we produced here, a lot of times I'm even at 100, and sometimes I'm at 50, so there's no good answer for ISO. You're gonna use the right ISO for your situation, for your environment. Apertures, for this type of flash photography, I'm always between f/28 and f/8, okay. Very, very rarely am I going to f/16 or f/22. The reason why is these flashes just don't have enough power to pump through that little aperture. So, that's the downside to using these small flashes. How would you shoot f/16, f/22? You have to have two flashes, three flashes, four flashes. So, if you need more depth of field, for example, if you're photographing an automobile. Let's say your neighbor has a 1957 Chevy and he just painted it and he wants you to photograph it, and you need from the front bumper to the back of the vehicle in focus, well you have to be at f/16. The only way to do that is to bring in more flashes to the party, okay, and maybe even flashes on different light stands, you know, throughout the length of the car, so, in general, if you're using one flash, stick around f/4 to f/5, six, somewhere in that range, okay. Shutter speed, well, we're limited, right? We're limited to a 1/250th of a second or whatever your camera's maximum sync speed is. So, for the camera I have here today, that's 1/250th. I have other Nikon cameras that are 1/200th, and I know a lot of Canon cameras are limited to 1/200th. Some Canons go up to 1/250th, so just keep that in mind. Whatever your shutter speed is, initially, you can't go above 1/250th, and you'll see why in a little bit, and then, sync, shutters sync, on each camera you have the synchronization mode: normal sync, rear curtain sync, red eye reduction modes. These are synchronization modes. You have to set that, in generally, for rear sync, because if there's any movement, you want the blur to be behind the action, behind the activity, okay. Well, how about flash settings? In my mind, even though our flashes these days, especially like the $500 Nikon and Canon flashes, they have five to seven exposure modes on them: TTL, TTLBL ... RPT ... GN, Manual ... That's five and I know there's, oh, there's A, there's AA. So, you've got all of these different flash exposure modes. I think there's only two that you need to worry about, TTL and Manual, okay, and most of the stuff that I do, I use manual. I use TTL when I shoot an event. I just shot an event, a fundraising event this weekend, and I shot TTL because I'm moving around, right? I'm photographing here, I'm photographing there, the light's bright, the light's dark. TTL allows you to do that quickly, but when I do this outdoor portraiture, I'm almost always in Manual, 'cause the light stand is there and I've got my subject there, you know, the flower's not moving, you know, so, when things are stationary and I'm on stands, I tend to go with Manual mode. Pretty simple, flash settings are easy, two options. Flash power, that's the next thing. In TTL mode, we're dealing with, see TTL's a little bit different. TTL is through the lens metering, and what the camera's trying to do, is trying to make the flash make a medium brightness exposure. Middle gray, you've heard of that term before, or 18% gray, that's kinda what the flash is trying to do, make that exposure so it's middle of the road. Well, middle of the road is, well, it's middle of the road, and sometimes you want it brighter and sometimes you want it darker. So, in TTL mode, you're like, you go plus one. Plus one means one stop more than middle gray. Minus one means one stop less than middle gray. So, typically for outdoor flash photography. You've got what I call the key light, and the key light is, del sol, the sun, okay. The sun is the key light. Your flash most of the time is the fill, is the fill light. So, the fill is almost never as bright as the key. So, almost always when I'm using TTL, my fill starts out at like a minus one. It's just a good kinda starting point, and as you'll see in all these videos that I produce, that we produced, I'm changing the power all the time, but I generally start my outdoor flash at about a minus one when I'm using TTL. How about Manual mode? Well Manual's different. Manual, there is no metering from the camera, You're doing it, it's manual. So, you're actually deciding. You're like, turning the volume dial, zero, you know, all the way up to maximum. So, what is maximum? Well, all of these flashes have a maximum power output of one over one. That means, 100% power, full power. So, one-half, so if this is, if this is one over one, half power is half of the brightness, quarter, eighth, sixteenth, thirty-second. So, you're controlling the power based on whatever the full dump is, the full power output, and as I say again, you might need two or more flashes, like if you, if you're maxed out at one over one, or if you're, even in TTL mode, and you're at like plus two or plus three, and you're like, "Uh, it's still not pumping out enough light. "I need more power!" The way you get more power is more flashes. So, before I get to the next section, the next section is building your exposure, let me just see if there's any quick questions on camera settings or flash settings. So, when you're shooting in certain places, there's really deep shadows, on the video you said to expose your camera first. How important is it to, to expose to those shadows or those highlights depending on your environment without considering the flash? Yeah, good. So you're gonna see, in fact, I'm so happy you asked your question now, 'cause it's the perfect segue to the next video, and the next video is all about building your exposure. So, the way I like to work, and again, this is one man's opinion and I know all those out there in the internetland, you may have a different approach to this, but the way I work, is I start with the ambient light exposure. So, I take my pictures first with no flash, and I look, you know, all of our cameras have a screen that has a blinky, a blinky screen, it shows you the blown out highlights. So, I'm looking, for example, on the shoulder of the photo. Am I blowing out the shoulder? Or a hair on the forehead. Before I even add flash, am I blowing anything out? So, a lot of times, I will set my exposure so I get no blinkies or no blown out highlights. Alright, that's my base exposure, my ambient exposure, then I add the flash in to fill in those shadows. So is that really what you're asking? Yeah ... And also just considering, you know, backgrounds and like off, off subjects. Yeah, so like, is the background in the shade? Right. So this happens all the time. Is the back, in fact, one of the photos I'm gonna show when I show a shooting in the sun, the background was actually in the shadow, and that's a different exposure overall than if the background's in direct sun, and so, there's no easy answer for you other than, maybe the best answer I have for you is what is your artistic desire for that photo? Do you want the background to be darker to make the photo look a little bit more moody, a little bit more heavy? Do you want that background to be darker and airier, to be a high key photo? If so, that's where you set that base exposure, okay? And then, your flash just fills in from there. So, I know that wasn't a specific answer, but it's really about your artistic decision, how do you want it to look. Thanks. We'll just do one question this is from Ralph Soma who's wondering, "Is there sort of a consideration "in terms of the largest size softbox or umbrella "perhaps that will work efficiently "with just one speed light "before it gets too big for that power?" Yeah, great. You know, when I first started out, like everybody else here, I bought a softbox and an umbrella because everyone told me, "You need to have a softbox and umbrella." So, I bought an umbrella, it was like this big and I bought a softbox that was like this big, you know, 'cause it was only $13 (chuckles), at the local camera store, and I was like, "Oh, cool!" And no problem, your flash can fill all those up, but then I got this mind, thought in my mind like, "Oh, if I get a big softbox, "then I have to get big lights "because those big lights will fill the softbox." Well, what I found over the years is all of my big, huge, honkin' stuff works just great with my little speed lights. Here's the thing, you just have to make sure, I'm gonna walk over this way camera folks, so you can see, you just have to make sure that your flash fills the entire umbrella. So, in this case, when this flash fires, you're gonna, the angle of coverage will only actually go out to about here. So, how do I fill the interior of this umbrella? Ah, great solution. These little diffusion domes that you get for free with your $500 flash. This little plastic thing, it's worth its weight in gold. You just put that on there and now, what that does is it causes the light to go everywhere and fill up the interior, and the same thing goes for softboxes. If you use these little diffusion domes, the light will actually shine to all corners of the softbox.
Class Materials
Bonus Materials with Purchase
Ratings and Reviews
Brandon Couch
This is the second class I've taken with Mike and it was amazing! So easy to understand even when you get into the "tech" side of how flashes work but especially when using them outside and how easy it is. I would totally recommend this class to anyone wanting to take amazing images outside with one flash. He even makes bare bulb flash look awesome. Such a great course!
SunSoBright
Mike Hagen has become one of favorite instructors. His instruction and question answers are clear and concise and he has a real world approach. He has a friendly and approachable personality. Best of all during this course he works by himself which makes you feel you too can accomplish the shoot on your own. Mike demonstrates a practical approach with affordable equipment as he is aware many photographers starting off do not have a huge budget. In his other course on using your first flash he also had several gear set suggestions based on budget which was so thoughtful and helpful. I hope Mike does some more advanced courses as well and I will keep watch for his name on the course schedule. A definite thumbs up for photographers starting off using flash.
Laura K.
I have watched a couple of Mike Hagen's classes, and hope Creative Live will bring him back to teach more. He is a fantastic, thorough, easy-to-understand instructor. He doesn't assume viewers already know certain things. He is humble and diligent and truly wants students to understand and learn the things he is teaching. He breaks things down and explains things better than most, and he doesn't hold back on details. Mike also provides helpful handouts/written materials to supplement his videos. I really like his classes and teaching style, and hope to be seeing more from him in the future.