Burning & Dodging on a Smart Object
Lesson 5 from: Introduction to Layer MasksRafael "RC" Concepcion
Burning & Dodging on a Smart Object
Lesson 5 from: Introduction to Layer MasksRafael "RC" Concepcion
Lesson Info
5. Burning & Dodging on a Smart Object
Lessons
Class Introduction
04:00 2Quick Ways to Make a Selection
13:03 3Create a Layer Mask
14:24 4Adjustment Layers Overview
10:11 5Burning & Dodging on a Smart Object
04:56 6Quick Color Correction With Layer Masks
06:22 7Advanced Selection for Layer Masks
13:01 8Smart Objects & Layer Masks
17:12Lesson Info
Burning & Dodging on a Smart Object
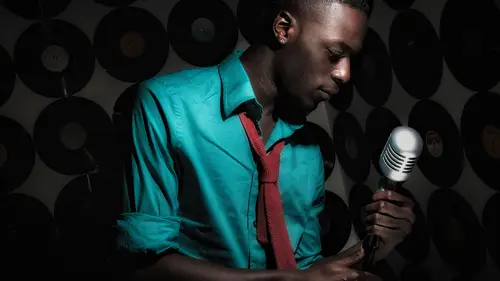
This is a picture of a friend of mine destiny that we did Ah, shoot for How do we apply these concepts to actually finish a picture? Well, I can do some camera while raw work over here and what I want to do just to kind of prevent myself from kind of messing anything up. But I want to make sure that I keep this thing in a state where I can go back and edit stuff. Remember that inside of camera raw, whenever you're open up something, if you click on open image all the way down here, what is going to do is it's going to take that information and turn it into pixel based data, which then has a much more limited range for you to be able to push or pull or change any kind of color. So I'm a big fan of Look, I'm gonna keep as much as I can, just in case someone had the shift key. And as they hit the shift key, you'll notice that it turns into open object. So any time that you work with something in camera raw that you want open is a smart object just click on the shift key. It'll open it as ...
a smart object. Now we have this set here, and you'll notice that the icon that we have for this layer is a different type of icon. It's a smart object, right? I can make any kind of adjustments on top of this, but should I need to go back to that actual raw file? I could always just double click right on here, and it brings me into camera. I can pull shock and pool. I can edit. I can modify whatever it is that I need. Click OK, and that change has been made. So now let's go ahead and apply some of the stuff that we did. And I did this previously, and I didn't talk about it. So do you want to highlight it? Instead of going into a layer layer? Just are adjustment layer and selecting one of the masks. You could always just do it over here with the black and white cookie. If you click on here, you'll see that you have a bunch of different things that you can get to that we just kind of show you the full list. So you can get a lot of the different things that you want right from inside of the layers palette. What? I'm gonna do something. Come back over here. I'm gonna go to curves There's my curves will darken it, Grab another one, grab my curves, Brighten it. So this is our burn. This is our dodge again. We'll grab this will invert, invert And now dodging and burning is done. All we have to do here is select a brush low flow color of white, make it bigger and now burn portions of the image like I don't want I don't want any attention to the sidewalk. I wanted to just be him. There's one adjustment. I want to put a little bit more adjustment onto his hat. So I'm gonna go to Dodge when you zoom. When we're talking about zooming right command space bar, we can zoom in and get right into the hat. Another thing that I think that a lot of people tend to overlook is that when you're zooming, zooming is relative to the area that you happen to select from. So if I want to work with his hand and I do command space, part If I zoom on his hand, I'm gonna get to his hand. If I zoom out and then assuming his hat, I could get to his hat. If I want to work on a button for zoom on the button, I could get into the button. So just little things like that, Like all of a sudden, you're like, when you're working, every second counts every time that you want to be able to add something to It's little things like knowing Oh, I'm gonna work over here. Someone zoom right there. You can get to exactly where you need to go. Now I want to do one more thing here on the hats. Wanna bring this hat up and gonna make my smaller brush? Look ahead and we'll just bring that up here. We'll take the brim and we have that set and then I'll just call this Dodge Hat Command zero to zoom out. And now take a look if we have the before turn turn. That's where we That's where we were because you had a little bit more after. If you want to do it easier, you just option. Click on one of the eyes and it will turn all of the other eyes off option. Could be. I again turns all the eyes on so before after before after, and it's just that kind of adjustment that you can use to move stuff around.
Class Materials
Bonus Materials with Purchase
Ratings and Reviews
Dave Sordi
Great class. Lots of really important tips. RC is really good at understanding what question a student might have even before the question is asked. Highly recommend this class.
Zolti
It is a pleasure to watch him, and he manages somehow to keep your attention from the start to the finish without realizing the passing of time, He explains the do's and don'ts with Layer Masks, how to use each of them and when, I just simply loved the instructor and the class. He is one of my favorite instructor from Photoshop Week 2018, and if I could not buy all the bundle, but I would buy some classes, his are definitely chosen.
Mark Koller
Awesome class, love RC's style. Intro to layer mask is loaded with goodies.