Lesson Info
3. Cropping
Lessons
Introduction
00:59 2Lighting and Concept
02:07 3Cropping
02:38 4Bringing in the New Background
02:44 5Masking
32:02 6Creating Depth
07:27 7Painting Wet Rain on Costuming
28:45 8Creating Rain Drops
15:06Lesson Info
Cropping
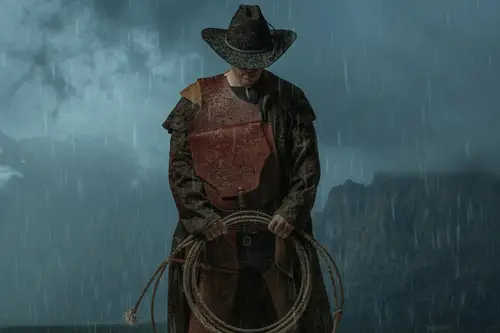
So the first thing I want to do with this image is cropped. Now, I believe in using your keyboard shortcuts as much as possible. So I'm gonna walk you through that. We're gonna hit the letter C on your keyboard for Crop, which is going to bring up this little border thing here. So crop is on the left hand on your toolbar here about four little doo doo doo thinking meticulous. I don't know. Buttons down four or 51234 It's the fifth anyway, So we are going to change the aspect ratio of this because this image is nice as a vertical, but I really want to make it a horizontal shot. So we're gonna grab the crop tool. And right now, here I have clicked your original ratio. So that means that my image is going to stay, um, as an eight by 12 perspective or whatever the real word is for it. But anyways, this means I don't have to hit anything on my keyboard to change the aspect ratio. Uh, this is going to stay exactly the same. So this is actually kinda handy because you can change it to 1 to 1 ...
square four by 55 by 72 by three, etcetera, etcetera. I think we're two by three. Um controls you anyways, so we are going to crop this. And if you take this down far enough and then just pull your mouse away, it automatically will flip for you. I used to do this all the time. When I was doing Cropping is I would like, rotate everything afterwards. It was a mess. I'm so glad that we don't have to do that anymore. The other thing I want to correct with this image is that he took the image crooked. This is what happens sometimes. I don't hold my camera very a study very often, especially when in the studio. I'm excited. I'm working on something and I'm stoked. I tend to get a little wobbly with my lens. So what I'm doing right now is I'm just paying attention. Two his shoulders and I just want his shoulders and the hat that kind of straighten up. You can also adjust it a little bit by hitting the over buttons on your keyboard. If you want to get a little bit more precise with it. So I'm trying to make sure that the distance between the hat and the edge of the frame is similar to the distance to the bottom of this little frizzy, frizzy part on the last suit to the edge of the frame. So I just wanted to be similar, and it's looking pretty good. So if we want to accept that, we just hit enter on the keyboard and we have cropped and straightened our subject.
Class Materials
Bonus Materials with Purchase
Ratings and Reviews
Steve Vick
Great hands-on course. I love Renee's straight forward approach. This is the tool, this is what we are going doing with it and here's how to use it. For me it is the fastest and most practical way to learn. No fluff, no long-winded stories... just doing! In some of the other courses I viewed, I find myself skipping ahead waiting for them to get to the point. But this course has a great pace. I will certainly look for more from this teacher. Thank you.
Lukas Ujma
Greater, nice work! Semply and clever.
a Creativelive Student
I've been compositing for a few years, but masking a subject always presents its challenges. Renée gave a series of tips that were very helpful, including information about how to use the "burn" tool to enhance a mask. That's something I'd never done before. Can't wait to try it! The part of the lesson that explained how to make the subject look as though his clothes had been in the rain was also an eye-opener. The method is simple, but the results are outstanding. I had tried making my subjects look as though they had been rained on, but it never looked real. Now I know how to fix that!