Lessons
Lesson Info
Backgrounds 101
So lots of different purposes for journal, but today we're going to talk about an art journal that's just to play and experiment, and so we're going toe face that blank white paper, and we're going to create some really fun stuff. You guys ready? All right, so let's, go ahead and open up our our journal page. Uh, so that you have two pages facing each other to blank pages. And what are you going to deal with us to blank pages? It's? Kind of scary, huh? I'm often times I just open it up to the middle. I don't even start at the beginning because I may want to go back and do something very special in the beginning. Yeah, you just open it up. It doesn't matter where it isthe it's all play really doesn't matter what we're going to do it. So this isthe watercolor paper doesn't really need to be primed or have any surface on it. But if I do use jess oh, which is like a primaries for your walls. Just it was a primer. They'll pre prime canvas with jess. Oh, we're going to use it is a little bit...
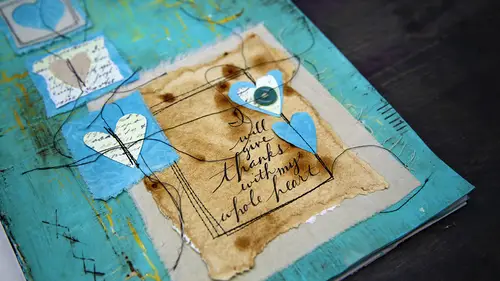
of a layer on the watercolor paper itself, it will receive the paints and mediums that we use after this differently where it's on the paper than where it's not so we're going to use it sort of is a layering tool here you guys all have just so on your cart and you have a palate thank you art alternatives for your generous donation of the supplies were loving the jessa and the palate pads that we have today we're going to start out with a little bit you're going to take your palette knife get a little bit of just so out on your palate you're going to roll this out so that you have a nice puddle on your palate then we're going to take things that have pattern in them now all you have to do is look around your house to find things that pattern you might raid your recycling bin and find some bubble raft you might raise your kitchen and find attributed a hot pad that has pattern on it if you were in sorry about that kept stepping on him if you were in my last class which is all about making collage papers you guys made your own handmade stamps so you could take foam stamps teo ad pattern but into this puddle of jess oh, I'm going to take things like this precedent and then press it down this is white on white it's really hard not very great television right now sorry it's not very exciting yet but what this white on white is going to do that's going to act as a resist to certain mediums later so I'm just going to go ahead and roll our press that on I'm also going to take my breyer and roll it in some areas so I'm just taking the rest of the jess oh that I started with on the palate and rolling it off onto my page okay, not very exciting yet, but believe me it does get exciting in a minute we're gonna go ahead and get it dry by mixed paint with this well it's still wet it's just going tio mix the white with the paint color so we do want to get it dry just drives pretty quickly, especially when you put it down in a really thin layer like you have here it's not really really thick if it is thick that's great too it just takes a little longer to dry, but it will add, um texture on the surface at this point right side up doesn't matter you can keep flipping your book around and there is a front and back to the book that's one thing when I'm working in a book normally I create art journal pages by working on the loose leaf paper that's my preferred method and I bind them together into a journal when I've done a number of pages um one of the main reasons inevitably, when I'm working in a bound book, I do a page upside down it's just the way that it happens, but every you know, every bound book I've ever worked in, I end up doing something upside down, so just keep that in the back of your mind today and it's ok, if you do it upside down and just you know what, it's interactive, then when somebody is looking at your art journal, they actually have toe work with it, right? They have to turn it around. It's interactive that's what we that's what we call it. Ok, so we've got some jess oh, on the page, the next thing we're going to do is introduce some color and want to talk to a little bit before we introduce color about how to avoid making brown or chromatic neutrals. Our three primary colors this is review for most of you three primary colors red, yellow and blue. If I want to make brown, I'm going to mix all three of these together, brown or grey? Ok, if I don't want to make brown if I don't want my colors to be muddy, I want to make sure that I'm only using two of the primary colors at any one given time, so red and blue make purple, I can use red, blue, purple pink, because pink is just read with some white in it. Other shades of blue, other shades of purple. Any of these, no matter what I d'oh, I'm not going to end up with brown. Okay, back to my primaries, red and yellow make orange. Okay, I can use again pink because that's red with white in it. I can use orange. I can use yellow. I can use white obviously right light pink. Any of these colors mixed together are not going to make brown. Now, let me just say this. I love this color combo right there will be really tempted to to throw this lime green in because I love this lime green. I mean, he really tended to throw it in here doesn't mean that I can't ever use that color in combination with that. But when I'm talking about the wet techniques that we're doing, where we're actually applying the paint with a breyer, where we're rolling the paint out on the surface of something and applying it that way, if I don't want brown at that point in time, I'm not going to throw this in until later weaken layer this color overtop, but when I'm mixing them all together in a wet technique, I want to not throw that color in quite yet, you guys got it with the colors, any two of the three primary colors at any given time are fine once you throw that third calorie and you're going to end up with some brown mud, so with this technique, we're going to start with the lighter colors, so here I've got three choices of green I'm actually going to take the lightest color of green I'm going to take a blue and I'm going to take a yellow, okay, so no matter what I do with this combo right here, if I mix a mix in mixing mix, I'm only going to get green, even if I over mix it, what I'm going to do is I'm going to take about a nickel size to a quarter sized dollop of paint on my palate if you still have a lot of just so on your palate, either use a dry spot or just get tear that page often start with a new one minus pretty dry on there, and I'm squirting my pain out kind of close to each other, usually in a triangle formation. I know this sounds funny, like how do you put your paint on your palate, but it'll make sense, so I've got my paint, can you guys see that? I got my pain on my palate and I'm going to take my brera and I know we're having some trouble with these prayers earlier hopefully the bill, they will roll nicely for you if not just pull the edges out a little bit. I talked about briere's in another class and ah, breakers could be really expensive that's that rowley tool that you use for print making these air actually, clay rollers they're much less expensive but, you know, much less expensive you to get what you pay for, and sometimes they get a little bit stiff and so if you just take this wire and you pull it out a little bit, it helps it flow a little bit in sorry, sarah years not wanting to cooperate. Ok, I'll give you my breyer, eh? So what I'm going to do is I'm gonna hover my breyer over this puddle of paint, hover it over top and just like I'm buttering a cobb of corn corn on the cob let's remember that I'm going to hover it over the paint and I'm going to load up my breyer with these three colors, I'm going to start in one direction and then I'm going to turn it and however it and loaded up, so now you see all three colors on the breyer you see that now, if I were just a lay, lay my brera on their enroll, enroll, enroll it's going to really mix the colors rather than just applying them to the surface and the reason that I turned my pet my thing halfway through it so that I didn't end up with three stripes down the center that I actually have kind of a mixture see how mine's not like three stripes of color right down the middle so I have a mixture of paint I'm going to start on the outside edges and just start to roll some paint around the outside edges of my two page spread here I'm not covering everything up I am maintaining that white space and this is what I have. You guys see that my tilting it up far enough, ok? Not a whole lot of the white spaces covered up, but I do have puddles of really a thick paint around the outside edge is what I want to do into that thick paint is I want to find things with texture again, it could be this trib it it could be your bubble wrap. It could be this plastic canvas grid ok, somebody take this plastic canvas grid and I'm gonna press it down I got two choices of worry press it down, I can press it down into the wet paint that's happening on my on my page here that's my preferred method okay but if yours isn't wet enough you can actually repress it into your palate but I'm pressing it down into the wet paint and I lifted up anytime I press it down and I left lift up my tool it has paint on the back side of it so I'm pressing it down and sharing that paint from the surface in a couple of different areas so I'm distributing the thick wet paint from the surface of my journal page around into that white space into the white space in between where I've rolled the pain down again I have don't have the whole thing covered and if you are if your pay if your journal pages not wet enough you can do the same thing by taking your breyer and rolling it onto your whatever it is that you're using with texture or you can roll out on the surface of your palate I still had a lot of paint left there I can roll into that so I'm going to mix it up I'm going to do two different things take some bubble wrap is well tap tap tap out into the palate the paint that's there and share it on the surface of my journal and if I put it in two spots I really want to put it in three to just causes my eye to being bung being bung back and forth between the two but three especially if they're placed in somewhat of a visual triangle will allow my eye to travel around. The two page spread is one cohesive unit, so I've got my bubble wrap in one, two, three spots on the surface, so I've got my grid stamped in here I've got the color rolled around the outside edges and then I've got the bubble wrap in three spots okay, once I get that done, I'm going to get this layer dry that's a bonus that's a bonus? I always tell my students which everybody's gonna want that in there it's a bonus it's layers that you didn't have to work so hard for, so yes bubble wrapped us build up a beautiful patina of dried paints on it, and many times the bubble wrap will give back to you give back a little flecks of paint that you had on there from before there are so many ways to attack a blank page these air just some of the techniques, all of the techniques that I'm giving you today you can do in any order hey you don't have to start with a jessa layer you could start with the stamping with texture layer and then come back with the jessa layer and then come back with the breyer layer right you could do these in any order is a matter of fact it's really fun to write down the techniques on a little slip of paper kind of put it into a jar, pull it out and say what I'm going to do next okay, I'm gonna do this one and your pages come out looking completely different every time you do that just depending on the tools that you use depending on the colors that you use and the order in which you do them okay, so once this is dry, we're going to add a layer of tissue to this hey, tissue is transparent. Some are tissue when you put what I think about it when you put wet mediums like glue on tissue what is it? D'oh? It crinkles up and it pulls apart not this magic tissue that I provided for you today are created life write it for you. This magic tissue is do you know what? Watching tape ists ok, are we are we have tested watching tape? Yes. Ok. Think of this as a big twelve inch roll of washington deal without the sticker on the back. Okay? It is magical in so many ways, but what we're going to use it for today is airing terrorism off just like wax paper or oil and then I'm going to tear probably five different spots member plod numbers air really pleasing, really pleasing to the eye for some reason odd numbers go figure I'm not going to tear them in any, uh specific shape I'm just tearing chunks of it, I'm tearing about five and I'm making sure that some of my pieces are coming out over the edges so it's not just centered, I'm not just working right here in the middle that's why? When I used the breyer, I had you roll the paint around the outside edges sometimes it's really hard to remember to go off the sides of the page, whether you're working at an art journal page or you're working on a canvas, oftentimes I find, oh, I'm focused right here in the middle and that's not necessarily what I want to do, so I want to make sure that some of these air going off the outside edges now, how are we going to stick this down? We're going to that was a rhetorical. Now the rhetorical question I'm going to tell you, we're going to stick it down with gel medium, which you should have here. Thank you, dot org for donating this matt, medium it's, this one with the pink shimmery because have three layers who got modeling pace, crackle, paste and this is matt medium I prefer a matte finish on my adhesive some people for for a gel amina gloss, finish on my adhesive on their adhesives but I prefer matt because I can always add gloss later but if I've got a little bits of glass here and a little bits of glass there because most of my paints or matt then it is distracting so I can always add a gloss finish and especially in an art journal I prefer to have a matte finish because always pages air closed if they're galassi they tend to stick together a lot more and you'll get that sticking thing it's unintended texture it's not bad but may not be what I intended so you have some used up gift cards sorry it's not a bonus you don't get these gift cards keith this jar is pretty small in my gift card is not going to fit in there so all I have to do is cut a portion of this off we're going to use thes did everybody they should be a near top row of your cart somewhere and if not I have a whole bunch more up here we're deep in my overflow usually have a bunch of them in life it's in the container with the brush is now you can use a sponge brush to apply this you can totally use a sponge brush to apply your your medium I once I figured out that I could apply my medium with a gift card I never used a sponge brush or bristle brush again number one gel medium really wrecks your sponge. Meanwhile, sponge brush is just disposable anyway, but it really wrecks the bristles of a really good brush. So I never remember to wash my brush out right afterwards, so any time I can put a medium down without having to use the brush that I have to remember to wash, I'm going to do it. So this is a great way to get your medium down on the surface. But let me tell you, in order to get the tissue to stick down to the surface of my page without there being ripples, bubbles, puckers, which, you know, textures not bad, but if that's not my intention, I want to know how to get it down really smoothly, so that it becomes part of the background, not lifting up. Peeling up, puckering and bubbling is, I want to make sure that I get the medium in three places. I want to get the medium on the surface of the page on the back of the tissue that is going down or paper that's going down and over the surface, so the three spots very important to have even moisture distribution. So what I'm going to do is I'm going to take a little bit of this medium, and I'm going to scrape it down on the surface of the page, where I want my tissue to go, then I'm going to take that same medium is still on the back of this card. I'm gonna scrape it over the back side of the tissue. I have people ask me all the time. How do I know what's the backside if you can read it? That's the front side if you can't that's the backside, okay, so we're scraping the medium on the backside of the tissue, then I'm going to take wet sites. I'm going to join the wet sides together, and I'm gonna scrape over the top. What that does is it gets out any of the access medium from underneath, because if I was really heavy handed on there, I've got a lot extra behind its getting out any extra from behind and it's applying that thin layer over the surface. Okay, so then that puts it down nice and smooth. You don't have any bubbles or ripples or pocket not that there's anything wrong with those, but if that not your intention, this is how you get it down, nice and smooth. I'm gonna go ahead and apply this in all the different five different areas on my journal page, right? I can't it's so hard for me, teo, use anything else but this and it's okay, if some of your paint was still wet and it's lifting up is you're putting this layer down that's fine, we're going to direct the seven layers to this page, this it's okay, sometimes, when I'm working with mediums like this, it ends up getting on the page is beside. If that bothers you, there's ways to get around that, for me, is just a bonus to already have a little bit of paint on the edge of the page, just it's just a bonus. That's the way I look at it, but if it bothers you to have that extra paint going through onto the pages, besides, what you can do is take something like wax paper. Um, this is essentially this is freezer paper, and you can slip it in between the pages can see that we do have extras of this, or you could take some sheets from your palate, because your palate is essentially freezer paper, and I'm just going to pop it in right here, behind the pages, since he had that protects my other pages. Now, now I'm on lee working on these pages, okay? So back to gluing, I was in a class one time where the teacher gave sponge brush is to apply the glue, and I've been doing this for about three years now where have only used cards to buy the glue and it took everything that I had to be able to use a sponge brush in my mat medium I even like kind of search through my pockets like do I have um a card in there anywhere I even looked in my phone where I was really tempted to use my driver's license I did it but that's how once you get used to using the medium in this way for another thing it's you're not wasting anything you're using absolutely every little bit none of it's getting stuck up in the bristles of a brush it goes down you get just the amount that you need not too much not too little just the right amount right you guys all start with the same supplies and yet they all look different yeah I usually don't just scrape that excess off and they're usually don't do that because that contaminates the jar there especially there's little a little bit of paint on it so okay once I get my tissue down it doesn't have to get dry I can dry it but the next layer that we're gonna put over top of this is pain if you think of jell medium is clear paint paint works fine with paint so it's just clear it's not the color is not going to move around anywhere usually when I have a color layer I would definitely I'm get it dry, but because it's not a colored layer it's just fine for it like that ok, the next layer that we're going to add to this is stencils we're going tio yea and that we love those okay, let me pull my stencils out again thank you to our wonderful sponsor deco art for giving us all of these stencils stencils are a great tool to use in your art work to add just a up papa pattern in a variety of colors now the colors that I used to begin with remember I said that I really love the color of this orange with those, but if I threw it in and that layer it was going to end up making brown this is the time where I don't really have to worry about making brown this is the time where I can anything goes as far as the colors go, I'm going to start with just a little bit pay on my palate can always add more a little bit of pain on my palate. I'm going to use a makeup sponge to apply the paint through the stencil you guys have a good probably too many choices out there of stencils to use for your patterns, but if you have just a few stencils at home, I'm you can make your own stencils by taking an exacto knife and transparency sheet or an overhead she protected transparency or a sheet protector or even just a standard playing card I know those air small but you can make little bitty little bitty stencils what he needs she go also go through the dye cutting machine absolutely yeah, ok good question transparency sheets to go through deadheading machines beautifully now when I use a stencil with a acrylic paint I don't typically use the entire thing I just use little bits and pieces and remember odd numbers are pleasing to the eye, so if I use it in one spot I want to use it probably in three spots and because this art journal spread is so large, I might even use it in five spots just like I did with the tissue hey, one pattern I'm going to start with is this little tracks pattern and to apply the paint through the stencil without getting it using out behind I'm going to pounce my paint with my sponge on the flat and then I'm gonna pounds it off so I'm passing it on and then I'm pouncing it off that's applying just the right amount of paint at the end and I'm going tio there we go and I'm gonna turn my stencil so that it's not always going the same direction and I'm gonna pounce that pattern on in a few different areas pounces on pounds it off and then pounds it through this dental sometimes the pain is still really juicy on the front of the stencil when I've pounds through it so I can actually flip it over and press with the heel of my hand to maybe it'll work this time from didn't work last time sometimes it's really dry and it doesn't do it but just you could try it so I stenciled in in three different areas on here I want to change colors but I don't want to just keep throwing this sponge away and picking up another sponge what I want to do when I want to change color so I'm gonna add another color that may not mix with the orange the way that I wanted to what I'm going to do is I'm just going to cut the end of that sponge off with a good sharp scissor and now I've got a clean sponge to start with and this can just go in the trash I am not afraid of color in my artwork but if you like the monochromatic look just stick with colors that come right next to each other on the color wheel we started to move and no, you absolutely can start to move in this pattern khun go all over fill in that in inside space we're going to come back well I'm not gonna tell you where we're going with this because I want you just to like do it with no intention of saving anything? Just have fun with it layer layer layer another thing I could do with the stencil this is a pretty small pattern I can layer to patterns over top of each other so I can layer the one that I just did with a smaller snakeskin pattern and let's see what that looks like sometimes it works sometimes it doesn't it's just getting that the right combo it's kind of cool that snake skin in the chevron pattern it's getting the right combo I think I have some square cut outs here or circles or even better so I layer something like this over top of my stencil I can actually get a pattern but in a certain shape so and I'm not worried about layer alec aiken layer one stencil pattern over top of another in a different color and it looks great so what we're trying what we're aiming for right here is a hot mass okay, just saying throw it out there, just get layer, layer and layer because we're going to do some right we're going to do something that's going to bring it all together so I would tell my students if it's looking like a hot mass you're doing it right? This isn't love yeah there's so many cool stencils in here, so if you haven't had luck with temples before but with acrylic paint it because what acrylic paint and stencils are not friends they wet acrylic paint wants to steve behind the stencil so that's where you want to apply it with sponge and get the least amount of pain on your sponge that you can the least amount is going to get you a really chris image sometimes you think about in my throwing on too many different patterns hey, again, the number three comes up three different like if I have circles going on I'm going to have big circles I'm gonna have little circles I'm gonna have medium sized circles that only counts for one pattern then I can throw on maybe some text maybe numbers or letters and then maybe one other design so I've got this whole chevron pattern going on that typically is very pleasing to my eye again, this art journaling is all about playing and finding what works for you if when you finish you're like, wow, there was a lot of stuff going on maybe next time you can edit it back and say, I'm not going to throw every single stencil I own at this, but I'm going tio have let it let it be in families so I see there's ah there's that diamond shaped pattern out there what is that called harlequin pattern that is very angular and would look really nice with a pattern like this okay, so if I'm mixing patterns that look like they belong to the same family. They're going to work really well together and it's not going to be overwhelming like, wow, I just threw everything that I had at that, and I'm not saying that I'm not looking at anybody's work out there and saying that I'm just it's something to keep in mind. Okay, so we're how are we doing? We're loving this, okay, let's, cover up a little bit more. You thought you did enough do just a little bit more. Okay, you can also take the paint directly from your sponge and just apply like if you got a little bit of paint left on your on your sponge, just apply it directly in splotches of color. I know I said protect some of the white space, but what we're doing with this particular page, I'll I'll tell you now what we're doing with this particular pages were going to mask something out on it, and we're going to spray over top of it. So you want the things in the center of your page to start looking interesting as well. So I know we started around the outside edges, but you do want some interest going on in the center of your page to think about this central part and start adding some color and pattern in there as well. Another way that you can apply pain where you were talking about applying it with a stencil through a stencil. You can also just simply swipe the paint onto your surface. Now notice we haven't brought any brushes that yet, right? Where there's so many other ways you get paying on a page besides using a paintbrush. So look around your house and find different different things that you can use as tools. I'm going to take a little more of this turquoise color this one's called indian turquoise and with the same card that I used to apply the medium earlier the mat medium. I'm just going to pick this color up and I'm gonna swipe it, it's pretty bold. I'm just going to swipe it onto my page again in a few different places and before it dries all the way, even though swiping, it goes down really quickly. Um, it dries pretty quickly as well. Before it dries, I'm going to take I'm gonna lay a stencil over top of it it and with a wiper think I said that they have the art wife's back there, the baby wipes. This is the trick if your baby wipes or too wet, if you wipe it away right now, it's going toe. Who's out below so I was take the corner of my apron and I squeezed my baby wipe out just to dry out all these have been sitting out on the table so they're nice and dry they're damp they're not super wet but what I can do is rub through and especially over the area that's pre jess owed this pain is going to come up nicely hey so there's some pattern and if you can see that from overhead or I could tip it up if I need to absolutely so right here I swiped the paint on and then I laid the stencil over it and I wiped it away through the stencil I'll do that again right here so you can see just another way it's a subtracted method for using your stencils so there's another bit of that so the paint was swiped on with the card on well the paint was still wet I laid my stencil over top of it on with a damp baby wife wiped the paint away through the stencil wait case over top of this I'm not worried about getting this part dry I'm going to take my acrylic inc acrylic inc is highly concentrated color suspended in on acrylic medium that's very fluid it acts just like ink does um this particular color is indian yellow can I have one of my marine blues back would be my favorite go to color thank you and while I'm going to do with this I could always shake up the bottle because the pigment particles do settle to the bottom so I want to shake up the bottle first and then I'm going to suck some of that liquid up into the pipe at tip here and then as as if I'm drawing with the tip I'm going to set the tip down on the surface of my archer I'm not even squeezing the tip here I'm not even squeezing the bulb of this the fluid actually wicks out of the tips so number one I think that people do when they won their first using this is they squeeze the tip and a whole lot of that fluid comes out this is super super concentrated and so if I don't want there to be this is a huge overpowering mess of color on here sometimes I like that but if that's not my intention I'm not going to squeeze it very much at all just enough to get it to flow out that out the end once I get a few band noticed my magic number here it's an odd number one two, three, four five five spots on there I'm gonna take this is just plain water in a spray bottle I'm going to start from a distance and start to spritz I can come in a little bit closer as I see how much water that takes to get that ink to start to spread when they call this etch a sketch are you can lift it up and let it run, but stop when you like it don't ever do it that's the one thing oftentimes I just keep lifting and turning and lifting and turning on the go. I liked about two turns ago, so just go slow on this just stop when you feel like, oh, yeah, I really like the way that isthe then you can get it dry into this wet ahh acrylic, thank you can't take things like, ah, bamboo skewer and kind of pull this color out and draw with it if it works, there we go, it's just varying my mark making I've got some bold color and now I've got some little fine lines that is showing up. This is not working as well, right on this particular service, so I'm going to switch and try a brush instead a nice little round brush, and I still want to maintain a lot of that very organic thing that the ink did with the water spray were whipped out and feathered out, so I'm not really covering that part of, but I'm pulling into that really dark part of the ink, and I'm turning these circles into sort of a flower shape. Which you can do anything you want you can also pull some of this up and actually paint pattern I was think that the most interesting our journal pages are ones that have lots of layered pattern layer over layer over layer if I take a paintbrush now into this acrylic inc and continue those little circles in other areas of my page just very cohesive comes together very nicely okay, so we're just about done with this layer we're going to let this get dry you can start to dry it with your with your heat tool it wasn't quite done sometimes the page tells you it's not done yet and you just listen I'm lifting it up and letting that puddle run across oftentimes when I work in an art journal all want some areas that I can actually write words along and these drips are great for writing words on they don't always have to be horizontal you can have vertical lines as well that are great for writing along so consider that oftentimes I don't start with any end goal in mind but it just kind of happens some of the lift I'll show you guys this way if I lift that up so that puddle at the top love that happening and sometimes I might just add to make it happen a little more at a little more water into it not much just a little ok and I'm ok with that and we're just going to let these dry for a little bit. Okay? And then we'll come back. And we'll finish up these pages.
Class Materials
Free Downloads
Bonus Materials with Purchase
Ratings and Reviews
Elizabeth Evans
Thank you Andrea Chebeleu for helping us find our own clouds in the creative process. I appreciate how you encourage us to use what we already have to listen to our imagination. Your signature in the art you created today "Be" reminded me to be in the moment and make the creative process a process not an end result. The bonus was meeting you! Have a good week.
Linh Dang Perrino
I didn't find this class worth the price. There are a lot better art journaling videos for free on YouTube. The instructor seems nice, but some of her comments make me feel that she's not as knowledgeable as other artists when it comes to art journaling. I would list others artists, but not sure if CreativeLive would approve. Really! If this is the first time you've heard of art journaling and you can afford to waste $25, take this course. If you know about art journaling and is a starving artist/student, look up art journaling on YouTube.
Student Work
Related Classes
Paper Craft Ideas