Lessons
Day 1
1Introduction
14:32 2Apple Logic Pro Preferences
22:22 3Interface and Customizations Part 1
39:26 4Interface and Customizations Part 2
34:16 5Making Music with Apple Loops
36:59 6Building a Track Part 1
28:47 7Building a Track Part 2
28:34Building a Track Part 3
17:39 9Virtual Instruments Tour
44:15 10Basic MIDI Recording and Editing
25:25 11Basic Midi Editing Part 1
21:38 12Basic Midi Editing Part 2
29:44 13Quantize and Virtual Instruments
31:11 14Programming Drums: Custom Drum Kits
31:34 15Programming Drums: Ultrabeat and Drummer
37:05 16Recording Digital Audio: Set Up
36:01 17Recording Digital Audio: Guitar Part 1
30:13 18Recording Digital Audio: Guitar Part 2
20:49 19Recording Digital Audio: Vocals Set Up
29:28 20Recording Digital Audio: Vocals
18:25 21Recording Digital Audio: Comping Vocals
25:55 22Editing Your Composition Part 1
29:46 23Editing Your Composition Part 2
44:06 24Flex Time and Pitch Part 1
39:17 25Flex Time and Pitch Part 2
35:09 26Mixing: Getting Ready
28:50 27Mixing: First Steps
29:45 28Mixing: EQ and Compressor
27:35 29Mixing: Drums and Plugins
37:40 30Automation
24:52 31Exporting the Final Mix
13:52Day 2
Day 3
Lesson Info
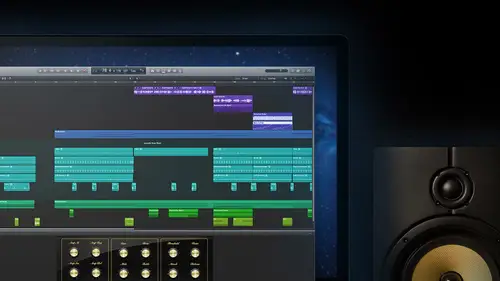
Interface and Customizations Part 2
Uh we've done some customizing now we've made us look the way that we wanted to have brought the buttons that we want again feel free anytime going to change those back up again but I want to spend just a little bit more time here with our demo session taking a peek around showing you the couple things that we're gonna be using moving forward making their own projects making their own music care so let's jump right back into it kind of got my three screen sets three main ones set up so I'm gonna look at my main area here with my tracks and the inspector also open on screen set one screen set to a little bit more dedicated just to working in that main area there with our arrangement and of course our mixer now we're taking our first look at here so what's do of you a little tour rather of some of these areas talked a little bit about the inspector here about how again it's focused on whatever track I'm selected here in this vertical list tracks going horizontally left to right um and th...
at's going to update our inspector with basically a channel mixer a channel strip here showing us a bunch of info? Well, I want to show you that again so we can jump back to the third window that we just popped up but didn't talk about it but this is our main mixer from maine mixer window where we can look and see all the different, uh, tracks? Well, we could actually change this one as well. So everything that we're going to we're going to see it's going to give us options to babe number one, make it fit screen number to show us information that we care about, maybe there's some stuff that we're really not going to mess with, and we just don't need so a lot of these buttons going to start just in the middle and the work to the right, some of these other functions with the ad it and the options and the view we're going to talk about changing while we're in some of the other songs, but just simple in syria looking at either single tracks, the tracks as they exist back over here so we could see these things are linked together, so I look at a certain number of tracks here we'll be able to see some similar things happening or being able to jump if I look at my mixer right now that many files to all and then take a look at what my mixer actually contains. So this is something cool I want to spend a little bit of time in here to realize how sometimes a session khun get scary. Like, how many tracks do we haven't? Like? Some of those, uh, projects that we work in the studio contain one hundred twenty tracks that's that that's almost common these days with some of these things, you just keep building stuff and building stuff like when you're working on your music with your vocals, you know what? We stack a lot of your own vocals and stuff, right? Going to pick up that yeah, you dance like when you do vocals, do you, like do lead vocal harmony, vocals, doubling vocals, things like that? Yeah, there's usually like too many. I can't even see them, right? Yeah, totally cash love your answers. So we're talking about there's, you know, be able to go in and see how this real estate that we have the room we worked with, which we've already heard from one of our viewers at home, you know, is a precious commodity it's something, you know, we want to be able to get around, but not be overwhelmed with what we're looking at. So we're going to take a look in this tracks area here and take a look at what's actually going on, and we haven't even had a chance to listen this yet, so we'll play here through our apogee quartet. Ana let's play what's doing right now is start at the beginning of the song I've got this yellow bar happening at the top which is that cycle which means whenever I hit play stop and play with space bar it's gonna launch back to that want to turn that off so I can jump around starting stop a few places so I'm gonna hit the seiki that'll turn it off so I'm gonna learn there's a key command rather than going up with the mouse which takes me away from my work area they hit c to turn it off I want to move my cursor respect clicking right here in that ruler above it showed me the bars so it's, the bar beat musical grid ruler there they play real close to some of these vocals that are happening here go on that play a little bit in the background. You can see that when I select this track sure enough, I've got control of it over here. Turn it down, he goes away. Turn it up there is and that's a single vocal track like something regina would do when you're tracking your single vote cole's, right? But like I said, you start to get background vocals, tons of them and here's another lead vocals just a single vocal but they get back into a spot over here I've got these backgrounds happening let's take a listen with zoom a bit more with my command and right arrow and as I play this here, get some backup. Okay, so that was that, but what I solo that so we can hear let's get rid of those other trucks and see what's happening on this magical track share sounds like a few people write at least a few cases of this singer going through on da singing. Well, if we noticed with this track a little bit different than the other vocal tracks we had there were actually looking at a different type of organization with the track here a new thing called a track stack people that were used to using like logic pro nine might be aware of an older versions that to track folders where we could kind of take some stuff and clean it up by hiding it and the one thing's the rather than seeing a bunch of regions like we would with those first two vocals, we could put them together. But there's, another concept here of track stack were actually instead of just performance is being moved someplace we're giving it a place where we can stack a bunch of tracks with their individual components individual tracks like these lead vocals but then hide him away with one master control track and that's what we're seeing here with this track hatter and with the fader and control for it but let me click this little revealed triangle here and bam when we disclose this I see what's actually happening so and we started here another thing to point out this is what really I'm kind of shocked me when I first noticed this when I first opened up a session with it is if I notice my track numbers here you guys see the lead vocal track one up top there lead vocal to second track third track you bet that's where my background vocals and look at the next one track nineteen somebody doesn't know how to count or something's going on right that we don't get to there but when I click this down this little reveal in this track stack I c o there's four through eighteen are actually all these background vocals let me zoom so we can see what's happening with x is not a lot happening all the time here but throughout the song we see that what they've done is they take their different stack so here we have four vocals and if I zoom a little bit this way I'm going to see another new feature and logic where it's letting me see that's one of this here is a mono track single wave form going through the middle but also now for the first time we're able to see both wave forms left and right of a stereo track and that's I know all this here we're pretty new to logic but in the past people wanted to see both their left on the right see if there's differences between them we'd have to open it in a different view but here just by giving it the correct zoom level seen me holding down command on the screen there but I'm also using the up and down arroz c some sterile in so we've got some sterile recordings of a couple of vocal takes in the smaller one together can I've got a master control up here so I'm soloing just all the background vocals never go once I get into this view I can also you know sometimes you listen the vocal like yeah I stack those together but some things maybe not so great with all the men they're not the case here that's a great song everyone's doing good with the vocals but if I wanted to listen maybe for a problem I have some individual control with these solos ahs well so I'll be able to go in here and here just specifically what's happening with them so all these tracks now being revealed in here so different parts of the song different stack back on vocals theo section to the other one here let me assume these back and um it's who can see again what's happening so there's all those background vocals gonna go a little bit further turn this down, theo, listen, all the music's happening here and as I go through the same thing, if I counted those numbers through now I'm revealing those through eighteen and get me two nineteen with a guitar twenty with the base. But now twenty one, which is a sin stack. I see that same little disclosure triangle. And I see that the next one after it forty six. So we've got something happening underneath that one. Open it up. Look at that. There is all of our seance stuff that's happening again. I'm gonna have a control here where I can go and be able to solo just the seance tax. So there's, my different since playing there. This part of the song I've got one, two, three, four, five, six teas are all audio tracks and these are things that they recorded all the audio with it. And there they are stacked together and we see that keeps going and going. So since pop song lot of synthesizers playing lots of these things stacked away. Let me go further way say they did the same thing. This is a song that's got acoustic drums with it, and in fact, it's got all these acoustic drums plus and processed lo fi drums there in stereo sets and some different things happening plus there's elektronik drum section going with open those up look at all those so you know, hip hop kick, eighties kid, the big collapse at me with him. Another disclosure triangle here with percussion. Click those open on there we go all that stuff, plus all the effects that might be in here a cz well, look at all that stuff. So you know, some of you are familiar with working on some stuff, but like, you know, you've seen you've seen things like this before in our pro tools sessions are some other d a w they're older ones where things start to get out of control pretty fast once you start having fun and getting a bunch of stuff it's great things is sounding big and full, but it just gets kind of hard to get back and forth like a whip, which would solo dough I hit, you know, just to get me that, my sense, how many of these do I have to highlight and then be able to click the a sonnet or group them and be able to click a solo button to get just all these things to play that's what? This idea of building tracks tax is going to be so great, and over the next couple segments, we're going to learn how to create our own but this is where it starts with finding one being able to open it look what's going on inside of it and the same type of thing once I get this back down to a manageable little section you see, we've lost no control over any of these, so we're always going to be able to open those stacks back up mute stuff so stuff changed their individual volumes if you wanted to add effects just to the different ones so one of our background vocals we want to put, you know, some kind of a modulation like a chorus on we can and it won't affect the other ones but as far as like now hear some editing moving groups around together and stuff like that can all be handled together um really handy and again the biggest thing for me saving all that space I've got my essential elements of the song all with unorganized track header controls that we need like solo and mute be able to take them out for a bit being just hear those things for a little bit great to do in this main area but when I take it now to screen set three that's going to make a lot more sense for us to and among the tracks sure we could go through a look at some tracks so those again those headers for the things like the lead vocal, the secondary vocal and then that background vocal stack I'm just looking at one channel for it see it's got its own input here it's got some effects that could be on for it including liken e q at the top all kinds of different things that we could do with japan moving the left speaker right speaker volume of course and that fader but when I go to that top selected there again of all that's where we're gonna be able to go in and I can see now all those individual one so we see yeah, all those background vocals that we're all uh together in that set this thing's all had their own studies, so in that first section of the song we see that you know, they weren't all just the same volume set they didn't have the same affect insert plug ins on them like compression each you and things like that very much individual tracks but once we get him kind of setting their relative position, we can now go into this tracks view here and be able to see just the main track hatter that's able to control and put those things where we want them to be. So I love that that's one of the cool new things that were going to see here in our main work area eyes sometimes these tracks gonna have this and there's different types instrument stacks versus like some track type stacks with the different tracks sort of organized together but we're gonna learn a couple segments when we start with the instruments will be able to do the same thing when what we want to do is control maybe with a midi controller notes going into multiple sound devices multiple instruments at the same time so good stuff there all right? We haven't any questions coming in yeah, maybe just as a review, um josh statment had asked, can yu knw s more than a single level into the track like a stack within a stack? Um a stack within a stack er is not one that I've really looked into on by showing me that I can't a ce faras the way what I would normally do is uh when we start to create these like I'll grab these two tracks that we had those two vocal tracks and by the way I do this was going to show you a bit later, we'll show it now I can't go in here and I can create a track stack out of those and it tells me do I want to be a summing stack or it just puts them together or a folder stack and anything we do with him so offended like a folder stack there would see that there's a sort of a sub output for this one can still get at them when I'm in that one it's selected I can also go back in there and flatten that stack which is to get back to where it was before what I'm noticing here is when I look on two of my track stacks how am I going to track is that it doesn't give me an option for it okay so I don't think so but I will also do some research on that if I find out that yeah there was going to let you know okay and then a question came in from any v h fifty one fifty just saying asking how do you enable create these tax it's just drag and drop well there we go talking about selecting this is another new thing uh that you know I'm very happy to see is the ability to select multiple tracks in this main work area different track types and different ones and I'm doing it by adding you can see there the modifier shift which works in a lot of different mac apse where if you click on something the whole downshift it'll grab everything in between your two selections well that's definitely the way this is gonna work too but so here if I click the top one and one further down while holding shift it's going to add those into selection so everything continuous or next to each other all went into it if I want to do ones that maybe weren't right next to each other I could use command so that for non contiguous connections but when I select two things this gets to our question finally under the track had her in the main menu that's where we're going to see this idea of creating the track stack we're going to talk a little bit more about this with the instruments and we're going to talk in another segment about what's really the difference between this folder sack and the summing stack and why we want to pick one over the other but I'll wait till we have a little bit better example for your jumping into that but there's a short answer yes all right um last look here in our demo session before we move on a little bit again these were our region's we're going to start working with him so I just want to point out these are ones that have been changed a little bit in the fact that they have will know some different colors and stuff like that we're going to get into changing all those things but this is the appearance of above here lose a great example this distorted guitar as an individual track so what we see when I zoom in here with digital audio we're going to be looking at something like this which is a way for zoom all the way and going to see that there's actually two waves in there and lay it over the top each other it's another one of those separate it you can see that it's stereo there was some different things happening from left to the right but we're just looking at the audio wave can has been captured and digitized um and that's what an audio region looks like whereas if I go below it and we look at this track here this is actually what we're taking a look at this one going to be a midi region that's on an instrument track so there's a software instrument that's playing the bass or a sampler on these air midi notes that air in there so we're going to see some differences with them will seem in a different color but those are our two main regions that will be working with our region types but also notice that the stacks that we've just been talking about they give us a little appearances well it almost looks like the midi with cem dash is definitely doesn't really look like the audio but what it's doing is just showed us some placement saying yeah on this part of the song there's some stuff happening on a few tracks here and one track way down at the bottom so that's what we're going to see her I heard some people talking wondering why in a couple of things they had why they had uh what look like mini notes what happened in there what keyboard we just lost their um all right let me jump out of here and everything else that we haven't had a chance quite to talk about here we're going to catch while we go along the way I was just sort of saving them up for us until we get into our own sessions will start moving it ok lasting gonna show us in this one as well get going is how do we get out of it a couple different things I know that there's some people that air jumping on with logic pro I've talked to some new students have had some friends have had that air going to mac for the first time and I think we're talking about you know used to be a pc user and hey, I'm getting mac and I've you know, there's this great new d a w for my new computer called logic pro tenant it's so affordable there's a couple things that maybe we need to know on dh that is sometimes closing out the windows. I know a lot of people whether it be pro tools or logic when they get to the mac they think you know that closing with those old red buttons actually close out the app or close out things should know that you know, sometimes that's not the case sometimes everything can appear is though it's gone, but it can still be playing just fine even though we think we're totally out of that app so uh the proper way to get out of the solid times make sure we're saving what we're doing and uh and then opening new files in closing in quitting the app so under file first thing I suggest always no matter what you've worked on even if you don't think it's that great you just had a few minutes and you work with something save it save it I talked to friends all the time we've got some friends that do uh uh like to talk about before queues for movies and tv and they will be either telling me just a story about how you know I was sitting at home and one of the buyers that take stuff from me once in a while collins said that he has a vans commercial that they need a piece of, you know, sort of moody electronic music for it's like so I would zooming through that drive and found that song we did it the songwriters campus, my friend bryan brown I'm talking about andi he's like yeah, they're so they wanted it they used it in they pay the money just cause he saved something remembered where it wass even though it just seemed like it was, you know, an exercise and song writing he's able to take the music from it and make money with it so any time you guys do anything you never know how brilliant that just might be to somebody else, so always save it. So where to start talking a bit more about that file management some under file here save its great command us if we've ever named the thing if you've ever given it a location to be that's what's great it's just going to update it in that spot save ass is one of them take out, take a look at it in this segment here where what we're going to do now is tell it, where do you want it to be? And this is what I'm suggesting that you guys even if you give it a name, what I'm talking about going to let me spread this out so concealed it better is that idea of looking in the finder so this is the same view under save on the mac that we had basically when I was just double clicking on the hard drive here, being able to look at my favorites and go to a certain place so before again, this is the mac hd I'm on top now I pick music I went into logic, my saucing stuff there what I'm going to do here is look at that same appearance where under logic, if I look under here yeah, that was the one of music that was the one on the sea a loner fifteen computer that's directing me exactly where I want to save this automatically made logic file a few guys inside if you want to make new folders you've got this button down here so if you want to say you know, messing around projects for this one we could say this is our class so class projects create and now we can give it a different name so you know, this was the original name I threw t k and the end of it every time I go on, I update something with it rather than replacing that one if I was at a good spot, you know, a good spot to stop before it might be a good place to pick it up again. So I get, uh, you know, in our studio with michael here we we like to get in the habits of things like, you know, song one and then drums if we just got the drums and then song two guitars once the final guitars have been putting vocals when she had that level and it's then when you get into mixes mixed warren mixed to mix three anything different about instrumentals you know, a cappella anything you can put in the name to kind of help you out, I think works well, especially if we're gonna be looking in ah view down here and organize my project as one called folder it's great to look at it but they also did this really great thing where they allow to put some tags on there too so we can say some things about it with tags be able to do a search and find some stuff to win this case I call this one t k too but it's going to be in our class project folder now important before we move on close up by finder there so give us a little bit more space here's another new thing so everyone that's uh you know from coming from logic nine we have some options here organized my project as a all right and now package and folder or two options and this is one where some people have an advantage on me when they've used garage band before I remember that you know is pro tools and the logic user when garage band came out and so while I do like it I thought was cool I hadn't done a lot of work as far as saving it, but I'd see some people's projects and etc that they had, you know, audio files and recorded their guitar, their vocals and on their computer but what I'd look for you know when I go to jump into it it would be like that project I just uh we're just about the saviour where would I notice was under again music logic and here's the one that I had opened previously here's our demo session and all I've got here, this is similar to garage man is one document okay? And for those you, they're coming from pro tools or get older versions of logic that's a little sort of alarming because this would be sort of similar to what we'd call a session document. You know, the one file that you could double click that would open it up and remember some things like, what was your last appearance? And did you have many notes? But these type of documents in the past, when I thought it was a session document, didn't contain things that you put into it like audiophiles like hey where's, my vocal where's, all those background vocals that that guy did, you know, where is all those real drum samples? All I see here is one little document, so this now is what they're calling a package, so we see package it's a cool, organized way toe have just one file, you know that your song, everything you build is going to be put inside there unless you tell it to put it someplace else, um, for an example so we can take a look between the two of them, what I'm going to be doing. Is going to save this version inside class projects? There's. Nothing there yet. I'm going to save this, as is a folder. And the best thing is I'll be able to show you guys the difference between the two. Finally, it says, copy the following files to your project and this is the same. If it's a project or a folder, these air your options for you first audio files. And if you are going to record anything, this is my advice to everybody that's the one you always always check if the other one's air off. At the very least, if you always do some kind of recording with audio, this button needs to be checked just once you click it on, it should pop up every single time you noticed. Our default was to copy all these things. But the other options air this in excess instruments. In samples, he excesses the sampler access twenty four. And so if we like, had drum samples to make a beat or if you had some cool sample from dialogue from a movie or something to put in your song and you load it into the sampler, this is what's gonna force your project to save a copy of those samples into a folder for you. So if you have used it absolutely put it in altar beats a drum machine we're going to get really familiar with tomorrow same thing weaken drag and drop samples of your favorite old drum kits are real drums into there if you've used them in the song, you might want to put them there the space designers a reverb uses basically impulse responses which are sort of recordings of an actual space that it can use to generate the reverb sort of space are dimensions for us the ambience um from that something that if we could put on there as well and movie files, we're going to talk just briefly at the end of the class about how we can bring in quick time clips and put sound and sound effects to those types of things this is going to force a movie file copy now you know I just read all this stuff and put things in their big thing to think about with all this stuff audiophiles the given always I say that's always put it because you want to know where the audio files are going and they should be associating either with your package or your folder otherwise they're going to be recorded someplace else in your computer so by saying copy these into the project audiophiles means no matter what they are existing with where you go to open up this project that's essentially these other ones, I'm not, so I'm not going to be a with the exception of, like, maybe movie file when you actually have ah movie that you're working with it, the other ones he excess instruments and samples all to beat samples and space designer impulse responses. Those are things that, um, a lot of times came with logic, right? That's the stuff that we downloaded at the beginning so there, there on your computer it's not like he went grabbed him someplace. Although there are times where you can do that, you could drag some, stuffed your desktop downloads from sounds and use them on him. But when you're normally just gonna work on your computer, you're not going to take it over to, you know your bandmates studio and work on stuff you gonna work on your own computer? This stuff isn't so important to copy, in fact, it's making another copy of something or exists on your computer, but if you're ever going to go someplace like to, uh, your your bandmates house our studio to work on it and you're not sure that the he downloaded everything that you did, this is where this becomes important. You're saying ok, now everything that's part of my song, I can be guaranteed that no matter what everything I have when I take it away from my computer and like a flash drive or you know, I, uh put it using a sending service like trop box or you send it or something, I know they're going to get everything I had even if they didn't download all the same content that I had that's huge whenever I take it out of my world out of my studio computer on my laptop I'm just gonna copy all this stuff people like what about movie files? If you don't have a movie it's not gonna copy anything it's not going to go find you a movie you know, it's just what stuff you're working on so I'm sorry to kind of keep going on this so much, but again it makes your life so much easier you'll be so much happier when you say yep, I just started doing that all the time so so that we can go look at the difference between this package our folder I'm saving this one is a folder and there we go and we see what's going to his copy over those audio files anything else it needed. Now I'm gonna close this out and to do that we go down close project closed just the normal command w that's gonna close a window so we want to totally get out of this one close that project if I've changed anything I will ask again do you want to save it normally not of any harm in doing that? We'll take it back against the mac level here and just to show you guys um you know you'll find your own preference I think that most people getting started when we look at the differences between these again so we can look at both of them here inside class project so here's the two I say there's the first one that we're working they're the exact same session, right? We didn't change anything between them, but this is the one saved as a package over here where we get just that one nice document that inside that class product this is the same song as a folder saved as a folder ok, probably because I'm old and stuck in my ways I'm going to prefer this folder away because I like to be able to jump in here look at it and something like lis mode on dh see, okay, yeah there's all those audio files there's all those vocals that we saw a hidden away in those tracks tax that's all the individual takes that they ever did with this song anytime they ever hit record and they save those those air in there things called freeze files where we can, which there were none and there and this is that session document I was talking about so I look over here and it says file type with logic ex prada logic ten project rather plus it made folders for the impulse responses so there are all those sd I ours the impulse responses for the different reverb is used in the song the movie file they actually have that little demo thing showing up in the picture uh sampler instruments so yeah, they use tons of the sampler stuff. So had I gone someplace with this song which just the session document know this stuff would have been missing some of these things probably, um get samples for the different things so ah, the different stuff that was using samples and then alter beat the drum machine samples as well, everything there I can now go and have it work I like the folder view because I'm looking in here I could double click on this thing but I can also get two different things and find it also goes along with that save as idea of I did two here I could have also done the three the vocal the drummer you know, whatever ones my different versions I'd see them all here and I'd quickly be able to see things like datemodified okay, that works for me but again I came from a place where that's the way we had to start I think a lot of folks are gonna like this single document looking way where we could go on and say yeah double click that I'm back to my same song I was in before now if you do this it doesn't mean and this is where I was very happy to see when I first started seeing things like just saved as a project not as a folder and like well what if I need to get in there what if I want to steal one of those vocals you know, for a remix or something like that that's what we're gonna be able to go in here and by doing like a control click on it we can show the package contents and when we look inside there we got a bunch of stuffs all the alternate savings of which we'll talk about some contents return those to the package info and of course media so there's all those audio files impulse responses samples, same stuff all in a folder view I just had to do one more control click to get to it so I think this is going to be the popular weight a lot of people are going to use it here is the package all right that concludes our talking about customizing your first little view with the demo session um any questions we need teo get on that before we move on to the next topic going to questions in the studio audience um the question came from jose does the package format cannot be used to send a project the internet and not be preoccupied with file corruption that's a that's a great question I'm not totally sure I mean I do know a couple things with it is that it will make it easier for sending us faras not having teo compress the folder having to make one final if you guys ever try to say the folder of projects you know they don't want you to get send multiple files a lot of times with some of them so this gives us that one document type to be able to send but as faras the corruption of it I just don't have any experience with it so none of those things and I'll definitely look into and I'll uh I'll get the answer for great um and a question came in from a logic man and j new jersey how can I move logic pro x assets to final cut pro x or share projects was soundcloud right sound card that's definitely coming up okay, one of those options but we're talking about final cut is the one that's one of our advanced topics we're gonna talk about it another date okay that's great just say, you know we're going to get that because I could go into that boy will be going down time over great question, but we're going to. We're going to hit that one a little bit later, and definitely, they share with soundcloud one, we're gonna be able to operate to that a little bit too sweet.
Ratings and Reviews
a Creativelive Student
Travis Kasperbauer was one of the best teachers in this discipline I have encountered. His style of teaching is easy to follow. I learned more in one day with Travis then i have learned in a year watching video online and learning on my own and from others. Travis knows what he is talking about and what he doesn't know he takes the time to figure it out and walks you through the process of finding the solution to the problem. I find this important because there no one way to do anything when being creative and sometimes understanding the process to figuring something out is just as important on the steps to do something. So many people spend so much time explaining where a button is that they spend little time in truly explaining why you are pressing the button. Travis takes the the time to explain the basic lingo other instructors use but spend little or no time explaining. After Travis explains the basic foundation of logic pro he jumps right into the important thing we all want to know, and that how to make music. I does not matter what genre you are interested in this is the course for you. I watched the course live and after felt it was every bit worth it to own it! Take this course it is worth every dime. I look forward to his advance class in the future. After watching this class i feel confident that what i learned here has given me the tools for his next class but more importantly I can start experimenting and making music today! Thank you creativeLive for this course and Thank You Travis for your gift and knowledge. Thank you for making music attainable to the masses. Ronnie AKA agentdownbeat.com
Mark
Extraordinarily well done. My long time expertise is with video production ... Avid and Final Cut Pro so I understand the learning curve in tools like Logic. But I was simply “blown away” by the quality and content in this class. I had already poured through two other video based courses and decided to try Travis’ course based on his credentials. It’s not even close: this course is superior to anything else out there. Here’s why: 1. He uses deep and creative real world examples based on his production experience. 2. He is a master of every feature of Logic Pro and then gives you precise examples of how to use those features to deliver a great production. 3. His “layered” approach to presenting the concepts makes the content “stick”. He doesn’t just turn on the fire hose of content, but brings in key features at just the right time. 4. He covers everything and showed me how to save a ton a money because of all the unique built in features. For example, because of his broad experience with 3rd party plugins and libraries, he showed how Logic meets and exceeds those other tools. 5. His style and communication ability is top notch. This is a long course ... I think this was done live over 3 days but absolutely worth my investment in time. I wish I had come here first.
Ellen Gibson-Kennedy
This is a great course. Travis is an excellent teacher, as well as an interesting and relaxed speaker. I liked the casual classroom environment, which gives the impression of being in the room as well. I learned so many great Logic Pro tips. Highly recommend and enjoyed!
Student Work
Related Classes
Logic Pro