Lesson Info
31. Exporting the Final Mix
Lessons
Day 1
1Introduction
14:32 2Apple Logic Pro Preferences
22:22 3Interface and Customizations Part 1
39:26 4Interface and Customizations Part 2
34:16 5Making Music with Apple Loops
36:59 6Building a Track Part 1
28:47 7Building a Track Part 2
28:34Building a Track Part 3
17:39 9Virtual Instruments Tour
44:15 10Basic MIDI Recording and Editing
25:25 11Basic Midi Editing Part 1
21:38 12Basic Midi Editing Part 2
29:44 13Quantize and Virtual Instruments
31:11 14Programming Drums: Custom Drum Kits
31:34 15Programming Drums: Ultrabeat and Drummer
37:05 16Recording Digital Audio: Set Up
36:01 17Recording Digital Audio: Guitar Part 1
30:13 18Recording Digital Audio: Guitar Part 2
20:49 19Recording Digital Audio: Vocals Set Up
29:28 20Recording Digital Audio: Vocals
18:25 21Recording Digital Audio: Comping Vocals
25:55 22Editing Your Composition Part 1
29:46 23Editing Your Composition Part 2
44:06 24Flex Time and Pitch Part 1
39:17 25Flex Time and Pitch Part 2
35:09 26Mixing: Getting Ready
28:50 27Mixing: First Steps
29:45 28Mixing: EQ and Compressor
27:35 29Mixing: Drums and Plugins
37:40 30Automation
24:52 31Exporting the Final Mix
13:52Day 2
Day 3
Lesson Info
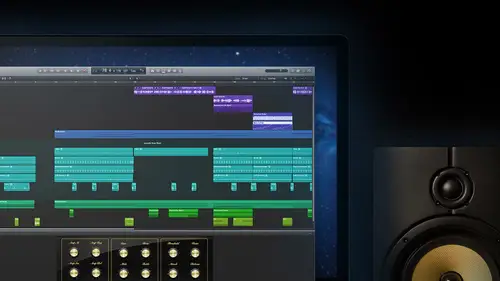
Exporting the Final Mix
How do we get this whole song out of here? So we need to remember that again. What we're doing is building a new audio file. So just like we were recorded, the vocals and the guitars we need to feel all these tracks, all those drums, the guitars, the keyboards, the base we need them all to fit into a new stereo. Twenty four bit file. That means it's all coming out through the output here. So our output track which we consider like the master fatal and we have a master volume control over here, this is the channel that we can process and listen back to everything. So I want to take off the one plug in that I had on here because we had a question come in just a bit ago that somebody asked, how can we control the volume on the master within each you owe? But I think they asked a stuff is going through undo a little bit of our automation, so at least we'll get through this crazy stuff. Having friends, all right, so now what they want to know is, hey, if we start to get too loud here, you k...
now somebody turn this up to exaggerate it, we get a red light down there. Red light equals bad stop go back means that we've exceeded those twenty four bits in the file that we have on this is the most important file that we're going to make out of the whole song practically write it z the final song it's our final balance of it. So this is where we actually need to care the most about the file that we're making. So just like I said before with recording like a vocal track, what I'm looking to do is make sure that I'm getting good volume I want to use those twenty four bits, so I have the dynamic range I wanted to get near the top definitely into the yellow with its peaks, but I'm gonna make sure it doesn't go too far doesn't go, you know, up into the red or into the clip, these little indicators they're going to tell us how far away are we from hitting the top? I like to get it as close as I can to be honest with you, some people talk about keeping dynamics, I don't want it to be slammed up here all the time some types of music you do want to keep it slammed up there all the time that's up to you, how does it sound? Good, but they've definitely given us a bunch of ways that we can safely keep this file uh, you know, within our dynamic range, but also not go over it and sound good, so for that I'm going to go to the settings up top here and let's just take a look at some channels trip settings in the factory here, so all kinds of different stuff isn't a ballad basic broadcast ready is a good one if you guys want to trade songs with each other and you say I want it to sound like it's on the radio, pick one of these things like pop rock broadcast ready and notice what will happen in fact, let me go back in here for just a second and we will get rid of that hope sorry, not delete, but reset that channel strip and I will listen the volume here as I go a little bit for a little bit louder. But if I change that, we're now say two slightly different sounds with each of these, maybe a little bit more program for different genres of music are stiles different sounds? They're gonna happen with this so again, see what you want try some different ones out juice a meek yuan this is another place with the I'm just gonna warn you be really you see they put the linear phase one on the final for us always you're going to see really small adjustments on the knicks and we have all those tracks coming lots of stuff happening so when you get here don't try do instead of those extremes they're really going to change what's going on with next, especially with big boost big cuts you're gonna be missing whole instrument sometimes when you do it so always on the master light little amounts of adjustment with the q saying with compression sometimes, but one of our big questions that came up just a little bit ago was how do I stop it from getting too loud? And this is the best way I think for intro class tio tio approaches to say this adaptive limiter which if you need to find it it's in the dynamics and it's the very first one limiters liken compressor where it turns stuff down but the difference here is that when we set a place where we don't want to go above, it doesn't go above it. So I'm going to look at this one called the output ceiling move it up to a minus point one and now not only will I stop it, we'll never see this master go above it right there but I can actually squeeze some more volume so you're doing dance music or something you want really loud you can change a couple things like game get it quite a bit louder no more dynamics it's just loud hall in time but it is a great way to just sort of bump it up a little bit and most importantly protect us from going over on clipping shoes your ears and make sure it's not distorting too much when you go through those all right? So now once we have that a good level set on her master we have the settings we want curing like that but we're happy with the sound now we can bounce we'll go in her file we can see that we have a bounce to a couple of different things here but bounce, project or section or even easier so you remember where it's at on that main output of your master ray below the meter is this little b and c that's the same thing brings us right here, okay? Question uh what's the difference between balancing attract and exporting so exporting a lot of times we were exporting stuff we're talking about just sending something maybe in the state it is out like exporting a midi tracks so that it can go someplace else, right? But when we talk about bouncing it's a traditional term in turn that we've used for a long time for moving off of one state of attract like to another like he heard about like the beatles bouncing down like when they had four tracks they'd record three of them bounced them together down to one it's only talking about combining some stuff together so when we bounce in place with software instrument tracks where we're doing is taking midi on instrument plug ins that affect the sound, putting them all into one audio file. Okay, when we talk about balancing our session here, we're talking about taking all of our tracks whether they be software instruments and many are audio are the auxiliary where we just passed up through effects and bringing them together and we're putting them all into one stereo left right song so that's the bounces in rather an exporting this kind of just a single cent away now we're gonna put everything together so full featured balance options you're meaning that rather than just doing one thing at a time, we can do probably everything you're looking for on we've got to be a little quick with it, but stay with me I'll talk about a couple of important ones pcm first of all, this is the one that for me is always check no matter what this is what I do when I'm bouncing pulse code modulations talking about high quality audio files and if we look over here as we clicked these different things like mp three lt's show me qualities for an mp three pcm I look file format ff wave that one's we talked about before, so I picked the way file it's just like when we made our session into the recording settings wave twenty four bit forty eight k if you want to just keep the highest quality file, do the one of the same thing the session isn't we recorded this at twenty four bit forty eight, so that's what? I'm going to make it again? I'm not going to try to make it a higher quality because it it just won't be than what we started with, but I'm also not going to dumb it down there's other ways like itunes that we can convert this down lower so sample rate bit dad the same file type options split or enter leaved always make sure everybody inter leaved sometimes people talk to me like I didn't bounce like he said, but when I listen to it again and itunes gave me two songs in the first one and only played in the left here and the next one and only played in the right here because it took our stereo and it gave it split what? We wanted them to be inter leaved as one file so luckily it defaults there, so we know we don't have to worry about it, but definitely file type enter lead on, then it's going to give us an option here for dithering. This is another conversation we could go on for a while, but basically this talks about going down to sixteen bits, so if I was going to sixteen bit it would have to take eight of the twenty four bits and knock him off right? If we don't use this thing called dither, it's just grabs eight bits and they could be the eight bits on the top that we're the most important but what dither does is it goes down and it find spaces where we didn't feel a bit or the ones that were quite us the least significant bits and it gives us sixteen of the best one so if you haven't do sixteen for some reason like because you want to make a cd file, then use dithering if not, please keep it at twenty four now this is the kind of file I think always to do document high quality versions of your work don't forget don't think I'm going to do on amphorae an mp three and then I'll come back into it just always do the pcm then if you want on m for a a good quality, you know compress well, do it at the same time let's just check multiple ones can same thing can pick what kind of mp three you want if your computer still has a optical drive which a lot of them don't now you can even burn a cd at the exact same time that we're doing. All of this are, you know, susan's done. Bring it so you click that one make a cd. But as you see here, this magnificent new longer has the cd drive all right? A couple of their important things here say we're gonna make our high quality file. Is that, uh we want to go hundred pcm, make sure you have the start the end times, right? So my some started at bar one, beat one, right? But here it says bar twenty that's because I have something selected in there and I will put in the beginning for me. And then you may have to go back out and figure out what was the end of the song, but I think they actually have around right there. Now, this one a little bit of controversy mode, riel time or offline. Okay, so with offline when it's colette's doas quickly make a bounce, you'll see it zipped by really fast and people love this option on they've been begging for it and other applications. So apple is definitely out of the game with it. Andi, I have no problem with it. There was some talk about it maybe not being his high quality is what we call a real time one but I won't tell you guys use off line if you need like a quick version before you run out the door but when it comes to your final mix do you really time the difference again is it's going to make you sit and listen to your song all the way through and sometimes when you're mixing on dh you've been working on a song forever the last thing you want to do is sit there one more time and listen to it you just want to get out and forget about it for a little bit then going listen to it telling you when you've done your bounce and you you've done you're mixing your doing your bounce the last time you listen to it is the most important right spent all that time writing a song creating the song mixing it hit bounce given a name and this I'll show you just this very next thing with bounce on dh sit back and listen to it because what I find that end up doing all the time is canceling the bounce why because I realized there was still a little mistake you know oh man I really want to turn that little thing down hope there was still a clicker a pop in the guitar I forgot to turn back on the reverb whatever it is it's always something where I sit there going on and I got to stop this I'm gonna fix it, go back, rename it and started again. If you don't do that, you're gonna be stuck with a file that's going to haunt you forever because you'll always hear that little mistake, so always, really time not offline unless you're just quick curry, but please listen to them finally normalize or what it can do there's actually go in and change the volume of your track. I'm not a a friend of that. We've done a lot of mixing to control it, so I use off or if you didn't use the limiter, you could do the overload protection I'm a fan of off hit bounce, it lets you name it s o way said it was called our love is a uh and when we hit bounce, we hear it start to go in. This is again the idea that way and credits as we listen to something as we're rolling on out here, yeah, that's it when we're done with that bounce, we're going to see in a folder inside our project folder or inside the project, we actually have ah bounces holder now and that's where your song is same thing is with all of our sessions in the alternate of it, name your balances first pass then, when you start doing sakhalin's, it's really common for me, tohave, ah, folder full of five or six different versions. If you're going to be like you guys were gonna be a big, famous people with it with your early stuff, make sure you do a knock capella version so people could do remixes of you. Make sure you do an instrumental version so they can use you in commercials about paying you for the whole vocal. You know, these are things to do when you're sitting here, but keep that folder going on. Different name ings of all the different balances you do, that's, the end of our song, everybody.
Ratings and Reviews
a Creativelive Student
Travis Kasperbauer was one of the best teachers in this discipline I have encountered. His style of teaching is easy to follow. I learned more in one day with Travis then i have learned in a year watching video online and learning on my own and from others. Travis knows what he is talking about and what he doesn't know he takes the time to figure it out and walks you through the process of finding the solution to the problem. I find this important because there no one way to do anything when being creative and sometimes understanding the process to figuring something out is just as important on the steps to do something. So many people spend so much time explaining where a button is that they spend little time in truly explaining why you are pressing the button. Travis takes the the time to explain the basic lingo other instructors use but spend little or no time explaining. After Travis explains the basic foundation of logic pro he jumps right into the important thing we all want to know, and that how to make music. I does not matter what genre you are interested in this is the course for you. I watched the course live and after felt it was every bit worth it to own it! Take this course it is worth every dime. I look forward to his advance class in the future. After watching this class i feel confident that what i learned here has given me the tools for his next class but more importantly I can start experimenting and making music today! Thank you creativeLive for this course and Thank You Travis for your gift and knowledge. Thank you for making music attainable to the masses. Ronnie AKA agentdownbeat.com
Mark
Extraordinarily well done. My long time expertise is with video production ... Avid and Final Cut Pro so I understand the learning curve in tools like Logic. But I was simply “blown away” by the quality and content in this class. I had already poured through two other video based courses and decided to try Travis’ course based on his credentials. It’s not even close: this course is superior to anything else out there. Here’s why: 1. He uses deep and creative real world examples based on his production experience. 2. He is a master of every feature of Logic Pro and then gives you precise examples of how to use those features to deliver a great production. 3. His “layered” approach to presenting the concepts makes the content “stick”. He doesn’t just turn on the fire hose of content, but brings in key features at just the right time. 4. He covers everything and showed me how to save a ton a money because of all the unique built in features. For example, because of his broad experience with 3rd party plugins and libraries, he showed how Logic meets and exceeds those other tools. 5. His style and communication ability is top notch. This is a long course ... I think this was done live over 3 days but absolutely worth my investment in time. I wish I had come here first.
Ellen Gibson-Kennedy
This is a great course. Travis is an excellent teacher, as well as an interesting and relaxed speaker. I liked the casual classroom environment, which gives the impression of being in the room as well. I learned so many great Logic Pro tips. Highly recommend and enjoyed!
Student Work
Related Classes
Logic Pro