Lessons
Lesson Info
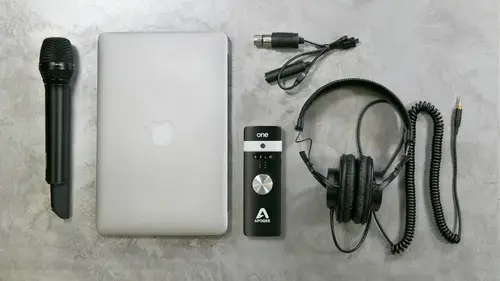
Midi Mixer and Vocals
The next thing we're going to do now is talk about different types of many based virtual instruments things like keyboards, guitars, bases, all that kind of stuff and a natural place to go to next is we have an acoustic guitar we've got the drum track maybe want through a bass part in there so I'm gonna go ahead and add a new instrument track and most of these instrument tracks or stereo, so we'll just go and make it stereo and we're going to call this base when he opened bring up a plug in on that channel it's a multi channel plug in under instrument and it's called expand and expand is a plug in that comes with pro tools it's actually free when you get pro tools it's untiring library of just all different types of instruments there's a number of different really great plug ins to use from a lot of manufacturers this one's a good place to start with just you get a sense of like organs and strings and basin electric guitars all the kinds air in the actual program that you can use so yo...
u kind of just at least get a sense for howto mess around with different virtual instruments each one of these has four different channels that you can use so you could actually program for different many tracks and send it to different plug ins to save processing power if you want we'll talk a little bit that when we get to the mixing section but right now each one of these little boxes is a separate instrument that I could bring up in use you can change certain parts about it but most of the time the presets or what you want to start with when you're using this stuff so if you click on the name right under here there's different categories um we're going to look at all these different categories there's pads since ambience acoustic pianos organs were going to go down to base and let's pick um let's see we'll do a full finger base and then as you start to hear this we're gonna hit record on the instrument track got kind of a standard sort of bass sound that we're going to start with you can mess around with a couple different types if you want so if I wanted to try maybe a soft pick base lou has more of an electronic sound so we're gonna try yeah we'll see if there's a friendless base or a double bass which sounds pretty good um maybe want to start with that um drop it and active so we're basically just going to start off with just sort of playing along with the track and seeing what it sounds like I mean wait I spent a little bit of time to sort of messing around with the track writing up different parts maybe you want to try different rhythms, you can sort of message the kick trump pattern don't be afraid at this point to go back into the drum part and think, oh, maybe the base part should match mohr kick drums, I should change the kick drum part. This is the part of recording where it really becomes a lot of fun and you could have been a lot of time really perfecting it to be exactly how you want. We're gonna go ahead and pull up a base track we've already recorded, so we could just sort of move forward on the other instruments real quick. I want to show you we're gonna record just a first part of the base here, so you can kind of see how the middie editor works. We'll talk a little bit about that, so I'll just play and record, just like you would an audio track, and you're you can record a middie track, except the cool thing about many tracks is that then you can go back in and actually move the notes around and change what you played if you make any mistakes or change the particle. So I'm just going to kind of record a little section over the beginning here so we can show how to do that, so just like, um and audio track, I'm just going to hit record from the very beginning on again with virtual instruments I don't have to worry about bleed or anything like that because there's obviously no microphones it's all just built into the computer. Wait, so if you see now that this little part that I sort of threw together real quick if I want to edit this, I want to say I want to pull that up in the mini editor double click on it and it's going to pop up all the notes that I just played exactly how long they are, so now I can go in and I can start to sort of, like, mess around with what I played and maybe change the part a little bit let's go back just a right here. So you this note I didn't like so much, I just want to go back, so I'm gonna move this note back up to here or even just keep that on the way. This part is a little bit weird put a leader out there e maybe I want a short in this note here, so I'm just gonna book ended a little bit that I can even just draw new notes if I wanted tio with the pencil tool it's a little bit off some that grab it and slide it depending on the style of music that you're doing right now, this isn't perfectly aligned to the grid. If you notice a lot of the parts like and later and early that's, how you know more acoustic type instruments, you would probably play and expected to sound like there's a lot of styles of music where you'd want it to be really snap to the grid and really perfect, especially with, like pop or metal or even modern rock. A lot of that stuff wants to be perfect s o with virtual incidents that's actually really easy, you can kwan ties everything where you can take every, um, every note that you've played and then just snap it to the grid. It depends on the style of music that you want to actually do that with s o kind of depends on how you're going to actually put everything in in what you wanted to actually sound like, um, you can online notes individually or even dragged him off as a whole to be a little bit behind the beat. So it's really more a matter of just like going in and spending a lot of time with how you want it to sound like. If you want it to be really precise and perfect, or if you want to have to have a little more of a human element, the nice thing about using virtual instruments is that you have complete control so you could make it very human or you could make it very perfect, just depending on the style of music that you're using. So, like I said, we're gonna go and pull up the bass track that we already recorded just to kind of move on. Um, so we'll pull up the other thing that I did, so once I have, the bass track done is I pulled up a plug in that waves makes called the guitar amp to cab, and the nice thing about this is that this simulates running the guitar and the bass actually through an actual bass amplifier, so it gives it more of a natural sound. Um, you could load different presets. This is sort of modeled after a tube uh, sbt amps, you can kind of get a sense for what that would sound a little bit. You can even adjust all the individual controls on the amp like add more drive if you want that, we'll make it cleaner are cool, so we've got a base part, we've got a drum part, we're kind of moving along as we start to add some overdubs. We're going to try a different type of sounds added, maybe like an organ or something that she could throw in, and then we'll go into adding a vocal track. Just one real quick thing. A lot of producers have different perspectives on when you should record vocals. Some people feel like it's vocal should always be the very last thing that you do because as you build the track, it influences the sound of the track, and the vocal should respond to everything that's happening in the music there's also the thought that's different that the vocal should be the very first thing that you do and then build everything around it. So it kind of depends on what your workflow is. I usually typically liketo wait till later in the process to record vocals, just so that the performer, the singer, is actually responding musically while they're singing to the whole track and not just a a small part of the track that way, as we start to add more instruments, it doesn't change how they're vocal for a sits within the actual sound of the whole track. It makes it a lot easier, like I said, it's all just kind of preference on how you actually go about doing that, so we're gonna go ahead and add in just a real quick organ. I'll bring up the track here that we recorded before just you can kind of see what that looks like again I just used the same thing it's an expand plug in um and they have a number different organ sounds this one is called paler shade of white, which is a sort of like a rock organ sound um you can sort of hear so in the same way that we recorded that track with the base we do the exact same thing with the organ tracks we're going to go in and you can see real quick so the part that I wrote these are all the different sounds that we played and if you were to play along with one thing real quick, especially with parts like organ you really want to spend a lot of time dealing with dynamics virtual instruments are great often they have great sounds that they've sampled but their specific notes and so they don't really emulate a performer actually performing dynamically within the song. So a lot of times you have to program that in especially things like organ. So what I did is if you can see the fate in here I put in a little bit of a fate on the organs so that when you're listening to the track sort of naturally fades and is like a organ player would actually play instead of having just start off all the way and we'll get into this we talk about mixing in a little bit but mostly that's all stuff that you do with what's called automation, which is with any track you consort of program and write in automation changes for volume and stuff and make it a little bit more musical. Michael online wanted to know about if you're recording yourself, which I'm sure a lot of people are doing this you're watching this course can you automate the the muting because you manually we're meeting we're tracking live can you automate that? Of course, so I've got the click track right here on its own track and it's a dog's track, which means that the natural state that isn't is the volume automation part, so all I would have to do is go to the very end here where the track ends and right where the track ins I could just put in an automation point and mute that so that that happens every single time from then on that's actually really great point and usually that's an easy thing to do so that you don't have to think about it automatically mutes it every time, right in the end? Yeah that's a great question, so we've got an organ track we've got based kind of layered on some instruments the last thing they were going to do before we get into doing the mixing and kind of talking about how we put this whole session together and start to export it is you want to do some vocals so josh, if you want to step up, we're gonna do some vocal tracks on maybe a little bit of doubling and then move right into mixing a lot of people have questions about where and how to sing into a microphone. This is ah large diaphragm condenser mike, which means that the diaphragm which is actually responding to his sound is about the size of a quarter. Typically you don't want him seeing directly into the center of the microphone because a lot of the air is going to push that diet form back and forth and give you a really sort of willfully basie sound that you don't want to have typically I usually have vocalist aims sort of the very top of the microphone and a little bit off axis so that it gets sort of the sound of what they're singing and avoid some of that that lower end wash that you get from when you're too close. We want to try to avoid that in engineering is called proximity effect you try to stay away from the very center of the microphone s o if you were to stand here, I'm gonna have him seeing just about forty five degrees off axis and sort of aimed towards the very top of the microphone and usually want to be about six to eight inches away just depending on how the singer responds so like just where I'm standing you know perfect so we're gonna go and bring up a new vocal track we just doubling the courses or everything yeah we'll get to doubling in second right now we're just gonna do an actual vocal why catching the place okay the scratch track that we did got you especially with vocals be really careful about click track bleed most of the time singers don't need click tracks you're playing along to all the rhythmic instruments that you've already added so you shouldn't need a rhythmic guy there are exceptions if you're like starting right at the beginning of the songs and I'm she'll need just a lead in to tell you when the song actually starts but right now there's an interest so we don't really need that so we're just gonna go ahead and need to click track entirely and not really worry about it again you want to sort of watch out for how loud they're going to sing so that you don't you know have any distortion it's always better to keep the level is lowest possible a cz long as there's not too much noise in the track from the noise floor without getting distorted to try to avoid it as much as possible so if you want to go and seeing a little bit josh so quite loudly and quite shuns on city eh yes hey you the bruises from beaten last night awesome that sounds great so as you can see yeah so as you can see I tried to set it so that when he's really loud it's just a little bit in the yellow and there's still plenty of headroom and when he sings quiet it's just a little bit in the green so that we're not too low and not too high we want to definitely keep some headroom andan again I'm gonna edit everything with his his headphone make something to change in the maestro app something to bring down his vocals and pan those back center is that better? Yeah yes awesome cool yeah we're gonna go ahead and jump right in and do a vocal take real quick let's just do for the sake of time josh was just do a verse in of course then we'll jump right in um someone starting just right at the top here we'll go ahead and you are speakers code my held a mile roll back this gets up way songs sing that's my way wait okay so what's we've gone through and recorded all these tracks we want to go back through and start to edit and clean up some of that stuff a lot of stuff in the beginning here's where he's probably just breathing we don't want that on the track we want to try to go through and remove any time when he's not singing this is also kind of a tricky are you have to be careful for because you really want to listen to when he has breath pickups, that you don't cut some of those off there's lots of recordings where people chop off any breathing at all, and as you listen to back to the track, you don't really notice it, but it feels like they're suffocating cause you never actually hear them breathe, so you want to think consciously about how much of the breath you want to cut in and out when you're tracking vocals and how much you want to leave in that's just sort of like a preference thing, so we'll go through and listen just a little bit here, they're seeking kind of get a sense for what that sounds like that's a good example right there, if I cut it off really soon, even if I faded it, you don't hear the breath at all that got this on, and you might not notice it at first, but it feels weird is you start to listen to it, it starts to feel a little suffocated, so we're going to go ahead and back it off a little bit, so we pick up some of that breath well, I got this and it's really subtle but she can definitely hear it well that get that just little breath right at the beginning sometimes makes a big difference well, I got this tone a black coat my bed so held a mile role but I can't this kid's way need a play I got song sing ship that's my way but I ain't got nothing keep men down along thank god nothing keep me from playing my song through and just again chop up some of these dead sections so there's no bleed keeping in mind I want to keep the breaths and um before we move any ford let's go on record one more take of just the verse in the course and we're going to talk about something really quick called vocal comping which is what's really helpful when you start tracking multiple vocals maybe it up a little bit yeah in your headphones thanks. Yeah, sure of course. So bring up his headphones a little bit so we're going to record another take of the same track. Pro tools has a really great way of doing this with what's called playlists so instead of having to add another track and then try to slide some stuff around I can just all recorded on the same track on a different playlist so if you look at the name of the track and the edit window here there's this little tiny arrow next to it I'm going to click on that, and that brings up the playlist manager for that track, and I'm just going to say new going to create a new playlist, and if you look, it labels that vocal o one, which is take one or take to basically and it clears off the track. Now, that doesn't mean that I've deleted that other stuff. I can always go back to that original playlist and it's still there, but aiken record fifteen sixteen takes of the same vocal track and then be able to go back and in copy and paste each section from the best takes and then compile the master take of what the best sections are so let's go through real quick and just record another verse and chorus so that we can kind of come together a little bit of that section. We like our guests on a black old code in my pants are held a my rope, but I got this gets meat of clay aiken songs sing it's your mess in my way got nothing, keep men down no, I got nothing to keep me from, but I got so now we have a second take for that same track, and now I can go back through and start to listen to each take and figure out which take I like the best, so I'm gonna go through and listen really quick again, I'm gonna clean this up, just like I did the other one put a little fade right of the top, make sure I don't chop off too much of the breath we go back through and listen and I can actually pull up and look at all the playlists right in the track that shows me each one that I'm listening to, and then I can move it up, which is really cool. We'll talk about how to do that just a second. Um, so I'm gonna listen back? Well, yeah, there's one on top is the one that you're actually hearing now that's the most recent one we took well, like out this stone, a black old code in my pants are held by a road, but I got this gets a meat of play, so let's say, like right here, this phrase needham, I'm not sure if I like that. Is there a better version of that, so I'm gonna go and cut that out and take the same part and just move that up this gets you need a play, a song maybe even the word play I don't I want to keep from that older takes some of the drag this all the way across this gets you needed a lay I got songs to sing is you're messing my wave it eh? Got nothing to keep men down long maybe I want to hear this version to someone cut this out and move this operate here hey, I got men down along like that a lot better and then I can start to go through and do that. So the whole song where maybe even this is only two takes, but I could have ten, fifteen, twenty takes in the same track that go through every single instance in compile the perfect master track. Once I've done this any time again that there's across right here I want to put in a cross fade just to make sure that there's no clicker pop somebody going to each of these. And then at the end I'll have a whole compiled master take of all the best takes are all the best parts of each take that I can put together is one vocal take on doesn't happen with vocals, they just with vocals that can happen with qatar's, you could do it with string parts. Most sessions that a lot of engineers on a work on usually end up taking multiple takes of each part and then compiling everything together to get sort of the best take that they could work with. Um okay, so we got to move on. We've got all these overdubs done way have the master vocal take that we've used it's all compiled we've got all the acoustic guitars that we've done that we wanted we've already doubled we want to go ahead and start mixing so just real quick before we jump into this last section the mixing section is there any questions we have just on overdubs and comping all that kind of stuff is there ah, hot key for the oh the I forgot the fade in and out for the section so then there's no pops sure, yeah so there's two ways to do fade out, fade ins and fade outs and cross fades if I have like this section right here like let's just say this vocal section I can either use the multi tool and go to the upper right hand or left hand corner and click and drag for a fade or I can drag the cursor across that area and hit command f and that's what brings up the faith dialogue so there's sort of two different ways to do that
Ratings and Reviews
kyle
Clear, concise, interesting! Zach presents a lot of information in the context of an actual song being constructed from start to finish. The entire process was easy to follow, and Zach provides key insights for each step. For example, when starting a project, I've never known what to do first - lay down a drum track, record guitar, record vocal ... ? After watching this course, I have a much better idea about how to decide which thing to do first, and the concept of scratch tracks adds a lot of flexibility to the process. The addition of doubled tracks and other instrument layers ("overdubs") made a huge impact on the overall sound and these seem like very achievable steps for a home studio. I've done some home recording and mixing with garage band and an old version of logic. This course is a great update on that. While Zach demonstrates protools, I think it's pretty easy to map most of what he did to other apps like garageband (which admittedly has more restricted functionality). I'm looking forward to starting my next recording project using what I've learned here!
Mark73
This was a great course! I've found some valuable information over the years here and there, but this is the first time I've actually found a substantial amount of stuff I can actually use in the same place. It's the best course I could've imagined taking on the subject and I even learned a thing or two about other products and plugins that I may use in the future. Right now I'm using the simplest version of Pro Tools available (SE), but even so, I learned a few new functions on it that I had no idea how to perform before taking this class, as well as some valuable recording techniques and concepts that will help me for years to come. Best class I've ever taken and I look forward to taking several others! Many thanks!
Don Trapani
This was a great course for beginners, it was a true introduction. Of course the instructor used high-end software and equipment; he is a professional music producer, and is comfortable with the tools he uses on an everyday basis. I did not hear him say you had to get the products he was using, he just identified the tools so anyone watching can do their own research. After watching this class, I checked out several sources for more info, and found that you can get a basic interface that comes with the DAW software, for as little as $100. If you have an interest at all in home recording but don't know where to start, this is the course for you. 5 stars.
Student Work
Related Classes
Sound Mixing