Lessons
Lesson Info
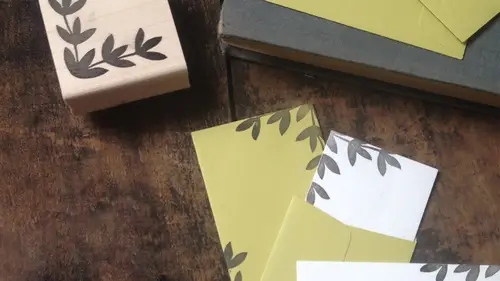
Transferring Stamp Design
She would make a stamp and a perfect I have some templates that I brought from home um basically what I've created here, I just did a little bit of sketching at home, you can make a stand from just about anything you can make it from a photograph, you can make it from a pattern that you see in a a book or, you know, something that inspires you, um, whatever it is, um, I like to I have a couple of like, inspiration books that I have, and I take clippings out of magazines, and I kind of scrap book them and just to keep my memory fresh on different things that I like, and then I will sketch into my sketchbook once you have something that you like if it's like original artwork that you've sketched, what I would recommend is making a photocopy of it and the trick that I found it works really vest, and you'll see in a minute when I go ahead and start transferring the design to the rubber is that you when you have your printout of your designs, you don't want it to be one hundred percent blac...
k scaled down the opacity on your on your printer or you know, whatever, wherever you're printing out your design scaled down the capacity a little bit so it's it's lighter than what you'll be drawing so that once you start tracing and I'll show you this you'll be able to see where you've traced and where you haven't traced yet so I've got this little design I'm gonna go ahead and uh let's see no one of your inspiration for designs come from meghan you know that's a good question I guess just things that I see around me different patterns, different patterns and tile in wallpaper and people's clothing, different motifs that I think that would make a really cool stamp really into typography I really love doing like hand lettered designs and then turning that into stand into a stamp you know, people have those like alphabet stamps that's like to try and stamp something out it's like h a b and it doesn't get all lined up and it just looks a little you know, funky I just love to be able to make my own personal message and it could be in my handwriting or it can be in a cool thought that I found and then you know, stamp it infinite number of times so um yeah, so basically now what I'm doing is I'm going to cut out my little design that I have printed out and I'm going to cut a piece of rubber to match my design this is where you could use that number six blade I'm just going to use an exacto knife works just as well so I've already got a scrap piece of rubber so I'll just use that I'll save that piece for later um what I want to do is cut out a piece of rubber the same size and shape as my my template now I've got a nice template here that is pretty much the same it's that same shape whether I flip it over or not if you had a shape that was like an l or an all belong shape where it would be different if you flipped it over you want to be mindful of that because you don't want to cut out a piece of rubber um that's going to be a weird shape and then when you get a transfer the design it doesn't match because you're flipping the design over there's probably a better way I could have said that but that's the way it came out so I'm going to flip my design over lined it up on top of the rubber and I'm just going to slice a piece off this doesn't have to be perfect I I'm just you know, sort of lining it up I'm going to cut it down more later, okay? The next thing that I'm going to dio this table has a little bit of a texture to it some actually gonna keep my my cutting that out the next tool that you're going to need is, um a soft graphite pencil I like to use a six b so basically graphite goes has a scale there's f and there's a tch a number two pencil for example is an hb um and then it goes up to nine so there's two b three b four b five b up to nine b I like to use a six b because it's nice and dark and it the graphite comes off under the paper and then transfers to the rubber really well if you can't find a six b like a seven b or in eight b ap probably is a little too soft nine b is almost like a stick of charcoal, so if you start drawing it's almost going to crumble like a piece of charcoal so I would just kind of recommend um a little bit softer. Six b is good, so now what I'm going to be doing is I'm just going to go ahead and start tracing my design and I'm kind of loosely coloring it in um mostly what I'm being mindful of our that the overall shape, the outline of what my design is. But now as you can see up that I'm drawing you see if if my on temple it was fully saturated black, it would be a little bit difficult to see where I had already traced this's a pretty simple design but for something that has a lot of contrast you know I would just really need need to be able to know where my tool had are where my pencil had already been question how often do you do this process versus just drying directly on to the brunt of the rubber that's an awesome question I'm glad you brought that up you can draw directly onto the rubber but be mindful of two things this is soft and this is hard and if you start drawing on it you might actually impress into the rubber which once you go to stamp could you know leave a mark um the other thing is what we're doing right now is this is my design right side up say this was text for example and I go to transfer to the rubber it's going to be in reverse and then when they go to print it's gonna be right side up again so if I start writing out hello I go to stamp it it's gonna not be hello it's gonna be in reverse yeah so um if you could write backwards awesome but I kind of like to do it on the paper and then I can also kind of brief fine as I'm tracing it if I have printed out something that I kind of wanna alter as I'm as I'm sketching it out ok so I've got my design transferred the next tool that's going to come into play is a bone folder um I just didn't bring a traditional bone folder but a bone folder basically, if you've seen it's kind of like a book finding tool or scrapbooking told help you fold paper on dh it's nice and flat and wide. This is just another type of bone folder that I like. It has this really wide flat surface. You don't need all these fancy tools if you just want to like without, you know, a credit card from your wallet that would probably work, justus well, teo, basically I flick that because sometimes little bits of graphite gets stuck onto the paper and I don't want them to transfer to the rubber. I'm goingto place this back face down onto my rubber, holding it, not moving it around, and I'm just going to start furnishing the design. This doesn't take too much pressure. The important thing is that you're not moving the design once it's down on the rubber, I need a fully burnish all of it down, and if you get curious to see if it's working, you could just kind of lifted up and peak and there it is. I'm pretty confident that it's there, so I'm just going to go ahead and lift it off, so there it is.
Class Materials
bonus material with purchase
Ratings and Reviews
Erica Engdahl
I found this nugget of a course a really inspiring boost for me in my own stamp carving. Good information delivered in a calm and clear way by an engaging instructor. Worth the time and money!
Karen Ard
Super short class but had the info I needed to start! Thank you
Christina Althouse
Thank you Meaghan for the overview and demonstration for how to carve stamps. I am completely new to learning how to carve so this class was very helpful!