Lessons
Lesson Info
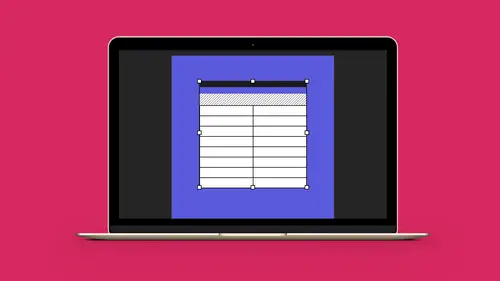
Add Images to a Table
Now up until recently one of the problems that we had with tables is that putting images into a table was never fun at all because these are just text containers. So how do you go in and actually put these in so that you have the ability to have images inside here. Well the answer is you really didn't. You'd have to go and you'd have to take your content and you'd have select your imported image, copy it with your selection tool, take your type tool put it in here and paste it in place as an inline graphic. It was clunky. But now they've gone through and they've made it a little bit easier here so we don't have this kind of issue with going in and imputing images in here. So here's how we go ahead and make this happen. Sorry folks I've just gotta change this font it's just a little bit too bold right here and it's annoying me. Much better, okay. So if I go in and I'd like to put in some pictures here what I'd like to do is I'd like to have some pictures under this row so I'm gonna sele...
ct the row or the column and I can always say insert another one if I do this, its just gonna insert another blank row or column here without the content which I could certainly do. Say okay, one row below and it gives me that. So now it's all blank. I could copy it as well and then just delete everything. Simple, six of one, half a dozen of the other. Now these are all text containers here and I wanna convert this to an image container here and now finally we can do that a whole lot easier. You have to select the cell and if you want to, you can sect the entire row and do it all at once or you can do just individual cells, it's not something that you have to do all or nothing. I can do three in a row I'm gonna do all of them here because I'm gonna put pictures in. Gonna right click and I'm gonna convert this cell to a graphic cell okay. This is not something we could do before. And with our preview turned on, you're gonna see that these turns into boxes here that are an X and they're pretty much snapped in here okay. So that's nice that we have that with that content. Then I can take and I can literally import any graphic in here that I want and if I wanna stretch these, this is gonna stretch as well. So because these are image containers or graphic containers, I can go in under the file, menu, choose place, and I can grab any content that I'd like and I can grab whatever content that is bring it in and it puts in right in there and then you have to go in and you're gonna have to fit your container, all that other stuff to make your content fit. But you know what, I can always go in with this row and simply go in with my type tool, drag that size and you can see that's gonna resize all the containers right there. Now what's cool about this is that when you use graphic containers, one of the things you can do with these containers is you can control the fitting of these containers, object, fitting. So I can bring things in, if you know these shortcuts I can go ahead and do my auto fit, I can fit the content proportionately and it's gonna fit right in there. Select a container, go into file, place, grab what it is that I want, bring it in, use my shortcuts, fit the content proportionately, and so on. So I like this feature. It didn't work before, it works great now. You can just go in and fit them in right there. Now what's interesting too is when you have your content in here an you wanna go in, you can still use your type tool and grab all of your content here and you can still merge all these cells together but it doesn't like when you merge graphic cells by the way folks. But you can go in and simply delete the boxes out of here which leaves your cells back to your original text cells. So if I didn't want all those I could just select those, get rid of my graphic containers, they're still cells right here. If I wanna merge these together, right click, merge all the cells, can put content in, merge these cells, put content in. Sometimes you wanna go in and you wanna put content together keep it all together. So in this case I've got cells that are, I don't need these two cells together. I don't need the amount of credits, the instruction here, so I'm gonna put these all into one. So I can take my two cells together right click and I can merge the cells and it keeps the content of both of the cells. But I don't need two cells here, I just need the one. Same with this, I'm gonna go ahead and merge those together get rid of the extra content and there we go. Same here, merge the cells. Great so now this just makes it a little bit more clean. I can do the same here, it's the same number and get rid of the extra content. Great, so this cleans it up a little bit more. And again I can go through all of this and just separate out the ones that are different. What this does though is that now which row is associated with which. If I select the first row here you'll see here now when I select this that the merged cells then are going to favor where the initial cells started. So you can see when I select this row and I go through and I divide everything or merge them together, the first row is going to go ahead and select all that. The second row will only do these sections okay. So one of the other things we can do is we can divide our cells so I can select the cell, I can right click and I can split the cell horizontally or vertically. Well if I split this cell horizontally again and I go back in here and I select, you'll see that it'll return it back to that row or column that I had which is kinda nice. I can go back in and merge these together. If I would like to split something vertically because I'd like to put in something in here, I could. I could go in, select it, and split that vertically. And it allows me to split it into multiple columns. Now this is all one column and this cell right here surprisingly enough, is a column all by itself okay. So now we've added a column to this without really expanding this so this can get a little bit tricky. I see a lot of people, no I don't see a lot of people, but I see people doing this using a chart over and over and splitting and dividing and merging and dividing, you don't wanna keep doing that because it's just like cutting apart anything and putting it back together, you start ending up with a lot of chunks and pieces even when you merge it all back together, it doesn't always go back together in the exact same way. So you can split and divide and merge things together here and do that but keep in mind that it may not work exactly the same way that you want to. So merging these things together works really good, makes things a whole lot easier, cleans content up, makes it look a whole lot better. Of course if you merge cells, one that's empty, one that has content it's just going to give you just the content.
Ratings and Reviews
Student Work
Related Classes
Adobe InDesign