Create Your Plan
Lesson 19 from: How to Start a Photography BusinessPye Jirsa
Create Your Plan
Lesson 19 from: How to Start a Photography BusinessPye Jirsa
Lesson Info
19. Create Your Plan
Summary (Generated from Transcript)
The lesson is about creating a plan for starting a photography business, with a focus on wedding photography. The instructor outlines a month-by-month plan for learning and practicing different aspects of photography, including camera mastery, lighting techniques, and post-processing. The lesson also addresses overcoming self-doubt, handling client expectations, and finding models for test shoots.
Q&A:
What is the recommended time commitment for starting a photography business?
The recommended time commitment is 10 to 20 hours per week, which includes practice shoots and learning time.
What are the main focus areas for month one?
Month one focuses on mastering the basics of exposure, composition, and manual mode, as well as learning on and off-camera lighting techniques.
How can I improve my photography skills with limited gear?
The instructor emphasizes that it is possible to create professional-looking shots with basic gear, and encourages students to focus on technique and lighting.
What should I focus on in month two?
In month two, the focus shifts to specializing in a specific niche, such as pet photography, newborn photography, or maternity photography.
How can I overcome self-doubt when asking people to pose for me?
The instructor suggests gaining confidence through education and practice, and recommends starting with friends and family as models for test shoots.
Do I need models to sign a model release for test shoots?
Yes, it is recommended to have models sign a model release for test shoots, as the images will be used for portfolio building.
How should I handle clients who want to see samples of my work?
At the early stages, when you don't have an established online presence, it is suggested to focus on test shoots with friends and family as models. Styled shoots can be scheduled later for showcasing high-quality work.
Why should I avoid experienced models for test shoots?
Experienced models may not accurately represent the challenges and dynamics of working with real clients. It is better to practice with inexperienced models to build skills in communication and directing.
Lessons
Class Introduction
13:12 2Common Myths & Unknown Truths
11:42 3The Road Ahead
13:03 4Find Your Passion
06:06 5The Lin & Jirsa Journey
13:54 6Part-time, Full-time, Employed, Partners?
03:51 7Stop Wasting Time & Money
06:07 8Your 12 Week Roadmap
04:33Great Plans Still Fail
06:01 10Strategy Vs. Planning
04:16 11Mind Mapping
07:25 12Select a Focus
14:16 13Competitor Research
09:34 14S.W.O.T. Analysis
13:54 15Strategy & Long Term Goals
03:50 16Values, Vision & Mission
27:49 17Effectively Managing Your Time
15:05 18Artistic Development
07:30 19Create Your Plan
13:12 20What's Your Product
10:51 21Luxury vs Consumer Products & Experiences
11:44 22Quick Break for Econ 101
16:31 23Your Target Market & Brand Message
21:25 24What's in a Name
09:20 25Your Client 'Why'
05:43 26Crafting the Why Experience
24:17 27Document the Client Experience
08:29 28Business Administration Basics
27:03 29Book Keeping Management
06:51 30Create the Logo & Branding
07:04 31Portfolio Design
15:11 32Design Your Services & Packages
18:51 33Pricing Fears & Myths
08:46 34Three Pricing Methods
25:39 35Package Pricing Psychology & Design
06:15 36Psychology of Numbers
07:29 37Pricing Q&A
23:51 38Grass Roots Marketing
09:36 39The Empty Party
07:03 40Friends & Family Test Shoots
16:28 41Join Groups
04:32 42Second Shooting Etiquette
07:44 43The Listing & Classified Hustle
14:10 44Make Instagram Simple
13:55 45Your Automated Pinterest Plan
08:01 46Facebook Because You Must
07:37 47Giveaway & Styled Shoots
12:17 48Content Marketing & SEO
08:12 49The Monster: SEO
07:26 50Selecting Your Keywords
05:45 51Testing Your Keywords
07:53 52Grouping Main & Niche Goals
12:39 53Your Content Road Map
11:47 54Content Marketing Q&A
10:45 55Inspiration to Keep Working
07:45 56How to Craft Your Content
15:03 57Internal Linking Basics
05:30 58Back Link Building Basics
04:55 59Link Value Factos
14:38 60Measuring Link Value
04:24 61Link Building Strategy & Plan
06:10 62Link Building Plan: Vendors & Guest Writing
06:45 63Link Building Plan: Features, Directories, Comments
03:11 64Link Building: Shortcuts & One Simple Tool
14:44 65What is Sales? Show Me!
12:58 66Your First Massive Failure
05:17 67The Sales Process
07:31 68Your Second Massive Failure
05:23 69Understand Buyer Psychology
10:00 70Step 0: Building Rapport & Trust
15:14 71Step 1: Identify Need or Want
15:39 72Cognitive Dissonance
12:01 73Steps 2 & 3: Value Proposition & The Solution
14:21 74Step 4 : Close, Make the Ask
04:32 75Step 5: Follow Up & Resolve Concerns
06:13 76Family Photography Hot Seat
12:06 77Business Example Hot Seat
15:52 78Boudoir Photography Hot Seat
16:09 79The Best Sales Person
07:45 80Your Mindset, Vibrations & Frequency
06:56 81Always Positive, Always Affirming
11:55 82The Second Money & Dual Process
07:39 83Chumming the Price Waters
03:57 84Creating Want or Scarcity
09:54 85Timeless Advice on Being Likable
11:53 86Selling Over The Phone
10:59 87Forbidden Words in Sales
11:40Lesson Info
Create Your Plan
Creating Your Plan. So here's my plan for you with a wedding focus, 10, 20 hours a week. This is gonna vary based on everybody's pace and your speed in terms of absorbing content, kind of understanding it and going out and practicing. The 10 to 20 hours a week includes your test shoot time. That make sense? So, I don't expect you to sit in front of a computer for 20 hours, I expect you to sit in front of a computer for maybe six to eight hours in a week, and then to actually put it to use in that week, otherwise, the concepts get forgotten. So here's my month one. My month one is focusing on the power of simple tools understanding camera, lighting, and post-processing. Week one is camera mastery. We wanna get the basics of exposure, the exposure triangle, the artistry, composition, being comfortable in manual mode. How many of you here could be given any camera and get to a perfect exposure in one single shot? If you can't raise your hand to that, that's like week one, getting to a per...
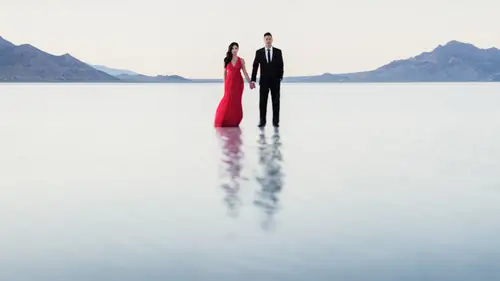
fect shot without even looking at the back of your camera. Okay? Week two and three, we start learning on and off camera lighting. I want to show you some examples of this. Week four is engagement photography, week one through four, we're doing raw processing fundamentals. So again, how to finalize and perfect the images as we go through learning how to create them. This is one of my first test shoots. This is Ryan and Ayu. They are friends of ours, from church, actually, and yeah, I was really good at the prom pose, I mean, there's so much good about this. I like it. Yeah. Okay. This is where I want you to understand where month one is supposed to take you is going from using this exact same gear, a Rebel kit, and then getting to this place in your technique, because those two shots were created on identical gear. Okay? I want you to have an idea of... Maybe you're applying this to dog portraiture, boudoir, anything, but that's the jump that I want you guys to have within your month one/month two of going from this to this with the same gear. That means that if you don't know how to create this with a Rebel, then we probably need to go back to like a ... That's why I was saying photography 101 is not like a easy course. It's not a 101 course, it's like literally everything that you need in terms of foundation. This, this is how manipulate an on-camera flash using white balance tweaks, holding a gel over the flash, and balancing it in a way that would actually light her up and balance her between the background without spilling light onto the water. This is what we call Lighting 101. This is the level I want you guys to be at within month one. Same thing. Can you position your subject to utilize ambient light in a scene, using on-camera flash to direct it off of some sort of light source to get back and to get definition, a rim light... This is again, Lighting 101. In Lighting 101 we go through examples, we cover fitness, we cover engagement. We cover family, we cover all these different examples of how to manipulate light with simple tools. On-camera flash, family portraiture. Okay, this is bouncing off a reflector, white reflector off of the right side. Then we get into off-camera lighting and lighting 201. Okay? One simple off-camera light source to get to a certain look or effect. A simple grid light to get to a look or an effect. This is one off-camera light source lighting him up, using the sun as a rim on the other side, and then balancing the exposure. That was month one. Okay? Now we go to month two. We learn photographing the actual subject. Month one, I want you guys to... If you are good on that stuff, If you're like, "Yeah, I got it", great, skip it, or just start pulling in month two. Month two is focusing on your craft, your niche. This is when you get the pet photography course, you get the newborn course, you go get the maternity course, everything else, and you fit that in, 'cause during this time, I expect you to be able to take... For a wedding, it's massive. There's so many pieces of a wedding that you need to learn. We're learning basically from bride and groom prep all the way up to wedding day portraits from a wedding, and the post-processing for that. These are the images I want you to be able to create coming out of these types of courses. Pin lighting... I like to create interesting groom and groom prep type shots. Getting good lighting and an editorial, Kind of soft, bright look with your images. I know that all of your styles are gonna vary. These are like the fundamentals of how to get to each of these different places so you can choose a style. When you're given a poopy situation, like a hotel conference room with those crappy wood walls, what do you do in that situation? Here's how, by adding two lights and adapting the exposure, we can get to something that's really nice. Okay. Changing scenes, this is that month,too. How to use certain elements in front of the lens to create something out of nothing. They're literally standing in a dirt parking lot, a really bad background and direct sun. Month three comes with further refinement, completing the wedding ceremony, details/publishing, group portraiture, reception, and then, now we're on efficiency and workflow of post-production. Convert that over to boudoir. Okay? But the raw stuff, you still need to build into your timeline. For a wedding ceremony, this is understanding positioning, so we have full-on maps on how does a team operate together, and if any of you're a solo shooter studio, you're gonna need to manage a team on your wedding day. You'll probably at least have a second shooter. You probably need to understand positioning of where you need to be. Maybe you're shooting solo. It'll cover how do you shoot a solo, where do you be in those kinda moments, but, here's the ideal with two shooters, three shooters, etc. How do you get the "must have" shots, what are the "must have" shots, how do you prepare the special moments, getting detail shots that get you published? We'll have a case study of that coming later. This is one of the most overlooked areas of portraiture. I'm not just talking about weddings, I mean, like family portraiture, I mean... This is at a wedding, obviously, but, a group portrait like this is one of your best marketing tools. People, for some reason, don't quite get it. They don't get that if you capture a great family portrait, there might be five, or six , or eight, or 10 people in that shot who are all gonna share the image. It's such a great tool, so we teach that aspect of group portraiture. And of course, being ready for crazy moments... End of day lighting. Okay. Use our plan or pathway. Find or make your own. Coreen is asking, "How do you overcome self-doubt about your skills, when people... when asking people you know to pose for you?" It says "as you're creating this artistic development, and you're exploring it as you go through the weeks and you're coming up against you own self-doubt." The self-doubt thing is gonna, it's gonna be one of those things that you learn over time. You kind of adapt over time. The big thing though, is that for Coreen and for everybody that's going out and shooting and doing these things, one of the things I wished I had back then, and I know this sounds... This isn't to sound pitchy or anything, It's just a matter of ... If you can learn something, and then go put it to practice, that's very different from trying to simply go put something in practice that you haven't yet learned. Right? When we first started, I was going out and just taking these couples, and I had no place to start. We'd just go take pictures, and I would learn "Oh man, nobody knows what to do in front of the camera." "Oh man, some of these shots are good, but some are not good." This is how you direct, this is not how you direct. I don't... It was a learning curve that was crazy. It's a very difficult place to start, but today, you don't need to start there, because if you start with something, let's say you read a book, you get an online course, you do something, and you absorb somebody's information on how to do something, you can take it into practice right away, discover what's effective, and then go right back to the education and say "Let me get more." And then, you go test it again, and in 12 weeks, you'd be amazed at the level of comfort you can develop by simply doing one piece of education, putting it into practice, and then repeat over 12 weeks. You do this process, and I have seen students come out of our boot camps in very short periods of time, that move from a $1500 price point up to a $4000 price point in a span of less than six months. From this simple educate/repeat, educate/repeat process. The worst thing that you can do as far as a time suck, is just to go out and fumble around, and try it without having someone or something there to give you a guide, if that makes sense. I wish we had that, but (rubs hands) it wasn't the landscape, but the time. (laughs) Julie. Yeah question. Do you make the model sign a model release for all of your test shoots? Yes. Because for boudoir photography, that can also be an issue. It can be challenging, for sure. For a test shoot, you generally want... When a boudoir client is a paying client, Um hmm. You give them the freedom to sign or not sign that model release. When it's a test shoot, I would say, you don't take it on unless they sign the model release. The reason is, you're doing it for practice, but also for these images for your portfolio, and when it's an unpaid shoot, for you not to get the images, it doesn't meet your needs, and there's plenty of people that will release the images. We do have another question that came in from online from JP, who said, "What is your advice on handling clients that do want to see samples as you're going through creating this, you're doing your test shoots and stuff, in those first 12 weeks, and they want to hire you, but they want to see those samples, and you don't really have your online presence yet." This is where in the course you'll notice that we actually don't build in... It'll be hard to flip it all the way back to the beginning... But at the beginning you saw the layout, the styled shoot. Remember what week that was in? The styled shoot was actually week 12, and there's that note in there that says for styled shoots, feel free to wait a little longer if you're not there yet quality-wise, because with a styled shoot, that's where vendors have certain expectations from your work. They're gonna want images that represent their work, and their quality, and portfolio bases, and that kinda stuff. Going back to this, is most the time, like with early test shoots, you're not looking for quality models that want to see a portfolio, and they want to see all those things. You're pre that moment. What you're looking for is someone to stand in front of your camera, and you can find those best going to the family and friends network, who are actually gonna become your first set of brand ambassadors that we're gonna talk about. Tomorrow is... Sorry, not tomorrow, but later in the class is all about marketing and your first group of people that are gonna become your evangelists are actually this network of people you're test shooting. They're your friends and your family. I want to teach you how to put them into a group, and how to get them to help in the process. Okay? Don't be looking necessarily for... If you look for experienced models, they're gonna say "Yeah, if it's unpaid, I need to see your work to make sure you're good enough." But you actually don't want experienced models, right? That's kind of the opposite of what you want. Do you know why you wouldn't want experienced models? Well, how often are your clients experienced? Your clients have never been in front of your cameras. An experienced model is just gonna set you up to fail, because they're gonna come and stand in front of you and do their whole (hums) like all that. Do you like that? Lee liked that I got a... He liked that. Let me just... (audience laughs) They're gonna do everything correctly, then you're gonna get onto an actual client shoot where your clients can do nothing correctly, and you haven't practiced how to direct, you haven't practiced communication, you haven't gotten down the technique, anything. You generally do not want to go that route when you're looking for these test shoots. Inexperience is possible, and that's the name of the game.
Class Materials
Bonus Materials with Purchase
Ratings and Reviews
Angela Sanchez
This class has been an eye opener for me; a point of change in my vision as photographer. Pye is and AMAZING, INSPIRING, GENEROUS instructor, with an, authentic desire to help people and to share with them the best of his knowledge. I will not have enough words to say thanks to Pye Jirsa, as a teacher and as a human being, and thanks to Creative Live who allows us to benefit from the experience of such a knowledgeable, educated, well-versed photographer and instructor. 1000% recommended!
Yenith LianTy
Been following this guy forever. Pye Jirsa may be well known in the wedding & portrait photography world and if there is something that this guy knows it is how to create a business, a sustainable one. The workbook he provided is comprehensive, and I honestly wish I had this when I first started out as a photographer! I love that he talks about his failures, keeping it real and honest for anyone starting out. He is definitely one of the best instructors around, super humble, down to earth and with a sense of humor to boot. The course is worth it! THE WORKBOOK is AMAZING! SUPER DETAILED!
Tai Hsin
I saw the live broadcast and it was amazing. Pye is one of the best instructors and inspirational photographers.. there are two type of ppl.. one who has the knowledge and doesn’t know to teach another who has the knowledge and knows how to get it through.... I still didn’t purchase this as I am saving for my daughters entrance fee for collage... :) Anyways he’s one of the best instructors and a good friend.... very humble and always cracks jokes.... Keep inspiring and keep teaching.... my blessings are always with you pye.