Composite in Photoshop®: Selection and Shadows
Lesson 6 from: Simple Backdrops for CompositingBrooke Shaden
Composite in Photoshop®: Selection and Shadows
Lesson 6 from: Simple Backdrops for CompositingBrooke Shaden
Lesson Info
6. Composite in Photoshop®: Selection and Shadows
Lessons
Class Introduction
02:34 2How to Use Bedsheets as Backdrops
05:37 3Effectively Use Color Theory
06:07 4Set Design and Prop Placement
05:02 5Shoot Props and Self-Portraits for Composites
13:41 6Composite in Photoshop®: Selection and Shadows
33:25 7Composite in Photoshop®: Lighting and Color Adjustments
19:43Lesson Info
Composite in Photoshop®: Selection and Shadows
We've got the images that we just shot here in Bridge. And I tend to use Bridge over anything else simply because it makes everything really easy for me. I'm not making any adjustments to my images ahead of time. I don't need to make mass adjustments to my images. So I use Bridge because it's super easy to pull your images. Pull them into Photoshop, and use just what you need to edit with those images. I think that something that really trips people up when you're compositing is how do I possibly choose the images that I need? And you'll notice with the shoot that we just did that I don't really take a lot of images. I love to take just a couple of images, only what I need, and then I only have to select between a couple of them. That is much easier for me. So I've got this teacup. I shot in raw in JPEG, so that's why you're seeing the double images come up. And it's up to me now to decide which of the teacup images is the best one to pull in. Probably something that's at a lower angle...
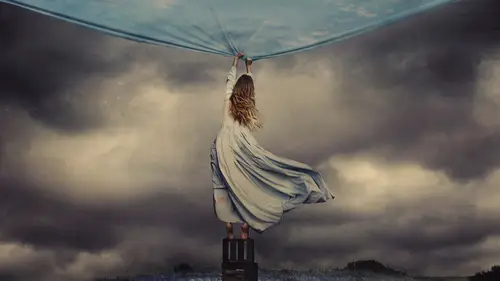
like we shot. So I'll probably go with this image or this one. But I'm not entirely certain yet. We have to actually go look at the background image first and analyze the angle of that room. We've got the teddy bear from multiple angles. And then we've got me. And this was our first test shot where I was a little bit too close to the camera. So after that, we moved back and that ended up working really well. We've got the dress in. There's just the slight tip of it that's out but that's not a problem. That's gonna be totally fine. And there I moved it in. And this was the image that I really liked from our shoot. The reason why I was drawn to this one over any other image is because of my pose and because my whole body was in the frame. I really liked how you couldn't see my face. I liked how it was a more exaggerated pose than the others. That one is a little bit more upright, looks a little bit more proper, but this one really has a good sort of slumped over feel which I was going for. Because, again, we've going for like rejected wonderland Alice here. She's very, very sad. So I'm going to pull this image into Photoshop. And I'm just bringing that raw file in. Here I have it open an image raw. And I don't need to make any adjustments because if you think about compositing as being many images that come on to be one, it's really hard to know if you need to change the color temperature or the lighting or anything about that image unless you see it in relation to the other pictures that you're pulling it into. So for right now, I'm just going to open it into Photoshop. And you can see here that I have the room already chosen, already picked out. This is our room that we're going to composite into. So you can see that red wall in the background which, in reality. is much more of a pink salmon color, but red is good enough. And that's why we used this red backdrop. You can already see as I flip back and forth that the colors are quite different. And that's okay. If you notice, this is a much more de-saturated version of what this is. So if I lower the saturation of the red color here, it actually should match pretty well. I'm going to go ahead and move my subject into my background, but before I do that, I want to look at this image. And, if you notice, you can really see the floorboards coming toward the camera from where I shot this room from. And that's a really good indication that I was probably down pretty low. If you can't tell just by looking at an image what angle you shot it at, that's when you need to shoot multiple angles. And that's why if I go back into Bridge you can see that I shot the teddy bear, for example, from all of these angles so that I had the exact right one that would fit. Because I simply never know. I am not naturally good at figuring these things out. It doesn't just come to me and I'm not good at anything that has to do with logic. So I like to have all of my options covered. Now, I only shot myself from one angle. And that could be an issue. But we're going to work with perspective changing tools just to see how it goes. So before I choose any of these teddy bear images, Winston, as he is now known, or the teacup, I'm going to go ahead and see if I fit into our picture. So there are a couple ways that you could do this. I'm going to click onto the image of me here. And I'm going to use the lasso tool and just go ahead and select generally around my subject. I am not very good at making very precise selections, so I prefer, instead of selecting right around my subject and using something like the pen tool, I would much rather just use my lasso tool, make a big selection all around my subject, and then erase. I find that erasing, particularly with layer masks, is way easier for me. So I am going to copy and paste my subject in there. And you'll notice that there is quite a shift in how big I am versus how big the room is. And that is okay. I look crazy, which is actually really good for the Alice in Wonderland theme, I think, but I'm going to go ahead and fix that with the free transform tool. So command-T, I'm holding shift to keep my aspect ratio of this image, and I'm simply going to make myself smaller so that I fit into this space. How much smaller, I'm not sure yet, so I can go ahead and play with that until I hit OK. And I think that looks pretty good. I actually think that we got pretty lucky on this image because it looks like we've got a pretty good angle here. I'm gonna make myself a little bit smaller, just plop myself right down in the room, let's go with that. And I'll say OK. Alright, so I've got me in there, and before I start to blend myself into this room, I'm instead just going to click that eyeball off that layer and bring in the teacup. So let's see how the teacup fits now. And this is all like a little jigsaw puzzle if you ask me. It's a little bit confusing when you're trying to see what fits and what doesn't fit. And it's all about just trying. So let's look at these images. We have close up, and then we have this really low angle which I think might be too low. So I'm just checking it out to see what looks best. I think one of those first ones was pretty good. Maybe that, 'cause that's a little too low. So we'll try this one. And again, I have no idea if I'm right about this. Just trying it out, seeing how this works. And we're going to go ahead and make a huge selection and copy and paste. Okay, well we definitely have a really big teacup. So that's good. But again, it's a little too big. I don't want a teacup that's going to envelop my subject. I just want something that's gonna be big enough to look really whimsical in the room. I think that's gonna be pretty good. So we'll start there. And you can see, I'm placing this teacup without thinking about what the background is yet. I would like to keep myself, as I have here on this layer, with that red touching that wall so that it's less erasing that I have to do, particularly around the hair area, but with this teacup, it's really not as important because it is such a solid object that if I start erasing around the rim of the cup it's gonna be much easier than erasing around little hairs on my head. So I'm not worrying if I put this over here where the door is, or over here. It doesn't really matter. And I think this will be a nice spot for it. So we're just jamming everything in the room. So now I'm going to find Winston. There he is. Good boy. I think that'll be a good angle, that very first one that we got. So let's open that. This is gonna be a giant teddy bear. (laughs) I just really wanna make a whole room of giant things. I think that would be fantastic. I don't know, maybe this will evolve. Let's see. So I'm selecting, copying, and pasting. Yes, we should do it. We should do it. Okay, but we're not going to. So instead, I am free transforming, making it just a little bear. Aw, so cute, right? Okay, there's my little bear. Put him in there. So now we have to start erasing. And this is going to require a few different steps with the erasing process. So let's zoom in. Well first of all, hooray, I'm in focus. That is not always a given with my photo shoots, so I'm glad that I'm in focus. But I do need to get rid of the background. And, as I mentioned, there is a way that we could potentially just blend this red into that wall. So the first thing that I'm going to do, let's get rid of the teddy bear and we'll get rid of the teacup and we'll keep me in there. First thing that I would like to do is click on that layer where I have my subject, and let's go into image, adjustments, replace color. Image, adjustments, replace color. And when we're in replace color, it's going to bring up this nice little graph and you have these little eyedropper tools. The eyedropper tool is going to let you select the color that you wanna change and then you'll see that graph change. The black and white graph. The black and white graph is showing you what will be affected by your changes and what will not be affected. So whatever is white will be affected by your sliders here, and whatever is black will not be. You can change your fuzziness by bringing it up or down. And if you bring it up, more will be selected. If you bring it down, even less will be. So I'm just bringing this to the point where my background is selected, but the skin is not. So you can see if I go too high that my skin tone is starting to be incorporated, so we'll just pull it back to about there. Which is about 98 points of fuzziness. So now I can start to change the hue. I can make it whatever hue I want. And it's going to change the background without affecting me, the subject. But we don't actually need to change the background color yet because it's the saturation that we're having an issue with. So I can take the saturation down and the whiteness up to try to match it to that background. So if I pull that up, saturation, we'll just mess with that a little until we get a match. And it is definitely possible to get a match. Oh, we're so close. Oh, hold your breath. Okay, 16, I'm gonna do 17. Let's do 17. Okay, that, I feel like that was the magic number. And then we can play with the hue to see if shifting it in one direction... Oh, we're really close. We're really close, you guys. I feel it. Do you feel good about this? I feel good about this. Okay, I'm pretty happy with that. I think that we're getting a pretty good match. So I'm gonna say OK. And this is going to allow us to simply gently blend that background into the wall. So I'm going to create a layer mask on this layer. And the layer mask is going to allow me to erase without doing anything destructive. So on my layer mask, I am clicking my brush tool, making sure that I'm on black with my color swatches. Making sure my flow and opacity is all the way up. And I'm just going to right click while I'm on that brush tool to take the size up, make sure that it's a nice big brush, and make sure that the hardness is down. And this is the one thing that I wanna stress here, when you're trying to blend a background in, it's really good to have a zero percent hardness. Because that's going to allow us to have a super soft fuzzy brush which is indicated by this brush right here, versus 100 percent hardness right next to it. You can see that the edge is super harsh. But we're trying to just blend really seamlessly, so it's great to have a really fuzzy brush. So that looks pretty good. And I'm going to start to erase. And you can see how, once I start to erase, you really don't have to go up against the hair or anything like that. It is such a soft, fuzzy brush that you can get in there and you don't have to worry about this problem area, which really is our only problem area here. I can cut in between the arm and the dress. I can cut all along the dress. Because it's opaque. But my hair is not an easy thing to cut around. So we have completely resolved ourselves of that problem. And now we're going to finesse it. Just around this area. I'm just going to take the opacity of my brush down. And, with the square brackets on my keyboard, I can make my brush smaller or bigger, and here I'm just erasing one more time but at a lower opacity. Just so that it blends even more. We have nothing to fear. Okay, it looks pretty good. Alright, so now I can go back to 100 percent opacity. In this case, we wanna do just the opposite of what we've done. So instead of a soft, fuzzy brush to get rid of our background, we're going to use a super hard brush. I'm going to take it to about 88 percent, 89, 90, anywhere in that range to start. Because I'm erasing against something that is sharp. I miraculously got my subject in focus, which almost never happens, and that's really good. So I'm trying to match the hardness of my brush to the sharpness of my subject who is in focus. So here I can go in with a pretty hard brush and just get right along the edge. The great thing about fabrics, no matter what background you shoot on, is that usually they're not see through. And if they're not see-through, then we have this really great option of just erasing whatever you want from the fabric. So you can see how I'm sort of taking a liberty here of just cutting into the fabric slightly, and that's okay because generally you're not gonna know if you've cut a little piece of fabric off or not. So you don't have to be super precise. Now that's not to say that you shouldn't be. But you don't have to be, generally, as much as going around skin or an object which has straight lines, for example. It's almost like this dress is just begging us to do whatever we want with it, which is great. So I'm going to erase around my subject. The good thing about creating like this with these backgrounds is that you don't have to have any particular backdrop. It doesn't matter if you have, you know, like an eight foot by eight foot seamless backdrop or anything like that. What we're really looking for is a backdrop that we can blur enough if we wanna separate our subject from it through depth of field, or a background that we can blend into the space that we're shooting in. And I think that if you can match colors, because color is the really important thing here, that's really all you need, is to make sure that you can match the color of your bed sheet or piece of fabric or whatever you're using for a backdrop. It could just be a wall that happens to have the right color. As long as you can match that, you're in pretty good hands. We used a red sheet here and that was just really lucky because when we were sourcing these fabrics, I just went out and got whatever I saw. It could've been red. It could've been blue. I didn't know yet what color room we were going to put me into. So that didn't matter. It could've been a blue sheet because, like I mentioned, it doesn't matter as long as it's a bold color. I would've been able to change that color to absolutely anything. So that is not of concern. The only concern is that it has a color and therefore the color can be changed. So I'm just going to get in this little crevice and I'm doing that just by making the brush smaller and getting in this little area. And you might wonder, well why don't you change the color of that area and blend that as well? And you could, for that little portion right in here that has all of that pink color, but instead of doing that, since half of this has the white border going around, I'm just gonna get in there and do what nobody ever likes to do which is to erase really closely. And I hope that you'll forgive me if I sort of make my arm look like a slightly odd shape. I'm going to go a little bit faster than I normally would here. But that's okay. I'm just switching to white and bringing back what I've erased too much of, which is why I always use a layer mask in this scenario. And you can see if we zoom in, especially here, that we've got these really hard edges from our eraser. So once I'm finished erasing, I'm going to just make sure to go right back in there with my eraser tool, take that hardness back down, and my brush size up, and just clean up a little bit of that area so that we don't have any harsh lines. In my experience, that is the number one thing that ruins a print, is if you have those harsh lines that are so undetectable, but every once in a while, they stick around. So we've got our subject, and she doesn't fit yet. Let me mention that. I recognize that she still looks a little bit pasty. Not like color pasty, like pasted in. And the lighting isn't quite right. But what we did here that was good is the angle matched and the lighting is very diffused, like we mentioned during shooting, It doesn't really matter that it's not exactly right because the light is very soft everywhere. In the room and on my subject. That means that I can manipulate the light a lot better than if there were a harsh light coming in and hitting my subject. If you can imagine, let's just say there was a light hitting my subject from the side, a really hard light. I would then have to emulate that light in a room that did not previously have that lighting. And that would be difficult. This, however, is a much more manageable scenario. So we're going to go ahead and get the teacup in and we're going to get the teddy bear in, and we're going to make sure that everything fits perfectly. Here we have the teacup, and I wanna quickly get around the teacup. I'm going to go a little bit faster for this one since you have seen the gist of it. So we've got our teacup here on layer two, creating my layer mask, making sure that I'm on my brush tool on black, making sure my opacity is up, and I'm definitely going to change the hardness to match the sharpness of my teacup, which is quite sharp. Maybe we'll take the size down just a little. And let's see how fast we can do this. I feel like we should, you know, you should definitely go get a picture of a teacup and put it in Photoshop, and cut it out and race me right now and we'll see who wins. Probably me 'cause I already have a picture of a teacup. And also because I'm going faster than I've ever edited in my life. I know that I just cut the arm of that teacup off, but we don't care, 'cause we're going really, really fast. And it is pretty easy to go fast with something like this once you get the hang of the flow of the brush and the settings that you generally like to use, because anything opaque is going to be much more forgiving when you try to cut around it. So I'm making up the lines a little bit. I'm not exactly tracing it perfectly, as evidenced by that, but that's okay. 'Cause we're going with it. And I'm just gonna get right in this handle which is going to be the area of believability with this particular image of a teacup. And when I say area of believability, what I'm talking about is where are you going to make contact from the object that you're putting in the frame to the floor, the wall, a person in the frame... Where is that contact being made? In this case, it's the handle on the floor and the body of the cup here on the floor. So that means that I need to create shadows in those places. And make sure that everything matches up really well. So I'm getting in the crevices and just making sure that I have every little bit erased. I'm going to switch to white and just bring back a couple things that I might have erased too much of in my excitement to beat you in our teacup challenge, currently. You know, if you zoom out far enough, it probably looks okay. So I'm gonna say that's good. And we're just gonna quickly get our teddy bear in. And I'm a little bit tempted to use a different tool here. So instead of erasing all around the teddy bear like we just did, because there are all these little fibers, I'm going to choose my background eraser tool and we're gonna see how that works. Instead of working on the layer mask, we're going to work on the actual layer. And what this is going to do is allow me to simply click, drag, and draw on the background. And the tool itself is going to try to separate foreground and background. This is really good to do if your background is super blurry. If you have hair and things like that, it's gonna really make a good distinction. And if there's a big color shift as well from your foreground to your background. We have all of those things going for us here, so I'm going to click and drag along my teddy bear. And you can see how this is working pretty well. And I have way less headache because of that. So I like how this is going, personally. I mean, would anyone turn down something that goes way faster and does just as good of a job? I don't know. I probably would, because I'm very stubborn about technology. But I shouldn't. So what this is doing is just separating foreground and background. Really, really easy. You can always right click on any brush and adjust. So for example, our hardness is up to 100. And you can see what happens if you bring your hardness down, it turns into a fuzzier brush which can be really good for hair and things like that. In this case, we have our little teddy bear, Winston, with the texture of the fur on him. And I'm just getting in there and seeing what happens when I brush against him. Now you can see that some pieces are being left red. And that can definitely be an issue. And the way that we wanna handle that is by changing the tolerance. So if I go down from 50 percent to let's say 13 percent, you can see that it's leaving even more red around the edge. So if i step back in history and change that and go to 100 percent tolerance, you can see that it starts to cut into the teddy bear. And it's actually choosing more of the foreground instead of less. So we were actually pretty good with 50 percent tolerance and that's where I tend to start whenever I'm using this tool. Just to see if I need to adjust in either direction. And even though I do have some red included in here that I definitely don't want, that's going to be okay because I can always use my replace color tool to get rid of that color. Or I can simply go back over it with a higher tolerance and see if we can't get in those nooks and crannies. So I'm just gonna quickly go around this area. In fact, I'm gonna switch back to my layer mask. And I'm just going to get in there now with my brush, since I don't have to actually touch much of the teddy bear here. We can go in on black and just really quickly get rid of all of that. I'm gonna make my brush even bigger. And we're pretending this is perfect even though I just cut his foot off. That's okay. Of course, I would never advocate for going super fast and leaving little errors. But in this case, I'll bore you to tears if I keep talking about it. Okay, so we've got our teddy bear. If we zoom out. And there's one very key thing missing here, which is shadows. Without shadows, nothing is believable. I believe that the sun makes us believe in everything. We should probably worship the sun. Because without the sun, none of us would look like we were existing in this place. So shadows are paramount here. And we need to create them for each layer. So first, we've got our subject. And she needs a shadow, that's for sure. So I'm going to use the lasso tool to create a shadow all around her. Wherever I think it should be. So for right now, we don't really have a direction of light, so I'm not going to choose her shadow to go way out to the left or to the right or in any direction. I'm just going to create a really light shadow right underneath her. Really close to her dress. And I can go in and refine that shadow a little bit by holding ALT or option. Just getting rid of maybe where I selected too much. Like that out here. I went a little crazy. Okay, and then I'm going to right click. And I need to feather this selection. So I'm choosing feather. And this is something where if you have a really good idea of feathering already, then it'll be pretty easy for you to just choose a number and see if that works. If not, experiment a little bit and see what does work. So I'm going to choose 40 pixels here to start. And we'll see if that's good. It might be way too big. It might be way too small. But what you're looking for in feather is the selection that you're making, if it's too hard or too soft. Just like with your brush tool when you right clicked and chose the hardness, you were checking to see if the brush edge is too hard or too soft for what you're erasing against. In this case, we're trying to make this selection that I just made harder or softer, depending on what you want whatever is in that selection to look like. In this case, it's going to be a shadow, so it needs to be pretty soft. So now that we have our selection made and we have softened it through feathering, I'm going to choose an adjustment layer in curves, and I'm going to pin that layer down to the layer that we're working on. Which is going to be our background layer. I want to only affect our background layer. Because if I were to put this layer above all of our other layers, it would affect my subject, my teacup, my teddy bear, whatever is encompassed in that selection, everything under that adjustment layer is going to be affected. But in this case, now it's only going to be on our background layer. Which is the floor, which is exactly where our shadow belongs. With a curve adjustment layer, I can choose to make that area brighter or darker. As you can see, that will be our shadow. But I actually like to use curves from the highlight portion to create my shadows. Make them just a little bit more believable. So now we have a shadow. Now if your selection wasn't perfect, that is totally fine. You don't need to worry about it. You can just click into your layer mask that is automatically created with your adjustment layer. And just like you would use a layer mask in any other scenario, you'll click on your brush tool. Make sure that your hardness is all the way down. Take that size up a little bit. And I'll probably take my opacity down just to erase a little bit where maybe the shadow went a little out of control. Perhaps just behind her here. I think this shadow is looking really nice. I think that it makes her look more believable. But we still have these really weird floating objects around her that need to be grounded with a shadow. So let's go ahead and create those. Another way that you can create a shadow, if you just take a look at this teddy bear, is if you wanna maintain the shape of a shadow, it's really good to use the object itself that you've just cut out as the shadow. So in the teddy bear's case, we're just gonna take Winston and duplicate him, now we have layer three and layer three copy, which are both our bear. Both of them are the same. Because they're the same, they're going to be exactly the same shape. Which is perfect. So I'm going to go ahead and I'm going to darken one of the layers. So just really fast, I don't need an adjustment layer, anything I can use, exposure, and just take the exposure of our teddy bear down. And so you can see now how we've got this weird teddy bear lump floating around. And he's going to be our shadow. But the one thing that we do know is that shadows can only exist underneath the actual object. So he's not in the right order. We're just gonna take layer three copy, move it right below layer three, and then he's going to turn into our shadow. Alright, now he's too hard. Just like with feathering, if you have a feather that is off, that's too hard or too soft, then the shadow won't look good. So in this case, we're going to have to make the shadow a little bit softer. We're not gonna do that through any sort of feathering or hardness, we're doing that through blurring. So I'm going into filter, blur, and I tend to use Gaussian blur in this scenario. And just take it up until that shadow looks blurry enough. And then I'll take the opacity down on that layer so that we have a nice believable shadow happening underneath Winston. We can do the same thing for our teacup if we want to, which is layer two. We can create a duplicate layer. We can go ahead and just quickly make it darker. We can change the order of the layers, so now our shadow is hidden until I shift it. And you can always play with the placement. You don't have to bring it just straight underneath. You can use your arrow keys to sort of manipulate where you think that shadow should go. I think we'll start there. And this shadow is gonna be a little bit more complicated because there are two entry points on the floor here. So first thing's first, I'm going to filter, blur, Gaussian blur on that layer. We've got a nice soft shadow happening, which could be good. Yeah, I think a nice soft shadow to start. We're gonna lower the opacity. And this shadow is gonna be good for over here, maybe under here, but it's not gonna be good for the part that's touching the floor. Because something that you have to learn with shadows is that they change based on how close an object is to the thing that it's touching. So the further away the thing is, the softer the shadow might be. But the closer it gets, the darker the shadow will be. So I'm going to use the layer mask associated with that shadow layer, and I'm going to erase much of it. I'm on a low opacity, but that's okay. I like to sort of finesse things a little bit, make sure that I'm not creating too much of a harsh distinction between what I'm erasing. There we go, we don't need any shadow up there. I like that. And now I'm going back to hand drawing in the shadow. So I'm going to draw the shadow here. Maybe just under there. I can hold shift to add more to my selection. Maybe there. And I'm just guessing at this point. I don't know if this will be perfect. But this is where I think we need a little bit of a harsher shadow. Going to right click and feather. And I'm gonna do 30 pixels this time. That might be too much. We'll see how that goes. And what I know is that I can not create this adjustment layer above my teacup. Because then I would be making the actual teacup darker. But I do want it on my subject and on my floor. So I'm going to make the shadow just above my subject layer and my floor layer with my curve adjustment layer. And I'm just going to make those areas a little bit darker. So I think that it was a little bit soft and I would probably do it a little bit less soft, but I'm gonna leave this for now and see if we can't try to bring this together with the colors, the white, and really just finish this image off.
Ratings and Reviews
Heather Lynn
I really liked this class. There are so many ways to accomplish the look and feel that you want. It's nice to see the variety of ways people use their own processes and pick and choose what works best for you. Great job Brooke. You related very well, and were very thorough with the steps your explained.
Max Safaryan
Great course with useful content and excellent delivery - Brooke is very informative, pragmatic and efficient. Well worth it!