Priority #2: Your Product Photography
Lesson 6 from: How to Build a Business While Learning Your CraftMegan Auman
Priority #2: Your Product Photography
Lesson 6 from: How to Build a Business While Learning Your CraftMegan Auman
Lessons
Class Introduction
10:05 2Why Do You Want to Make Money from Your Craft?
03:51 3Exercise: Take an Honest Look at Your Financial Situation
12:05 4(A)lways (B)e (R)eleasing
37:06 5Priority #1: Email List
49:00 6Priority #2: Your Product Photography
39:09 7How to Build an Audience
14:40 8Which Audience Building Strategy is Right for You?
10:21Exercise: Personal Focus Group
11:48 10Student Examples: Personal Focus Group
30:50 11Audience Growth Strategy: Search (with Tiffany Whipps)
28:14 12Student Examples: Search (with Tiffany Whipps)
21:36 13Audience Growth Strategy: Press (with Brigitte Lyons)
51:56 14Audience Growth Strategy: Visual Content Creation
38:57 15Visual Content Creation: Pinterest
12:27 16Visual Content Creation: Instagram
33:04 17Student Example: Visual Content Creation
07:54 18Is Your Growth Strategy Working?
17:04 19Honing Your Craft
20:57 20Exercise: Identify Where You Are and Where You Need to Be
08:37 21How to Optimize Your Experimentation
12:53 22How to Go From Experimentation to Focus
22:25 23Student Examples: Finding Your Focus
16:52 24How to Handle an Evolution in Your Craft
26:59 25Student Examples: Handling Evolution
12:39 26Pricing to Support Your Craft
21:11 27Student Examples: Pricing
15:48 28Build Your Momentum Plan
26:58 29Student Examples: Build Your Momentum Plan
13:51 30Simplify and Celebrate Your Progress
12:02Lesson Info
Priority #2: Your Product Photography
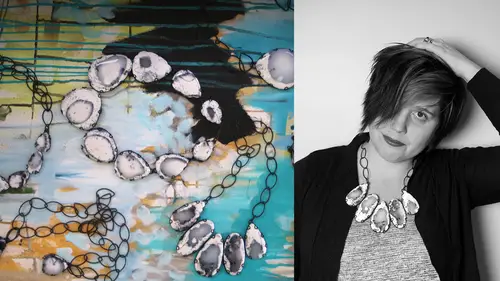
- [Megan] Let's actually talk about your photography now because that is your priority number two. Email list, get that squared away. Now let's talk about your photography, because here's the thing your photography will make or break your business. Not to make you nervous because I know it's a stress point for a lot of you but it's true. Because in our goal of connecting our craft and our audience, it is your photography that makes that connection. And that happens for pretty much any audience growth strategy that you're using. Even if you're using shows to grow your audience, guess what's determining whether or not you get into those shows? Your photography. So it's essential. It turns search into sales. So Tiffany is going to come, we're going to talk about search. And obviously, search is starting to get a little more image based, but search is a lot about your text. But if they click over and the image doesn't compel them to buy, they're gone. Good photography is super essential if...
you're trying to get featured in the press. There was a time where press would just pull everything because they had lots of money for on-staff photographers. Now, if you're sending them an image on a great white background, that may mean the difference between them picking your product or somebody else's because yours is ready to go. And time is money, right? Obviously, good photography helps you grow your audience on social media. Super essential. It gets you into shows. For the most part, it's also what convinces your stores to buy, right? It helps them see whether it's your line sheet or the email going out to them. A lot of buyers are making purchasing decisions based on your photography. So let's talk about the types of product photography that you need to have. And we're going to simplify this a little bit. There are a few other types. Everyone wants to get into the fancy flatly. But ultimately at the end of the day we at least want to make sure we're covering our basics. So first of all you need those product shots, white or simple background, and we're going to look at a couple of examples. And you're going to determine what's best for your products. And then you also want situation shots, models if they're wearable or something in use if they're non-wearable. This is what helps your customers imagine your product in their life. It also what creates the bulk of sale like your social media content. So first of all plain background. If it works for your product, it is a good idea to do white background even if it's not your primary way of doing it. There's just a couple of scenarios where white background is going to make your life so much easier. One of them is pitching the press. So if that's where you land in terms of your audience growth strategy, white background is essential because now a designer could take that, drop it into a product layout, boom, done. But I also recognize that not every product works on a white background. So if you're not pitching press or white background photos are also much easier to create a line sheet for wholesale, but they're not 100% required. So if your product doesn't look great on white, you can think about other backgrounds. The thing with other backgrounds that also makes them trickier is consistency on your website, right? So it's really easy to get every background white, white regardless of when I shot the product. It requires a little bit more finesse and finagling to get every shade of gray to match every single time. So keep that in mind and be honest about your photo skills. If you're like, "I have no idea how to make sure every gray looks the same." To do that it's easier. You can use a Magic Erase Tool, take it down to white, it's fine, it's simple, right? But some products, this may not work. So Tiffany Whips who run Tiffany and Studios and she's going to be in a little bit later. Her and I have had this conversation multiple times. She makes really thin delicate hoop earrings. They just disappear on a white background, they just vanish. So you can use a more interesting background, you just want to keep it simple and consistent. And just for fun I threw one of mine on there to see. So you can play around and see what works for you. And this kind of stuff always looks really fancy when it's happening, but I'd show you guys what that picture looked like. It was a tray from Ikea, weird Christmas fake plant from Target sitting on my dirty studio floor next to, like a French door that's all windows. So when you're like, "I can't shoot this because I don't have a beautiful table," and neither do I. I have a tray I bought in clearance at Ikea. So keep in mind that cropping is really that's where the magic happens. Okay? There is that. The other thing is then your situation shot, and those give your products context. I'm not going to lie. I love situation shot. They're my favorite. It's way more fun to shoot. Also that's where the fun happens. So if you do something wearable, you're going to end up using models. It's just a reality for wearable products. In a pinch, I have a not terrible looking mannequin that I shoot on. The mannequin does not have a creepy head. Get rid of the creepy head in mannequins. They just look creepy. So in a pinch, if I want to show scale of a necklace, I'll shoot that. But what I do is I just schedule occasional shoots with my model. When I say model, I mean, your very willing friend who is okay with their picture getting taken. Now my current model Keeley, amazing because she actually has modeled. It's really nice. But until I had her and she also has a friend that I happened to have that I was like, "Oh you're a model, great, come on." But before that it was like a former student of mine who just had really good hair, it's like my brother's fiancé who has real nice collar bones. And there was a lot of strategic cropping out of faces because I got tired of being like, "Stop making your face like that." If you're like, "I don't know how to find a model," let me tell you what I did. I went on Facebook, because you forget all the people you know, right? I went on Facebook and I just started scrolling down all of my friends. I was like, "Oh yeah, she's cute. Let me message her really quick." Right? "Okay. That's not working. Let's see like friends of friends." Just use your network. Not everyone's going to say yes, but it doesn't have to be so complicated. And here's the thing. People like seeing pictures on regular people because they're regular people, so it's really helpful. And of course, you can have some fun with your situation shots too. This is from my series called Megan Holds Things. Really creative. These are not actually my hands. If you look at my Instagram feed, there are like three different sets of hands. Some of them are mine, some of them are not mine. This one's easier to take when it's not my own hand. So you can have a little bit of fun with this. These don't have to be boring, but here is something I want to point out if you're doing it yourself. You will notice that in both of these images there is nothing in the background. The biggest mistake that I see people make when they try to do their own model photography is that they want to put it in a situation but they're not good at cropping and editing things out. So then you take these pictures and you get them back to your studio and you're like, "Why is there a tree branch sticking out of her head in every single picture?" It's hard to do. So this is just a wall in my house. If you don't have a blank wall, take a couple of big pieces of foam core and tape them together and stick them behind your model. Once you get comfortable with this kind of photography, then you can start to get a little fancier. But simplify because it saves you so much headache, because I don't have to worry that there's like a weird tree branch sticking out of her finger, right? Because there's no trees. Now of course, if you don't have a model, if you don't have products that can be worn, you don't have to use models at all. So this is Anitra from Reflektion Design and she makes these beautiful pillows. She's giving people a little context. Again, edit, right? If you're going to do situation shots, think about what's in the background. In this case I'm going to point out what's not in the background. There's no cable or cord, I don't see the plug for the lamp, I don't see the iPhone charger sticking out there. So take a minute and actually edit. Take stuff out. Keep it a little simpler. But I also want to talk about learning or outsourcing because you do have options here. The thing with outsourcing is it can get expensive when you're focused on AVR. So if you're always having to pay a photographer to shoot your product, it does start to get expensive. That's where learning can be super helpful. That said, not everyone is a photographer. And just because you have a fancy camera, doesn't make you a photographer. So if you're like, "You know what? This is something that I know I want to take off my plate, Megan," there is no shame in that, like hire away. I know Sarah works with someone and your person is awesome, I've looked at those pictures. Keep on doing it, it's working for you. - [Sarah] She's better at that than I do. - Right. Yeah, your person is so good and I won't tell anyone. We're going to let Sarah keep her secret. But the other thing is you can also mix and match, right? So you might shoot your own product photography so that you can get stuff out the door faster, but then you might hire a photographer to do your model shots, your situation shots because, again, they're better at it than you might ever be. But when you're thinking about this, you can think about treating your product photography as an extension of honing your craft. So it's not like, "I'm terrible at product photography and it's never going to happen," or like, "I have to go from terrible to perfect. All right. You know what? This week I'm just going to focus on getting a little bit better. Maybe it's today I'm going to order some lightings so that I don't have to wait for a sunny day." Who's still waiting for sunny days? Anyone? You guys? Okay. Let me tell you something. A nice light with a soft box with just a little diffuser, not that expensive. Go on Amazon, you can go to someplace like B&H Photo, it will save you so much headache not having to wait for that sunny day. Under $100 and now you can ship products any day you want. Totally worth it. So you might decide you're going to do that, or you might decide, "Okay. This week is the week where I finally learn..." Now you're going to go to the M-setting out on my camera. Maybe I'm going to figure out what that aperture priority setting is. This is the week I'm going to do that. Here's the good news. You guys are all watching this on a channel that has amazing photo resources. Obviously, you're all predisposed to watch the Craft & Maker channel, which is fine. We're awesome over here. But one day when you're in your studio and you've already seen that Craft & Maker class a couple times, try on a photo channel instead. You'll learn a lot just by watching people. So use CreativeLive as that resource because they're so good at it. All right? The other thing is you want to develop a process for your product photography. I think Denise, you were saying something about it takes you like a long time or something earlier where it was like a big roadblock for you. What was that? - [Denise] I mean, I've learned a lot from watching my friend, Darby, that does all of my stuff, and so I feel like I've got a handle on a lot of it, but it's a big part of it is lighting. Like I shot my own Valentine's Day stuff recently and I realized when I went back to edit all of them, the light was orange, like they all had an orange tint because it wasn't sunny enough and I was using an overhead and it's just...So getting the lighting and the background paper not getting smudged and just arranging everything perfectly and then shooting on an iPhone and trying to get good photography on an iPhone instead of borrowing a good camera and last minute problems. - Right. Okay. So before we talk about this process, I want to give you guys a couple quick tips that will solve some of those problems for you because I think they're problems that a lot of people have. So anytime that you need to shoot with a combination of natural light plus another light because it's not bright enough, buy daylight bulbs. Whatever light fixture you're using, throw some daylight bulbs in there because then they're the same color or pretty darn close and so it's going to change some of those hues. The other thing is make friends with the white balance setting. So on an iPhone, you can download apps that instead of just shooting with a regular camera, you can just shoot with apps that give you more control. So I think one is just called Camera Plus or something. And so you can get that and it lets you manually adjust the white balance so that you can make sure that the color is right. So I don't touch a lot of settings on my camera but I always manually set my white balance, saves a ton of headache. So those are two big things that I would do that will actually save you a lot of headache going forward. Any other questions while we're on that? All right. So I want to talk a little bit about the process that I use because one of the things that I think happens is that, let's be honest, photography takes time, right? Especially if you've got a lot of products, you've got a lot of new stuff, it really takes time, and because it takes time, it makes it hard to embrace that always be releasing mentality. So what I do is I always batch a big photo-shoot and I will do...I have two separate types of photo-shoots that I do. One is product and then one is model. The only exception is rings are one and the same because I just shoot them all in models, and usually the model is my hand, this is the hand, this is the camera timer, there's a lot of that. If you could see how ridiculous I look when I'm taking pictures. It's true. The other day there was like a piece of foam core balanced between my head and my light because I was trying to block the glare, I'm not even kidding you, on my head on my light. It's okay. Be creative, be weird. No one can see you. And then you just go on CreativeLive and tell everyone about how weird you are. All right. So I batch a big photo shoot, I'll schedule a session with my model, or I'll say, "Okay. Tuesday afternoon I'm shooting everything." Then I always edit like the bare minimum of photos to get products released. I take a million photos. So when I have my model, we will shoot like three or four different outfits, multiple pieces, multiple poses. I burned through SD cards like they're going out of style. They're cheap now, let me tell you. They're cheap. You just go on Amazon, you order the big ones, you order a couple, you just take a lot of photos. But I don't try to edit them all at once. It takes forever. My SD card just lives on my computer. So edit the bare minimum to get products released. And then over time I'll continue to edit additional photos and that gives me new content. And this is how you can always be releasing without having to shoot every day or even every week. So if I'm lucky, I see my model once a month. I think it's going to be like four months between the last time I saw her and when I'm seeing her again. It's just holidays, crazy schedule, whatever. But I don't have to call her every month and I can still develop new photography. So like the last batch of stuff I did, I actually couldn't even book my model, so I called a well-meaning friend. Like, "Hey, you have a nice hair. I'm coming to hang out. Can I bring some necklaces?" This is literally the conversation. She's like, "Sure. I'm in." I do a little cropping. So I release these new necklaces and literally it was like, "Okay. What do I need to get it out? I need one white background shot, one picture on my model, boom, it's up." And that was enough to email my list and say, "New stuff is up." And then if something sells, this is always like my test, right? Like, how few photos can I use to sell something? And then if it doesn't sell right away, I'll add more over time. So I think when I released this, so I shot a whole bunch of different versions of this necklace on the same day. But I'm pretty sure when I released it, I put like maybe these first three up. And then over time I just jump back into my SD card, scroll through, "Okay. That's a cool one. Let's edit that one." And then you can do the same thing with social media. This, I literally, this is the perfect example of like conversational copy. I could post this picture as a reminder that there are still a few hours left to shop the sale, but the truth is I just found this picture on my SD card earlier and I really liked it and wanted to share it. Right? It doesn't always have to be so savvy. I found this picture I thought it was quite I wanted to share it. So over time you can continue to release those pictures. And so I'll add those pictures, I'll post them on social media, I'll go back and add them to my product description, from there I'll pin them to Pinterest. So I'm not feeling like I have to get everything out at once and it really makes things a lot easier. It make sense? So the other thing you want to think about is how much time do you need to set aside for product photography. Do you have to set aside time for learning? So, is your product photography kind of crappy right now? Be honest with yourself. It's okay. Mine was bad too when I started. Everybody is bad when you start, unless you either were a photographer or you're married to a photographer. I was always jealous of those friends. Like the ones who married photographers and graphic designers, I was like, "Oh, you're so smart." I married neither of those so I learned how to do it myself. But so where are you at? Be super honest. Like, is this holding you back? And if you're not sure, ask someone. Ask someone who's actually going to be honest with you. Like certain people in your family, you can't ask. I can call my sister, she will tell me the truth no matter what. Right? So ask the people you know are going to be honest. So then, how much time do you need? Do you need to spend time learning and improving? Maybe you need to set aside time to watch some classes in CreativeLive. Then how much time are you going to spend shooting? How much time are you going to spend editing? Thinking about how much time you need to set aside. And honestly, what we have is when we're looking at on how do we break down our time? Really, photography gets its own chunk. It's actually that important because it really does make or break your business. And we're going to come back to this later, so once we talk about those audience growth strategies then we're going to go ahead and come up with a game plan for you that actually determines how you're splitting your time. But we're going to get to that in a little bit because we have a lot more ground to cover. And so I want to see if you guys have any other questions about product photography or even if an email question popped in your head and you need to revisit that. Jordan. - [Jordan] What would you suggest about sort of partnering with other people to take your photos? Because what I've done in the past is I'll like boxed up, sometimes it's only like $30 worth of product, I send it to a mom who takes really nice photos, she takes pictures, she sends me pictures, and then I have stuff to post. - Yeah. - But like how...I just have a hard time figuring out like how much should be like lifestyle pictures on my Instagram versus like and this is one on a white background or this is like much simpler. - So what I find is that more so the like white background simpler stuff, that's what's going to happen in your product photography, like, not product photography, in your product descriptions and your product listings. Getting all tongue-tied. In your product listings, that's where you're going to see more of that white background simple as your initial images, and that's probably because it's easier to just keep consistent and then you'll add in more of your lifestyle photography, whereas on Instagram you're going to use more of that lifestyle photography. That said, everything is an experiment, so you drop more white background in one week and see what happens, and if it's like your audience loves the white background or the simple background, then you do it. But if your audience isn't responding well, you add more lifestyle into the mix. So it's really more so about playing around in that case. Denise. - Lifestyle shooting with products that are not wearable such as like I have a lot of like medicinal salves and deodorants and sprays. I struggle with like being creative of how to...I haven't done a lifestyle shoot yet because I have like these very limited ideas that I've seen or that I can think of like, "Oh someone holding the bottle or like putting the salve on their hand and like..." I mean, outside of like the bathing salts and oatmeal soaps, like those are great because you can style those in like a really nice bathtub and... - So in your case, you're probably going to do less with model and more of like setting a context. So are you doing some of that now where it's like the kind of flat lay, like here's what's happening. So I think that's more of what you're going to end up doing because right, it can be kind of challenging. - It just get lost in what's happening... - Right, exactly. - because the process is so small. - Exactly. So in your case there, you don't have high impact, I would just avoid most of that model stuff, unless you're doing something like really, really like close cropped where like she's got some cool nails or something. - It's just their hands. - Right. But just be warned then people will just get excited about the nails. Yeah. Another thing to keep in mind there. Are you going to add something to that, Kalyn? - [Kalyn] Oh no. - Okay. Let me keep going then. So in your case I would really think more about like setting the situation. I would, for you I would just do a ton of flat lays, like, "What cool things can I bring in and take the picture?" And I know that's sort of like the obvious solution, but it works and it's what people are responding to. - Okay. - So I would kind of keep doing more of that. - Okay. I have felt this pressure to do lifestyle shoots, but I've struggled with how to even make that work. So I guess just don't feel that pressure. - I don't...Yeah, I wouldn't feel that pressure. And I think the other thing...And again, it's all an experiment, so your audience might respond differently. But what I found interestingly enough for my audience, is that my audience doesn't actually want to see pictures of other people anyway, like they don't mind the model, but they want it cropped, right? There are weird analysis on my Instagram. The only face people want to see is mine, which is ironic because I hate taking selfies. So your audience may not even want to see that. I do find that the exception with your audience doesn't want to see other people is if you're making kids products. Like I think with kids products people want to see the cute kids all the time. So in that case like take the picture of the kids. But a lot of times people don't want to see other people because they're like, "I don't know this person." Like think about when someone shows a picture of them like partying with their friends and you're like, "I don't know these people. Why do I care?" It's actually kind of the same thing I think with model stuff, like they don't really want to see a lot of other people's faces, and in your case they want to think about how it's going to incorporate into their life so that flat lay with other things. That's going to work. I'm going to do Kalyn and then Jordan. - I just have a kind of a practical question about hiring models. I mean, do you have like a model wardrobe? Because I guess if it's a friend that you can say, "Okay, well, wear this one thing." But if you just hire somebody it's like you don't necessarily know or their style might not work with what you have in mind. - Oh, I have an entire Keeley rack in my studio. I know what size she wears and so I buy things. Sometimes I buy things and return them. Not the best practice but it's kind of common and you just keep stuff clean and you tuck the tags. But I also like to develop some consistency, so when I shoot things on Keeley and I love them, I keep them. So I literally have a rack in my studio because Keeley and I do not wear the same size. It's my Keeley rack and I just add to it over time. So what I would say is if you don't have a specific friend and you're going to be hiring, then when you're looking for models, like your first model, whatever she is, whatever size, then you're probably going to have to just commit to that. And there is a little bit of wiggle room if stuff is a little big, like you clothes pin and back. And so you do have some options. But yeah, I just have a rack of clothes for my model. - Okay. - Yeah. - Sounds good. - Jordan? - [Jordan] It was just actually to add to yours. So something that my friend has sort of had success with with a similar product is that video is with lifestyle kind of works better and with like Instagram Story being like, "Oh yeah, putting on my salve," or like, yeah, that engages people a little bit more than just like, "Here's a picture of me putting on..." like, yeah. Does that make sense? - I've been meaning to do one, like for a dry shampoo is one of my newer product. And I used it on a friend of mine who had like super oily hair and I kind of was like doubtful that it was going to work. And then I was like, "Oh my gosh, look at your hair. Why did I not video this." Like, I need to show people this. - And the other thing that I will say is I totally agree with that, I think it's an awesome idea. But the one thing to keep in mind is that things like Instagram Stories or Instagram, like they disappear. So if you're going to do that, I would actually shoot... - Put the video. - Right. So what I would do is I would actually shoot with my iPhone to like get my Story, and I would have a different camera or a different something on there to record a more permanent video, probably cropped horizontal... - You put on a website even. - That you can put on YouTube and your website. So anytime you're doing content, try to make it work as many places as possible. One of the other things I didn't talk about which is something that you have to consider is the fact that like for Facebook, a horizontal image works better than Instagram is like square to sort of vertical, and Pinterest is very vertical. So when I'm doing a model shoot, I shoot really wide so that I can have that. And sometimes I just crop those down, but usually what I do is I have a process and I do not have a zoom lens. I have a fixed lens so it's literally like we shoot wide and then I turn the camera vertically and I shoot vertical, but still kind of far out, and then I walk in a little closer and I shoot horizontal again, and then I turn it vertical and I shoot that again. It's ridiculous, but you kind of have to think through that way because every platform is a little bit different. So it's just something to also think about. If you're unsure, shoot wide and then crop it later. If you're like, "I don't want to go through the three steps," shoot wider than you think you need and crop it down. All right. I think we have a couple of online questions, so let's look at those. "If I'm creating items that can be used indoors and outdoors, should I try to take situational photos in both locations or try to be consistent in where I take the photos?" Zoe. That's a great question. Consistency is going to help you with branding. And as I mentioned before, outside is hard. There's a lot of stuff happening. The light is nice but there's a lot of things that you have to edit out. So I would say in the beginning, maybe stick to indoors as much as you can, and if it's something...I don't know what your product is. But if it's something where like you're trying to tell people they can use outdoors too, maybe bring in a few details to your indoor shots that imply the outdoors. So maybe that's some plants or maybe it's like a little bit of sand. I don't know. You can make like a fake sandbox in your house. I only say that because in college I had a weird sandbox in my room. So it's totally doable. You get a cardboard box, you put it together, you put some sand in. I have no idea what Zoe's products are, but I think we just designed a great shoot. But really the idea is anytime you can control the situation, it's better and it's always easier to control the situation indoors than out, so I would recommend shooting indoors, again, not actually having seen your product. All right. Next question. "How do you get that great white background? I lose a lot of definition with my silver jewelry on pure white, or I end up with gray." So I am not a Photoshop expert, but I have developed some little tricks to handle that. And so I'm just going to be real techie for a second. In Photoshop, I open up Levels, I find a little white Eye Dropper and I click, but I do not try to get the background completely white with that Eye Dropper because you're right, you lose like a lot of stuff. So I get it sort of white and then real photographers are probably cringing right now. But then I literally take the Eraser Tool and I make the edges really soft and I make it like sort of opaque and then I just erase everything, and then I make it smaller and smaller so I can get a little closer to my product. Simple as that. Now that said, I will say that silver jewelry on pure white is really hard. So if you don't need pure white background, if you're not pitching the press, I would play with some other background colors. I would think about something else that you can shoot on because it's going to pop so much better. I probably wouldn't use straight black because that really sucks the life out of it especially online, but I might play with some other backgrounds so that you end up with something that looks a little bit more vibrant for your work. Michelle. - [Michelle] I have a tip for this because I have that problem too. - Perfect. - I use the Teeth White option in PicMonkey because that's what I use. And if it's... - I didn't know that was a thing. - Yeah. There's like a teeth whitening filter and you just like rub it on there and it turns the background white and it keeps everything else the same. - What did you say the name was? - PicMonkey. - Is it an app or an actual computer, like a website or something? - It's a... Yeah, it's a website. - It's a website. Yeah. - PicMonkey.com. My friend is a photographer, Amanda Creek, and she uses something called the Gray Card which I'm not a photographer so I don't know how to use that, but she has a great post on it, but the teeth white thing in a pinch works great. - Yeah, and that is awesome. I didn't even know about that, so thanks Michelle. All right. Perfect. I think we have another question. "How many shots per product? How not to get crazy shooting among gazillion of photos?" I might be the wrong person to ask this because I just told you I go through SD cards like a crazy person. And for me, part of that is that I learned how to shoot my products on slide film. And with slide film like there's no going back, there's no editing, so you shoot a million times. So it's just sort of my habit. But so when I shoot a product, I will shoot hundreds of images. My goal in that is to end up with anywhere between like three to five great ones. And then that's usually when I just stop going through the list. The other thing that I do in those hundreds of images that I shoot is that I do not try to find the one that's perfect, I just look for one that looks good. So if I'm like, "Okay. Here is Keeley wearing this necklace on this top. Scroll, scroll, scroll, scroll, scroll. If I can live with that one." Pick, edit, move on to the next scenario. Because if you try to decide between like, "This is the best one and this is the best one," you're going to be there forever. Pick one that's good enough and move on. So yeah, I go crazy shooting, but it's okay because I don't let it stress me out in the editing process. And especially with things like models or if you're waiting for the light to be right, the worst thing is shooting all that and then getting it back into your computer, and then realizing that nothing works. I would much rather have shot more photos than not enough and then I just know what my target is to get them out. And again, when I'm trying to get something launched, two. If I have two good photos, that's enough to get the product out. One plain background, one model. And then over time, I'll try to get to maybe like I said, four or five more model shots to really get that in there. All right. Sarah? - [Sarah] Do you ever show things like in their packaging on your website? Is that something your customers really look for? - I don't, but in your case I probably would. Like you have a cute little packaging and that's something that I would do as like an additional kind of plain background shot. For me, it's not that exciting. And actually, I use it as an element of surprise for my customers because they get things in like a nice box, a little ribbon and I mention it, but I want them to kind of be pleasantly surprised when they open it. But in your case, like you have that bag that the strap goes in, or no? - I have a new one, I think the new one that you might have seen, but I found that like I'm able to incorporate my brand more when I show it in the packaging rather than just like as a product because I don't have like...If she has deodorant then it has the name right on it, but mine would just like be a random guitar strap if it didn't like have the packaging with the brand. - Right. But one of the things to keep in mind is that your brand is not just built on, say, the logo. So your brand is built on the consistency of the images. So there's no photography anywhere where anyone sees my logo. But I shoot very consistent images, so like for me you'll notice that my model is almost always wearing black, white or gray. And I'm usually shooting on that same sort of gray background. So I would not worry about feeling like every image has to see the brand element. More so I would say it's important to show the packaging if that's a value-add to the customer. So like if they can then keep the strap in that little bag when they're not using it so that it stays nicer, that's something I would communicate. But if you're just doing it because you feel like you need your logo in a picture, I wouldn't worry about it. - Okay. - Matt. - [Matt] I feel like there's a disconnect with the photos I use on Instagram and like the actual product because all my product shots are usually like, it's like illustration work. So like I'll do it up and then like it's on the desk and stage it and I'll put this brush in the right spot, and blah blah blah, and have little plant sticking in kind of, which is good and it looks cool, but then I think when I put that online, there's like a disconnect between like, "Am I getting this?" because it's not the original, they're getting like a print of that or a part of that. - So in that case...So what are you showing online then for your online images? Just like a plain shot? - For the online images, is that image of the desk, like it's a clear image of like... - On like your Instagram but not... - Yep. - What goes in like your product listing? - That image too. - That image too. Okay. But that's showing the original not the print? - Yeah. I mean, they're essentially the same because like that photo is technically a copy of the original anyways, but like I have like another shot with it that shows the size options and they're framed in an actual physical thing. But I'm just wondering like, is it better to like online have just like this is the actual print you're getting versus like this is the image you're getting. - So I usually recommend that the first image of a product is something that's just really clearly like this is the thing you're getting and then backing that up with your situation shot so that it's not like, "Am I getting this plus like the four other things in the picture?" Yeah. So I would always start with that one something that keeps it fairly simple and then add the other things in. I think it makes it just a little more clear. And I realize that you can do all of that in your product descriptions and product descriptions are important but not everybody reads them. - Yeah. - [Woman] Yeah, because I think for me I was about to ask the question because one of the product sale for our planner stickers. So in my description I say, "Planners not included," right? Because... - Yeah. - So would you say the same thing kind of like the sheet of stickers and then the sticker in the planner? - Yes. So is the sheet, are they all the same sticker? - It depends. - So if it's all the same sticker, like the first image I would show the sticker. - Mm-hmm. - And then the sheet and then the situation. If the sheet has multiple stickers on it, then just show the sheet. - Okay. I think we have at least one more online. Yeah. Erin. You are welcome. And yeah, make that work. Take advantage of the people in your network. Maybe it's not your husband, maybe it's your best friend, maybe it's the daughter of a family friend who happens to be a photographer and you keep forgetting to ask her if she'll just help you out. And especially when people are starting they need to build their portfolio, so yeah, take advantage of people, not...Taking advantage of the fact that you know people and then make sure that you are very nice and thankful and appreciative of them later. Do not let your photography hold you back. If it's not a great, fine. Start and share from where you are. Just post it. I want to tell you guys something else that's beautiful about the internet. You can delete things. Right? So your Instagram isn't great, your photography is not great, so you're like, "I can't post on Instagram." Post it, show up. And if you go back a year from now and you're like, "Oh, I really hate that image," delete. It's fine. Just delete it. So you can't erase everything, but you can erase a lot of stuff. So don't let it hold you back, start where you are and share and then move on from there.
Class Materials
Bonus Materials with Purchase
Ratings and Reviews
Liana Badea
I truly enjoyed this class, as it is very detailed, but straight to the point. 30 modules, more than 10 hours, it is so worth it! I also loved the interactive part of it. Building your business from scratch is not easy, there is so much to do. This class gave me some important pointers and valuable guidance, thank you Megan! I strongly recommend this class to anyone who wants to work smarter, not harder and be successful.
Maike Armstrong
First of all, it's so fun to learn from Megan! She is so motivating and enthusiastic – making you feel great about your business even when you are just starting out. The class is well put together, easy to follow and has simple, actionable steps to follow in order to actually move forward. I definitely recommend you check it out for yourself!
Kristen Girard
Fantastic class! If you have never taken a Megan Auman class, this is the perfect one to start with. It filled in some knowledge gaps that I didn't know I had. Lots of great basic knowledge that I haven't been able to find elsewhere. Super helpful!