Lessons
Class Introduction
04:07 2Find Your Voice
05:24 3Getting Yourself Mentally Prepared
09:50 4Your Business Support Team: CPA and Insurance
13:00 5Your Business Support Team: Lab Partnership
05:02 6Your Business Support Team: Assistants You Can Trust
06:48 7Your Business Support Team: Local Vendors
16:51 8Photography Education
11:18Pricing for the Clients You Want
08:02 10Making the Sale
16:53 11Preview Showing and Sales Appointment
18:48 12Establishing Strategies for Making the Sale
09:54 13Five Mistakes Photographers Make
19:40 14Home Tour
16:33 15Home Tour Q&A
09:33 16Lighting Setup in the Living Room
20:20 17Shoot: Family in Living Room
21:08 18Photographing Families Q&A
18:32 19Shoot: Headshots in Living Room
13:21 20Hair and Makeup for Senior Portrait
08:09 21Garage Lighting Setup
10:21 22Garage Shoot: Casual Senior Portrait
09:53 23Garage Shoot: Senior Portrait in Short Blue Dress
24:11 24Working with Light Qualities and Quantities
23:40 25Working with Sekonic Light Meter
22:40 26Office Shoot: Senior Portrait in Long Blue Dress
13:14 27Dining Room Shoot: Long Blue Dress Window Light
14:54 28Dining Room Shoot: Product Photography Window Light
28:25 29Product Photography Post Production
05:27 30Portraiture Post Production
12:40 31The Final Reveal
18:47Lesson Info
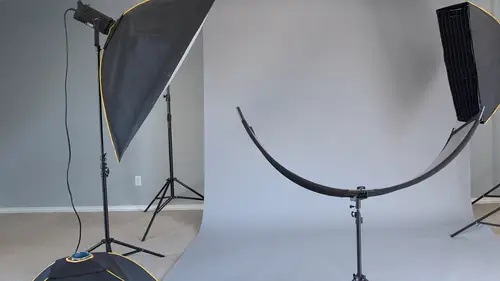
Garage Lighting Setup
we're good to move into the next video where we're going to set up the garage correct is that's where we're headed next our studio all right so we can roll the tape so during the walk through we talked about the garage and we came out and looked around the garage but now a greater ready to go so let's do this john let's put you we're going to set this background at an angle so let's move you quinn back up just right about there probably and I think from this kind of an angle about like here is where we want to go you know I'm explained why we won't do this at an angle instead ofjust flatters are straight uh by coming at an angle my light is not coming in at a forty five degree if my backgrounds out of forty five degree angle my light's coming in at a forty five degree angle that gives me highlights and shadows and it gives me death shaped form texture dimension it does all those things that we're trying to accomplish so I think this is the right spot something so if you could come in f...
eeling mark well this may not be the right distance apart but leased it from the right angle and we'll put the background up there first and we'll get that in position then we're going to bring in just to make sure that we have a good clean solid floor here without a lot of bounce in case the sun moves over enough what is going to put some words and roll out some of seamless paper ok rolling on the floor just a just so we got a flat dead surface that lie won't bounce off of too much sounds good okay so let's do that we'll hang that up first I'm not sure what kind of distance were at here but we can probably uh we can probably just again like you did earlier was he sees the clamps if you just hold that stand for me got it that's gonna be great ok that seems about right let's uh let's talk this over there first this can be a do it yourself thing but it's a really slow and tedious process I think yeah I think I think one thing we want to caution people about when they anything that you've tried a hang or set up your yourself it's gonna go pretty high uh you kind of want to have two people work on if you can uh just because it's a little bit safer I mean when you start trying to a lot of stuff by yourself you get yourself in real trouble real fast and boy equipment's expensive when it when it continues to break not that I've ever had anything break of course but uh yeah you gotta be real careful and and safety is a big concern and especially in your home you know like stand falls over with a strobe on it and you took out two vases in your living room or in the guests living room s so that's no good so we wanted we do want to use uh two people whenever possible just to keep things a little bit safer okay so we'll take the first sexing up yeah and then let's go up just one more little bit can you tell him where to stop their uh I'm hitting the garage then I'll just come down to my side that it pretty close okay good all right so then we can just take that just straightened that safety rope from the garage door opener and throw that in there like that take care of that way and you know I just got an idea down while we're up there anyway let's grab one more clamp and let's just put a little bit of ah ah drink let's put a little bit of a drape okay on this side over here because I've got plenty of fabric on this side so why don't I just take this guy here and I'm just going to take him about in the middle and just start rolling it up and I just kind of gives me a little bit more of a kind of a look into the background texture to background yeah just gives a little bit more something something and that's gonna be behind our our model and she's gonna be let's move you over a little bit more little bit more right in there yeah right in there is gonna be our shot I think but here's here's the point again with the angle of the background if I'm shooting back here sort of straight onto the background now I've got great direction in my life quality so I've got like quality but I've also got uh measure for the light quantity it doesn't matter it looks first first glance it looks like it's a little bit too dark it's not too dark you've got new cameras you can take your eyes so as high as you want nowadays so it doesn't really matter uh so but I think there's going to be great great like quality right here and I think we're going to get a great shot of this young girl and I think she's gonna love it I think we're gonna love it so we'll roll out this uh seamless on the ground just to make sure there's no bounce off of the floor and then we'll be ready to bring our model on set that is this when when the sun comes over the house and it starts to drop it in the west sky we're still gonna have great like water here but if I'm not careful I'm gonna pick up a shine off of the floor this gray paper down it's gonna eliminate that from being a problem for us and that's why we're doing it I want to make sure that I control the light not that I'm being controlled by the light so that's why I'm news on a flat surface paper on the bottom it's light years wide it would cause me more troubles some people gold but it's a natural reflector well yeah but it also has a natural problem if I need to reflect dumbo I'll put one there but I don't need it one bouncing off the concrete so that's first and then safety is other thing let's talk about that you've got to make sure we talked about two people setting up the background wait bags are always important tape you've gotta have all this stuff you know it when you go off on location or shoot in a location like this uh requires some stuff and you've gotta have all your things so sure makes you easier when you have everything you need with you so that's what this is all about I think so so there's a little bit of a problem with portrait photography when you've got a given light source and someone's at a forty five degrees stay away from the light you know if I turn it this is the light for me I'm turning this way my hand might be closer to the light than my face is so therefore my hand is getting a little bit more light my my face might be a little bit darker than the hand if I'm narrow window and I'm doing window life shot from turned sideways my shoulder might be getting more lights in my face the shoulder be brighter than the face leonardo not davinci I mean rembrandt and his studio he kind of figured this out and he didn't want to paint anything darker toe eliminate hot spots or hot areas he really needed a light things the way that they should be so what he found out was that you see this column right in the middle of garage if I pose somebody and I'm shooting from the outside of the garage shooting this way in if I post the mind is kind of keep backing him up back him up back him up to right about here they're hand is covered by the column but their faces not so that knocks about a stop of light off of the hand as opposed to out here where the hands getting full light so here just a little bit of that column introduces just a little bit of a gobo toe lock off a little bit of light stupid silly little thing that's amazingly smart I think um so so those of you lighting technicians out there pay attention to the details on letting you know but we can fix it later in post you can but you're gonna miss dinner with your family so muslim fix it when you shoot it and it's something we can do with soft boxes to we can put a screen scream in front of a soft box here to lower the latest hit bottom here and and if you don't have a scream you can actually even raise a soft bucks up and tip it use the bottom half is the gobo there's a lot of things you can do but but by by and large and john is just like me I'm we're kind of lighting guys and our idea is you got to get it right when you pull the trigger so it doesn't need any work after the fact and that's what we're after I I had I had a great great mentor that mostly taught me to do all my practicing on my testing with transparency film although I was shooting and mostly making a living with with color negative film but he basically taught me that I had to get it right when I shot it because transparency film has no uh margin for error as you all know if you ever shot a roll of slide film uh and so I did learn little subtle things like that garage door and things like that that it's it's a small small thing but you know if it does stand to reason that if I'm turned this way in my life sources here my hand is going to be hotter than my face not by a lot but it is gonna be harder than my face well that's going to require some additional editing later you're going to brush that down uh either layer mask or brush it down and use a selective adjustment brush or however it is that you want to do this stuff will put a grady in on it or whatever you do uh but the fact is is there anything that we could do to fix that at the time of capture and if there is then you have to do at the time of capture and for me I know it's one of those things that's one of my soap boxes it's just like exposure with me it's like godly guys I just think we can do it and it doesn't take that much more time but it doesn't mean you have to be more I your eyes have to be open you have to be a little bit more thoughtful and you have to be plugged in a little bit more to all your environments now in this situation let's consider this is my home this is my studio I'm working in my place I'm going to have all my stuff with me um if this is where I'm actually going to truly shoot with clients from time to time I'm probably going to take that one back wall that you keep seeing with all the stuff stacked on it I'm probably gonna have a roll down piece of fabric or something to kind of cover up some of the ugliness of the junk and I'm going to make sure there's no oil spills a floor that people have to walk through because this is me bringing a client into an environment where there are expectations for what they're going to get so I need to at least make certain that that I do bring them into my environment in a way that is as professionals I can present it even with the blue trash can behind me
Class Materials
Bonus Materials with Purchase
Ratings and Reviews
Sean
Another great course by Tony Corbell. I loved this course. Tony is a great teacher, great photographer and great business man. He's enjoyable to listen to and a great teacher. He holds nothing back and shows how to shoot great pictures even in small shooting environments or on a low budget. I would buy again Tony's courses.
Penny Foster
Wow! Tony is fantastic! So many hints and tips, crammed into this great course. I shoot portraits out of a small converted garage, about 9 ft high, 9 feet wide, and about 19 feet long. Tony has shown me so many ways to make this small space work for me, for which I am eternally grateful. What this course highlights is that whatever small space you have, there are ways of making it work. You need to buy this course and watch it over and over because, every time I watch it, I gain more and more info that I missed the first time around. Brilliant!
Kat Ciemiega
Absolutely wonderful, I cannot praise the content enough. I value Tony's stories as much as the information he is giving away, because it puts the data in the perspective and practical context of the actions we take. Thank you for this class!