Lessons
Class Introduction
06:46 2Seeing Light and Why We Add Strobes
05:36 3Camera Settings to Control The Scene
06:20 4Controlling Off Camera Light
11:50 5Accent Lighting the Subject
19:10 6Shoot: Overpowering the Scene
10:29 7Shoot: Creating a Whole New Scene
17:01 8Class Recap
05:48Lesson Info
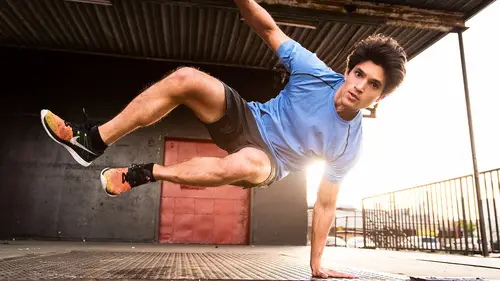
Shoot: Overpowering the Scene
So let's go ahead and bring our model over. We'll move all these other stands out of the way. Yeah, let's clear that out as well, just so that we have a little freedom for where we're moving there. And now, this section... You guys wanna pan over with the camera too, and check out the location we're photographing here. This is looking really good. So, what I wanna do here is go for something more dramatic. I have a cool wall. When you work in a location, we don't always get the best ones, right? So, I wanna try to be positive and find the silver lining in every location. So, say I walk into this old beat up warehouse with nothing but gross florescent lights and it's pitch dark outside so I can't use the windows. I'm gonna look around and be like, "OK, what can I use?" What good thing do I have? Well, we have an incredible wall here. And with this wall, I wanna get some texture with the wall. And you know how we get depth and texture in a face is by moving the light off camera to show s...
hadow, because shadow is what gives us that nice 3D definition. So, if I have this nice wall and I just shine a light directly at the wall, it's gonna be flat. So, what I'm gonna wanna do, is move my light off camera a little bit so that I'm creating some shadow and I get textured detail on the wall. And at the same time, that's gonna create hard light on my subject's face. So, we'll approach that in a second, what we might do there. Let's go ahead and get our camera settings. Again, I always start with just my camera settings, so I'm taking my wireless trigger off the camera. Let's go ahead and try a shot with our settings just the way they are. (assistant speaks on stage) What's that there? Oh, there we go. We're alive! All right! Beautiful. Thank you for posing still because sometimes your test shots actually come out to be incredible photographs because your subject's usually at ease. It's like, "Oh no I'm just testing here, you can relax." And like, "Oh OK, I can be natural" and they knock out a great pose or a real smile. So, sometimes your test shots are keepers. So, always make sure they're in focus and composed. This right here, again we just have such an amazing location right now. I would kinda bump the exposure here a little bit with ISO and shoot natural light if we were talking about a natural light class. But instead, what I'm gonna do, is I'm gonna use that shutter speed I was telling you about. Alright, I don't want to see any light from this room. What I'm trying to do is turn out the light in this room and we're gonna imagine it's bad light. So, I'm gonna crank my shutter speed. If you look over on the computer, you'll see that it's now gone to 1/200th of a second, which is about my maximum. And I'm gonna have to let less light in, so I'm gonna go to 5.6, which decreases the aperture, so less light's gonna come through. It's also gonna increase my depth of field. So again, we have a cool wall. I want the wall to be somewhat in focus. So, maybe if I go to F8, my wall will be in focus and my subject will be in focus. These are things I'm thinking about. What do I want in focus? And how dark do I want my room, or how light do I want my room? If I take this photograph again, that's what I'm looking for. I don't wanna see anything here really. I can even go down to ISO 100. See why I didn't start at 100? Started at 200, so that I could go down a little bit more. And now we've got room. When this picture comes through, it's almost completely dark. If you look at our histogram up on the top left, there is no data showing there. We've completely underexposed the room. That's like the shot in New York City that I showed you. With the proper camera settings, you can completely turn the lights out on the world, which is gonna work in our benefit here. Now, let's go ahead and turn that light on. Let's add some light. Thank you, sir. Can I have you step out for this one? Can I have you flip that light on for me, is it already on? It's on, OK. So can I have you step out for one and let's go ahead and put our wireless trigger back onto our transmitter here. There's our test shot, our flash is firing. And let's just go ahead an take a shot, see what our wall's doing. It's not bright enough, it's barely registering. This is another thing I love about strobes is I have the power to turn this up. Rather than going all the way to that tall light stand, these Broncolor Siros can trigger remotely, but they also have power control remotely. I'm just gonna go ahead and hold this transmitter down and you hear the beep, it went up one stop, another beep, another beep. I just turned that flash up three stops. It's gonna be three stops brighter than it was previously. Let's go ahead and take this shot again. Now, we're starting to get light, look at that. We're getting dramatic light there. I'm liking how this is looking. Let's go ahead and have you step in. Perfect, right about there. And now, looking at the photograph on the screen, looking at her, she's gonna be in that sweet spot. Alright, let's go ahead and take this shot. Beautiful, so the exposure is pretty good. It's pretty spot on there. Can you go ahead and put our highlight warnings on? It's gonna be the triangle up top. Those are my angry blinkies. Those are my highlight and low light warnings. They're on the back of your camera. If you've ever overexposed a photograph and you've looked on the back of your camera, sometimes your highlights will start blinking. Those are your highlight warnings, that's your camera telling you, "Hey, you've overexposed your highlights." I call them the angry blinkies because they're like, "Man, you've messed this shot up, come on dude, get it together, you've overexposed." This, right here in capture, you also have the same thing. What you see in blue is completely black. There's no exposure there, it's underexposed. If we saw any red, the red would be my highlight warning and that would say, "Hey, you've overexposed highlights." Now, I can't nit-pick this image here on a computer screen ten feet away from me, but the highlight warning will really quickly keep me honest. And I just wanna make sure I don't overexpose anything, especially her skin tones. So, by having that on, we're good, my exposure's good, you can turn it back off. Now I know that all these photographs are gonna be great and I'm not gonna lose any detail in her skin tones. The second thing we're gonna start looking at is the quality of light on her. Remember, this section we're talking about overpowering the scene. We've used our camera setting to knock down the light. We've focused our light from our strobe to get this cool spotlight effect going on in our background. But we can't forget the first thing we covered, which was flattering our subjects, right? That's why I started with that, always make your subjects look good. I don't care how good you are with strobes, how cool your photographs are, if your subjects look bad, man, you've failed. That's only half the battle. We can do a couple of things here. I can't really move my light much because I set up the lights to get this scene, but I can work with my model. So a professional model's gonna see that a be like, "Ugh, too many shadows. Move the light "closer to your camera, less shadow." Well, if I can't move my light, I can do the opposite. I can move her face. You're good where you're standing, just turn your face slightly into the light. Now this light is going to be very flat and it's gonna hit both of her cheeks, both of her eyes and we're gonna get a very flattering light on her face, but we haven't had to sacrifice the feel of the lighting that we've created here in the room. Let's go ahead and photograph this again. Excellent. There we go, so now we have nice flattering light on the face and we have this cool, more dramatic look there. Can you compare this to the very first photo, from the room, where we had maybe the brighter exposure. The very first one, with no strobe, just the room opened up. Hit Command T. Awesome, there we go. So we've dropped her in and now with no strobe light. Just the first testing exposure we have with no strobe. Keep going, keep going, keep going up. That one right there: the flat one. Perfect, compare that with our last one. You can star both those, so we can reference them. So, this is what we're starting out with. On the left is the natural light photographer, which could be good: I could make that brighter and I could work with that. But I'm a moody photographer, I like industrial places. I like going to Detroit and photographing, I did live in Detroit for two years. I like going in, photographing the urbex places, where you find the really cool gritty areas and bring light and you impose your own feel on a scene. So, what we did, is just with one strobe and controlling the scene with our camera, we're able to really quickly go from left to right here, which is huge. I mean, that is a very big difference and it's not a ton of equipment and it's not a ton of technique. It's just understanding what our camera can control and how to place the light. I wanna shoot around with this for a little bit. Let's get some shots. I'll have you keep posing and when working with subjects, I like to set a stage for them. How many of you are working with professional models every day? No hands went up in the room. (audience laughter) Back home, I bet you're like, "Oh my God, "a professional model costs as much as my camera lens." Honestly, a day to work with them. Usually we're working with just friends, family's clients, so what I like to do is I like to set the stage for my subject. You've noticed if she looks straight, the lighting's bad. If she looks in one direct, the lighting's good. But telling a non-model to just stand right there, you're never gonna get a relaxed look out of them. So, I like to explain what the scene is. In this case, I've got this lighting coming from here. It's very dramatic, think you're on stage and this is like the spotlight. This is your audience, here's the spotlight on the stage. You can look this way, you can look into the light. You can look a little bit over that way to let the light graze your cheek. But just don't look over that way. That's in the wings, that's backstage. You're the performer, you're on stage. This is your stage here. You can pose anywhere here and it'll look good. OK They have freedom now, she has freedom to express herself within an area, but she knows what that area is, so she's happy there. I hope, let's see. (laughs) Now she can just free pose and move around and get comfortable, work different expressions and I can move around too, and get different shots. Beautiful, I love that. Hold that pose for me. I'm gonna to come back and we'll do a full body here. And now we can really start seeing what this lighting style has done for us. When you actually pull back and hit the Y, there you go. That's really cool. I love that pose there with your body towards me and then just working your face over that way. Excellent. I'm gonna go really wide here. Cool. So, we were able to really quickly with one light overpower the scene, empower our subject to be comfortable and move and work within a space and still get some dramatic lighting at the same time. So, thank you very much, that's cool. Do you guys have any questions about this particular setup, overpowering the scene. You don't always have to have a great environment if you have a strobe. You just have to find a backdrop, or something like that.
Ratings and Reviews
Piotr
this is a super express class, fantastic... within very little time the guy explains what other need hours and hours to explain. clear explanations supported by practical examples how to sue light and what happens. this i avery basic but if you need to refresh your basic knowledge it is highly recommended to listen to this guy, he is good he is also fun
Jeanna Rice
Worth every penny! I'm a natural light photographer looking to have more control in less than ideal lighting situations and this class was perfect! Erik covers so much great information in an efficient and effective way. He automatically answered all my questions just as they came to mind throughout the class! Love that he covered both creating dramatic and natural-looking lighting no matter the environment you're in! Thanks Erik!
Rich
Erik is concise, approachable and effective with his teaching style. This class had the perfect tempo yet covered some of the most important concepts and things that people usually struggle with (aka me) which is mixing ambient light with flash. Superb class, superb teacher.