Using Live View Focusing and Overlay
Lesson 31 from: Get The Most Out of Your Photos With Capture One Pro 12David Grover
Using Live View Focusing and Overlay
Lesson 31 from: Get The Most Out of Your Photos With Capture One Pro 12David Grover
Lesson Info
31. Using Live View Focusing and Overlay
Lessons
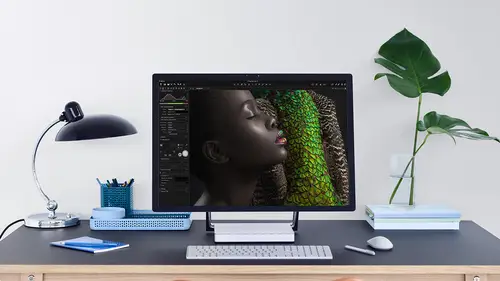
Interface Overview
04:08 2Customizing Your Workspace and Keyboard Shortcuts
15:55 3Making Your First Catalog
07:02 4Importing Your First Images
11:51 5Virtual Organization
20:21 6Basic Tool Behavior
13:32 7Starting Approach to Editing
24:02 8Next Level Editing
20:10Color Tools Overview
16:28 10Basic Copy Paste Workflow
10:40 11Basic Export
13:32 12Getting Started on an Edit
05:13 13Adding Layers to Your Toolkit
10:25 14Radial and Linear Gradients
08:21 15Luminosity Masking
10:12 16More Advanced Layers
22:44 17Removing Simple Objects and Local Adjustments
14:52 18Advanced Color Edits
05:31 19Using the Color Range to Select Just What You Need
05:45 20Editing Colors in General
03:48 21Editing Skin Tones
14:30 22Combining Color Selections with Layers
08:58 23Creating Masks From the Color Editor
10:28 24Color Grading with the Color Balance Tool
16:34 25Intro to Second Day
01:37 26Session Overview
05:47 27Tethered Basics
05:04 28Setting Up Simple Sessions and Setting Naming Conventions
10:11 29Controlling the Camera
05:08 30Handling Next Capture Adjustments
07:39 31Using Live View Focusing and Overlay
19:40 32Selecting Images and Using Smart Albums
14:55 33Saving a Session Template
03:51 34Overview of Process Recipes
05:28 35Tokens Overview
26:21 36A Simple Round Trip
14:04 37Sharpening Workflow
08:06 38Creating a Recipe for Web Output
15:50 39Selecting with a File Name List
11:46 40Using Plugins and Sharing to Clients with PRODIBI
06:06 41Image Review 1 - Sometimes Simple Works!
08:44 42Image 2 - Radial or Gradient Masks, Object Removal
07:28 43Image 3 - Keystone Tool and Aspect Ratio
09:11 44Image 4 - Using Styles in Capture One
10:04 45Image 5 - Black and White
09:13 46Image 6 - Landscape
07:22 47Image 7 - Portrait
05:06 48Image 8 - Action in Lowlight
07:46Lesson Info
Using Live View Focusing and Overlay
so to help you with, um, composition, tasks and things like that. There's a whole suite of things that you can do when in terms off live. You now know all cameras support live you again. You can check the Web pages of capture one to see if your camera can support it. So cut some cameras. Was she tethered? But they won't necessarily be able t o do live you so you'll see down here in also in the camera told, We've got shadow button. Next to that is the live you button. So if I turn this on, then live, you will pop open. And first of all, we can see that it's the wrong way around. So some cameras it will pick up on the tilt center. In this case, it's not. But no matter, because underlie view controls, we can change the orientation to a specific rotation. So I think I want 90. Yes, 90 degrees like so That's also really handy if you're shooting the camera overhead like flat artwork or folded fashion, something like that. Quite often, the rotational sensor can get confused. It doesn't know w...
hich way is up, so you can change it here like so, and it will also change in next capture adjustments. Over here, too, said, Now that we've got live you up, this can help us work with composition. So Alex, who's just gonna help out the second the live you feed is nice and far. So when Alex comes in and just there we go goes across the camera. If you just want to move an item for the sake of moving, then you can see straightaway that too nice Fast frame rates, like 2030 frames per second, and it's really nice and easy toe check for composition. So if you're working with the food stylist or yourself, then it's much easier to watch what's going on with live. You, um, peering through the camera, moving in a bit, going back to the camera and so on. It works really nicely, So that's if you like our four frame view. If we zoom into 100% then we can actually use this as a means to check focus as well s so you can focus the camera manually. Alex, wouldn't you just try and focus it a second? Because it's not super easy if you do it manually. Actually, Alex, just twist the lens so you can see on. It's kind of difficult, because no matter how sturdy or tripod is, everything always bounces around a little bit, so it's not super easy. So fortunately, what we can do if we go to their camera tools is that we have a whole tool here called camera Focus. So this has thes three arrows either side, which is essentially near and far, and its course adjustments and fine adjustments. So, look, I could just see a little insect on our strawberry there so that you could see the quality of life you. So if we click far, that's going to rack the focus, you know, way back in the image. But we're not touching the camera, so it's not bouncing around. It's really easy to see. So if I wanted to nail focus on our strawberry, then I can do so. So course adjustment here with the big arrows, medium adjustment on the middle, and then it's a fine adjustment with this arrow here, so it's super simple to get her focus spot on so I can zoom out and then we can check over here and see how the focus looks and so on. If any point we want to stop live, you weaken. Just close this window and it comes back out and you can hear the mirror jump back up. Then if we want to go back in, we can open live you and then we get live you back as well. Now, if you find your live, you exposure looks like really bright or really dark. There's probably a setting on your camera, which will simulate the exposure. So if you work with flash, for example, you're probably you know, it's smaller apertures F 11 on your flash sync speed and for the ambient light that's going to be under exposed if you like. So the live view of the camera will try and simulate that s O. You need to be able to turn that off on the camera. Now it's referred to as different things in different cameras. So here we go on the cannon. It's referred to his exposure simulation, and I've disabled it. So turn that off if you can. As an option, you've still got all your camera settings here as well. You've still got the camera tool so you can change settings as you're working in live you as well. So what? This point? 01 last thing. Also, to help us with our composition, you'll find a tool called overly down here in the live view menu. On what overlay allows you to do is to drop any kind of image format like a PNG file JPEG tiff onto the image itself to help for composition. So we've got a fake magazine cover right here somewhere. So this is a, um, PNG file with transparency. So if I dropped that in, we can see exactly how it's going to look so I can change the capacity. So if I need to be aware off, you know, fitting around text on the magazine and so on, I could do so. So I'm just gonna pull up this handle here, and then we can move it around. We can change the scaling like so and also its position by moving the sliders. Or we can use this particular panto here a swell. So if you're shooting packaging or feet to cover magazine or you're trying to do composite work, for example, then this could be really handy the overlay feature. So if we're shooting a background plate and then we're shooting a different plate than it can help in live you to actually be able to see Okay, I put my background plate on the overlay so I can see how the shot I'm doing now is gonna fit together if I need to need to do composite work later. So the overlay tool shows up in live you. But it also shows up in the main window as well, which you'll see when we cancel that down. There's a few other options in live you as well, eh? So we have this focus meter, which is quite handy. So if I click on this icon here and drop this on, that will give me an indication of what the focus is like on that particular part of the image. And I can drop a couple of these in. So if I wanted to maximize my depth of field, I could put one there, one here and now I can see how the focus is looking between zone one and zone two. So if you're using technical cameras with tilt and shift or tilt shift lenses, this is also a good visual way to see that, and then you'll see if I change the focus for a second. So if I throw the focus out and we go back to the tool so you can see now those bars have dropped right down because the focusing is soft. So if we change this, so let's keep these up here so we can see. So now if I optimized my focus, see, as it gets better and better, then these balls keep creeping to the right, like so and also you can see the orange lines zip around the outside as well, so you can judge the quality of the focus, too, so you can have a number of these spots. I think the limit is for there we go. Three maximum of three focus areas like so and to close them down. We just go to the X in the corner. So I'm going to check my focus once, Mawr. So let's go up here. Let's check in all strawberry. On second, let's come out of like view. Refresh that feed that's better. Focus is actually pretty good as per the focus. Me, too, said. So I just tweak and a little bit like so, So pretty happy with that. All right, let's put that away, Andi. There's a couple of other things which you might find useful depending what you're doing as well. So we've got up here grids and guides. So if we click this on, if we need to align to Horizon or something like that So we could drop that down there if we need to level the camera and also verticals Aziz. Well, okay, so I think we're almost ready to start building our shoot. So I'm gonna turn off grids and guides and right now is still in our lighting test. So I'm gonna go to shot one, and we're going to say, Set, that is the capture folder. See, the camera moves, and now we're ready to shoot in that one. So if I go Teoh back to the camera tool, let's just take a shot, see how we're looking. You can see that my overlay has popped up in there as well. By default. It's in The capture. Took a tool as well, so that's a little bit on the big side. So let's scale that down because we had a crop. We can move that around and just to give you an impression of how it's working so you could see my counter is at number 17. As I said earlier, if we want to reset that, we could if we wanted to. Let's just check my crop for a second. It's a bit bit aggressive on the crop, so let's go Something like that. We've still got the adjustments carried over because we always said Copy, next adjustment from last, So copy from last. So when the previous short, we copied that over a swell. So if I rattle off for a few more shots like son, let's get that crop a bit better. So do a few more captures and again captured from the button control K to capture or capture from the camera itself. So this is our shot one, if you like, and then we want to go through and distinguish between a few different shots are just check that were actually in focus. Yeah, pretty good. Looks good to me. Eso the next shot that we're gonna have. Let's just do a couple more to fill up this folder a bit so the next shot that we're gonna have is that we're gonna go to shot too, Right? Click said his capture folder. You can add that as a short cut, a swell. So if you look under there, uh, it it many No, it's the file menu. My mistake. You can see you've got the options here for set as capture folder. So if you wanted to make that a short cut, you could as well. So instead of having to mouse back to the photo tab and change it there, you could set up a short cut to set his capture folder so I could just go straight to shot to tempt my short cart on the capture folder is set and also for the counters. You can also use short cuts to reset the counter. So if you're a bit smarter, the mean you can remember, you can go to the folder here, click on the set this capture folder short cut, hit the reset, Countess your car, and then you're good to go. Okay, so next short, we're going to switch out or empty Joe without your let's turn live you on So Alex can see what she's doing looks pretty good. It's really an event. Invaluable tool for adjusting and composition on DSO on, especially if you're alone photographer working by yourself. Trying to do this and looking through the camera is really super difficult. So if you're working on set this working on set on your own like this, a fair amount, there's no reason why you can't run, you know, a second onset monitor that's right next to the set. So as soon as you trigger live, you you've got a monitor next to you and you're happy with moving the stuff around of being able to see. So that looks good. Let's just check. We're still in focus. Let's just tweak that ever so slightly. Is that so subject? So I think that's probably about right, so we're happy with that. So now you can see that I've switched to shot to As soon as we take you capture. Let's do another one. Look at the naming. It says shot two, and our counter is continuing to roll on. We've got the adjustments carried over as before as well. So we're rattle off a few more shots so we can fill up this folder if you need to shoot rapidly, you'll be able to do it a bit faster from the camera itself. So when I hit come on K on my keyboard, I can shoot pretty quick. But there's a slight delay just for the message is getting to the camera itself. But if you need to shoot fast like you're doing portrayed work and so on, as you saw a little bit earlier, you can rapidly shoot, depending on the camera. Let's just fire a few quickies off. 12345 You'll see if I can get back quick enough on screen. There's like an orange circle around the shutter button. So if I just trigger this one quickly again so you can see that orange circle pop up. That means there's images waiting to come from the camera. So if you're operating, capture one. Maybe is a digital tech that gives you an idea that they're still images coming down. Depending on the camera model cannon, for example, there's no way of knowing if it's one image or 10 images that is still coming. It's just images are coming. But on Nick on, for example, slightly different. You'll see a number of dots around the outside of the circle. So if you see seven dots around the outside, that means seven images are coming down the pipeline as well. That's a good little indicated to know. So if you're working with the photographer or yourself may say, Is everything safe? Is it all on the laptop? Yes, I can see that. All images down who did? Okay, now we're gonna be fancy for our third shot. So let's go to short three. Like so Right. Click. And we're set this as the capture folder. Okay, so now we're going to go back into I'm just gonna take a quick shot, Alex, to make sure everything is good. And we can actually. Yep. It's good. Let's check for focus. Yep. Nice and job. What we can actually do is shoot during live you as well. Some cameras. It's a bit dependent on the model, but with this cannon in particular, we can do so. So let me just check Harkin. Shoot. Yes, we can. So what we're gonna do is let's put our overlay back on. Let's find overly now. We can customize this as well because I must have got rid of overlay. So let's bring overlay back. Turn that on and let's fit to this. So what we're gonna attempt to do is make a beautiful magazine cover, like so and shoot with live you want. So if I hit the button, then there's a slight delay. But you see, it still pops up and then live. You comes back on again. Just put your hand in front of the Yeah, so we still got live you. And then if we shoot, we get a shot, and then it's recorded as well. So let's go for Alex. Let's see if we can create art so I can see where Alex's hand is going in. Okay, go for it. Okay, let's take a shot. Let's take another one. Okay, let's go again. So fill out some or and a bit lower, I think, but low a bit lower. Get good. Maybe next one, we try lower again. Okay. And a bit lower and lower down, I think. Yeah. Perfect. So you see, the capture rate is a little bit slower, but it still works. Let's dio another one. Yeah, same height. Good site. Okay, good. Good. Hi, I'm Amy. Perfect. like so so again, A little bit slow when live view is on, but it's still very simple to do. So this way we can really frame up, shot nicely and see what we've got. So I'm going to come out of live you. And if we just scroll back, we can see all the various different attempts that we made. So did we get something? Let's see. Almost probably one of those that we can use. Uh, a swell. Yeah. Let's try one more go for go for Max. Max. Honey, in this case, Uh, yeah, I'd say sort of somewhere in the middle. American? Yeah. Yeah. Loads of it. Need a bigger spoon. Yep. Ready? A bit lower. Great. Like son. So without live you, that's kind of really hard to do, or you've got to be at the camera and shooting as well. But then there's the chance that you're knocking the camera. It's unstable. Mean this way. We've got hands off approach on the camera on. That works really, really nicely. Okay, cool. So let's recap what we have, you know, session. So we're going to go back to this folder, so if you remember, we had lighting test like so and shot one shot to and then shot three with our spoon pause. Like so if we look in the finder itself, here it is. So we had our capture folder lighting test whips, too many lighting, test shot, one shot, two shot, three, like so. So all in their individual folders and all with their individual naming as well. So shot one shot to shot three. So it meant I didn't have to think about changing that a tool. So if we were doing something like head shots, we could set up the folders of the name of the person that we're going to shoot before we get where we're going. So, John, David, Alex and so on. So we could do it that way. And then everything is set up as soon as we're ready to shoot
Class Materials
Bonus Materials with Purchase
Ratings and Reviews
Leon
This is a superb course. David is an excellent teacher. I'm coming to the end of it and have learnt so much. I've been using the software for a year, self-learning as I went along. I had watched the odd David Grover video on YouTube, but never got much further in my understanding of the software. Capture One is brilliant software and to do it justice you need to learn it properly from an expert. Highly recommend this course if you want to produce professional results.
lakiut
Excellent course and a very engaging speaker. If you are starting with Capture One 12, this is the best class to take. The lessons are presented and explained in an organized way that it shortens the learning curve. Thank you, David. Cheers!
Jino Lee
One of the best course I've purchased. Very helpful and I learned so much more with this course and in a short period of time, than all the official Capture One You Tube videos put together! Anyways David Grover is the same guy who does the Phase One C1 official YouTube videos, so there's no better person to conduct this course than him! Truly excellent and if you think you know all about C1 Pro 12 interface, wait till you watch this course.