Lesson Info
11. Basic Export
Lessons
Interface Overview
04:08 2Customizing Your Workspace and Keyboard Shortcuts
15:55 3Making Your First Catalog
07:02 4Importing Your First Images
11:51 5Virtual Organization
20:21 6Basic Tool Behavior
13:32 7Starting Approach to Editing
24:02 8Next Level Editing
20:10Color Tools Overview
16:28 10Basic Copy Paste Workflow
10:40 11Basic Export
13:32 12Getting Started on an Edit
05:13 13Adding Layers to Your Toolkit
10:25 14Radial and Linear Gradients
08:21 15Luminosity Masking
10:12 16More Advanced Layers
22:44 17Removing Simple Objects and Local Adjustments
14:52 18Advanced Color Edits
05:31 19Using the Color Range to Select Just What You Need
05:45 20Editing Colors in General
03:48 21Editing Skin Tones
14:30 22Combining Color Selections with Layers
08:58 23Creating Masks From the Color Editor
10:28 24Color Grading with the Color Balance Tool
16:34 25Intro to Second Day
01:37 26Session Overview
05:47 27Tethered Basics
05:04 28Setting Up Simple Sessions and Setting Naming Conventions
10:11 29Controlling the Camera
05:08 30Handling Next Capture Adjustments
07:39 31Using Live View Focusing and Overlay
19:40 32Selecting Images and Using Smart Albums
14:55 33Saving a Session Template
03:51 34Overview of Process Recipes
05:28 35Tokens Overview
26:21 36A Simple Round Trip
14:04 37Sharpening Workflow
08:06 38Creating a Recipe for Web Output
15:50 39Selecting with a File Name List
11:46 40Using Plugins and Sharing to Clients with PRODIBI
06:06 41Image Review 1 - Sometimes Simple Works!
08:44 42Image 2 - Radial or Gradient Masks, Object Removal
07:28 43Image 3 - Keystone Tool and Aspect Ratio
09:11 44Image 4 - Using Styles in Capture One
10:04 45Image 5 - Black and White
09:13 46Image 6 - Landscape
07:22 47Image 7 - Portrait
05:06 48Image 8 - Action in Lowlight
07:46Lesson Info
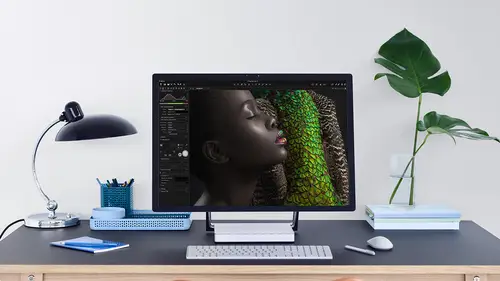
Basic Export
the next stage. If you think of capture, one quick start is to export out into tiffs. J begs final formats for further work and photo shop or delivery and so on. So there's two ways to do this in capture one. There is the sort of quick and dirty method on there is the repeatable, much smarter method. So quick and dirty method that's just hide my browser. It's where you would expect it to be. We would say file export images and then variants remember variances The capture. One term for those images. Originals will essentially just allow us to duplicate the raw files and put them in a different place So originals doesn't make sense. In this case, that would just give us a duplicate of the raw file. We want toe export those variants, too. Something else. So this dialogue pops up, which allows us to specify location and the file type like JPEG tiff and someone. So first of all, destination leads to use a folder. I just reset this. Let's choose a folder. So we want to drop them in pictures.
We can add a sub folder much like we did before. When we imported on. We can do this by typing manually so I can just fast capture one to create the folder like this. All we could use tokens as well, renaming if we wish, and then the recipe down here allows us to to define whether it's JPEG tiff. So let's say we want to have tiff files and they need to be in Adobe RGB and they need to be a full size fixed at 100% like so. So all these categories just allow us to define what the farmers should be. And then, if I say export capturing will stop processing, you can see the little process. Well, there's the activity bar on. Our export is complete. If we say OK and I go to my pictures, you can see my images and here they sit like so that's fine, but it's kind of inefficient if I want to have more than one image type. So let's say I need some J pigs as well, just to quickly throw up on a website or something like that. So I have to go back in and say export images variants change this to Jay Pig. Perhaps they need to be a slightly different size, so the longest edge are, say needs to be 1500 pixels and someone, and that will export them again. Wait for that progress and so on. That's only four images. If that was 1000 images, that's kind of inefficient to keep having to go into that dialogue. Change of parameters start on export. Go back into the dialogue, change the parameters, start another another export and so on. Now I use this method sometimes just to get a quick export, maybe one or two images. But if you're dealing with large quantities of images, then it makes much more sense to use process recipes, which is kind of like a preset for export. So you'll find them in the second to last tour tab. And these really are just presets for export. So these are the 12345 that comes default. But we can define any kind of recipe we want. So let's do the last one that we just did. So ah, say, plus on we say this is gonna be a J peg whips J. Peg, which is 1500 PX on the long edge. Like so Now I need to define this underneath, so it's gonna be a J pic. We can change our J pic quality. We can change our color profile on the scale. I said the long edge. I wanted to be 1500 pixels like so output location. I need to choose that. Let's choose a folder and we're gonna put them in my images once more. So that's now my output folder. And let's also at the same time export the tips as well, so I can activate to process recipes or three or four or five at the same time. So now we can have the tiffs on the J pigs going at the same time. So this will be a tiff, maximum resolution and so on. Now all of them are going to go into this folder called My Images. Let's just clear out those old ones and again, once again, you'll see tokens pop up because we can ask Capture one to help divide them based on a whole bunch of criteria again. So you'll see here sub folder. If I click on the box here again, we've got tons of these tokens which we can use, which could be camera serial number the date they were captured. All kinds of stuff on were doom. Or on that, especially when we shoot tethered as well. We can use tokens to really help us on our exports on the tethered shop, but in this case, I'm going to use a really simple one. Let's go to the General group and pick out recipe name so that's gonna make a folder based on the recipe name and automatically slow those images in there. So I've got to process recipes ticked, and I can just say process down here like so all we can use a short cut key. But let's click this button process that run those to process recipes simultaneously. If we go to the export folder Weaken, See, we've got J peg images tucked in their folder by the same name and then tiff images also tucked in their folder by the same name. That's just a really simple example. Weaken build on a lot more with tokens if we wish, but just doing something like that will save you a huge amount of time. Rather than going back into an output dialogue and back out again and so on and so forth as the course goes through were pick up on these, you know, a little bit more as well. Um, because they pop up all the way through. You know, general work flow, that exporting is the last thing that we do or round tripping to photo shop or something like that. So I think that brings us almost to the end off this segment. Any questions from the audience? Yes. Is there somewhere in there, too? Limited, specific file size? I had something recently where he needed to do that, and I didn't know where to find it. In capture you, it's Ah, it's a really good question, and it's something that comes up a lot, but it's it's not possible to limit to a file size. Uh, the reason for that is because, and I know it kind. It could be useful, but the reason for that generally is because then your compression is going very image to image. So let's say you had 25 images, which you had to have a certain limit then. The compression, like for J pick, for example, depends on the image content, so some images will compress quite small, and some will struggle to compress to the same amount. So if you say well, every image can't be any bigger than one megabyte, for example, then when you export all those images and look at them to keep them within those boundaries than the Jay Peak, compression might have to be set quite low. So then, when your images are looked at some, we're gonna look super nice and some are gonna look, Maybe not so nice. So while I agree, it might be useful for sort of image quality integrity, it's not necessarily the best option. You're better off with something like scaling it to a certain pixel. Dimensions like the longest edge can only be Max 2000 or something like that. So if you can find out, okay, are your image size requirements because off dimensions or other reasons normally, or find that with a pixel dimension, then every single image will look the same quality. The final starts were very, of course, as compression technology does, but you won't have this issue of having images at different quality levels. So I hope that makes sense. Any other questions? You know, I haven't issue with my use export variants, regardless of the destination, it goes to a prior destination. Good question. So if we go, is this using file export images or the process recipes? Okay, so if we go in here, what you might find is that for whatever reason, the destination. As you said, it's not going to the correct place. The easiest way to do that is to go to resettle up here, and that will take everything back to the default. And it won't recognize any sort of previous path. So do that. Are you working in a catalogue or a session? We're gonna count along okay. Yeah, just go for that reset tool. If you get any weird behavior like that, it's generally because the Apophis is set to that old destination. So going here, reset toe each time you do it. What you will find with process recipes is that you won't really have that issue because your output location is defined here. You can also reset this tool as well and always go back to whichever folder needs to be. If I just use pictures quickly, a surefire way of seeing exactly where it's going to go see this little tiny arrow here. If we tap that, that will show us in Finder or Explorer exactly where images are going to go on again. Any weird behavior. Reset the tool and stop get makes sense. Any other questions in the L Point naming you put variance in that tokens are tokens. Yeah, exactly so in the output naming tool. And we do a bit more of this when we shoot tethered as well. This works in exactly the same principle as tokens. So if I wanted Teoh, add something else. So right now it's image name, which is the same as the raw file is. It was generated from the camera. But let's say we wanted toe have the recipe format as well. Liked it for Jay Peak or the recipe name. I can either choose the token boy clicking on the box and picking it up. Or, if you know the name of the token. It's something regularly that you use like for its armful recipe name. If I start typing, it gives me a token suggestions so I could add the recipe name to this vile, not file format as well, and I can divide this up. Oops. Forget the right symbol. I can add symbols in between. There we go get there eventually. So if I want to divide this up so I've got the image name and then the recipe name as well. So have the original image name and the recipe named that it's used as well, for example, So now if I just process thes two out once again, oh helps if you choose an output folder. So let's just put them in here on Bennett starts processing and you'll see that this one is called down here. J Peg 1500 Long Edge. And so again, there's loads a token, so it could be very imposition. So if you have different variants of the same image, it could call it very one very too, which is really useful all kinds of token possibilities there. As I said, we do a bit more of that when we she attended a swell Yes, So for the job name Field is that kind of move. Unless you put in a token that you want the job name to go. Yeah, so So there's one thing that we we didn't let's find it put location. Yeah, There's also a job name token down here, like as you can see. So if you've used a job name, token elsewhere, then it will also pick it up there as well. So if you don't have a job, name token, then no, nothing is gonna happen here. So But if we put in job name like so, then it will use whatever is popped in here. So if this was a job for creative life, then we could tuck that in there on then. It would also use that in the naming. As you see, that's often quite useful one which I often have an output naming because they're not just chucking a job name there as well.
Class Materials
Bonus Materials with Purchase
Ratings and Reviews
Leon
This is a superb course. David is an excellent teacher. I'm coming to the end of it and have learnt so much. I've been using the software for a year, self-learning as I went along. I had watched the odd David Grover video on YouTube, but never got much further in my understanding of the software. Capture One is brilliant software and to do it justice you need to learn it properly from an expert. Highly recommend this course if you want to produce professional results.
lakiut
Excellent course and a very engaging speaker. If you are starting with Capture One 12, this is the best class to take. The lessons are presented and explained in an organized way that it shortens the learning curve. Thank you, David. Cheers!
Jino Lee
One of the best course I've purchased. Very helpful and I learned so much more with this course and in a short period of time, than all the official Capture One You Tube videos put together! Anyways David Grover is the same guy who does the Phase One C1 official YouTube videos, so there's no better person to conduct this course than him! Truly excellent and if you think you know all about C1 Pro 12 interface, wait till you watch this course.