The Best Way To Test and Fix Problems
Lesson 8 from: Fundamentals of Adobe Character Animator CCTony Harmer
The Best Way To Test and Fix Problems
Lesson 8 from: Fundamentals of Adobe Character Animator CCTony Harmer
Lesson Info
8. The Best Way To Test and Fix Problems
Lessons
Class Introduction
07:44 2Sketching Out the Character
11:52 3Building the Face and Head
16:32 4Developing the Eyes
06:17 5Phonemes and Visemes
09:55 6Building the Body & Adding Gestures
17:46 7Checking the Hierarchy and Structure
14:33 8The Best Way To Test and Fix Problems
11:07Lesson Info
The Best Way To Test and Fix Problems
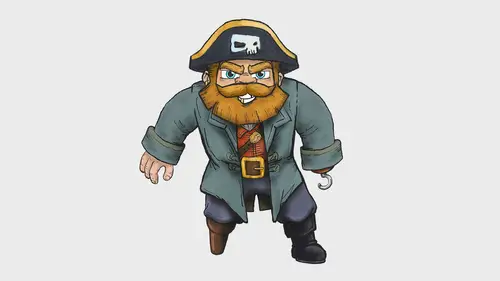
So what I'm going to do here is just gonna create a brand new project, okay, out onto my desktop. So I'm just going to drop this on my desktop, and I'm gonna call it CA part two, like so, CAPT2, as you can see just there. So it's creatin' that project. And this is what a new blank project looks like. Pretty blank really, there you go. So you can go to the start workspace and get stuff from there, but otherwise, in here in the record workspace, which is the default, it is pretty blank. And what I'm gonna do is drop back to Photoshop just for a second, okay, and let's pretend that you've been working along with that layer structure. You've taken one of the default puppets here, okay, and you've probably renamed it like so, so I'm just gonna call this one Jeff for no reason at all. There you go, so this one's now Jeff, looks suspiciously like Chloe, has many, many of Chloe's traits and behaviors, not so much with the swinging hair in the background and the clip's definitely gone, they wer...
e all things that I could access here in the layer hierarchy, but just for argument's sake, we'll pretend that I've drawn this puppet out, okay? So I've used that as a basis and I've drawn the whole thing out, and I've tried naming all of the layers myself. And we're gonna see how that works, okay? So, it's gonna save that, and it's actually saved on my desktop, and I'm gonna switch out to Character Animator, and to bring a puppet in, you simply use the import command. So you go file, and import like so, and then you go to a location, so if I just come along to a location here, here's Jeff.PSD, like so, and I'll bring that in, and here it sits in the project window at the top. And when you're actually testing out whether or not you've got the hierarchy correct and all of that stuff, the best thing to do is actually run with it, and you'll learn more by doing that. So I'm gonna drag Jeff from here into the timeline down at the bottom. So if I pull that down like so and just drag it across into the timeline, then it prepares Jeff and puts Jeff/Chloe into the scene there like so. So ready to go. Now I could try testing this out by turning on the camera, I've kind of got a fairly reasonable amount of certainty that I'm gonna be successful here because it's based on Chloe. Okay, so if I turn on the camera, and what you should do when you set this up, can you see there's a thing that says set rest pose, just to the left of the camera, what you should do is look at the camera from the length or distance away from the camera that you would be whilst performing, and then click set rest pose. Just look straight on at the camera like that. And what you'll notice, you won't, but this is really, really high definition here on this big, wide Wacom Cintiq at the moment, but you might actually just be able to see some markers on my face that the program is overlaying. They used to be a lot stronger, but now they're not. So there's a few things going on there, apart from Jeff is a bit floaty, so if I was doing an animated ghost, ah, don't be scared, I can't get out of that floating line. So there's some reasonable stuff going on there. It is actually looking around with me I guess, and if I turn my head, it's turning, some stuff going on with the body there as well. So we can fix all of that in due course, but just test it. Now something's not working, now this has got a draggable I think on the arm, no it's not doing anything just there, so there you are, there's nothing going on with the arms at the moment. So I'm gonna disable the camera, now let's go into the rig workspace, which is where we're going to spend quite a bit of time in this particular segment, and what you need to do is actually double tap on the puppet in the project panel to load it into the rig workspace. You can see the difference here between if we just look at the project panel just for a moment, that's at the top left. You can see the difference here between the puppet, it's got a little chest piece kinda icon, little person icon there, and then underneath the scene. Because puppets can't exist in isolation, they have to belong to a particular scene. And of course you can have the same puppet in different scenes, you might have a puppet where it's doing some dialogue with another puppet, and just in case you're wondering how you're going to get around being two puppets at the same time, we will get to that, I promise you can, you can be two puppets. But they can have a scene, and maybe in the next scene, maybe they're walking along talking, and then maybe in the next scene they're chatting again, but on a more tighter crop, so they're kind of close in on that and so on. But you can build scenes. But you double tap on that and you get into the scene. If you double tap on the scene here, this scene hasn't really got a lot going on, it just takes me out to the record workspace. But if I double tap on the puppet, then it takes me into the rig space as well, and you don't have to go to rig first, it will take you there if you're not there already. So a few things going on just here, and so you can see that the layers, some of these things have got small icons next to them, and that means that these things here look like a crown, that means they can work independently of its parent group. Now generally, we don't want some things to work independently of their parent group. To illustrate that, I'm going to hit the crown icon just there, just in that column, you can add the crown icon. Now watch what happens when I go back into the record workspace and turn on the camera and move my head around. Yeah, and that definitely is not right. (laughs) Or if it is, I've got a super power. So there you go, you can see it's floating around on it's own, that's what warping independently means. Now you can specify that in the layers, you can't see it here in the rig workspace, so what I'm gonna have to do is just jump back out. I'm just gonna disable that warp independently for the head group there. I'm gonna take you back out to Photoshop. Let's have another look at this file, and one thing in particular here. So if we swap back out, can you see that some of these canonical names as they're known, that means it's the proper naming for these things, have a small plus to the left of them. And that's the kind of historic way of, and it's still valid now, to make sure that something moves independently of its parent group. You see that head does not, but if I changed it here and added a plus there and save that file, this isn't something I would really want to do. Let me just do that and save that file. Let's go back to Character Animator, and can you notice, I don't know if you saw that happen, but in the rig workspace, suddenly that crown is back next to the head. So what I need to do is to fix that common error. So let's have a look at how we can do some of those things. Basically identifying them in the first place is the thing you need to do. Head's moving away on its own, so obviously it's moving independently of the other things there. So if I go back to Photoshop, then given that I know that pluses allow independent warping, I can go okay, that's fine, what I can do is just change that layer name there so it's just head, so it's a parent group, or a group, but its name's correct, and save that, then switch back to Character Animator. Fast switching, which I'm doing here by the way, is a real bonus when you're working in things that interoperate in this way. If you're working between Character Animator and Photoshop or Illustrator, being able to switch quickly is a really useful skill to have, and I command + tab, so I basically hold down the command key, or some people call it the Apple key, the command key on the keyboard, and strike the tab key like that. And if you do it quickly, you don't see the heads up thing. If you do it slowly, like that, you see all of the applications that are running in your heads up display and you move to whichever one is highlighted, but if you do it quickly, you can see it just jumps there. Now on Windows, that's alt + tab to move through things. And again, if you do it slowly, you'll actually get an expanded view of all the applications that are open and you can choose from there, on the Mac it's icons. But that is a useful skill to have because you can see here, and with the stuff we did in the last segment, that we are actually moving backwards and forwards between Photoshop quite a lot. And even though, the reason we're doing that right now is because we're explaining things and working things out together on how this works. You'll find you will do it a lot, especially at this particular stage where you're fixing common things. So go to that and check out things that things are named in the right way, and if you see something you think, oh that shouldn't really move on its own, or if it's moving in an irregular fashion, come back and disarm that either by changing the layer name on the right hand side here in Photoshop to do that. Always make sure your work's saved, get into a habit of I'm going back to Character Animator so the first thing I do is command or control + S to update, followed by the command + tab. On the Mac it's easy, because you can just hit your thumb down on the command key, and then just hit S and then tab, so you're saving and then tabbing across to the next thing. On Windows, all you've got to do is just shift slightly across and you're good. So really easy to do in both cases, and if you wanna fix the thing inside of the rigging workspace then of course you've got this column here for independent warping. So that's how you can do those things. Now some of these elements have different things that allow them to be controlled, and they're through a system of things called handles. And so what we're gonna do next is we're gonna add some handles onto some of these groups, and see how that changes their behavior as well. So this is all done here in the rig workspace. Now first of all, on the body here, I've got this origin, and that's basically the origin that the sort of center as it were that the sort of body gravitational center if you like of the body, and that will change certain things about the way the body bends. So you'll see that if you take the origin high up in some things, and really low down in others, that will change the way the body bends.
Ratings and Reviews
Gary
Great Class! I am just beginning to learn Adobe Character Animator and this class was a great starter for me to learn some of the background on how the program works.
Student Work
Related Classes
Design Projects