Finishing Your Metal: Sanding the Surface
Lesson 13 from: Foundations in Metalsmithing: Statement EarringsMegan Auman
Finishing Your Metal: Sanding the Surface
Lesson 13 from: Foundations in Metalsmithing: Statement EarringsMegan Auman
Lesson Info
13. Finishing Your Metal: Sanding the Surface
Lessons
Prerequisite #1: Basic Metalsmithing Tools
18:10 2Project Overview: Statement Earrings
07:55 3Designing Your Statement Earrings
24:03 4Choosing the Right Metal for Your Statement Earrings
16:12 5Transferring Your Earring Design to Your Metal
10:39 6Sawing Basics: Putting the Blade in the Saw Frame
10:54 7Sawing Basics: Bench Pin Setup and Hand/Body Position when Sawing
13:04 8Troubleshooting & Student Hot Seat
10:18Drilling Holes and Cutting Interior Shapes
09:11 10Drilling Holes for Jump Rings and Ear Wires
04:22 11Proper Workflow for Cutting Out Your Statement Earrings
30:02 12Finishing Your Metal: Filing the Edges
09:46 13Finishing Your Metal: Sanding the Surface
18:40 14Finishing Your Metal: Choosing a Finish and Polishing
08:23 15Finishing Your Metal: Sealing Brass and Copper to Prevent Tarnish
05:27 16Making Jump Rings to Connect Your Metal
06:31 17Making Ear Wires
09:05 18Assembling and Evaluating Your Statement Earrings
13:34 19Alternative Step: Soldering a Post onto Your Statement Earrings
14:16 20Adjusting your Workflow for Soldering & Hot Seat
08:46 21Taking Your Earring Design to the Next Level
06:13Lesson Info
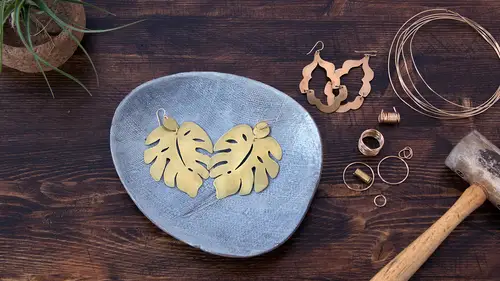
Finishing Your Metal: Sanding the Surface
Let's talk about sanding the surface so, through the process of cutting, and filing and everything that you're doing you're gonna end up with some scratches on your metal, and we want to take those out. So we're going to do that through sanding. Sanding is really the process of using finer and finer scratches to remove larger scratches. It seems counterintuitive but that literally what we're doing, is we are scratching the surface in order to take out the bigger scratches. So, as I mentioned sandpaper comes in a number of grits and so this a case where the smaller the number, the coarser the sandpaper. Usually you might see like an 80 or something but for the most part you're not gonna need anything coarser than an 150 or 220, but it goes all the way up to 1000, 2,500 which is very, very fine. We're gonna work our way through these sandpapers to take out our scratches. What we want to do is really alternate between, so I'm gonna start with my 150 here. A lot of times you can buy sandp...
aper like in a pack, so I have a pack here that's like runs through all the grits. You want to look for black sandpaper, wet-dry sandpaper. What you want to avoid is the brown sandpaper that's intended for wood, we want sandpaper that can be used for metal, it might not say metal specific but it will frequently say wet-dry sandpaper, but what you're looking for is generally it's gonna be the color black. You might also see something like silicone carbide, that's what the sandpaper is made out of. And again, on your PDF supply list I've got some places where you guys can get that. So the first thing I usually like to do is, I like to make an assessment about if I have any deep scratches in my metal. The reason that I want to do that is because I don't want to use a more abrasive sandpaper than I have to, so if I don't have to use a 150 or a 220, I don't want to because I don't want to put those scratches in if I don't need them to take out other scratches. So if I'm looking at this here I've got like a pretty deep scratch that's coming across this guy here so that to me is a pretty good sign that I'm probably going to have to go in a couple of these scratches here with my 150 to take these out, but on the other side this side looks pretty good I've just got a little bit of glue and a little bit of sharpie, so on this side I might skip my even maybe my 220 and go to my So let's just go ahead and start sanding. One of the other things you can do is if your table is really rough think about if we've got this side down here and we're adding pressure we could end up putting scratches back in to our other side. So, I'm just gonna grab a few sheets of paper from down here. (drawers clanging) (paper shuffling) Just so that I've got something a little bit nicer on my surface to work on and actually I cannot break myself of this habit but in my own studio, I sand on my lap. It's just one of those weird things that I'm like, work on your table, then I'm always down on my lap on my apron. So, if for some reason that works for you, you can do that. So, what we're going to do now is we're just gonna start to sand and we're gonna go ahead and I usually try to work in one direction at a time. Where I'm trying to go ahead and take my scratches out. And so you notice without kind of even explaining what I did I tore off a smaller piece of paper and now I'm just working on something that's a little bit more hand sized, so I always just tear kind of chunks off and even this is probably a little bigger, so I might make that even smaller. So now I'm just gonna sand and if you feel like you wanna kinda get a little bit in there, again you can hold it in your hand (scraping) or on your lap, or you can put like a rag down on the table. So my goal is really to see, add these scratches in here so that I'm taking out the ones that I could see before. So, I'll do that. (scraping) And then usually what happens is you get pretty good sense when you should jump to your next grit if you got those scratches out So, you always wanna alternate directions between grit so I went one way and now I'm gonna go the next way and sometimes depending on my piece I like to sort of sand diagonally instead of that way. So let's go in here with my (paper tearing) Yup, 220 always check the back that's gonna tell you where your numbers are. So, now here with my and I'm just gonna sand now in a different direction and as I'm sanding this, what I'm seeing is that big scratch that I kind of had across here I'm not really seeing it show back up so that means I'm probably good and I can keep moving on to the next grit if it came back I would come back in with my 150 and sort of work my way around. (scraping) and because it's really easy to kind of lose track of like what all of these little bits are, when I'm working in my space I will literally line them up in order. So, like here's my piece of and then when I'm done with my it'll go there and I'll kinda work my way through. Specially as you're doing multiple parts for your statement earrings. (scraping) and I know because of all the questions you guys have been asking, that you're wondering, is there a faster way to do this? And we're gonna talk about that in a minute but I still think it's really nice to kind of know this old school way of cleaning up your metal. So again, we're kind of just working our way across and we're literally going to just keep working our way through our sandpaper so now I've done I'm gonna jump up to and like I said I kinda did that assessment where I thought this back side didn't need the 150, didn't need the so I'll come in here with it does have a little bit of glue gunk on it so I might try to see if I can get this off with a 400 if not I'll jump back to the 220. But I'll come in here (scraping) opposite direction (scraping) So I'm just gonna kinda work this across. (scraping) and what'll start to happen here is we'll just start to get this more consistent finish. So, once I am up to this point I usually do. There's two different schools of thought here, one is like you do side all the way through the grits, and then you do the other side. I'm not that person so, if I were doing this in my own studio, I did the 400 on this side I would flip it over I would do the 400 on this side but just for expedience sake I'm not gonna do that. So we're just gonna keep moving through because I want you guys to see kind of how these scratches come out, so... The other thing that you can think about too is, we're gonna talk about finish in a minute but how well finished you want to be so if you want something with a high polish, you really have to take out all the scratches. Which means you really have to work through every grit sandpaper, but if you're like me and you're like, I kinda like a nice little matte finish. I usually skip a couple of steps so I'm gonna skip this 600, we're gonna go to our 800. (paper tearing) I'm like oh yeah, matte. Matte finish is great, like it's so pretty. So I'll just come in here with my (scraping) kinda work the other way (scraping) now you also can get things that aren't just the sheet sandpaper. So you can get sanding blocks that have these coarses, or I got these little sanding pads here put those in our little camera. And so, I might find... this says it's... 150, 360, so this says it's 600 but it feels pretty fine, so I might use this little pad instead. (scraping) and go in there, I can see that this is definitely feeling like a different grit so even though it says it's it's pretty smooth, so if I were working through this order I would not jump between the sandpaper and the sanding pad I would use one or the other through the whole process. But that is an option as well and so you're literally just gonna see, you can see as I'm putting this sanding in here it's starting to get even though it's matte with a texture, it's starting to get shinier right, we're starting to see kinda the surface come up and then really it's kind of up to you as far as how far you wanna take this with getting out those scratches bringing the finfish up. The other thing I really like to use are these abrasive papers or abrasive cloths if you look in a jewelry catalog or even on amazon, you might find them as being called polishing papers and just like sandpaper they run through all the grits, but what I like about these is that they are a little bit more flexible so you can kind of beat them up a little bit more they do not tear as easily as the sandpaper. So I found... It's better to cut them into pieces just because they kinda tear really funky, and this is really important as well if you tear them you kind of get some jagged edges that can actually put scratches back in your metal. So I think this is actually, the green is which is a little bit more abrasive than we've been, so I'm just gonna jump to this blue. And if you're one of those who don't remember the color order, these do not come labeled I would label them in my own studio. Like I kinda know at this point what color but you can see how this is gonna like smooth it up even more. So I've got this nice... Little polish, so what I generally tend to do is, you know work my way through take out scratches with my sandpaper and then come in here, with my abrasive cloth and get this a little bit more now I can see, got some kind of deep scratches in here that didn't quite get out so if you see that happening you can always back track and say okay, those didn't quite come out I think I'd have to go back to my or my 400 and see if you get them, or you can decide you don't mind them in and leave them in kind of an aesthetic choice there. So that's one thing you can do to kind of bring your surface up to a finish. Now for those of you who are wondering seems like it's gonna take a lot of time, is there a faster way? You can also use the flex shaft so, I am not a big flex shaft finisher person it's just never been my nature, but I also understand that hand sanding a lot of these takes a lot of time. So there are a ton of different abrasives and wheels and finishes that you can get what you generally want to avoid are actually even though it seems counterintuitive you want to avoid the things that look like sandpaper because they're actually way more aggressive than you probably need. So these, I'm gonna put them here under our little magic camera. These are actually these great little abrasive disks and so the way that they work is that they fit on this little wheel here I'm gonna put some on. So, they say it's something like... Three to six of these little guys stack up per wheel. And just like with sandpaper they come in grits. So it starts with our yellow is our 80 grit, red 220, blue 400, so you would work your way up through just like you would with the sandpaper. And so what happens is, you can just stack some, higher shiny ones in here. So we'll just stack these on our little spindle here. And I can not for the life of me figure out why in this kit they only give you one spindle seems highly inefficient to have to change it so you can buy more of these little spindles and if I was doing this, if you were doing this for production, I would buy multiples of these little spindles so you can keep one spindle for every grit of your piece in here. So then this can just go in our flex shaft. And what I recommend is if your doing a lot of this finishing, and you wanna look for something faster than hand sanding. Just start kind of searching you know looking at the different option at the jewelry suppliers have and really at the end of the day you're just gonna have to buy a few things and try them out and I would again look for, things that are jewelry industry specific so you can certainly go to your hardware store and buy lots of little finishing attachments that would go on a rotary tool. But the problem with a lot of those... I'm just tightening this in here. Is that again they're gonna be really aggressive for what you want with finishing metals. So you really wanna stick to ones that are jewelry specific and you don't have to use it in the flex shaft you can use them in a rotary tool or a dremel. But you wanna do that, so now this just works by, going over the surface. (grinding) and probably because this is a really... (grinding) big sheet,I would probably be better off stacking like six of these instead of three just so it covered a little bit more but you can see how this sort of thing would make quick work of what we're doing with the sandpaper here, so again I wanna be able to show people how to do this with as little money investment as possible, which is why I'm always a fan of the sandpaper, super inexpensive, easy to work with but if your like Megan I wanna bust through this get yourself some attachments for the flex shaft so that you could really move through this finishing process quicker. Read any questions about that. Guess-timate on the price of the flex shaft and the birds, just a... So, a Flex Shaft is gonna rage you anywhere between like a hundred for a low end model and anywhere between like two, 250 for a slightly better model but you can do a lot of that with a rotary tool like a dremel, which you can pick up for much cheaper. So if you're not sure, that's kind of a better place to start. I know that this little kit from rio was kind of expensive, I think it was like $60.00 for all of these attachments which again if you're just doing this for fun, for a hobby sit down in front of your TV, get your sandpaper sand it out, but if you're trying to think about doing this for production $60.00 for a little kit is gonna save you a ton of time, that's probably worth it. Great a shout out to one of our regulars, Red Scorpio's out there... What's up?... She's watching it, so... I wish she was here... She mentioned the dremel so thanks for mentioning that. then the question was, do you discourage circular standing? Circular?... Do you?, yeah... Oh, like that kinda pattern? Yeah, circular, yeah. Yeah, I, just aesthetically I'm not a fan, I guess. So I always do like that kind of directional but there's no reason that you couldn't do circular, yeah. Cool, and we have all the links to all the equipment we're using today in that PDF, that folks if they rsvp then go to class materials, download it for free. Yeah, absolutely so, everything's on there, and if for some reason you're trying to find something that's not on that list you can always just tweet me at Megan Auman and I'm happy to send you guys a link for stuff so, I'm happy to share. And I noticed, just myself when you just cleaned it up with the cir... Yeah... With the... Yeah, with the little abrasive wheels It really became quite shiny. Yes. So is that because it's a certain grit? Yeah, so that one that I used here was, what did I put the green on there? So that's, yeah, so that's one micron so that's really fine, so it's closer to a polishing finish, and that's what'll happen is the more and more you get kinda the finer finish the closer it's gonna get to shiny. And we'll talk about kind of how to even get it a little bit further, but what you can see as I kind of did that is that there are still fine scratches in this, which means that if you really, really want a high polish you have to be really, really, really careful about taking it though all of these levels and really taking out all of those scratches because as soon as you try to make it shiny without taking out those scratches you see them all back in there. So, shiny is nice but it also requires a lot more work to actually get these scratches out right, because from a distance it looks really shiny, up close you can see there's still some pretty big scratches in there. Cool, a couple more questions Yeah. But you always want to level up don't jump, don't really jump around... Right. Level up, go through all take your time. You always wanna work your way through you can skip a little bit if you're going for more of a matte finish so kind of a matte or a brushed finish, I might go like every other so I'd skipped the 600. I went from four to 800, but if your going for that high polish, generally you're working at, it's every about 200, so like start with 150 then it's 220, 400, 600, you wanna kinda stay in that and then 1,200 keep working up that way. Great, and with patience you can get to that high shine with sandpaper as well. Well yes, So you have to eventually move over to something that's more polishing so sandpaper will only get you so far so then you'll need to make the jump to either the polishing paper or something that happens on a Flex Shaft. You'll always, If you only use sandpaper like let's actually just put. So if we stop at say our 1500 sandpaper (paper tearing) that's gonna give us a nice finish but it's not gonna be... (scraping) as shiny, so that's where we would end you can go a little bit higher, you can get like 2000, but you can see here it's still much more of like a kind of textured matte finish than with our polishing wheel.
Class Materials
Free Bonus Material
Bonus Materials with Purchase
Ratings and Reviews
user 1398976626171314
One of the most special things about Megan, is that though she is a creative, she is extremely good at business. Her organized way of thinking and presenting material, and her genuine joy when empowering her students with the tools needed to be successful, is charming and so much fun. Somehow there is such seamlessness and flow to her class structure and explanations, that I can absorb what she says and easily retain it. I really can start a jewelry line just with this class. She is amazing and LOVE her style!!!
user-172aa6
I really enjoyed this class! Megan provides a great foundation for using metal sheets to design/make jewelry and using wire to make unique findings. This was a great class for learning the fundamentals and sparking inspiration for new projects
Vernell Bevelander
I LOVED this class! Megan is such a detailed teacher. She leaves no stone unturned. So much fun! Can't wait for my next class!