Lessons
Intro and Overview
14:53 2General Techniques
13:03 3Kick Drum Techniques
31:02 4Kick Drum Questions
18:11 5Tom Drum Techniques
22:44 6Snare and Tom Q&A
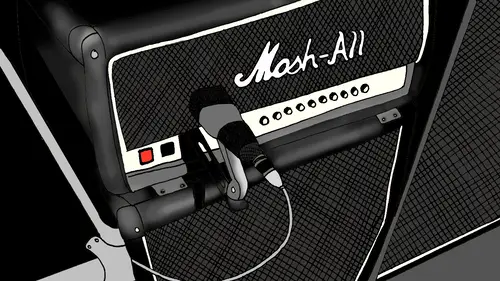
22:02 7Overhead Mic Techniques
25:21 8Room Mic Techniques
23:21Lesson Info
Overhead Mic Techniques
Now we're going to start focusing on treating the overhead like an overhead and doing it in such a way that it will combine with that snare and tom track in a constructive way. And so one of the things the first thing that I decided to do I was actually to delay that overhead a little bit and this is kind of a risky move because it can potentially be a phase nightmare. But you know in a normal sort of recording situation, a no overhead track is delayed in time from a close mike track so electrically the microphone that's on the snare drum, for example and the microphone that's above the drum set electrically are sense electricity essentially moves at the speed of light is is getting to your recorder at the same time, however sound moves a lot slower, so there is a an offset between when the the pressure wave, which is the sound way from the snare drum reaches the close mike versus when the wave from the snare drum reaches the overhead so that you know and I find it that offset in my se...
ssions oftentimes is like around one hundred eighty samples as I mentioned here, so I decided to give to give that a try to see if I could kind of fake the offset between the close mike and the overhead teo get a bit of space so I should I should mention before even though it's not realistic to the way that we hear things organically in a in a room that in the context of recording that that time offset between a close mike and an overhead actually has a certain sonic benefit because the um the transient attack of the close mike is not happening at the exact same time as the transom attack of the overhead mike which enables us to have like a much more sort of impactful close sound and then the overheads air suddenly delayed behind that and that gives the snare drum a degree of spread particularly in a situation where we're not trying to get a lot of the attack of the snare from the overheads are mostly just looking for a sort of like the character and the the width and the realism of the room so we're going to try to fake that by delaying the overhead sound of it so um I think I already did that let me just kind of double check comes we'll look at the uh yeah when I ask a question you said her lay at one hundred eighty samples now that that's contingent on whatever sample right you're it isthe yeah and I think that that hundred samples was kind of more of a note to myself in terms of like um well we could we could pull up some other sessions and kind of look in terms of like, milliseconds I have to do a little bit math not sure what that is half top my head but it's not much it's like maybe like two milliseconds or something like that so you know trying to kind of kind of fake that s so you know I think I'm going to grab go to steal a track from my my as mixed right my excuse me my as delivered session and then kind of bring that down the way I think I'm doing this with oh I'm doing with uh I don't move it manually I did it with um so I don't need to do that you know I did it with uh time adjuster so yeah let's let's let's check let's check out how that overhead will combine with the snare and see if see if it's actually a problem so let's find us a passage with a bunch of snare um here's one okay so gonna solo the snare um in the and the bottoms near michael just hear that all right you know what I'm gonna turn off all these plug ins that I have on the overhead track and then let's listen to just the overhead all right because I don't need a loop that long um okay so uh let's sew up the sneer now and listen to how they combine all right so now let's try this little offset and see if we have it if it still sounds okay together theo eyes actually sounds a bit deeper I had toe invert the polarity of the overhead as well you see this little clarity button over here so um and this this is kind of an instance when that question that came in during the last segment about about the bass bass drum mike's as I kind of worked through that I mentioned that sometimes you can use ah phase shift to your advantage and use use that as an e q and in certain face positions you we'll be losing mid range but in losing mid range the net result of that is that you have you might have more bottom end so in this case here with this we are imparting a subtle phase offset between what we're hearing in snares in the overhead versus what we're hearing with close mike snares and that is giving us a bit of what I would consider here please and thank you and we're going to hear how that offset um ads adds realism to the snare mohr as as I add additional processing tio this overhead tracks so we're going to come back to this and listen to the overhead track again and with um with the sample, the one hundred eighty sample offset and without once I've done the additional process into the overhead track so we go back to the slides for a sec all right, make this overhead but larger all right, so I'm gonna put a whole bunch of plugs on here and I'm just too quickly run run through this this stuff is, um a lot of this stuff doesn't really pertain to like fixing in the mix this is just a lot of this stuff is kind of normal, mick stuff like like the queuing is kind of normal stuff we would do with with overheads is and then but you know we're needs pro and be a little bit just because it's a mano overhead and the way in which it was aimed wasn't really capturing all of the symbols even lease or to use probie to try to like even out uh, symbols and also to get a little bit more attack out of the snare and then it's like I couldn't really tell from watching the video what the microphone wass in in the overhead position but looked like having an expensive small diaphragm condenser, so don't try using sound toys decapitate her, which is a favorite of mine and I know a favorite of brad's I've heard you can identify a vocal that's been processed with decapitate or even if you don't know, so we'll use him to capitated to kind of class up overhead a bit and then we'll talk about stereo widening of the of the overhead it's amano signal but don't try to make it a bit wider so that it gets out of the way of of this kick and sneer which your pan to the centre s ok, so back, tio yeah, no river, whatever. All right. So, uh, back to the pro tools and let's check out, check out that same passage and start addison plugs. So, first up broke you two and, um, let's see, yeah, I guess I'm just yeah, I just wanna say I'm just using a monument sense of pro que tu and not a whole lot happening here. Um, just kind of carving out a bit of bottom, adding a bit of air and then checking out some of the harsher frequencies in the upper mids and not use some of that stuff out so you can see, like, right when we're playing it, um actually let me just mute for a second so I could talk while it's what's playing you see, the spectral analyzer is kind of like a bump in the snare that's happening within this purple guys. So we're having a bit a bit there to just kind of bring bring some sneer presence forward. Um, we're adding a bit of air up top and then also trying to suck suck out some of the harsh symbol frequencies in the upper mid range and that's just a bunch of hunting around for for what that's doing whose stuff is and then also bury in mind like the balance between all of the different symbols so you know like this this little mid bump here might have more to do with the ride than it does with a high hat and um you know, these these higher mid cuts might have more to do with the crashes than they do with the high hat and then also cutting a bit of low end not only because you know as you can see there's not a whole lot of information down they're coming from the symbol so we don't need a lot down there but also some of the some stuff leaking in there is the guitar and the bass and we don't really want to have a whole lot of that and our overhead mike so we have amore kind of direct sound from the close mikes on those on those instruments so here we go just a little bit of that stuff not not a whole lot um let's bring up pro am me next you know, this is this is were using we're letting we're letting more sneer through the low men were kind of squashing some of the highs and I'm doing that mostly to kind of level out not only the tone but the volume of all the different symbols and I feel like using this thing and these were mostly set to kind of slow slow attacks, so we're just kind of letting through a lot of the transit attack and then kind of squashing the decay using slightly longer released times, which is just tryingto get a get a greater drum to symbol balance, and then also even out the symbols here a bit more of that. This one's nice, because you can really see it on lee it's only active this upper mid man is really only active when the crashes air being hit, so I did. I did used to use quite a fast attack time on that, so the snares are unaffected by this band, but whenever the that left crashes hit, this thing ducks out of the way. The left crash seems to be one of the really dominant symbols in that microphone, even though it shouldn't necessarily be the dominant symbol on a kid. All right, uh, next up, when tries to decapitate er, and this one has a bunch of different mowed down in the bottom. I'm using mode a, which is like the apparently, I think, it's like a impacts three fifty simulators, that son, right? Yeah, um, and we're going to do two things with this will be adding a bit of drive just for cem cem, harmonic overtones and then also using the high well, they're called low cut, high cut. I would call it high pass and low pass but you know, the filtering on the extreme ends of the frequency spectrum we don't need much on the bottom. And then in the top that's where the mike sounds kind of cheap, so we're gonna try to class it up at the top. And, um, something that's interesting to note about decapitate er, um well has wet, dry, which is kind of cool. So as we dial something in, we can then dial it back using what tribe. But these thes two switches here kind of interesting the steep and the thump the's adjust the slope of the high pass and low pass filters and let me just just for ah, just for argument's sake, I'm just gonna throw, like, just open up any old any old q on any old channel and then let's let's do like a, um well, it's called low cut in procure to also so this is this is like the same type of filter that they're describing as low cut in decapitate er and let's go a little steeper. So when when you engage thump, what it does is it gives you kind of a resident peak at the corner frequency, so it's cuts off frequencies below you're the frequency in which you've chosen, but that it also gives you a bit of a bit of a boost right around the corner frequency, so and it allows you to kind of replace sub base with high base in using on ly one instance o or or one band of any hue, this could be an especially useful tool uh, when for playback on small speaker systems where they don't they don't really reproduce sub base, but they can reproduce some high bass, and this will give you a bit mohr that perceived bottom and even if it's not really there, so when I'm engaging, say, thump on decapitate er this is this is basically what I'm doing and then same thing with with that, uh, well, if you what they call it, um, whatever they call that thing on the high band, you know, simple, similar kind of thing you could get, like, a little presents peak right at the corner frequency before you're filtering off high end alright, I'm just gonna get rid of this plug is I'm not using it back to captain oh, yes, steep that's what they call so that's it's adjusting the shape of the slope, but it's also giving you that little like resident bump around that frequency, so fact, let me just are you gonna listen to it for a second quick with that all but that'll show you what I'm doing with these filters and with the drive control theo you hear with it on the high hats really like sicily and shrill and just kind of cheap sounding and then when I turn it on, things get meteor and that's that's a combination of the drive control here as well as the stuff that I'm doing so let me kind of back down on everything I'm doing within two cap decapitate er and then build it back up so you can hear how decapitate her affects the sound so you can hear with the drive we can really just the dynamics and greatly reduced the dynamics on the right track with the same sort of with when the output control is set to auto it kind of keeps the output volume pretty pretty steady compared to the teo the volume and then with mohr drive your bringing up it's like it's kind of like a compressor and it helps to just kind of, you know, even even the level everything I'm using this as a way to help control the level of the relative level of all the symbols of course this control of course this control should be used sparingly because it gets pretty trashy when you're really maxing it out on do you lose a lot of detail? It sounds you know it sounds may be a bit classier, but you lose a lot of the detail the nuance of performance with with mohr drive there um all right, so let's get into some filtering with this thing we can almost like retune the snare drum with this low cut control because that little resident peak we get a two cut off frequency so somewhere in this like like eleven o'clock toe one o'clock range seems to be a lot of control over the the pitch of the snare drum and kind of like where the meat hits you if it's in the face or if it's in the chest or fifth in the gut so let's, check that out, theo so I like a meaty snare some kind of like going on the lower side of things and then below this frequency doesn't seem to really do anything for me, so I'm just kind of allowing it to filter off that stuff it's not really important to the signal um I've also brighten it a bit here just with this overall tone control, we don't need to discuss that too much and then let's hear how the high cut effects the high hats you know, these sound like pretty new shining, bright, brash sort of high ass maybe we can make him sound a little bit, you know, old their funk here more worn out I don't say less aggressive but but softer and more in proportion to the rest of the symbols all right, so that's that's nice sir and then we've got our mixed control so we can go one hundred percent theo you know or all the way down to zero I'm going to give it you know, somewhere around seventy five so we let some of some of that super high super low stuff through but for the most part we're kind of filtering it so you know, that's just had a bit a bit more focused and a bit class year um all right, so now let's use maybe use some of the reverb impulse that I created in my own studio using ah deacon volver so basically I this there's a way to kind of capture impulses within a room that um can model the probe the the the river a profile of a really acoustic space and can then impart that profile on existing audio signal so I'm actually gonna pull up um gonna pull up a a kn overhead impulse that I made so basically went in my studio I had like a speaker that was kind of blasting some sounds out in the position where a drum set would ordinarily be and I had a whole basically welcome miked up a drum set and got drum sounds and then I removed the drum set replace the drum set with the p a speaker and then started blasting tones out of this p a speaker and those tones were used to create a model of the room. I talk a lot more about this in my first career I have lot of course you should. Probably probably by that right? And also these thes these impulses come come free with that with that previous creative live course of mine, um, been anyway, uh, so got some reverb impulses that I made from the overheads that we're just, you know, right basically right above the p a speaker that I created them from. And I'm gonna try putting those on this mono overhead track as a way to add some stereo with to the track. And this, uh this probably is gonna be a little tweak. Ege actually, I think the overhead ones probably not wide enough, I'm going to use I'm going to try a couple different. Just go listen to a couple different, um, room mike impulses that have made real quick try to figure out which one I want to use. Yeah, big room is probably going to be put it, maurine the correct acoustic space for the show um, so now we just want to mess around a bit, maybe with, um, with the k time and um who's. Sort of the wet, dry blend so we can hear we can try to make it sound realistic, like it might have been a stereo overhead or or, you know, a lisa narrow kind of stereo overhead. All right, so I mean, we can tweak that all day, but that's kind of the basic gist of the idea here being just finding away at a bit of with to the overhead sound doesn't overheads don't have to be like super intimate directional sounding if we get a little bit of spread to them, then, um, it opens up panning space in the centre channel for the things that we know we're going to live in the center, like the bass drum in the snare drum, which which will help our are snared, which will further help our snare drum and our overhead cooperate independently. So, like, uh, like, as as I mentioned, the last segment where I like to take, um, like, if a multi making a turn up, I like to sort of really separate. The two different mike said, amusing and into frequency components that's kind of what I'm doing here, but in panning components where I've taken the snare drum from the overhead track. But I've processed that and a whole bunch of different ways to make it really sneer focused. I've taken the overhead track, delayed it, process that and a whole bunch of a bunch of different ways and spread it. So now I really shouldn't have nearly as much sort of phase relationship between the snare and the overheads and as I would have not done all that processing and hopefully they will, um they will cooperate as independent sources and not not is inherently linked as they really are. Okay, so let's hear this now with the snare drum and see how they're talking together, theo stairs like, really dominant now, because I think in the final mix, I have a lot of overhead, someone turn down the snare master a bit for now uh, or maybe we'll just turn up the overhead. All right? So that's not bad let's, let's hear? Um how this time adjuster offset the delay offset to the overhead sounding now so starting bypass so I don't know how well you guys can hear it, but from my perspective, I'm hearing like sneered, I'm almost sounds like taller when it's in mono, it sorts, like more focused, and then it's got mohr, like, spread and class and space. When I, when I delay the overhead, get it, get it away from this near close, mike. So I'm liking that. I'm gonna leave that on, I guess it's a bunch of little. We got a little bit of re re presenting into our master reverb a little bit let's. Just see how that sounds, not really doing much but it's on now.
Ratings and Reviews
virtuosi101
An absolutely fantastic course for anyone who is new (or even experienced) on how to use very innovative techniques to help bring some life to an otherwise poorly recorded demo. Thank you Kurt!
exoslime
another fantastic course in the creative live audio section, kurt kills it,!! thank you!
Ashton Thebault
Definitely some handy tips in here that are useful for mixing live music, poorly recorded tracks and anything else that couldn't be rectified during recording. Kurt gave some tips I had never thought of and there were some valuable insights that came out from his discussions with people in the room. Very valuable if you deal with any sub-standard recordings and if you just want to get some tips.