Posing to Accentuate Shape (contains nudity)
Lesson 4 from: Fine Art Nude PhotographyLindsay Adler
Posing to Accentuate Shape (contains nudity)
Lesson 4 from: Fine Art Nude PhotographyLindsay Adler
Lesson Info
4. Posing to Accentuate Shape (contains nudity)
Lessons
Class Introduction
14:28 2Etiquette and Preparation
30:21 3Fine Art Nude Posing Essentials
24:44 4Posing to Accentuate Shape (contains nudity)
31:24 5Classic Poses for Nude Male (contains nudity)
15:35 6Classic Poses for Nude Female (contains nudity)
15:12 7Sculpting with Light and Shadow
18:05 8Lighting: Definition and Separation
20:54Lighting: Low Key Male And Female (contains nudity)
28:22 10Lighting: High Key Female (contains nudity)
14:45 11Patterns and Projection (contains nudity)
19:31 12Nude as Fine Art (contains nudity)
24:32 13Nude as Creative Canvas: Male Statue
17:23 14Nude as Creative Canvas: Female Statue
11:25 15Nude as Creative Canvas: Splatter Paint Torso
16:30Lesson Info
Posing to Accentuate Shape (contains nudity)
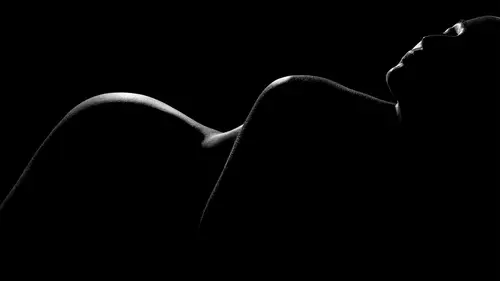
I'd like to take a moment and summarize the most important parts for posing a fine art nude form. And so the very first point that I really need to make is probably seems maybe counterproductive and that first point is there's no right or wrong way to pose a nude. And what I mean by this is if you are going for something that's dark and creepy and based on the concept of agony, well, you could have your subject curled up in a ball with her arms all twisted and it could be completely wrong posing but it's right for your shot. So I want you to keep that in mind. And what that means is for this first tip to give you, is before you shoot your image, decide what is the purpose of the shot. Is it going to be based on the subject's curve? Is it using the nude form as a canvas? Is the form and the pose telling a story? Or is it meant to be a motive? So the very first thing you need to decide is what's the purpose of this fine art nude image and how is posing really feeding into that concept? N...
ow, continuing on this concept, when you know what the idea is you can decide if the pose is based on strength. Maybe your using more triangles and right angles and stronger lines. If it's based on curves and it's meant to be soft, the hands will be different, the pose will be different, the emotion will be different. So ask yourself that question before you ever begin your shoot and then save inspiration, at least that's what I do, save inspiration to get me started on the right path. Alright, so that's to set the stage for flattering the fine art nude form or for coming up with ideas for posing. Alright, now everything I'm going to be talking about from here on out is more about flattering. Like, more traditional posing. If you are trying to do a figure study, if you are trying to create curve, if you are trying to give pleasing lines for the eyes to follow, that's what I'm going to be talking about now. So of course there are other solutions than what I'll provide, but these are going to give you strong foundations and if you want to change these or break these rules, no problem. At least you know the rules that you are breaking. Okay, so, the next concept that I'd like to discuss or the next idea you should keep in mind is when photographing the female nude form, you want to bend and curve as much as possible. So the rule that you want to remember is this, if you can bend it, bend it. If you can curve it, curve it. And so that means maybe if the legs are completely straight, adding a curve is probably going to be more flattering to the nude form. If the arms are straight, adding a bend or a curve is going to be more flattering. And so when you're photographing your subject if you're looking and thinking, well, what can I do to give more pleasing lines, bend and curve. If you can bend it, bend it. If you can curve it, curve it. So, I'm going to invite Angelica out here and I'm going to show you this first concept in practice. So if you wanna step right out here. I'm gonna step you right here. And I'm going to have you pass the robe to her. Great, let me grab my camera. Okay, perfect. So let me just get a test shot to make sure that I've got my lighting and everything all set. Alright, great. So I have Angelica facing straight on towards the camera. No bends, no curves. And so when you look at the shot, I mean the form is great, but there's nothing for the eye to follow and I want to create those beautiful curves. So there's a couple different ways I can do this. So I wanted to start by talking about one of the core poses that you may have heard about in, kind of antiquity. Perhaps you've heard of the term, contrapposto, which means counter pose. And so if you look at the statue of David, that's contrapposto. If you look at Venus De Milo, that's contrapposto. And it's just a very subtle way to shift the weight in both the hips and the shoulders in order to create a little bit more of flow to the pose. So I'm going to demonstrate it and I haven't shot Angelica before. I haven't directed her before, so I'm going to demonstrate it. And this is what I do a lot of times on my sets. I'm very active so that I feel like they can mirror me and so that they can see kind of what I'm going for. So we're working together to achieve a pose. So let me tell you about the concept of contrapposto. Alright, so, I'm gonna face straight on this way. And, of course, I have a flowy dress on so this becomes somewhat more challenging to see. But the idea is if somebody's facing straight on like this, flat-foot, okay, no curves. The idea of contrapposto is you shift the weight onto one hip, whatever one. Notice how my leg kinda bends in. So already I've introduced a bend. This is the if you can bend it, bend it. If you can curve it, curve it. So, shifting the weight, knee in. Now when you do this, this hip goes up. When that hip goes up, this is adding a little bit of an S curve. What I do, or what you need to think of for contrapposto is when someone's flat-footed, imagine a line drawn from shoulder to shoulder and from hip to hip. Right now these are two parallel lines. So these parallel lines create no motion and no flow. So when I shift the weight on the hip, this parallel line, it's not a parallel line anymore. It goes upwards. Now, if I shift my shoulders that same direction, what you'll see is this line between shoulder to shoulder comes down. So basically what you'll see is the line from the hips go up, and the line from the shoulders come down, and they meet somewhere close to the body. That's contrapposto. So if you take a look at all of these old Greek and Roman statues, you'll see that pose. This is a very subtle way to shift the weight, create curve. But you can keep pushing it more dramatic. The more you pop out the hip, the more you lean the shoulders, the more you put the hands up, the more dramatic it gets. So this is the very basic of adding just a little bit of bend and a little bit of curve. So, let's give this a try. Alright, so flat-foot one more time. Perfect. And now whatever you're comfortable with, swish the hip out far to one side. So keep lean even further, perfect. And now tuck your knee in. Great, and keep going in further, further, further, further. Perfect, and now lean your shoulders that way. Great, and I'm gonna have you put your hands up. Perfect, just like that. Great, and now I'm gonna do, I'm looking and that's creating the curve so I've got the shape. That looks good. (camera clicks) I'm going to create it even more dramatically. So, same thing, tuck that knee way over. Perfect, just like that. Now, lean that way even more. Great, just like that, perfect. So it's giving me even more curve. Beautiful. Great, so you see this is a drastically different shot than we had originally 'cause all of a sudden my eye has this beautiful shape to follow and I have created curve. So that's the most basic, subtle way to add curve. But now, I'm gonna keep going a little bit more dramatic. A couple of other ways that you can add curve to your shot. So, what I'm gonna have you do, is I'm gonna have you turn to your right. So this is one of the things that I do for a lot of my subjects that are perhaps a little bit more slender. When they're more slender, just sticking hips out and stuff, they don't have as much curve to work with, so I'm going to introduce the curve more. When I face her to the side completely, so I'm gonna face like that, perfect, there aren't really many curves. She's a slender subject but you face anyone to the side and there aren't many curves. So I actually have to create all of it. And so the first thing that I'm going to do is create a curve is I'm looking here and everything is vertical, straight up and down. (camera clicks) So what I'm going to do, I'm going to create curve number one. If you can bend it, bend it. If you can curve it, curve it. So what I'm gonna have you do is can you put your left foot up on toe. Perfect. Okay, so the shape that you get right there is that you get a curve on the lower part of her knee to her thigh and then you get a curve from her bottom to her lower back. Just by popping up that foot. The problem is that where I have her arm right now I can't really see that curve. So can you move your arm forward just a little bit? Great, for right now. Perfect, let me take that shot. (camera clicks) I'm gonna build this step by step. So I've started to introduce a curve. As I look at the shot, I've got a curve from the knee towards the bottom. But then I look at her lower back there and I could curve it more. There's ways I could emphasize this. So what I'm actually gonna have her do, is I'm gonna have you arch your lower back. Makes a huge difference. Let me take that same shot. (camera clicks) Great. Now, if you're looking at her lower back, it's drastically improved. So much more of a curve to follow. Now, because I like to be polite when posing my subjects, I say arch your lower back sometimes as a way to say, stick your butt out. Like, it fundamentally does the same thing. But also it's creating that beautiful curve. Alright, so I've got if I can bend it, bend it. If I can curve it, curve. Bent the knee, curved the lower back. Perfect. The next thing that I'm going to do is something with the arms. Right now, they're not bent. They're not curved. They're just at there side. So what I'm going to to is I'm gonna have you pull that arm back just a little bit. Great, that's perfect. And pull it down just a little bit more. And then put the elbow away from me. Right there, great. So, I am moving that arm back. I can see the curve. I've added a little bend. And let's take a look at how that looks so far. And lean your chest forward just a little bit. And arch til it hurts. Perfect. (camera clicks) Okay. All right, so that has improved the shot as well. It's giving another curve for the eye to follow. While I'm at this point, let's talk about ways to bend. Okay, so what I mean by this is if you're photographing your subject, and you want something to be a little more gentle, more subtle, you want to have softer curves of the arm. So, for example, just a little bit of a bend can create quite a nice shape. Whereas is you put the hand on the waist or the hand on the bottom, this creates a little bit more of a stronger pose. The more acute angle or the right angle. Whereas an obtuse angle, the long angle and a soft bend, is gonna be a little bit more gentle. There's not a right or wrong answer. It's just knowing that how you bend the arm, it will make a difference. So, keeping that in mind. I will be thinking about that when I pose. All right, so I'm gonna have you do the same thing. Perfect. Great, that's great. (camera clicks) Wonderful. Okay, now as I look at this shot, I've bent the knee. I've curved the back. I bent the arm. Bend, curve, arch, got all of that. However, that back arm. The back arm is just kinda, kinda standing there. It has no purpose. So I can make this shot more elegant if I do another bend of some sort. And how I think of it is anytime there are two things: two feet, two knees, two hips, two shoulders, two arms, two hands. Anytime there are two, the more you have them on different levels, the more dramatic the pose. Okay, so let me explain what that means. If I have both hands soft on the hips, it's kind of a quieter pose. It I bring it up to the chest. This is a little bit more dramatic. If I bring it up to the head, that's even more dramatic. So it would be the same thing with the legs. If I have both knees side by side, each time I raise up a knee, it gets more dramatic. So when I'm posing the second hand, the other hand in the shot, if I want the shot to be a little bit more subtle, a little bit quieter, I keep the hands on closer levels. If I want it to be more dramatic, I'll raise that hand to the chest, to the face. Again, two shoulders. I can tilt the shoulders to become more dramatic. So, is there a right or wrong answer? No, it's just knowing that first question: What's the purpose of the shot? What am I trying to show? All right, so let's do this again. Bend that front. Perfect, great arch. Wonderful. And now what I'm going to have to do is I'm gonna have you lean your shoulders back this way just a a little bit. Yeah, drop that front shoulder. Perfect, so I'm putting them on different angles. More dramatic. And that back arm. Can you touch real soft? Right there is perfect. And pop out that front knee even more, bend it. And then turn your chest towards me just a little. Great, love it. (camera clicks) Perfect. Beautiful. So when I look at this shot, even though my subject is very slender, I've created a lot of curves for the eyes to follow. So my first tip there was figure out what's the purpose of the shot. What are you trying to say? And then based on that, tip number two is if you can bend it, bend it. If you can curve it, curve it. I've benchmark and curved a ton a things. And then related to this concept, this next tip is to arch. I arched her in this because is way for me to add a curve. But pretty much whenever I'm posing a subject, if they're laying on the ground, if they're sitting in a chair, however they're posed, if I can see their lower back, I add the arch to emphasize it. So you could see that in this pose. Okay. So, next tip from that, also related. I'm sure if I asked her, she would say, if I arch her enough and twist enough and bend enough, it definitely gets uncomfortable. Without a doubt. And so my recommendation to you is to remember to give your subjects a break. Relax and then repeat. So sometimes what I'll do is I'll get 'em all twisted up, turn, lift a leg, all that. And then I'll say, okay, arch as hard as you can. Okay, say, remember that pose. Okay, relax. I'll say, all right, you remember that pose. I want you to hit it again. Because what ends up happening is if I have them holding something too long, you'll see it. You'll see it in their expression if their face is showing. You'll see it in their hands. You'll just see it in the shot. So I like to get them so they can feel the pose, take a break, and then we'll hit it again. So, I want you to keep that in mind. You might be comfortable, but they aren't. And so I like to have an open conversation once in a while. I'll say, hey, if it hurts, if it's uncomfortable, just let me know. And then they'll usually be like, can we take a break? And whatever. I've had many subjects tell me after a full day of shooting, they definitely feel a little bit sore. All right, so we've covered those essential parts of the equation. But the next thing I want to talk about is hands. I pose the hands a little bit. Now I'm just starting with like kinda one or two base poses here. We're gonna talk about a lot more. But something that's true of any pose is if you include the hands, they can make or break the shot. So, for example, can I have you in that same pose. Great. And I'm gonna have you take the back arm and grip it onto your thigh. Onto the thigh closest to me. Great. And put this hand, put this hand on top of the other. Okay, all right. So, this is supposed to be bad on purpose, all right? So if I'm taking a shot here. She's got a nice curve, she's got a nice arch. But when I've stacked the hands, that is all that I look at. It has a lot of visual weight, and there's a lot of tension. So the whole shot might be curvy and elegant and beautiful, and then I see those hands and it is a totally different message. So what I do is I usually check the hands close to last on the shot. At the very end I'll see a beautiful curve, okay. Great arch, perfect. Push it a little more. All right, now give me real soft hands. Wiggle the hands and set them back down. Because the hands can add to the mood or they can completely, completely destroy it. So i want to give you a couple suggestions real quick for posing hands when your photographing a nude. These suggestions are completely relevant whether you're photographing nudes or whether your photographing portraits. Here's just a few things. Thing number one is typically you want to see the pinky side of the hand. So when she put both of her hands on her thigh there on top, I was actually looking at the backs of her hands and it was very, very grippy. And it was very distracting. The pinky side of the hand is the most elegant. It's the smoothest line, the most beautiful curve. And so I'd much rather see the pinky side of the hand than someone do something like this. Right? The back of the hand, the palm of the hand, they're large. I mean, nearly the size of the face. So you do the same thing, where's somebody's gripping on the chest or stomach. That's all you look at. Let's just go back real quick to the first point, knowing the purpose of our shot. If you're meant to show distress or tension, sure, you can have the hands gripping on the body because you're trying to prove a point. But for us right now focused on beautiful curves, elegant line. So I'm usually looking to see the pinky side of her hand. So in the pose that I have her in, that base pose there with the front knee up and the hand on her thigh, well, the hand on her thigh, the pinky side of the hand is closest to the camera, which creates a very nice line for the eyes to follow. Okay, so we've got see the pinky side. But also you want to have relaxed hands. So I will often, for a subject, if I see them gripping, if I can see indentations in the skin, that's usually not what I'm going for unless I'm trying to show tension. So I will often ask my subject to move their hand into a position. Can I have you raise that front knee again? All right, perfect. So, all right, we're gonna do bad first. Can you just put your hand on your hip. Okay. So, when I'm looking at this, I'm not, the pinky side is kind of close to me. But the hand is lacking a lot of elegance, and there's also some indentations in her skin. What I usually do is instead of just saying, place the hand on the hip, place the hand on the thigh, place the hand wherever, is I have them move their hand into a position. So, for example, could you put your hand here on your thigh and then slowly move your elbow back. Great. And so what you'll get is just much softer, smoother lines. There's gonna be a lot more relaxed fingers, a lot less tension. And then if they get tense. Can you put your hand a little bit lower? Right there, perfect. Pull your elbow back a little. Great. And now wiggle your fingers and set them down real soft. Perfect. Put your hand over on the top of your thigh. Great. So, I look at them, the lines look a little bit too straight. No problem. Wiggle them one more time. Set them back down. Bend your fingers just a bit. Good. Bend the knuckle just a little more. And so I'm looking for something that's soft and elegant. I do a lot of directing like that. Same thing. If I tell someone, can you put your hand on your chest. Okay, so if you just put your hand on your chest, it's a flat surface. It doesn't have a lot of flow to it. So instead, I'll say, can you do me a favor and trace your hand across your chest. Perfect. Beautiful, right there. And then I can stop them when the hand looks like it's in a flattering pose. Let me grab a shot of this here. Turn your torso back towards me a little bit. Arch til it hurts. Great. Lean your chest towards me just a little. And chin down. And put your hand over just a little bit more. Great. (camera clicks) And those hands on the bottom. Put it down just a little bit. And wiggle, just a little softer. Right there. (camera clicks) Okay. So, I've given you some tips on how to have soft hands. Move them into position, whether across the chest, around the face, up the thigh, all of that. Wiggle so you get that nice, soft fingers. Set them back down. The next part is looking at the shot. You need to know that hands often act like arrows. They tell the eye where to look. Because if there's no arms and no hands. Can I have you put your hands way up? Great. Now pop up that front knee. Great. Arch your back as hard as possible. Tilt your shoulders this way. Great. And lean a little bit more. All right, perfect. So, if I look at this shot, your eye just follows the curve, right? It's following the curve around the body. In portraits a lot of times, you're encouraged to show hands. But sometimes in fine art nude, it may actually be better to not include them if it's meant to be purely a figure study. If I'm just meant to follow my eye around her body, which is what I have here. So it might actually be cropping the hands out prevents you from having a stopping point because the hands are the end of a limb. So your eye follows it and then it stops. But you can also use the hands as arrows. So if I have a hand on a chest and a hand on a thigh, I'm subliminally telling the eye, that's where you want to look. So can you put your hand real soft on your chest right there? Beautiful. Same thing on the thigh. Over again. Arch til it hurts. Turn your shoulders this way, and put your hand up a little off your chest. Great. And relax your shoulders. (camera clicks) And so if you look, those are the places that your eye goes. Your goes here to the thigh, and it also goes to the chest. So if you're trying to draw attention to a certain body part, putting the hand there will do so even more. For example, if you're trying to draw attention to the bottom more and the shape of the bottom, it might be having the hand there draw attention to that body part. So you're using it like little arrows. All right, so most of the time here, kind of stuck with this one base pose. But know that all of this applies to any pose. What can you bend? What can you curve? What can you arch? How are you using the hands? What's the purpose of this shot? All of that. Again, this is also really applicable to any type of portrait you take. Like, a lot of this is really, really true. But I want to make one point that is specific to nudes. With posing, very specific to nudes. For me, when I'm posing, I'm trying not to showcase what I call the bits. Like I, just for me, I'm shooting fine art nudes. I'm not shooting erotic photography. I'm not trying to be sexual. So, I kind of want to hide the lower half usually. This is for the type of work that I do. So when you're thinking of, okay, I want to bend, I want to curve, I want to arch, how do I do this? Whether the subject is sitting, standing, or whatever, I recommend that you bend the leg closest to camera because that's what censors your subject in a pose. And the reason I say this is for not showing the bits is that's not what my shot is about. My shot is about curve, it's about line, and that's not adding to the concept. So I don't need to show it. So, let me just show you real quick. Can you raise your back leg? Perfect. So this does add a little bit of curve, but what you'll notice in her bottom, it's not adding more curve. Its actually still a straight line. So, I'm gonna have you put your hand, put your hand soft on your bottom here. Great. Perfect. And then put that hand out just a little bit on the knee a little more. Good. So if you look. (camera clicks) This pose, I would say, would perhaps be a little bit more, maybe for this hand if I had the arm curled in it could be for a man because I'm not creating curve as much. If you look, I'm creating a little bit more triangles and strong lines. But if I bring the leg closest to the camera up, do the same thing, now I've got that nice curve to follow. Oh, and she's censored for the purposes of this shot. So same thing, hand here on your lower back. Bring that thumb in just a little bit, real soft. Arch til it hurts. Turn your shoulders this way just a little bit. Great. Can you pop that knee up real high, and put your hand on the knee now there? Great. Beautiful. (camera clicks) Perfect. And so I'm adding just a little more curve to the shot. So, when in doubt, sitting, standing, laying, bend the knee closest to the camera for fine art nudes. All right, so the last thing in this very introductory, essential section that I want to talk about is going to be the idea of perspective. Perspective is something that's important no matter how you're posing your subject. And so, couple things that I want you to keep in mind. And I've talked about this in my Posing 101 class. I talk about it in my posing book, like a lot of the things that I do. Perspective makes a difference to your pose. And so, you might have a pose that looks great. You've got it, like it looks great to your eye. And then you take a shot and it, it doesn't look good. Something's off. And that's because your camera angle and your lens choice all changes how the form looks. Now we're working in, you know, a contained environment, a gray background, a single light, so there's potentially a little less you can do with perspective. But let's say, for example, I have a shot that I want to be really abstract. And I want to see a really round, curvy bottom that looks very, very large to the camera's view. I've taken a shot before where I had patterns on the body, and I wanted to really emphasize the curve of the bottom. Well, I can do this with posing, but perspective is also really useful. So here's what you want to know about perspective. And I'm gonna demonstrate it a little bit here. What you want to keep in mind, and you've probably heard me say this a million times before. If you haven't, you're gonna really use this over and over again. Whatever is closer to the camera will appear larger. Whatever is further from the camera appears smaller. So, for example, if you want the bottom to look a little bit fuller, you have to find a way to bring it closer to the camera. And there are a couple ways to do this. The two main ways to do this would either be the pose or your camera angle. So, for example, I'm gonna have you turn around. And I'm gonna have you do that pose in the beginning where you shift your weight. So, shift your weight to one side. Now cross that knee way, way over. Perfect. And now bring your arms up and lean your whole body to the right. Keep leaning, keep leaning. Perfect. Okay, great. So, in an example like this, if I want her bottom to look fuller or bigger, one way that I could bring it closer to camera would be something like this. Can you lean your chest forward just a little bit? So when she leans her chest forward, she's actually sticking her booty out. And can you arch your lower back a little more? Perfect. So let me see. And lean your chest back just a tiny bit towards me. Just a little bit, a little bit. Good. And cross your knee. You can cross your knee over even more. Keep going, right there. Perfect. (camera clicks) Great. And can you turn your head hard to the right? I want to see your profile. Good. Perfect, chin up a tiny bit. Beautiful. And the hands on top, can you put them stacked one on top of the other? Beautiful. Ballerina-esque, good. And chin a little bit further to the right. Okay. Okay, so I'm looking here. And it's gonna make her bottom look a little bit fuller, a little bit larger compared to-- Can you stand real flat foot and real vertical? Okay. (camera clicks) So taking a look between the two shots, it's a way to make it look fuller and rounder because I've pushed it closer towards camera. The other alternative if I can get closer and lower. The closer and lower I get brings her bottom closer to camera, which makes it look larger and fuller. So when you're taking a shot, if you're saying, oh, I'd like the chest to look fuller. Can you lean it closer to camera? Can you bring your camera angle up? Or the same thing with the bottom or whatever else you're trying to do. So perspective, even though it's not really posing, it is. And it's really one of the ways that you can flatter the form and draw attention to where you want it to be. All right, Angelica, you can face back this way. I'll give you one more tip. Okay, so, my last tip is this. And this applies to everyone, but probably a little less her. Is to really focus on elongating. She's very elongated. She has nice, beautiful, long lines. But when you're photographing someone, if you're trying to flatter the form in a way that everything looks tight and has smooth curves, you want to watch out for bad posture. Or people kind of just sitting. Or leaning into themselves. Because everything kind of smushes up. So I'm always trying to pull up through the top of the head to elongate, which, if you do that right now, if you pull up to the top of your head and elongate, you'll feel your stomach tighten. So, if somebody wants a tighter stomach, that's one way to do it. Or if I am having a subject stand, like she's standing flat footed right now. Flat feet usually lock out the knees, lock out the legs. There's no bend, there's no curve, and typically, it pushes the stomach closer to camera when you lock out your feet. If you push the stomach closer towards camera, it makes it look larger. So instead, I might have someone go up on toe a little bit. Going up on toe elongates them. Same thing with just putting the foot out. If she just puts one knee out, instead of having it be flat foot, I have a point in it. It tightens the muscles in the calves. It makes the entire leg be tightened, which makes the muscles look more defined. So, I'm trying to elongate. I'm trying to tighten muscles. And so I look at a pose and say, well, what could I do to enhance that? Maybe it's pulling up through the top of their head, maybe it's a pointing of the toes. Is there something I can do to tighten everything and show better musculature in a particular shot? Of course, all of this comes down to what are you trying to show in a pose because if you want your subject all curled up in a ball, nice and protective arms wrapped around because it's meant to be soft and in the fetal position, well, then that's right as well. So that's why you have to answer question number one, what is the purpose of this shot? And then use all of these tips I've given you to better flatter the form.
Class Materials
Free Download
Bonus Materials with Purchase
Ratings and Reviews
ccPhotography
Amazing speaker, instructor and great photographer. The lighting and posing technique is imperative but she gives a lot of small tid bits and tricks that have already set me apart from other photographers. I love her work but I love her teaching style more. I recommend all her classes!
user 0256e5
It is a delight to watch someone who has so much passion for her art and Lindsay exudes passion and accompanies that with a great teaching style. She shares her knowledge and has a lot of great tips. I think this class makes a great intro to the subject. For me, this was time well spent.
Flavia
I love Lindsay's teaching style and all the insights she gives. I did my first fineartnude photoshooting applying everything I learned on this course! Thanks Lindsay you are a true inspiration and a great help during my photography journey.