Patterns and Projection (contains nudity)
Lesson 11 from: Fine Art Nude PhotographyLindsay Adler
Patterns and Projection (contains nudity)
Lesson 11 from: Fine Art Nude PhotographyLindsay Adler
Lesson Info
11. Patterns and Projection (contains nudity)
Lessons
Class Introduction
14:28 2Etiquette and Preparation
30:21 3Fine Art Nude Posing Essentials
24:44 4Posing to Accentuate Shape (contains nudity)
31:24 5Classic Poses for Nude Male (contains nudity)
15:35 6Classic Poses for Nude Female (contains nudity)
15:12 7Sculpting with Light and Shadow
18:05 8Lighting: Definition and Separation
20:54Lighting: Low Key Male And Female (contains nudity)
28:22 10Lighting: High Key Female (contains nudity)
14:45 11Patterns and Projection (contains nudity)
19:31 12Nude as Fine Art (contains nudity)
24:32 13Nude as Creative Canvas: Male Statue
17:23 14Nude as Creative Canvas: Female Statue
11:25 15Nude as Creative Canvas: Splatter Paint Torso
16:30Lesson Info
Patterns and Projection (contains nudity)
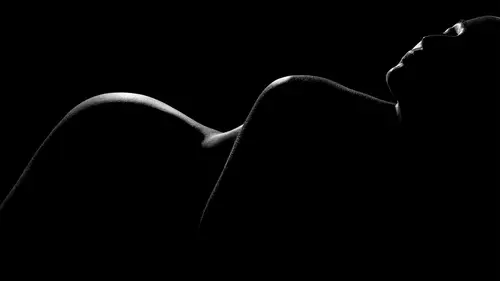
Okay, I am more than a little excited for this setup, because I get to be creative, and, let me just tell you what it is. So, I'm going to use a digital projector to project different patterns, and colors, and shapes, and lines onto my subject. And, I love to do this, because every single way that she moves, it changes the way the pattern looks, and every single pattern inspires me in a different way, and this is just endlessly fun, and it's something that everyone can do. I'm just using a regular digital projector. You don't need anything particularly fancy, although the higher resolution and the higher quality is going to help you avoid any pixelation, or any aberrations on the side, but it's just a regular digital projector. And then what I did, is I went onto Adobe Stock. And I went to Adobe Stock, and I searched patterns, and line patterns, and color splashes, and I downloaded those stock images, and now I'm just going to project it onto my subject. So this is going to be a situat...
ion where you would need to get rid of all ambient light. Turn off overhead lights. Close the windows. Block out any light, because it will influence what your end shot looks like. So, all I'm doing is I'm using that single projector, and I'm going to be switching through the different patterns, changing up the posing and that's all there is to it. I like it because it's so easy, but I get excited, because what I see in front of me is what inspires me. So, with that, can we kill some of the ambient light please? I'm very excited. We are going to start with this kind of splash paint pattern. And I have up a black seamless background, because I want that pattern to disappear. If I have her closer to the projector, that's perfect. And, which way, take a half step back. I'll tell you when, keep going, keep going. Right there. So what's going to happen is as I have her closer, if I expose correctly for the pattern on her body, it's going to be dimmer on the background, and also the background's far enough away that it'll just go pure black. So basically she will be emerging from the shadows. This wouldn't work as easily if you're using it on white, because some of the light's going to spill, so I wanted it to be nice and clean. Alright, so let me just try some shots. Alright, I'm gonna have you pop up that front leg, giving it major arch. Beautiful. Let me come in just a little closer. So cool. Great. Ah, that's so pretty. Alright, let me try a different pattern. Let's see what we got here. Yeah, that's awesome, okay good. Let's do, cross one knee over in the front, and I'm gonna have you, yeah I'm gonna have you do a graphic shape. Actually, put the right hand to your knee. Perfect, yeah, that's so cool. Okay. It's so cool. Alright. Oh, and I like with her chin down, because her chin down, then what it does is it kind of cuts, so I only see the lower part of ber body. I love that. And I like her graphic pattern, because it's reflecting the graphic pattern, or graphic pose, because it's reflecting the graphic pattern of the projection. Can you do one where you turn around like that real quick? And, yeah exactly. And, put your hand up just a little more. Perfect. Super cool. Okay, let's switch. Let's see what else I got. I could do this forever, so I'm only gonna do a couple more, because, I really like it though. Can you turn to your left? Great, and do that one where you pop up your front knee, exactly. Perfect. And I'm gonna have you put your left hand down. Ah, that's so cool. Perfect. And put your right hand so it's on the side, with your elbow bent. Yeah, right there. Great, so that's one of our go to poses. Turn your torso back towards me a little. Okay, and I love this shot, so I'm gonna switch some patterns, just to see what it looks like. Cool, take a couple more like this. I could do this forever, so let me just do two more. Let's do this one. Turn your torso towards me. Oh, keep where you were but just a little bit towards me. Great, and roll your shoulder forward. Your left shoulder forward. Right there, good. Perfect. Ah, so cool. Alright, last one. Let's see what I'm gonna do. Let's do that one. So I picked a lot of patterns that had continuous lines, because when those lines run on her body, depending on how I pose and curve, it'll wrap around. So, the idea is if she, if you're using a pattern that is kind of erratic, it's somewhat harder to see the curves of the form. But if you pick a pattern that's a little bit more consistent, as it wraps around the body, you can actually see her shape. And I'm using a pose, that instead of having her straight on, I can turn her away from the projector, because that's going to emphasize the way it moves even more. Something straight on, it'll be a little bit flatter. Something turned to the side, you actually see the lines bend. So I'm gonna end on this one. Let's do, let me see. Turn your body to that side a little bit more. Good. And I'm gonna have you turn like this. Great. Perfect, ah, so cool. So for all of these shots, what I'm going to do is, they're not totally as clean as I would want them to be, because it is not necessarily I high end projector, and sometimes I'm using medium resolution patterns. What I'm going to do, is I'm gonna be shooting, I'm shooting tethered into Lightroom, so I'm gonna pop over, play around with the contrast, play around with the clarity, and I'm gonna get beautiful, clean images that I already know I love, because I already see them and look great in camera. So, simple projector, lots of cool patterns. I'm going to continue on in our projection theme, because I loved that so much, and I love the way the patterns wrapped around the body. But let's say that I want an image that's a little bit more crisp, or maybe I have a little bit more control, or maybe I wanna shoot it on white, or maybe I wanna mix it with other studio strobes. It's really hard to do that when you're working with a regular digital projector. And so, in fact, there actually are specialty modifiers that project patterns using studio strobes. They come in different sizes and different names. Something like a spot projection, or a zoom spot, or something around that. And so they make it for Bowens, and Broncolor, and Profoto, and there's a mount for Elinchrom, and they also make it for speedlights. There are couple different companies that make this for speedlights. And how it works, is depending on the modifier, and depending on the company, you buy these little cutout, these things called Gobos. And, stands for go betweens, Gobos, and they come in all different sizes. There's a website that I usually order them from called Barbazon Lighting, and they have thousands of these. And you can get them in any shape, any pattern, whatever you want. I even have one that's in the shape of my logo, although I don't think I would use that for fine art nude projections, but it's so cool having, and you can see I've got tons of different shapes. One thing to watch out for, is if you are going to use this, make sure that you check out that the Gobo you buy matches the size of your modifier. Because there's different sizes, size M, and it depends on which one you have. Okay, so, my point of this is, how it works, is the one I have is for Profoto. And, it's over here. And it's called the Profoto spot small. And I use this a lot in beauty photography. Sometimes I'll cast just a strip of light across the eyes. But what's cool in nudes, is I can get a little bit more avant garde with it, because there are no rules. How it works, is I put the Gobo into the light. In this case, I just have a bunch of different sized dots. I'm gonna put them into the light, and then in the very front of this light, I can move the lens in and out, to make the circle softer or more focused. So I'm gonna get them really focused there, and I lock it in place. What's great, is if i want, I could be shooting her on a white background. And what I would do, is I have that white background, so she's lit in silhouette, and then she could have these dots on her, and I could mix it with studio strobes. Again, with a regular projector it'd be so much more difficult to do so. Or, I could add backroom lights. And I could use a strip softbox, or I could use barn doors to carve her out from the background. So in this instance what I'm going to do, is I'm gonna use just two strobes. I could use more, but we'll keep it simple. So I'm going to use the spot projection, the Profoto spot small with the dots on her body, and then I am going to use the strip softbox with the grid on it, just to carve her out a little bit. What I've decided, is I'm gonna use one of our go to poses. We're going to use the go to pose where she was sitting on the ground, with her arms and her limbs crossed over. Because I think that way it becomes very abstract. When I see all the different limbs. If I wanna show her chest, I can bring it back to the fact that it is a nude, but it's really cool because both the pose, and the lighting, and the pattern, and the composition will make it feel very fine art, in that it is abstract. So, that's looks cool. Let's just give this a try. I just wanna have you ... Perfect, yeah that's exactly what I'm looking for. Great, so let me give this a test. Great. Another one. Let's take a look. Let's see. Oh, that looks so cool. Beautiful. Okay, I'm going to, I love this, and what's nice is that strip softbox there, it's putting a little bit of a highlight on her lower back, and on her thigh. So, if I want to draw more attention to her curves, and not just the pattern I'm projecting, that's what that back strobe allows me to do. So I love that. I'm gonna have you put your chest up just a little bit, so I can see it a little more. Perfect, in that same pose. And I'm gonna crop in for something more abstract. Turn just a little bit more towards me. Just a teeny bit. Great. Perfect, cool. And if you can lean in this way just a little. Great, and arch your back just a tiny bit. And then turn your whole body to the right, so I'm watching the modeling to see how the dots are falling on her form. And come back towards me just a little. And turn your chin to your right. Great, and then put your hand on the other side of your face. That side, yeah, good. Super cool. And I'm just gonna move you this way, just a little. Great. So I can create so many different abstract shapes. Let me just try one more. Hide that back arm for me. Put it out in front, perfect. So I'm gonna get something where I can see the curve of your back, just a little more. Great. And then hand soft to your lips on this one. Super cool. And give me one more, real tall. Great, perfect. Beautiful. So that second strobe, it's giving the curve of her back. The main light is giving me that pattern. I would definitely play with this more, because I'm looking at this, and I see some really cool abstract lines. But what's nice is I have strong lines, but then also curves. So it's making a really interesting pose. So, definitely a good way to get creative and try something different. Thank you, you did great. Thanks. Alright, the idea of this fine art nude shoot, is that we're going to project a beautiful pattern on our subject, but we're going to do so, using a little bit of science and knowledge of lighting. And the reason I had an idea for this shoot, is on a really bright and sunny day, I was looking at some palm trees, and the bright sunlight was casting beautiful, crisp shadows on the beach, and you could see all the detail of the leaves. And so I thought that would be really cool, but why not do it with another pattern. So what I did is I bought a piece of lace, and I took this outside in the bright sunlight, and I held it up, and of course the sun cast that beautiful pattern of lace on the ground. Well, it would be great if I could then put a nude, lying on the ground there, and photograph the form. But we're in beautiful, not sunny Seattle. And of course, if I'm photographing nudes outdoors, I have a few more restrictions. So I wanted to be able to recreate, or do something quite similar in the studio. So what I have to do, is I have to kind of act like I'm recreating the sun. So let's talk about the attributes of the sun. The sun is very, very hard light. And what that means, is that the transition from where it goes from highlight to shadow is abrupt. It's very, very crisp. Which works great for casting a pattern of lace, or for projecting the pattern of the palm leaves, because it's that hard light that carves out the shadow. If it's soft light, like with a softbox on an overcast day, you see none of that. There's not enough definition. So what we have to do, is we have to create a very hard light in the studio. And the reason the sun is so hard, is that even though it's really large, it's really, really far away. And it's actually that fact that makes it hard light. The rule of lighting is, the smaller the light source is, compared to the size of the subject, relative to the size of the subject, the harder the light. And the reason that the word relative is important, is the sun is actually huge, but it's so far away that compared to you, it's a dot in the sky. It's a tiny spot, which creates really hard light. So what that means in the studio, is I need to get a small light source, that's really hard, and have it really far away. So, you could absolutely do this with a speedlight, and many of the setups I have done could be recreated with speedlights. Speedlight is a hard, small light source. You take that speedlight, put it far from the subject, it's definitely going to cast some patterns with the lace. So what we have here, is we've actually affixed the lace on a boom arm so that it would stay in place, and then I've got a bare strobe. And so I'll just tell you a couple of the considerations you have here. First of all, that lace pattern, your subject needs to be as close to it as possible. The further away they are, the softer that the edges become. And then it's not really casting a pattern anymore. So your subject needs to be right up against it. The next thing is when you pick your lace, it needs to have a chunky pattern. If it's very fine detail, it's not going to show up. So you can see here, when you look at this lace, it just has a little bit thicker pattern throughout. So you may need to buy a couple to try it out. Something I've used in the past, I've used kind of a home decor lace. I've also used a lace parasol, that you can open up like the umbrella, and I actually realized that because I saw the sun through the lace parasol casting a pattern. Alright, so we're taking a look at that there. But the next part we have to worry about, is the distance of that light. Right now it's several feet away, but it might not be hard enough. The transitions from shadow to too high light might not be crisp enough. So what we do, is we continue to slowly move the light further, and further, and further away. And the further away it gets, the harder that light is. So if you're looking at your light, and you're like, man I wish the edges were harder, try to move it back even further. So let's take a look, and see what we've got for this setup. Alright, so the first thing I'm gonna do, can I have, let me test my exposure a little bit. Alright, what I'm gonna have you do, is I'm gonna have you take a couple steps away. Alright, and then turn back towards the light. So I just want you to take a look at when she's further away from the lace, the pattern on her body. Alright, as you can see, it's very diffused. It's very soft. There isn't much of that crisp edge. But, when I move her in much, much closer, right up to that lace, it becomes a little more defined. Great. Now unfortunately, I'm looking at it here, and it is more defined, but it's not defined enough. So if I want harder light, we can move our light source back. So I move it back a couple feet. Let's try, wanna try it as far back as it goes? We'll see how far we can get it back in this space. So we're having it right up against the wall. Now of course, when I do this, I have to adjust my exposure, because inverse square law. Backed it up, I'm going to need to open up quite a bit. So let's try this now. No flash. Oh. Got it, there we go. And now that lace pattern is very, very defined. If I wanted it even sharper, I could move my subject further away from the light. But we're gonna work with this, because it looks very nice. I also would ask myself, what's the purpose of this image? If the purpose is meant to be the shape of her body, and the pattern of the lace, then I think I'd probably want to see this end image in black and white. Color is really unnecessary, and it pulls away from the core idea. So, now what I'm left with, is figuring out how I can pose her, to really get the lace to wrap around her body in a way that creates interesting lines and texture. So I'm gonna have you turn towards the lace for me. Great, and pop up your front leg. Perfect. And then I'm gonna have you lean back away with your torso. And hide that hand for me. The front one, yeah. Let's take a look. And pull up to the top of your head real tight. Great, let's take a look. Okay, and I just need to get a slightly different angle. Getting a little bit of that C stand, so take a half inch back. Right there, good, perfect. Great. That looks beautiful. And actually the spread of the light right now, the light is hitting that black background, and giving me just a little bit of separation, and it actually works quite nicely to see the beautiful curve in the small of her back. So I'm gonna play with that a little bit more. So, can, yeah that's great. Beautiful. And I'm actually, if you see just a little bit of a highlight on her bottom, it's actually that light bouncing off the white wall in the corner, giving her a little bit of separation. When you have your light spreading everywhere like this, far away, no modifiers, you have to be aware of your environment. And so, I learned to see light enough that I know where light is coming from. Alright, so let's do just a couple more of those. Beautiful. Great, chin down for me. Perfect. Great, I love that. Alright. And now take one half inch closer. Just right there, perfect. And lean back with your chest just a little. Beautiful. I think that shot is exactly what I'm looking for. And if I wanna crop in, I want to get even tighter, it becomes a little bit more of an abstract. So, the main ideas of this is, get your subject nice and close to a lace pattern. Make sure it's a nice chunky lace pattern, and make sure you have a nice, hard light source. Get a really small, hard modifier, like a bare bulb, or a silver zoom reflector, or a magnum reflector, and then bring it really far away from your subject. That will give you the hardest edges, which are required to cast this lace pattern.
Class Materials
Free Download
Bonus Materials with Purchase
Ratings and Reviews
ccPhotography
Amazing speaker, instructor and great photographer. The lighting and posing technique is imperative but she gives a lot of small tid bits and tricks that have already set me apart from other photographers. I love her work but I love her teaching style more. I recommend all her classes!
user 0256e5
It is a delight to watch someone who has so much passion for her art and Lindsay exudes passion and accompanies that with a great teaching style. She shares her knowledge and has a lot of great tips. I think this class makes a great intro to the subject. For me, this was time well spent.
Flavia
I love Lindsay's teaching style and all the insights she gives. I did my first fineartnude photoshooting applying everything I learned on this course! Thanks Lindsay you are a true inspiration and a great help during my photography journey.