Working with Photos and Graphics: Scaling and Positioning
Lesson 18 from: Final Cut Pro X BootcampAbba Shapiro
Working with Photos and Graphics: Scaling and Positioning
Lesson 18 from: Final Cut Pro X BootcampAbba Shapiro
Lesson Info
18. Working with Photos and Graphics: Scaling and Positioning
Lessons
Class Introduction
12:34 2Exploring Final Cut Pro X: Navigating the Interface
32:32 3Exploring Final Cut Pro X: Project Timeline
18:23 4Exploring Final Cut Pro X: Basic Editing
16:07 5Refining Your Edit Introduction
15:15 6Refining Your Edit: Trimming
37:06 7Refining Your Edit: J and L Cuts
09:00 8Refining Your Edit: Roll and Overwrite Edits
06:25Refining Your Edit: Slip and Slide Edits
03:51 10Refining Your Edit: Auditions
09:27 11Setting Up a Project From Scratch
17:03 12Setting Up a Project: Importing Media
35:52 13Setting Up a Project: Keywords and Smart Collections
21:07 14Working with Audio
13:56 15Working with Audio: Syncing
23:40 16Working with Audio: Mixing
21:28 17Working with Photos and Graphics
09:55 18Working with Photos and Graphics: Scaling and Positioning
14:05 19Working with Photos and Graphics: Ken Burns Effect
15:17 20Working with Photos and Graphics: Animating with Keyframes
15:51 21Filters and Transitions Introduction
03:04 22Filters and Transitions: Applying Transitions
18:13 23Filters and Transitions: Applying Filters
14:23 24Titles and Generators: Lower Thirds
11:43 25Titles and Generators: Titles
05:40 26Titles and Generators: Backgrounds
11:46 27Advanced Skills: Color Correction
38:35 28Advanced Skills: Speed Changes
15:48 29Advanced Skills: Stabilization
05:53 30Advanced Skills: Green Screen
13:11 31Multi Camera Editing
06:04 32Multi Camera Editing: Organizing Your Media
08:54 33Multi Camera Editing: Creating a Clip
07:12 34Multi Camera Editing: Audio
09:25 35Multi Camera Editing: Working with 4K Footage
06:56 36Finalizing, Exporting and Archiving: Final Checks and Tweaks
04:34 37Finalizing, Exporting and Archiving: Exporting Final Project
25:46 38Finalizing, Exporting and Archiving:Cleaning House and Archiving
15:22 39Bootcamp QnA
14:53Lesson Info
Working with Photos and Graphics: Scaling and Positioning
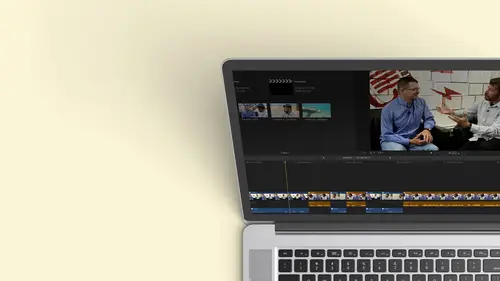
And now let's get our head around how we can work with this image because I don't need this anymore. I'm gonna go ahead and close. That gives us a little more real estate to work with. And as a matter of fact, because we're working with the still, I want to make this bigger. So you can, of course, customize by just dragging corners. Now, I have lots of real estate here in my very small laptop screen. And so I have the clip in the timeline. I have the inspector open and we've used the inspector before. We used it in audio to turn tracks on and off. Um, it's also where you would access things like your video and audio filters, but in this case, I want to work with something very specific. If I zoom in, you'll notice that under video, there is something called Spatial conform, and there are a drop down for three different options. Fit, fill, and none by default. It will do fit, so if I bring a clip into my sequence, it's going toe. Shrink it so all the corners are there. Let me go ahead a...
nd bring in the next image just because that's a vertical. That's a portrait size. So it stills. I think it's this one. That's vertical. Gonna grab that. Gonna hit the e key to do independent it. So I had this second clip here, and you can see that this clip is not filling the space. Now I want It's hard to see on this screen. This is the frame of my television. It's kind of black on black, so it's hard to see. You know, it looks like it's really teeny in this spot. Let me go ahead and make this so that this is more like a television set. So what it does is it brings it in and it wants to show the whole image. Okay, so it's going to squeeze it down what it needs to be, and that could be great. If I want to bring everything full and just not cut off any part of my image, I could do that. I'll just have something behind it. That's black, Okay, or you think it's black as it's not. This is actually transparent. So if it's on the bottom layer on the main storyline, yeah, there's nothing below it. So it is dark. But if I had another picture behind it, I'm gonna just actually throw one picture on top of the other one because you'll be able to see it really is transparent. So if I know that I'm going to cut away to this, it's going to be, you know, this size I want to be this size and somebody's talking. I'm gonna have to put, you know, some sort of a background in between which you can get out of final cut. They have a generator, you can get straight colors, Grady into moving flowing backgrounds. All of this is built in, and we'll get to that when we talk about generators in the generators lesson. But right now let's focus on working with images. And as a matter of fact, I think to make things a little little clear, I do want to put something behind it so you can really see what the TV frame is. So we're gonna cheat and we're going to jump ahead a little bit and grab a generator. We're not gonna talk too much about them, so I go to my generators tab. I look at my generators, see all these great little backgrounds. We want to jumping in clouds. You guys get the vote in front of a curtain. 1st 1 who speaks up wins industrial. Okay, let's be under I There we go. Industrial gonna go ahead. You industrial? Sometimes I forget I'm zoomed in on like what happened to the rest of my interface. Okay. And I'm gonna go here, and I'm going to attach this clip underneath. Connected. Oh, I actually this twice that. How did that get in there? There we go. You get to hear what's going on in my head. So now we have this lovely industrial thing. Should be showing beautifully behind it. It is. It is an odd color. It's dark. Lovely choice. Hard to see. Um, I want to get me in trouble. Uh, I can probably Can I change that a little bit? That was just really dark industrial loses. Okay, We're gonna go ahead and replace that. Here we go. Much easier to see her jumping through water through the aquatic world of final cut pro. Ok, so there she is. That jump here is the other jump. Okay. We can see what the background is really easy. to work with. So this is the default. This is This is the fit option. If I wanted this to fit and not have anything clear in the background instead of going to fit and make sure I have a clip selected, I'm gonna go ahead and I'm gonna do Phil. Phil will make sure that the narrowest edge touches the wall. So you see, you don't have any background on this. One will do. The same thing will go fit to fill, and we don't see anything. It just blows it up as much as necessary. So that's nice for the 1st 1 But this one, it doesn't really work much at all, right? No worries, because I could be positioned this. I can crop this. I can modify this. And that's what we're gonna work with. That's what we're gonna do. So when I do fit, I want to shrink this image down. Strength of you down so you can see what's actually happening. We're looking at at, um, building the frame. I'm gonna shrink this down. This little drop down window lets me view my image of 25% of its original size. So this is all the stuff that's outside the television set. I'm gonna go ahead if I click on that if I choose Ah, transform just so you can see this Be good. I just basically opened up the frame so you can see the original image. And this is what's in your TV set. Okay, so that's how you have to think of it. Um, it's actually still smaller than its original size. Remember, it's 6000 by 4000 but final cut has made it fit. Now, what if I do wanted its original size? Underneath Phil is the word None. So now it's a to 1 pixel relationship. It is now the full 6000 by 4000 wide. And if I after zoom back even further, I'm only seeing this part of the image inside of here, okay. And what that allows me to dio is this little spot is what my viewer sees when they're watching it. I can reposition this picture anywhere I want. Okay, I've zoomed back. I've stepped really far back from my canvas on its easel so you can see this if I switch my view here back to fit, that's nice. And big so we golf can see it. This is what I'm seeing. This is a 1 to 1, and I can really leverage this picture, and it's crisp, even though I'm only looking at a small chunk of it. Same thing can happen here. Okay, I'm gonna go in its selected none. And there it is. It's as sharp as the original. Okay, Thinks it was pretty low like that. I shot this. Okay, so there's how you can scale an image to the presets, but you can also scale an image to exactly the size you want. Okay? These air, like all or nothing, right? You don't want that you want have full control, your artists. So I'm gonna go ahead and let me just zoom out. And so I have this image, and what I'm gonna do is I can actually transform it. I'm going to shrink it again so you can kind of see what's happening. So we'll go here to, ah, say 50% and I want to start scaling is actually if you want to see the edges. I think I need to go a little bit smaller. There we go. There's my edges. So this is one of the downsides of something huge is that you've got a really kind of step back. But it sometimes that's there, because maybe I want to do a move on this, and I really want to have some space to work with. So I have my image to get to this point here to get where I can actually start working with transform. There's a little button down here. There's also keep with shortcut. But if I go to the far left of this window, there's a little drop down where I concede transform, crop and distort. Okay, so transform, and especially for those who are familiar with photo shop, allows me to literally change its position and change its size. So if I grab a corner and move it in, it's going to get smaller in the frame. Zoom back basically are pulled this way. I'm zooming in. It will always maintain the right aspect ratio for television. OK, unlike photo shop, where if you grab it and don't hold down a modifier key, you can change it by default. It wants to keep the same aspect ratio so you don't mess up because you don't want tall, skinny or short fat people that weren't that way originally. So I can start positioning from the corner. I could also drag it around. So maybe I really want to see her reflection versus her. There are Maybe I just wanted to fill the screen so I can position it Exactly how I want my image. Gonna go back to full view this little fit button. And I could, of course, a justice here. Also, I want you to see that as I'm doing it through the interface here, I can also do it numerically inside of my inspector panel. Make sure that the video clip is selected and you can see right there I have transform crop distort. But this is again a little confusing because I see no controls. You that see controls? No. Okay, they're very sneaky. If I hover my mouse over this empty space, I see the word show. This is something you need to know that if you don't know your like, how do I do this? If I click on show, I see the controls that I can then move with sliders are numerically enter numbers so I can go ahead I can scale it in this window. I can actually scale my X and Y values, which is going to distort my image. Not necessarily something I want to dio. If I do all this and I realize I've screwed up and I need to go back to the way it was, Any time you see a counterclockwise arrow, that's a reset option. I can reset individual parameters, or I can reset the whole thing with all the changes. So now it's position zero, and it's modifications zero. So this is, ah, a graphical way of manipulating the size of an image. Bring downfall. So that's one thing you're gonna want to do. You won't be able to just scale in size your image. You're not gonna move it yet, But what about some of these other options down here? So let me bring this in two perfectly fit. I'm going to switch from none too fit, so we see the whole image seem more than the whole image. What did I do? It did my scales at 55%. There we go. So there it is. That's the fit. I have the bars, but maybe I just want to crop it and see her, but I don't want to make it any bigger. Maybe it's gonna be a picture in picture or something. So in the same area that I found transform, there's also something called Crop. And when I click on Crop, you'll see these three little options. Pop up. Okay, Trim Crop and Ken Burns. If you come from an environment where you're working with safe photo shop and you're used to cropping, you have to kind of rethink what final cut defines us cropping and trimming. Trimming is what we some of us think of as cropping cutting off sides of the pictures top. Think of it as you have a scissors and you're just cutting out the part of the picture you don't want to see. So if I'm in the trim mode, I can go ahead and grab any of these hashes at the edge, and I can start cropping the image to just what part of the image I want to see. Okay, I could grab the trimming crop, see that I even use the words wrong. So I am trimming it, and I don't have to stick to any specific aspect ratio. I'm gonna go ahead and reset that. I can go over here. I'm gonna go show Crop because I want to see this. And I'm just gonna get my little resets on. We're gonna reset all of it. Here we go. So that's trimming Gives you full control. You can trim off whatever you don't want to see. If you switch to crop, it automatically switches to a 16 by nine aspect ratio. And I'm assuming you're working in a 16 by nine timeline, it will match whatever the timeline is. If you're working for by three, it will do that. But now, when I scale it up and down, it maintains the right aspect ratio. So really, I'm just reframing the image. Okay, so I've reframed the image and as soon as I hit done, I'm good to go. So it's very quick if you know, I want to just fill the image with one area. I don't want a crop. I don't need to scale. I could go ahead and I could just choose crop instead of trim. Boom. Pick my area. Good to go
Class Materials
Bonus Materials with Purchase
Ratings and Reviews
a Creativelive Student
Wonderful. This is the first time I've seen any of Abba's classes, and he's a great teacher. I've been watching the live sessions for the past few days and have picked up a ton of great tips that will indeed speed up my workflow in FCPX. He's a great teacher, and does a wonderful job of setting people at ease, ie. where he says things like, 'there's no trick questions', and times where he will click on something wrong, then he'll go back and show his mistake (pointing out his minor mistakes are actually a beneficial lesson). In all, wonderful wonderful wonderful. Thank you!
Lara
Fantastic teacher. I enjoyed every video, super worth it. I've been reluctant to jump into FCP X since it got upgraded from FCP. Now I feel confident to work with it again. Seems pretty self explanatory, but I am glad I watched the course. Abba covers pretty much everything you need to know. I also loved his personality, made me want to learn more each day.
Alan Pole
Absolutely brilliant. Abba gets to the point, is clear, organized and articulate, and lays it all out in a manner that quickly brings your confidence level from zero to hero. Highly recommend this to any photographer who wants to blog, build ads, or include video in their offering. I feel like an amazing new world has been provided to me. Thank you!