Lessons
Class Introduction
12:34 2Exploring Final Cut Pro X: Navigating the Interface
32:32 3Exploring Final Cut Pro X: Project Timeline
18:23 4Exploring Final Cut Pro X: Basic Editing
16:07 5Refining Your Edit Introduction
15:15 6Refining Your Edit: Trimming
37:06 7Refining Your Edit: J and L Cuts
09:00 8Refining Your Edit: Roll and Overwrite Edits
06:25Refining Your Edit: Slip and Slide Edits
03:51 10Refining Your Edit: Auditions
09:27 11Setting Up a Project From Scratch
17:03 12Setting Up a Project: Importing Media
35:52 13Setting Up a Project: Keywords and Smart Collections
21:07 14Working with Audio
13:56 15Working with Audio: Syncing
23:40 16Working with Audio: Mixing
21:28 17Working with Photos and Graphics
09:55 18Working with Photos and Graphics: Scaling and Positioning
14:05 19Working with Photos and Graphics: Ken Burns Effect
15:17 20Working with Photos and Graphics: Animating with Keyframes
15:51 21Filters and Transitions Introduction
03:04 22Filters and Transitions: Applying Transitions
18:13 23Filters and Transitions: Applying Filters
14:23 24Titles and Generators: Lower Thirds
11:43 25Titles and Generators: Titles
05:40 26Titles and Generators: Backgrounds
11:46 27Advanced Skills: Color Correction
38:35 28Advanced Skills: Speed Changes
15:48 29Advanced Skills: Stabilization
05:53 30Advanced Skills: Green Screen
13:11 31Multi Camera Editing
06:04 32Multi Camera Editing: Organizing Your Media
08:54 33Multi Camera Editing: Creating a Clip
07:12 34Multi Camera Editing: Audio
09:25 35Multi Camera Editing: Working with 4K Footage
06:56 36Finalizing, Exporting and Archiving: Final Checks and Tweaks
04:34 37Finalizing, Exporting and Archiving: Exporting Final Project
25:46 38Finalizing, Exporting and Archiving:Cleaning House and Archiving
15:22 39Bootcamp QnA
14:53Lesson Info
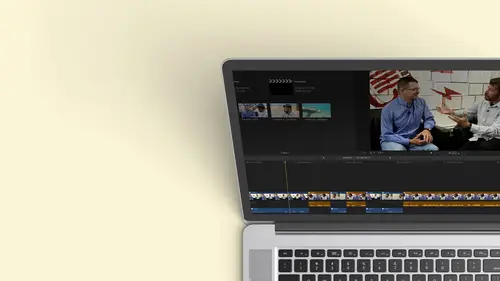
Refining Your Edit: Trimming
gonna go back to my interview. Now let's find the open. I think she has just anymore. So I'm gonna also play the piano schools, play the piano. I also teach. Now, if you're working on this media, I've already built this show and I'm gonna pop back and forth between to show kind of where we're going. And that way, if you're trying to recreate this, you can easily go back and forth. So the trick that I did hear with my pre cut is I made sure that I opened the project. So I'm gonna go up here and choose my smart collections and choose the projects. And I'm gonna pick the one that I think I did that I called finished, full cut. Okay. And we know now because we learned earlier that I could jump back and forth between different sequences so I can look at what I did before and repeat that are maybe take elements from it. So we did this a little differently with the dancing, but let's hear what she says. I'm an arrest. I, my dancer from Crimea. Huge concert so started in Russia, huge cultures.
So this starts with the deeper part of the interview. So let's jump back and we'll bring in that. I want to go back to my original story. We'll go over to interviews, and I think it still is part of the open. We've narrowed it down. There's a wide shot. I'm Anna Russell. I, my dancer from Crimea, and I also play the piano and seats. There's another trick, and I also play the piano and seats and she models. So we'll go into the actual dance story. That's where we want to go, and I'm gonna be hopping back and forth. So the nice thing is, and this is how you should start thinking about this skimmer and the play head. I just want to see what this shot is. I don't have to play it. As long as I don't click, I can skim over any footage I want to see and assume is. My cursor leaves that space. I see where the play at his part, So there kind of together and exclusive. It allows me to very quickly. So I have the piano stuff, so we're gonna go ahead. Listen to these two clips. We know we're in the close up. Maybe we'll go to the wide shot. I want to hear that I selected. I go forward slash There was in America at Maryland Duke Valley when I was eight years old. And I remember walking up. So we're going to start that I remember in America. So we're going to actually push everything down with another insert. And so after Crimea, there's a point where we want to do that. So we're gonna do an insert at it now, right? We want to cut that apart, push everything down, pick the clip will go with wide shot. I'm gonna put the whole clip it now I'm going to zoom in. Gonna make these large is I want to show you some work flows. So if we want to change the way we view things, that's clip appearance. We saw that yesterday and under clip appearance. I want you to see this. I can go ahead and I can make these larger if I want, so I can see things a lot easier. And if I needed to, I could go ahead and see this as a filmstrip, and I go to more detail 12th chunks and what not So we've done that. Let's go ahead and close that. Oh, by the way, for those who were so distraught earlier when I couldn't find that preference that I was looking for, angels have come down. And if you wanted to do continuous playback underneath this selection, this is where it waas. This is a new feature. As a matter of fact, that was in the latest release. If you click on continuous play back, you can just hit play on the first clip and it will just keep playing. So if you want to look at all of your footage without having toe stop and start, that's where the button this There we go. I may sleep easier tonight. So we've gone in there. I want to do the cut A war So it's probably no more market there. Go over here, go to the wide shot and we'll take that right from the beginning. I remember. So this is what I want to show you. I just selected a little piece by accident. This happens to folks all the time, and you're like, Wait, I want that peace or else you do this. You accidentally and this is what happens. We're often you click here and now you want to select a range inside, but it doesn't let you because there already is a range selected and you get frustrated. Well, don't be frustrated. Here's a couple different ways that you can do rain selections when you've accidentally selected the entire clip, we can market in point with a Nike that's gonna give me a new endpoint. I could mark an out point with the OK, that's another way you can initially market. But if you have the whole thing selected, you can mark a new in and a new outpoint and you're good to go. The other option is to remove both the in and out points simultaneously. Okay, so in is an in point out in is an, I point out, is an o point if you ever wanted to select an entire clip and stay with me here. So if I wanted Toe X is always the keyboard shortcut. To select an entire clip, Option X removes the enemy outpoint simultaneously, so I for in over out option I removes the endpoint option. Oh removes the outpoint Option acts, removes both the enemy out simultaneously. So if you've marked any kind of in and out point like, I just need to start all over again option X and it goes away I o. And this is these are some of the keyboard shortcuts that you will find valuable. They're not obscure ones. You use this all the time, so we're gonna go ahead. I'm selecting the whole thing. I wanted to an insert at it. I've played around over here. I know the cut should come in about at this point. And what kind of cut am I going to do if I want a wedge this in and insert added, it must keep a shortcut for inter w bingo. So there we go. I want to point out something. I did this for a reason. See this piano thing? It was connected to that sound bite there. So in a traditional editing him when you had tracks, if I put it clip in, that would have stayed way back there and I would have had this piano that I didn't need. But I know that I wanted this to stay together, and that's what's really cool about this application is it's very easy for me to move things around without things getting out of sync. As long as I've attached them properly with a connect clip in my sequence or connect edit. Let's see how this plays back. I I remember. So this cut kind of works Crimea. I remember. No, I sync up the Arctic. There's actually black here, so I'm gonna go ahead, and this is gonna be a little bit of a challenge because the camera wasn't running with the lens cap off. Actually, it's because we've mixed audio with different video. So I have a point here that I remember. It was in America at Maryland Duke Valley when I was eight years old, So I need to clean that up, so I'll probably put a cutaway there. Okay, I also may want to take out a chunk in the middle. Okay, so let's do that. First. I want to tighten up the story. Let's listen to what she's saying. I'm going to bring up her volume will actually do audio editing a little bit later. When is the up arrow okay to get to the beginning of that clip? I remember it was in America that Maryland Youth Valley guys eight years old and so And I remember I was eight years old. I think is what I want. Okay, I want to cut out. I was in American one. So if I want to do that and I want to make that added a couple things I would probably do, I would go in again so I could look at my timeline a little differently and maybe make my way forms a lot higher so I could see that, and then I'm going to make this taller. So now I can really see where she's saying stuff and ignore the fact that I've over modulated. It's just so you can hear it in the studio and you could hear it out online. So I want to remove this nice eight years old and I remember walking up this. I remember walking up the steps. So what I need to do, I my dancer from Crimea up. I remember there was in America at Maryland Youth Valley when I was eight years old, and I remember walking up the steps and I felt like a dancer. Okay, so if I want to cut this, we've learned we could use the blade kit, right? I could go ahead, and I'm gonna do this Just randomly. Room I play head where I want. I am commanded to make the cut command be There was in America at Maryland's youth rally, organized eight years old. Hit the, um, late again, and I could go in and delete that works three steps, But let's undo that instead of blading it, remove all my blade. Diane did a bunch here. Should be. There we go. I could go ahead and play. And if I know, I want to remove that section dancer from Crimea. I remember it was in America at Maryland. I remember So I could mark an in point there. Gonna let it play to the end of the sentence. It was in America at Maryland. Devalue guys. Eight years old. Okay, so I'm gonna be sloppy here intentionally. Eight years old, because I want, uh, I was eight years old. I'm gonna cut that right in the middle of a hidden. Okay, So I've marked my range, and I would do it a lot faster in real life, so I want to remove that area instead of blading. If I simply mark in my mark out or I could just do the range by going to the range. Team will do that a moment. But if I hit the leak now, it just extracts that chunk and titans the space. So if you have something you want to remove, it's great for interviews. Just throw them all in a timeline and you can see in the Audie away from where the gaps are, where somebody's not talking and you could just remove those chunks. And now you have a nice string, two of the parts of the interview you want to work with. So it's a great technique, so you don't have to go through all the steps. But again, I'm trying to give you the tools that work best for you. You'll find something that works best for you. So now let's go ahead and play that and take a look at some of the trimming techniques that we would want to use. Cry me up. I remember. So I cut off. I remember I was eight years old, so I need to fix that, and I could go in and I could trim this and pull it back if I wanted to unionize eight years old. But you know what you do A lot of times when you're editing, you play this over and over again, right? I remember recognized eight years old. So here's a couple of other techniques I know I made this added. I know. I want to listen around this at it. We learned that the forward slash but would play anywhere between an in point and an outpoint. Any selected range. Okay. Forward slash Underneath the question, Mark. If I choose the question mark, shift forward slash. Instead of playing around this era here, it's gonna play around the cut. Okay, so watch this. I'm gonna hit shift forward, slash Remember? Eight years old. So that way I can listen to and I said, Oh, there's a problem, and I can start tweaking it, okay? And maybe I want to pull this left or right. But the idea is a lot of times when editing, especially editing audio, you need to play it over and over again because part of it is the rhythm. Okay. Is there a long enough pause? Or if you're cutting between two actions, does the action feel smooth? so not happen to go back and move your cursor in front each time and then play and then stop. It's a lot easier to hit, shift forward, slash and listen. But we're gonna take that to the next level. Everything gets taken to the next level. I have this already selected. I know. I want to move it left or right. I want to nudge it a little bit. Okay? I don't want to have to sit there and pull it because, you know, I've been up for 36 hours editing my hands, not steady anymore. You can easily nudge any selected edit point or a clip with two keys, comma and period. So if I hit the comic E, I am dreaming this I'm adding a frame at a time. To her speaking, that's the common that's going left periods gonna go right. The clip that I'm affecting is the clip that has the directional little yellow points going that way or this way so I can do very precise editing in my time on and really trim things down to a fine point. So I've done this trim and then I'm gonna hit shift forward slash me up. I remember Valley guys eight years old, and so if I didn't like it, all I do is through the period of the plus and hit shift forward again. I keep listening and listening and listening. OK, so that's one way that you can do that. If I wanted to work with that a lot, I could also market in and an out. Now, Before we saw that, I marked it in and out within a clip to just play that section over again. Now, by hitting the Ford Slash by itself, I remember Valley. So I just want to point out you could do that. You could play a hole. You want to play a whole chunk of a show 56 edits in your sequence. You don't have to do it one clip at a time. You could market in to and out, and you could hear that whole section and that you could make changes and tweak it again. So, having that control now, let's go ahead and take that period that nudging to the next level because perhaps I don't want to move things one at a time can when it's like this at eight point If I want to do it at a time, I can do that as another default. So period and comma nudge, one left or right shift knows how these modifiers air, starting to do things that you can kind of predict. So if I had shift Kama 10 frames at a time, so I finally a 30 frame for a second. I'm moving 1/3 of a second time. 25 frames. If I'm Pau, it's, you know, not quite 1/2 2nd so I can go in and I could be very precise. And then I hit that shift work e and I can get the rhythm just right on my edit points. Well, talking about the, um the between in the use the way they used their blade under the elite Ah, at the final result were what the different with a different in the so that so the question waas um I used the blade to cut something, and then I did it another way. I just market in and out, ended up in extracted it right. The truth is, the end result is exactly the same. It's two different ways to do it but sometimes you are playing it, and you know where you want it to go in and out. And instead of having toe stop and hit blade and stopping him blade, it's quicker to market in point at an out point and then just hit delete. But the net effect is exactly the same, and there are times when you just want to trim something off. So remember, the blade is really useful allows you to cut something in half, and then you could do something with it. Um, and then the extract. Ah, for example, we haven't got here yet, but I'll give you a workflow where I might use a blade. I might have a single clip, and I want to do a transition from the clip without a filter are in effect to a clip with the filter and the way that filter is designed. It's an honor off thing. It's not something that I can adjust on the fly, so maybe it's a filter that goes to black and white from color, so I could cut the clip in half with the blade. I don't want to remove any of the clip, and I put that black and white filter on one side. And then I do a dissolve between the clip to the clip to itself. So there are definitely uses where the blade is more more property use than the extract at it. Good. OK, that's a great question. And what's that question really pointed out was, I'm giving you multiple ways sometimes to do the same thing. And I do that for a couple of reasons. One, Everybody has their own style. For some people, they will. It will never stick Teoh to do a range and delete. They learned it by themselves. And they know how to use the blade tool. They will always blade. And you know something? If it works for you, do it. Okay. Some people just natural under things one way or the other. Okay, you're a dragger. Your keyboard person. Okay, If you're not a keyboard person, you're going to do it the other way. The other thing is, I actually use both ways, because if my hands on the mouse, I may do it one way. If my hands already on the keyboard, I may do it another way. Okay, But as you're learning, find the way that works for you and stick to that. But I wanted folks to be aware there's other ways to do things, and if they're already doing it one way, are another way that I'm teaching, that the way they're doing it may not be wrong. There's just an alternative way of doing it, which is what people like being out there going, Oh, I use extracted it all the time. I didn't even know you could plate. People are saying Oh, my blading, Is it wrong to use extract? No, not at all, And this is what it's all about. You slug things in, and now you start finessing things and there's lots of ways to do it. I'm gonna go ahead and zoom back out so we can see what we're doing. Give us self perspective and let's play and hear what she's talking about. Duke Valley. When I was eight years old and I remember walking up the steps and I felt like a dancer hut, so I think at this point we've seen her enough. It's established her will probably put a lower third here, so I'm starting to think about my story while I'm doing the cut, but it would be nice. I really loved the dancing stuff. So I want to put some pretty dance shots in, and I'm gonna put that in his B roll. Okay? So I'm gonna keep my play head there as long as the play. Its part there. When I do an insert, our, um, connect at it. It's gonna go right with that. Play head is if I market in point by hitting the I key, I want to point out that if I do caught, it's going to go where the range starts. It ignores that now. So if nothing is selected, the play had takes priority. If arranges selected, that takes priority. Okay. And I'll prove that, and I'll illustrate that. I don't think I need to prove it by throwing a shot in. So let's go with some of the dance studio footage and I have some really pretty stuff here. There we go. And I like this. This is some stuff that we shot and we shot this at 240 frames a second. So it's slow mode in the camera and we're playing it back at 30. So it's about 1/8 speed, and I just think this is a real pretty shot to get into. So we're gonna go ahead and pick that shot and I'm going to do a connected it. So there's the shot. It's a total of Ah, we shot two seconds. It ended up being 20 seconds. So this was actually 1/10 normal speed that we go. There's the move, Mark in and out. I'm gonna go ahead and do connect, and I get something interesting. This is gonna happen to you guys. There's not enough media in the source clip to fill the range in the timeline. The result will be shorter. So this is what final cut is thinking. It's thinking I have this amount of video here, and I need and I want to put it in that amount of video there, and obviously one is a lot longer than the other. As a matter of fact, if you need to find how long something is, you can select it and you can control and find out what the duration ISS control. D is duration. You'll hear me say that several times. So if I have this selected and I had control D I can see that. That's a 12th clip. If I go down here and I had control D I can see that's a 22 seconds clip. I apologize. I think I might have bumped Thea. That's if if I didn't bump it, um then the ghosts have returned to the shell. The ghost in the ghost in the shell movie. Um So what are my options here? Well, if I go ahead and I do the connected clip and I hit Q it's gonna give me that warning and I'll say, continue. It puts in the entire range I selected, but it's warned me that it didn't go all the way to the end. You'll also notice it did put it where the in point waas. I'm gonna go ahead and hit on. Do I want to remove this selection here? We've learned how to do that. You're gonna movinin point by hitting option on moving out point by hitting option. Oh, option X. Remove both of them. Now you're starting to see where this becomes valuable. Okay, I'm gonna go ahead. Option X removes that. And now wherever my play head is, I can do my connected clip Que did not get a warning. Did not get a warning because I don't have a rain selected. All it knows is that I haven't in point and it knows I have two points here. One point here, it does the math. Guess what? You're starting to learn something called the three point at it. The people who have edited before going Yes. Okay, three point editing allows very precise editing. You pick two points. It does the third. So by default, if I have one point here and two points here, it's gonna choose the duration, the range from my source clip. Before I had four points, it gave me a warning, but it always chose the duration from the sequence. So if I haven't in and out here, it will only use the endpoint there for whatever it needs to something to keep in mind. It's like you keeps you from getting into trouble. So that's it. You think of it, you pick three. It doesn't matter before there's a really cool little feature where you view a three point at it. But instead of worrying about what's on the beginning of the clip, you want it to end on a certain motion. Okay, so let's say when. Go ahead and delete this. She's talking be very quiet and not make a sound. I remember telling up this, so I want at the end of tiptoeing off the steps, I want the motion toe end and it automatically put you know where Put the beginning the end point at the very beginning of the Clipper Justices default. You know, I could have stretched this out over here. I could make it go across clips, but I'm not really caring about the beginning. When I go back to this clip here, gonna hit Option X. I like the very I wanted to stop right there. I'm clicking my range selection. I'm just dragging backwards and I just care about that full motion. So I want that full motion to happen. And I wanted to end there not asking much, right? If I did the cuchi, it puts it at the beginning, and I don't necessary I didn't see the action end. Undo that shift. Q shift Q will connect it to the end of the clip. It will match the out point here of the range to the out point here of the range. Okay, so I'll go shift Q. And you'll notice that her foot comes right to the top and then we cut. And this is really useful. Maybe you doing something where people are leaving, You know the ticking toward the New York harbor of the Seattle Harbor, and you wanted to end with ship Jesse's. It leaves frame market now point their marking out point in your show to shift Q. And now you can do a connect from the back. That's back time was a question about getting like, removing echo on interviews like the audio because we're not gonna cover, and I don't say we're not gonna cover it to be mean. We do cover audio, but if you have echoes on interviews, there are some great third party plug ins. Okay that you can add. And there is an echo remover and a whole bunch. Others that for both video and audio, and the best way to find out what's out there that's vetted that's approved, um, is if you go to the final cut pro website on Apple apples final cut pro website, and they have a special section on third party plug ins, and there are loads and loads of plug ins, and they're pretty reasonable. That's one of the hardest ones, toe. I mean, it's a complicated one. I think it's about 100 bucks, but it has saved my bacon many, many times. And that for a cooking show, the most bacon you can save the better. Yeah, there we go. So let's bring a couple more clips I wanna have. What kind of a sequence? We know we've timed it, right? How we wanted to, uh, Kip clip is connected there, and my timing is perfect. I'm gonna throw another clip in, and maybe we're gonna go with this leap here. We've got some leaps. I just want to get it right as she jumps. Remember, I can't grab do my range because I selected this by accident, right. So I also I said you could mark I you know, market in and now point or there's another option. You can dio if I am, I like to drag my ranges its natural Fiona wanted hit I You know, if you've already selected a range and you want to bypass that if you hold down the option key. It lets you just go and drag from wherever you are. So it's your already dragging is like, Oh, it didn't work. You have to move your hand off the mouse. Just hit the option key, and you can pick that range very easily. So I've picked my into my out point. I wanted to go right after this clip. So I'm going to use the up and down arrow, and I'm gonna go ahead and hit queue to connect that clip. Let me connect one, Maura, and I want you to see what happens that we have the leap. You have this? Yeah. That jump should be a little bit longer. Let me stretch that out. Telling up this That and Oh, yeah. Two jumps are nice, so I'm gonna go ahead and I want to trim off the end, Okay? I have a couple ways I can do this. I could go grab it. I could blade it. Okay. There's something else you can dio. And this is an advanced technique, so I just want to throw it out there. This is if I want to trim everything to the right of the play head. Okay? I can use the left and right bracket keys those with ones to the right of the letter p on an American keyboard. Okay. And if I hit option right bracket, it trims everything to the right of where my play had his part. If I hit option left bracket, grow here, that's selected, so it won't let me do that. There we go. It turns everything to the left. So that's another quick way to trim everything beyond option left and right bracket. Now I want to point something out. How did it know which one to cut when I had multiple things? How does it think it's something out there? There we go. It will, by default, choose the top most layer. There's a little dot here that indicates that that's the layer that it's working on. Our That's the clip it's working on. Okay, But when I was over here, went down there. So it's not gonna hurt my main story line because it's gonna go there first if I need it to select the main storyline. If I actually select, the clip now will use whatever clip is selected in my range. Okay, so that's pretty cool. Wait a second. Look, I selected a clip and I'm not using my mouse. This is a really cool feature if you have the play head and you have a bunch of stuff below it, If you hit the sea key for clip, it will select the clip on the main storyline. So I don't have to If I'm over here and I want to do something down there, I hit. See, I'm now in that clip. I market in point with my I can. I'm marking output with my okay. I could go ahead and do whatever I want in that range. I can add a filter. I can delete it. What? Not. Okay, So this is where the power starts coming and you notice. And this is a question I get asked often. Well, isn't final cut pro? Just a movie on steroids? Absolutely not. They both have a nice, simple initial interface, but its nuances like this that allow you to tell the story that you want to tell. I want to delete this chunk. Well, what's gonna happen if I hit? Delete it moved everything. It tried to do what it's designed to dio and I can undo that. So I remove this. It assumes I wanted to be back to back. And something interesting happened here in this next few minutes, you need to watch carefully because this is where it all comes into play. You get your head wrapped around this, you're ahead of the game, so I'm gonna delete it again. It cut that out. Final cut 10 avoids clip collision. So it says, Oh, this clip is connected there, so it stays where it is. This clip is connected to this clip, so it stays where it is. So when it pushes it together, one gets out of the way. So I don't accidentally delete stuff. We're going to see the top one, okay? Because whatever's on top, and then we're going to see this one assumes that pops in. So if I wanted to, I could at this point grab this and and move it over. But I'll tell you the truth is he? I moved it over, slid right down, and because of snapping Wow, it's continuous. I do that. I didn't really want to do that. What I really want to do is I just needed to take the cough out. I don't want to change the timing at all. So instead of hitting delete, I can hit shift delete. What shift delete does is it removes the clip and replaces it with that Gap clip that we learned about earlier. So my timing isn't off. This is just like a blank spot. It's It's like a hold spot. So now my timing is the same. I could remove that, and then it would close up. But that's one of the things you do. So instead of deleting, if you want to keep the timing exactly the same shift, delete that shift is getting a lot of work. The command gets a lot of work. The shift gets a lot of work. Option gets a lot of work because it's like another way of doing something. So it's things to keep in mind. So now we're starting to get some serious control with what we're doing in our sequence. So I have the dancer here. I have this here and you know what I think would be great if these two pieces were, you know, as a matter fact, let me throw one more element here. We have that jump. Let's do some regular stuff here. It's just nice spins. And I have that rain selected. And you know what I want. I really want to put it there. But if I put it there, I'm gonna have a problem. Right? What's gonna happen if I right now do a connected clip? Is it gonna move everything out of the way now? Now it's gonna connect it to where I wanted to be. So now it's on top. That's OK. She's on top. I could play it, but if I wanted to have this drop down, I could do a couple of things. I could move this out of the way. Drops down. Of course. Now I push this out of the way. Drops down. Gotta move that over. So this is really kind of clue gy, isn't it? Okay, so do undo a bunch of that stuff. What I really want to dio is I want thes three clips toe act as a family. We want them to act as a group. I want them to be connected at one point. And if I do any trimming like if I go ahead and I trim this clip I want this one to follow right along. Okay. Said I need to do something for that. So let me move this over. So I have three. What I will define as insultingly there's just like having fun here. They're just making fun of me. I have three clips, but the problem is they're each connected to its own unique spot, and I want them to work as a group jump. I'm jumping between my enter points just to make sure that my I don't have any. See. Look at that. When I played around, I got a couple of frames. I'm gonna zoom in really tight, flat frame, one frame of video looking at outer west blow or something. It's black. Unless you zoom in, you don't see it, But that's the problem. Okay, your viewable and what's really annoying is as you become a better editor. You start seeing these on television a lot, and then you tell you people you're watching with, like, shut up. Just don't watch the show, and then you're like band toe like, you know, the basement toe watch on a little, you know, on your phone, that'll make little TV's anymore. When we make big TV's and little IPhones. Okay, so I want to close that space. We've learned one way to do it. I could grab it edge and just extend that. But maybe I don't want extend it. I just want to move it over so I could physically grab stuff and move it over. But sometimes you want to be precise, so I kind of hinted to this earlier. Instead of selecting the Edit Point, I select the entire clip. And now, using those same nudge keyboard shortcuts of period and comma, I can move it over until it hits. If I overshoot, one all know immediately because it will step out of the way. Okay, so that's how you can make sure things are exactly where you want to be. So back to my original problem. I want these to act as a family. I can select all of them, and if I right click on it, there is an option to create a story line. It's if I can zoom in without losing that pretty good. Okay, so it's very bottom of the screen, but what this is going to do, it's gonna take those three clips and make them into their own storyline like the main storyline. But now it's a secondary story line, and you can have as many as you want. But it's a way to group clips together. Okay, that I can now manipulate them. So gonna create a story line. And as soon as I do that, you'll see there's a gray bar on top and all of my connection dots are gone except for this 1st 1 So now if I want to move this, I could even now click that groups under. I can grab that gray bar, which I can't see on my computer. Did I undo it one time? Too many? I think I did never assume in great storyline I could grab that great bar and I could move this chunk if I start doing things were, Let's say I took out this section. Remember how some of them moved and some of them didn't. They're all connected, so it only goes toe. That one spot gives me a lot of control. The other thing you can dio is there are times when you want to swap the order of clips because perhaps I really want the slow mo one at the end. I'm going to show you this on the main storyline because I don't want people to think you could only do this on secondary storylines. But we're gonna do in the secondary storyline too. So I'm gonna hit, shift, see, go to the head function left. So I might have these three clips here. They're automatically everything on this main story line automatically relates to each other where these I have to force them into its own story line. If I wanted to switch the order of these clips, all I have to do is grab the clip and drag it where I want it and let go. Because of the magnetic timeline, it just swaps them out without any problems. You don't get this when you're in any other kind of a nonlinear system. OK, Matthews modifier keys, apathy. Careful, but I can switch the order of clips. I can move things from the end to the beginning and it will automatically close any gap and keep it wide open and keep it exactly together. So that's pretty cool right now because I have a second story line. These don't move independently of each other away from my main clip there altogether. So if I want to put this at the beginning, I can, because they're all related. So this is really cool. So secondary storylines are an important thing to keep groupings together. If you want to move them as a group, if you want them to work together as a group. Now we learn later on when applying filters, and they will be in a later class that if I apply a filter, I'd still have these clips have their own independence. So I complied. Filter to one. It doesn't apply it to all of them because they're a storyline will learn in that lesson about something called a compound clip, where you put them in a container. Okay, so I just want to introduce that idea that you'll be introduced the story lines, which are these which basically keeps them group together with a single connection point. Yet you can move them around, and you can treat them independently with any kind of filters you want, or if you need it to group them to do something to them as a set, you have to put them into a container and that is called a compound clip. And we do that in ah, filter thing, I believe so. When you get to filters, you learn about a compound clip, but those of things you'll have to discover, I want you to be aware of that.
Class Materials
Bonus Materials with Purchase
Ratings and Reviews
a Creativelive Student
Wonderful. This is the first time I've seen any of Abba's classes, and he's a great teacher. I've been watching the live sessions for the past few days and have picked up a ton of great tips that will indeed speed up my workflow in FCPX. He's a great teacher, and does a wonderful job of setting people at ease, ie. where he says things like, 'there's no trick questions', and times where he will click on something wrong, then he'll go back and show his mistake (pointing out his minor mistakes are actually a beneficial lesson). In all, wonderful wonderful wonderful. Thank you!
Lara
Fantastic teacher. I enjoyed every video, super worth it. I've been reluctant to jump into FCP X since it got upgraded from FCP. Now I feel confident to work with it again. Seems pretty self explanatory, but I am glad I watched the course. Abba covers pretty much everything you need to know. I also loved his personality, made me want to learn more each day.
Alan Pole
Absolutely brilliant. Abba gets to the point, is clear, organized and articulate, and lays it all out in a manner that quickly brings your confidence level from zero to hero. Highly recommend this to any photographer who wants to blog, build ads, or include video in their offering. I feel like an amazing new world has been provided to me. Thank you!