Finalizing, Exporting and Archiving: Exporting Final Project
Lesson 37 from: Final Cut Pro X BootcampAbba Shapiro
Finalizing, Exporting and Archiving: Exporting Final Project
Lesson 37 from: Final Cut Pro X BootcampAbba Shapiro
Lesson Info
37. Finalizing, Exporting and Archiving: Exporting Final Project
Lessons
Class Introduction
12:34 2Exploring Final Cut Pro X: Navigating the Interface
32:32 3Exploring Final Cut Pro X: Project Timeline
18:23 4Exploring Final Cut Pro X: Basic Editing
16:07 5Refining Your Edit Introduction
15:15 6Refining Your Edit: Trimming
37:06 7Refining Your Edit: J and L Cuts
09:00 8Refining Your Edit: Roll and Overwrite Edits
06:25Refining Your Edit: Slip and Slide Edits
03:51 10Refining Your Edit: Auditions
09:27 11Setting Up a Project From Scratch
17:03 12Setting Up a Project: Importing Media
35:52 13Setting Up a Project: Keywords and Smart Collections
21:07 14Working with Audio
13:56 15Working with Audio: Syncing
23:40 16Working with Audio: Mixing
21:28 17Working with Photos and Graphics
09:55 18Working with Photos and Graphics: Scaling and Positioning
14:05 19Working with Photos and Graphics: Ken Burns Effect
15:17 20Working with Photos and Graphics: Animating with Keyframes
15:51 21Filters and Transitions Introduction
03:04 22Filters and Transitions: Applying Transitions
18:13 23Filters and Transitions: Applying Filters
14:23 24Titles and Generators: Lower Thirds
11:43 25Titles and Generators: Titles
05:40 26Titles and Generators: Backgrounds
11:46 27Advanced Skills: Color Correction
38:35 28Advanced Skills: Speed Changes
15:48 29Advanced Skills: Stabilization
05:53 30Advanced Skills: Green Screen
13:11 31Multi Camera Editing
06:04 32Multi Camera Editing: Organizing Your Media
08:54 33Multi Camera Editing: Creating a Clip
07:12 34Multi Camera Editing: Audio
09:25 35Multi Camera Editing: Working with 4K Footage
06:56 36Finalizing, Exporting and Archiving: Final Checks and Tweaks
04:34 37Finalizing, Exporting and Archiving: Exporting Final Project
25:46 38Finalizing, Exporting and Archiving:Cleaning House and Archiving
15:22 39Bootcamp QnA
14:53Lesson Info
Finalizing, Exporting and Archiving: Exporting Final Project
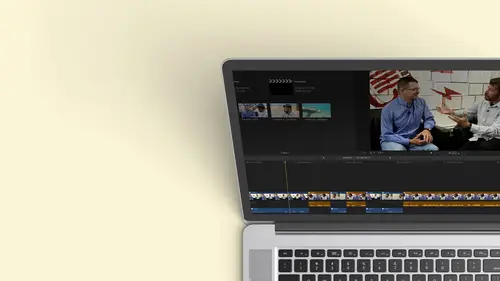
I'm ready to export it Now there's a couple different ways that you can export. I can either. If I'm clicking onto my current sequence, my current project, I can have that selected. I'm gonna go to the share menu. Or I could share directly from the actual project up here in my library. And you do these one at a time so I can't last so like, three different projects and say Share? That's the export function I have to each one. They do que up. It doesn't. I don't the wait till they all finish exporting, but you have to do them one of the time. Uh, so let's go ahead and do that. So we're gonna export the final cut. There are couple places you confined for exporting and get it from the drop down menu. Should be under file share. So you're not exporting. You're sharing, but I usually by default, go over to this little button on the far right, because to me, it's like how it's the end of the day is the end of the show is the last thing in the in the interface. That's my share. Button gives m...
e all the same things in my pop up. Now these are there by default thes air presets so I can export out a version that could be turned into a DVD. It creates the file I need it doesn't author. Actually, this might offer Yes, it does off their ah basic DVD heavier duty DVD authoring. You need to export out a specific type of file. People aren't really doing that that much anymore. As a matter of fact, I used to train people in DVD authoring all over the place 15 years ago. I don't even think I've actually made a DVD for a client in five years, and I probably haven't watched one because it's so much easier to stream things. But the technology is there. If somebody wants to deliver that, you can create a DVD. You can also create for a variety of other delivery formats so you can create ones for Apple Devices on. I wanted to play at 7 20 because that's gonna play on MAWR Legacy Apple Devices. It'll play all the way back to, um on Apple TV, too, because they'll play 7 20 But if you do 10 80 there's a lot of devices. They can't do that that only a few years old. Okay. And I'll show you a great little trick about that. When you actually step through, I may want to send it directly to Facebook. I may want to send it to YouTube video. If I do it to these, I'm gonna have to have to add log in information and will go right there. And they will create a file that is perfectly designed for those services because they have all the specs, they being apple, giving them to you. So a lot of times you just go right here and you're good to go. You also can output master file. So if you want to make an archival version of the highest quality, you can do that. Let's take a look. What happens when you select one of these choices? We'll start with an apple device. So let's say I want to put out 10. 80 p. That's what I worked on, and I'll go ahead and I'll click on this. I get this dialog box and this is my export dialog box. So what is telling me? Well, I can rename the show right now. It's named after the sequence. It's named after the project, so I don't want to call a full cut. I could call this Anna Russell CV. Okay, that's receiving. And then I can write what it's about. Now, the reason I want to write some of this information is this becomes metadata, that if I uploaded this to YouTube or Vimeo okay, our Facebook and somebody does a keyword search, this information could come up. So when I see that so I won't say this video is about full cut. I'd say this video is about Anna rustled and ballet. Then I have all of these tax. Where do these data tax come from? Well, this was all the metadata that I put into Final cut. It thinks I want all that, and maybe I tagged. It would be perfect. But the truth is, I don't need somebody to search for a wide shot and find my video, so I would actually probably remove most of these. I can just highlight them and hit delete. Now I can start adding things that I want tohave in the mated metadata. So if people are doing a keyword search, my video might pop up. So I would say ballet, and then I would Atacama. And then I would add something else. Maybe I would do, um, piano. And then I comma and you're seeing I can create as many as I want. So this will now be tagged. I could put Maryland dancer so I could do this, and then I would make this and be ready to go take a look at the bop. I'm getting a reminder. What's the frame size of what I'm exporting? Okay. And the frame rate is that stereo, is it? Motto. What is the duration of what I'm exported? And how is it gonna be tagged? It's an apple MPEG four movie useful. I want to make sure that this is the right version. This little picture is more than just pretty. I can put my cursor over it and skim through my show is the last check to make sure this is the right version. Okay. And then this little buttons really cool. I'm going to scroll down so you can see what I see. If you put your cursor on that button, it's gonna tell you which devices this will play on with no problem. OK, because it's 10. 80 p. It won't play in some of these older devices because they don't play. 10 paid ADP. The original IPad could only handle 7 20 Okay, so it's a great little check. So what if I wanted it to be a little more diversified for Where can play? Well, I could make some changes. I do want to point out It also gives me an approximate file size. Now I want to modify some things like click over aesthetics. This is the default settings for what I just selected as Apple devices. Okay, there's my format, Apple devices. I can change things now if I switch because I wanted just to go out to a computer, I could change that. Did you notice that Pop to yellow for a moment. That's a visual warning that things have changed. My file size is gonna be bigger. It's gonna be less compressed because it doesn't need to be for a computer. And it's going to play on fewer devices because of the way that it's now designed. Okay, so you have control has been a fact. If I go ahead, I can't. I need to zoom out a little bit so you can see I said to computer and guess what? It will play in a Mac and a PC, but not necessarily one of these, because it's huge file now. It's not like, you know, black and white. It may play on some devices, but don't count on it without testing, So that's really nice. I can change things. So what are some of these other options here? You'll often see one that says faster and code and better quality. Usually, what happens in this case is there compressing your video using something called variable bit rate, which means if there's more action going on, they give it more ban with, because that's a lot of scene changes. If it then quiets down to two people talking, it doesn't require as much bandwidth to send that part of the video signal. So it varies based upon how much motion is in each frame of video. And that's what this h 0.264 video Kodak that we talked about at the very beginning is all about. It's a great way to compress things efficiently, well, better quality. What it does is it also give me refer to as to pass variable bit rate, which means it's gonna analyze the entire movie first and then compress it as opposed to compressing and just looking a little bit ahead. Because it's done that analysis, it now could make a smarter in code, and you'll end up getting probably smaller and sharper file. Okay, so think about it's to pass. It will take twice as long. You worked a long time. You've edited something for, you know, 40 hours and it's a minute long. Why not take two minutes to encode it instead of one? I generally always like to do that. However. The default usually goes too fast and coat, but I can change that. I can confirm the resolution. It's 1920 by 10 80. If I go to 12 80 by 7 20 Look, my file size changed. It's not gonna play it anymore assistance, but I got a smaller file and this is the best guess. So if I'm trying to make something small so he says, Well, I needed to be under 100. I could look at ways I could do that. Maybe that I'm gonna have to shrink it to 9 60 by 5 40 Okay, so this is something that you consent to take back to 1920 If I put chapter markers in, we learned a little bit about markers in the course. Okay. One thing you can put it on your final program and I'll show you how to do it. Once we step out is I can go ahead and I can put markers and by hitting the M key. Okay, so if I send it out to a DVD, they'll be chapters. If I send it out as a quick time movie, Quick time movies, you can embed chapters so people can jump to certain sections. OK, so you can do that. You can include chapter markers, and then once it's exported, I can say, What do you want to open it or where do you wanna attitude? So in this case, if I just wanted to look at it quickly and quick time, I would choose that there are some ITunes libraries on this computer, so I could have a go into that itune library. Maybe because I want to use that because I want to put it onto my phone or into my pad and I want to be able to sink it, so you have control where it goes. I generally keep my ITunes library separate, so I would Polly put its quick time. Just have it open up or if you don't have do nothing, I like quick time. It lets me look at it after I'm done. So there you're already to go and then I would hit next. It's gonna ask me where I want to put it, and again check my name. So I'm gonna say, OK, save. And now I'm back into final cut. I can keep editing if I want to know what's happening behind the scenes, the same background tasks will allow me to see what's happening. It's sharing this video. It's encoding it in the background. Soon it's magic and I could go ahead and I could send it out with a different style. So let's talk about that. Let's look at some of the other options while it's working in the background. Another big option that we didn't choose on sharing is a master file. This is your archival version. If I click on that, it's gonna automatically go here. Look, it's 1.35 gigabytes. This is gonna be a pro rest because what it's gonna do, it's going to use whatever the project settings were. And it's going to use that as its reference. So because we were editing a 10 80 p with pro rez rendering, that's what it's gonna default to again. The same information is given here, says Master File. If I jump over aesthetics, I can modify things. So if it's a master file, you'll see video and audio click on that. I could put out video are the only I've done. This is a matter of fact. You can export a clip, not even a whole show. If you have a clip, you can export that clip or even select the range of a clip and export that. Maybe you have a really long clip, and you only want to save a little chunk of it. I've often exported that out and use that okay, video and audio. I wanted to pull the audio off something I recorded good audio, but it also recorded video. You know, it wasn't I'm not using the video, so I just want to strip it off so you control this. Maybe you're doing a graphic and you need to send it to motion. Okay, You don't need the audio, so you can choose that you can also at this point, switch back to Apple device. So basically, if you're here, it's a mastering. But if you need to switch something, there's your apple devices, your computer in your Web hosting options. Okay, we'll look at Web posting in just a moment. We'll leave it video. I can choose the Kodak. Look at all these things where we talked about the lovely word of Kotick, compression and decompression algorithm. Blah, blah, blah. OK, different flavors of progress. This is just really high quality. Un compressed. That's the default. Okay, for 22 it's gonna be a big file. These are even bigger files. These are used for graphics and animations without foot channels, and, as I said before, blah, blah, blah. Okay, hold course in that, and these are smaller versions h 0.264 That's what we generally do for the web, so you can control what Kodak depending on what you need to deliver thes Airil broadcast formats a lot. It's the same device and then on compressed. So these air some choices, the odd. So you're ever going to use this or this, or you're probably not gonna mess with that because it's gonna be the default whether you pick Web our apple device or mastering Kartik. So there you go. A doctor. 64 will give you a nice, smaller file, little more compressed in size, but it will still be full 1920 by 10. 80. So maybe you want to put that on your your drive so you can watch it on TV, but even switched that. Okay, resolution is fixed because it's based on the sequence. The project size. Okay. Can't change that. Then chapter markers, same questions as before. And then there is rolls. Okay, We talked about roles when we did audio and I said would come back too late. Remember, we were labeling things. This is music. This is Anna's dialogue. This is sound effects. This is the piano. OK, I can control when I exported my rolls. So if I wanted to export, say, a multi track quick time movie, it's going to give me options depending on what I check. And I could say put in all dialogue. A stereo only used Anna's dialogue. You have a lot of of granular control on the export now. You're probably not going to use this initially, but it's here. So if you cut something and you put two languages on a member state could do two languages. I could set it up so it exports with the language one and have a movie. I could also set up a preference, our default work sports with language to. So I only have to build it once and I can control what I export. I could say I want one with titles and one without. So one has all the roles and what has all the roles but titles turned off. So the idea is that you can create presets and I'm going to show you how to do that a moment. But it's pretty powerful. So that's why those roles we've been talking about periodically throughout have become very beneficial, and those are only available with some different saving versions. And I can also save this as a preset at this point. But I will show you another place to save. Let's go back to quick time movie that goes away. So there we are. We're good to go. I could go ahead and hit next. It's gonna go send this one out. I don't think I need to export this, but you can see the difference if I was going to do something different, Such as I wanted to do Web hosting. Okay, We go faster and code better quality, and it's gonna do its best job. I'm gonna cancel. I want you to look at what happens when I export this to say something such as YouTube or video venue. Okay, so I've done this. I want to put it on video. The first thing it's gonna do it gives me this dialog box. I'm gonna look at my settings. Okay? We're gonna go better quality viewable by. So a lot of times with video, you could do password protected so your client can see it, or people subscribe to your channel conceded The other thing you're gonna have to dio is if you'll sign in, it will automatically upload it to your YouTube. Are your video channel okay with all the metadata? One stop shopping. One step. Okay. So it's pretty cool, and you can control and say, What size is it gonna be? I want to be video 10. 80 p. As you see four k is great out because my main timeline wasn't four K. Why should I upload now? If I did four k, I could upload it. It's gonna play back four K. And then, of course, those services will create the smaller versions automatically once you uploaded. Okay, so this is actually pretty cool. You come to these settings so you can go through, gives you a sense of what the's are. But I want to show you how you can take a little bit more control, so that's simply export. But there's an other other option. You can either get it down here, add destination, or you can get it in your preferences under export destinations. And as you can see, I'm gonna zoom out just a little bit. These are the ones you just saw in the list, right? I can add any destination I want. So if I wanted to create a custom one, I can add a destination. So let's say I wanted to do Ah ah, Blue Ray DVD or one of these other websites. I can go ahead and I congrats that and say, Okay, I want to create a blue ray, and now that becomes an option. I can also rearrange these because maybe I do YouTube all the time. Just want that up on top. And maybe I never do DVDs. Okay, So I can go. I can, As a matter fact, I can go and probably delete that. And I don't have to be distracted by DVDs, so this uses the defaults, but I could make custom ones here. You know, I don't have to go in and change things all the time so I could do one of two things I could duplicate something. Have a new master file, and this new master file is going to be different. I wanted to be an h 0.264 video and audio. And that's gonna be that version. I'm gonna call this master H 26 former. I'm gonna put the dot in there. And now if I want, I can do a full one, which will probably be my progress. But with one click I can do that. I can also make this my default. When you're exporting. I mean closes for a second file share. Master Command E for export. So right now, the master file is the default. Okay, I didn't mean to click that. Gonna go back here under my preferences. We have the export, and what I want is I want this new one to be my default. I right. Click on it. I make that the default. Now, when I hit command E, it sends out the one that I always want to use, but done yet the reality is I have a client and they want three different versions. They want an archival version. They want a web version and they want an email or a smaller version so I can go ahead and do something pretty cool for my destination is gonna add a destination, click on the bottom. It shows me all my options, and I'm gonna create what's called the bundle. I'm gonna grab this bundle, even put it up top. Ah, bundle is a container of choices. So in that bundle, I can say you know what? We're gonna extend out a file. So we'll put that in the next board file, and I go ahead and to find what I want that to be. That's gonna be an 8.264 I'm also going to add another destination. I want a YouTube destination and it's gonna ask me more my sign in stuff so we can just do it automatically. And then I can add the default settings here. So I want to be 10 80 automatic, remember, Always, like better quality and you can changes. But these are my default ones. So we'll do this as private, and then we can put the category. And then I could even add one more to go back to add destination. And maybe I also want to upload it to the meal and again log in and different options. So this is the cool part. My bundle is there, and if I wanted to share directly to the bundle, I could go ahead and select it. But not only that, I'm gonna make it. Might default. So now when I hit Command E, it's going to do everything inside that folder. It's gonna make me three versions of my show with one click. OK, so I'm ready to go. All I would have to do is file share, default. There's my bundle in his modified. The only thing I didn't do that I would do is I might name that bundle because I might have bundles for different purposes, different clients. So this could be, you know, this is my bundle for the people of National Geo. This is my bundle for, you know, Major League Baseball. Who knows what it be so I can have these presets, and I can fill it up with a variety of ways to compress it. If you ever need to get into really mawr detailed compression, you have a client that has a specific requirement that you need to meet. If you have compressor, it's a $50 application. I talked about it before. You could choose that as a destination. Let's go ahead and under share at the bottom. I can jump right to those up preference presets. I could have a compressor setting, and when I click on compressor, these are the compressor ones that are built in. It's actually less than there should be, because compressors on on here. But I could go in select something that I designed and use really can compress it anyway. I want on. It's a pretty powerful program. If you find you need that, it's it's it's great $50 deal, you know. And it's an APP thing. So it runs on five computers. Think of that 10 bucks a computer for, ah compressor that you know, this was big dollars 10 15 years ago and it's a simple is that so I can share it. I can have it pop open as matter fact. The other one finishing Pop Open yet did was in the background. So there's my final that we put out. I'd watch it and I'm I dancer from Crimea E So I hadn't fixed the audio. Yeah, you see the idea. You watch it. It's good. And you knew where you saved it because you remembered. Now we didn't remember what I usually do If once it's opened, if you right click on the head of any document, it will tell you the path where that document ISS. So it's like, Oh, yeah, I thought in the Documents folder, so I'll click on that. It's like, Hey, I found where I put it. How many people in the room have say something and have no idea where it was afterwards. Yeah, yeah. If anybody doesn't raise their hand, they're lying and they have to leave. Okay, Are they Have you ever used a computer? So that's as easy it is. Just share your documents, and it's very powerful. And once you kind of get used to it, you just go. It's the easiest thing. So we have that done. I do want to point out a couple things I mentioned. I talked about markers. So if I want to put chapter markers in here in this in the timeline in my project I hit the M key to create a marker, and I hit the M key twice to now. Name it. So I did it twice. It opens up this box minute. Call this, um, Anna Open. And right now it's a generic marker for like, if I wanted to take notes, if I wanted to be a chapter marker, I'm gonna hit this little button. It's gonna turn orange. OK, I'm done so I can go ahead, put chapter markers in, and when I exploit either a quick time movie or to a DVD, it'll have that little drop down that they can click and they can jump to different areas, so that's very nice feature. The other thing I pointed out because I did have some longer takes so I could pick a range here. We're gonna hit the option key so I can just grab. That's a project, so I can't go through that May grab clip. Let me get another projects folder. That would be a smart way to start this. Here we go. So I want to export just that section. I grab it. Selected share file. Now, I've just taken out a little piece. This is useful for two things. One I could do a part of a clip. Or maybe I have a 60 minute show and I just want to send out maybe, like, one or two minutes to show somebody what's happening. I can market in an out point in my timeline. We know this was one hour, one hour, one minute, 10 seconds. But if I go down here and I market in point to here to an out point and I say export, first of all, I'm gonna select that I'm gonna hit control D 16 seconds, One frame. Let's go and see if we export that going to do this as a master file h 10.264 with a preset go down here, zoom in 16 seconds, one frame. It is only gonna pull out that one little section so you can put out smaller pieces. So don't just think that the share function is for a finish. Oh, you can do that to do break down clips into smaller versions. If you have one long take and you really want to just archive small chunks, you can do that. It's a waiter. I sometimes cut things up before you know I have clips and we talked about that. If the clips on your hard drive you have to bring the whole clip in, you know, if it's on a camera card, you can pick segments of it. But if you have 1 60 minute clip of maybe a concert and there's minutes in the middle where they're on break, but the camera is rolling, I would probably go and open up that whole clip in final cut, chunk it into two sections without that middle piece and re exported, and now work with that because why do I have to have that middle stuff? It's just gonna eat up space
Class Materials
Bonus Materials with Purchase
Ratings and Reviews
a Creativelive Student
Wonderful. This is the first time I've seen any of Abba's classes, and he's a great teacher. I've been watching the live sessions for the past few days and have picked up a ton of great tips that will indeed speed up my workflow in FCPX. He's a great teacher, and does a wonderful job of setting people at ease, ie. where he says things like, 'there's no trick questions', and times where he will click on something wrong, then he'll go back and show his mistake (pointing out his minor mistakes are actually a beneficial lesson). In all, wonderful wonderful wonderful. Thank you!
Lara
Fantastic teacher. I enjoyed every video, super worth it. I've been reluctant to jump into FCP X since it got upgraded from FCP. Now I feel confident to work with it again. Seems pretty self explanatory, but I am glad I watched the course. Abba covers pretty much everything you need to know. I also loved his personality, made me want to learn more each day.
Alan Pole
Absolutely brilliant. Abba gets to the point, is clear, organized and articulate, and lays it all out in a manner that quickly brings your confidence level from zero to hero. Highly recommend this to any photographer who wants to blog, build ads, or include video in their offering. I feel like an amazing new world has been provided to me. Thank you!