Lessons
Day 1
1Introduction
18:50 2Optimizing Your System
11:30 3The FCP X Interface
43:20 4Importing and Organizing Media
1:05:14 5Projects/Timelines
43:06 6Working with Clips
37:22 7Editing Audio
1:00:09J and L Edits
15:49Day 2
9How to Dissect an Edit
1:24:19 10Let's Edit Something For Real
1:18:45 11Introducing Music
1:18:56 122:45 pm - Audio Mastering
1:22:18Day 3
13Introduction
05:14 14Color Tools and Effects Part 1
1:07:44 1511:00 am - Color Tools and Effects Part 2
1:07:44 16Effects and Titling
1:17:04 17Exporting
47:49Lesson Info
The FCP X Interface
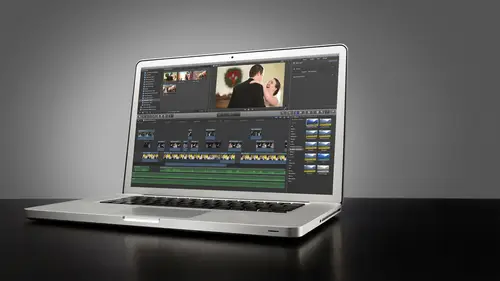
What you're seeing what you should be seeing on the screen right now is final cut pro ten as it will appear when you first open the program and you've really never used it before, okay, with the exception of a couple different things but it's not important. Okay, so what I want to do, I want to take the rest of the last forty five minutes of the segment and walking through what you're seeing here on the screen just so you have a job. And this is what I spent three days doing, no video clips, just comic going through and studying each of these functions and what what they're all about. All right. So even though it looks complicated were really only dealing with three windows here, this window up top, including this little sidebar right now is this called the event library. All right, where my mouse is here in this lighter gray area, this will eventually become the event browser. This is where our media we will see our media, all right, the clips that we bring into our events, the event ...
libraries where our events are stored. Okay, you see, here I have two hard drives. Mac hd is the main system hard drive. This is where the application itself is being run and operated from. We don't store our media on this drive there will never be events on this drive by default. If I just treat us down final cut's gonna automatically create one event on here. Why final cuts a diva? It has to have at least one event on the route hard drive. Ok, I don't know why it's just the way because you know what it is. It wants us if we go in. If I come out here in the finer finder and I click on mac hd and I go into my users movies folder it wants to have a final cut events folder there by default. Alright notice how there's no final cut projects folder. Well, we haven't created any projects yet. That's. Why it's not there, but by default if you just treat down your mac hd, they'll always be an event. And the way the program's configured right now it's renaming the events new event and then the date. All right, so we don't need to worry about that right now. Where I'm going to be creating events and working with media is on my work. Dr this is where I have all of my media. So if I were just to click the route hard drive here when it's his work drive, all of the media that I have on this drive let me zoom out here so we can see all the clips in full all of the media is just showing the every clip, every video, every audio clip every graphics file that's on the hard drive okay, if I treat down this will see all the different events that I have on the hard drive. Now I have five events here. Each one of these holds media pertinent to that event, okay? So again, just to reiterate events or we'll be sore media this is where our media is stored. All right, so the event library keeps track of all that if I were to connect another hard drive to this computer that has media on it right away final cut would populate that drive into this event library and I could click it and it would show me all the media on that drive case we have the event library we have the event browser I'm gonna move down here into this bottom window. The bigger window down here right now in the state that you're seeing this window is called the project library it's very much the same thing as the event library. This is just dealing with projects now what? Our projects anybody time line's good that's the best that's the best way to put it because it could be confusing to say while projects well isn't the whole thing a project yeah, you could say that I'm working on this project, but yeah, projects are timelines ok? So if I were to click on work drive here doesn't show me anything I have to treat it down and that what I've done is I've created folders, but if by default you wouldn't see folders, you would to see projects like this, okay? And these are all different timelines that air using media it's media that I've edited from my events. Okay, I like to keep my events named the same thing as my time lines that are associated with it okay, just keeps it just lets you be a little bit more organized for me helps me keep track things a little bit better, but these air projects and now that we're in the project library and it's just showing me all the projects that I have on my media dry now I can just click one of these and I can rub my mouse over this way. This is called skimming skimming is one of the is a very powerful creature from a couple of ten allows me to just run my mouth. I'm not clicking, just running my mouth over video or media and it's showing me in this window up here what it is I'm seeing and I can click on any of these and just kind of see what they are all right, so we have lots different projects is that the project we're going to be working with over the course of this programme. We're going to talk about new events in new projects too. All right, so our project libraries located down here I do have these sorted up into folders which you can just create by coming down here clicking on new folder and then dropping the project into it. I just want to open up one of these real quick and just show you the second stage of this window if I just take one of these projects and double click it it opens it up. Now we are viewing the project browser that were the timeline. Okay, this is the timeline. So now we're seeing what we're doing with our media from our event down here. Okay, so this is just a time line you can see I have some video clips on here and again, I'm just running my mouth over and skimming very basic stuff. All right, so let's, talk about this window a little bit more. If I come back down here to the bottom this little movie really type thing and fight zoom in here you'll be able to see a little better this little movie real thing here, if I click that it's just going to bring me back out to my project library all right, so if you need to get back to it this whole list right here just click on that little really take you right back down here on the bottom next of a little real thing we have another little icon this is the timeline index and I'm not going too much into this yet, but I just want to show you what it is if I click this it opens up a dialogue here on the left hand side and in this panel it's basically a list representation of all the clips in my timeline so you'll see if I click on a clip here and you look over here to the left it's actually going to show you where that clip is and its position time code on the timeline all right there's a lot more that goes into this window we're not going we're just scratching the surface. I'm not going to go into that a whole whole lot yet but that's how you'd access the timeline index elsewhere in this window we have a scroll bar down here on the bottom this allows us to navigate our timeline alternately I'm using a wheel mouse here if you have a magic mouse, you could just run one finger over the top but it's run one finger over the top I can navigate laterally or up and down on my timeline just an easy way of navigating the timeline over here on the bottom right hand side are zoom controls so I can simply just museum at a little bit I can simply distract the slider and zoom out zoom into my video clips or any media I have on the timeline very helpful this can also be accomplished by using the zoom tool by clicking z on the keyboard and zooming in you can do that we can click to zoom in or we can use keystrokes there's all different ways to do this just depends on your comfort level we're not gonna get too far into that right now feel free to throw out your favorite method in the in the chat room yep it all just you know it's all personal preference when it comes to that one great thing I love is if I'm zoomed all the way into my timeline here and I'm looking at my clips in this film strip view is really close up I can just hit shift z it will fit all the contents of my timeline to the window all right? So if I'm zoomed in here again let's go all the way in or you know, sliding however we want to do this and I just want to back out so I can see my entire timeline shift z I'm going to use that a lot throughout this program so you'll really see when we get into more complex timelines how I'm navigating around quickly and that's the key to working fast and efficiently on this timeline. All right, the last thing over here in the project timeline, if I zoom in down here on the bottom is a little switch icon, you're going to find this little switch icon in all of our major windows, and I'm gonna cover those on a little bit more depth in a second here. But if I click that little icon it's going to bring up some clip appearance options here is now I can choose how I want my clips toe. Look, if I want to see my video clips on the ship z out again so I can see them all right, if I just want to view them as audio only and I've disabled the audio on these clips, so you're not really seeing the way forms here, I can click this one. This next one here is going to give me small thumbnails of video image is the next one is going to give me larger ones. This next one's going to give me a fifty fifty representation is going to give me a nice split between the audio and video this one's going to give me all video thumbnails, and then this final one over here is giving me just a clipper, you know, a line representation of my clips. Okay, so clip appearances, depending on what you're doing in the timeline, could be helpful to kind of give you a better visual reference of what you're doing. We can also adjust the clip height just by selecting the timeline and then dragging a slider which will re size these however, we wanted to view them. So if I want larger clips, I would just slides it up but want smaller clips, I get a size it down. Okay? Connections. You see a little box here, that's a show connections, connections. If I'm just going to demonstrate this real quick if I drag a clip up, put it on top of something. This little lying right here is a connector. Okay, it's just telling me that this clip is connected to this clip, we'll get into more of that later. We're not going to touch that at this moment here, a moment in time, okay, but you can toggle that on and off whether or not you want to see the connections by clicking that button and down here on the bottom, we can determine where how we want final cut pro tend to display the names of our clips so we can see just the clip name or if we have other metadata applied to our eclipse weaken view those by selecting these options down here okay, so now that you've seen the switch in the project timeline window, I want to come back up here to the event browser, and I just want to open up a little bit of media in here, just grab on. Here we go, and I have a slider down here on the bottom, which will allow me to see mohr of each of these clips, you'll notice that these video clips are all separated, you know, buy box, they're all just each one clip is one box well, that's giving me a representation of a very long clip, so, you know, I might be looking at a clip here that might be several minutes in duration, but, you know, that's going to make it hard for me to go through in a very accurate scale to really get in there and see what each frame is doing or what you know, just the second is opposed to post a couple minutes so we can use the slider down here to kind of zoom in on our video clips and it's just going to kind of give us more of a zoomed in thumbnail view, and you'll notice that if a clip continues on from one line to the next, you're gonna get this jagged, serrated edge that just tells you there's more to that clip so we can zoom in increments of half a second, one second two seconds five seconds ten seconds thirty seconds all the way zoomed out until we're too seeing each individual clip as its own little item in there there's a switch icon here that allows us to adjust the clip height clip size in the event browser and we could also toggle whether we want to see the audio way forms or not. All right, so again, just trying to familiarize you guys with the different different things here we can also in our event library sort these clips by in different methods ok? So if we want to see instead of a thumbnail view or film strip view we can click this button. It will give us a list view of all of our media located in the event browser okay? And I can just toggle through those and you see a filmstrip representation of it up here. Double back to filmstrip mood right here or icon mode over here in this little gear box, we can now group our events over here in the event library by certain parameters weaken group in which we haven't group right now is by disk, so we're viewing them by hard disk, which is these right here okay, we can also group them by date if you want to we can show date ranges so if you had an event that was created over several days yeah, you're kept importing media over over time, it'll show you ranges, and we could also group are clips and different methods to weaken group these clips in the event browser by all these different parameters, if we have really number's assigned to them or seen designations or just by the length of the duration of the clips, I like to keep mine set by file type and the reason I like this because you'll see up here it says, quicktime movie we form audio png ease. This gives me a visual representation of all the different types of files that I'm working with in my event, and this just helps me at a glance to know, ok, well, I just wanted to I just want to see my video clips boom, I can knock this down, and I'm now I'm just looking at my quick time movies, all right? Or if I just wanna look at audio clips that don't have video associated with them, there they are final cut pretends so powerful with organization and this is just scratching the surface, all right? But we can weaken, adjust different filtering options right here in this dialogue, this little doohickey button right here on the side just toggles whether or not we want to see the event library. Very simple. Okay, so we've covered the event library, the event browser and let me show you one more cool thing in here while we're at it. If I'm working with clips here in my event browser, I can see them over here in the project window or the viewer if I'm down here in the time line and I really want to kind of see what I'm doing down here and work with video clips appear, you'll notice that it will toggle back and forth, which is nice, but there's one more thing we can do, we can enable the event viewer and that's going to open a second window for us, and this is very much like a traditional video editing program where we now have a two up display, and this now lets me view my video clips here in my event browser while also seeing the current frame in the project viewer. All right, just nice, it's. Just nice to have that option. It's a new option. It came with the ten points point six update. Just a nice thing to have. All right, so I'm just gonna hide the event viewer at this moment and that covers two out of three windows. That we're working with her here. The last thing we're going talk about over here on the right hand side. This is our project viewer. This is our main timeline viewer this is going to show us what we're doing down here in our timeline window. Okay, so you see, I have three video clips here and I'm skimming across them and you're seeing that represented up here in the project viewer if I wanna play back video down here in the timeline, I simply hit the space bar. Okay, he's going to play back my video and you're gonna see when one video clip ends in another one start to mix cut same thing right here. Cuts. Okay, very simple stuff I know of a lot of you are going way we get it, but it really is kind of important to see it all laid out in front of you. See, you have an idea, and especially for people who are new to the program, you can get a sense of how things operate. Okay, there's, some sub buttons up here in the project viewer. We have a play button here which basically does the exact same things. If I were to hit the space bar just gonna play back my video if I click that it's gonna play back my video, these two buttons right here represent previous edit and next at it so I can click either of these buttons it'll take me on notice that the play head here which by the way, I should probably label this this is called the play head this red line that you're seeing is the play head this is the play had stopper so this is basically telling me what moment in time my viewing and the skimmer play head is a sort of skimming through and showing me the frame that I'm representing by skimming okay, so you'll notice that the play head will move when I click previous at it and next that it just by clicking these buttons we can also accomplish this down here in the timeline window by pressing up and down on her arrow keys on the keyboard. All right, so I'm basically depressing up and down and navigating to each of my different cuts here. Okay, so what else do we have in this window of the project viewer? We have this little neat button over here that kind of looks like a architectural icon that is the crop button and we have three different functions located here in this dialogue we have a crop feature which allows us to crop our image in several different ways we have a transform option that allows us to do scaling and moving of our video clips, and I'm just going to use command z to undo and then we also have a distort feature, which allows us to do side kind of three d distortions and just skewing of our video clips. All right, we can disable those just by clicking them on and off. And then finally, over here on the right lower side. We have a full screen button. So if I want to play this video full screen, I don't have to start playing it and then hit the full screen button. I could just hit the full screen button and it will play my video back in full screen. Good stuff to have. All right, so up here on the top, last things, we have a percentage dialogue here. They don't just show us what percentage we want of you. Our timeline viewer window at or project viewer. We can resume that in however you want. I'd like to keep it on fit. Just fitted to the size of the window. I can resize my windows and it will size with it very, very handy. Okay. And you know what I really like about this program? Legacy version is ah, final cut seven. All these all of these different windows were independently floated. So you can close one and the other one's would still be there, and it was it would get crazy sometimes if you had a lot of different timelines open and you lose one and you'd have to go into finder and, you know, go searching for and then re maximize it in this case, final cut pro is one solid window, alright, so it'll just stay all in a nice little package there, which is really nice. Ok, up you at the top, you'll notice we have another switch. This gives us some parameters to work within our project viewer. If I drop this down, we have some options here for additional windows. On day three, we're going to work heavily with video scopes by clicking that first option. Video scopes will open our video scopes window. What you're looking at here is a way for monitor there's all different types of video scopes. We're going to really get into depth and how to use those for color, correct correcting and grading. All right, so I'm gonna hide that come down here, owned by the way that could be accomplished by command. Seven on your keyboard will open your video scopes on and off, which is very helpful when you're actually doing color correcting in greeting. We have a show angles button this show angles dialogue is for when we working with multi clips for working with wei have four five different camera angles and we want to switch him live as they're playing back the show angles dialogue will open up a window and show us different but you know all the different camera angles that we have okay show both fields this option right here if you're shooting dslr video or any of today's modern uh, progressive frame formats you won't really use this is for interlaced video old four eighty type video had an interlaced signal and doesn't really matter you're never gonna use it let's just put it that way. All right? So don't worry about that it's probably something you're never going to use we can view the different independent channels of our video here have you read only green? Only blue on lee and the represented by gray scale because that's how color channels are represented in visual form we'll get into a little bit more of that later but you can toggle those on and off there and then we have this nifty little overlay feature here on the bottom called show title action safe zones and what that's going to give us is a two line overlay on our project viewer that shows us where action is safe on most broadcast tvs okay, um anybody here working broadcast do anything cable work, even if you work it let's see it produce a video for cable like a cable tv commercial, and you give it to them. You'd want to make sure that all of the action, the important action happens within the boundaries of this outside box, any titles or text that you put up on the screen you'd want to keep inside the inner box, but this just gives us a visual reference of where things are in the frame, very useful. I kind of wish they had a grid display, which would you tell us where the third of our images, which you kind of give us an idea of how to frame things up and compose, which is nice. All right, so we basically just walked through the three main windows of the program, and I'm just going to kind of back out here and get to zero in terms of just the look of it because we're going to focus here on this middle bar. All right? We're gonna focus our attention here to the toolbar. Call it's the toolbar. Lots of different things happening here. The first thing you're gonna notice, we're gonna start over here on the left hand side this button right here looks like a filmstrip of the little arrow this is our import media button. Okay there's a lot of different ways of final cut pretend will allow you to import media all right? We can click this button and it's going to open a dialog box allows us the polling media from our hard drives or many different sources okay, we're going to get into that more depth in the next segment but for right now that toggles that on and off we can also use command keyboard short look, man, I got to talk with the dialogue down here on the bottom or or next to that I should say let me just actually put some media here just so you can kind of see he's illuminated these are ratings button it's, the little green star, the little stroke outline and the ex these air ratings buttons what these buttons allow us to do and we'll get into this with more definitely later these allow us to raid our footage this green star will let me a sign of favorite tag to eclipse so let's say I like this portion of a clip I really want to use this and save it for later I can just highlight the portion of that clip click this little green star it'll put a green line on it just to mark it is a favorite and then I can later around his view on lee my favorites okay if I want to un rates something so let's, say, I favorite, and I wantto unf avery, I could just click this little box that will remove the rating from the selection, and this red x will allow me to reject a clip or portion of a clip. Now, the nice thing about this is it won't delete the clip, it'll just market as rejected. So let's say, I have a shot of vanessa, and I want to use the first three seconds, but I really don't need the three other takes that were after that. I could just mark her best part as a favorite and just reject the rest if I wanted to get into more of that later, but these buttons right here, there's also keyboard commands, shortcuts associated with this, and we'll get into that little bit later as well. This little key icon right here is a very, very powerful feature of final cut pro ten you will be using this a lot. This is the key word editor what this button does bring up a dialogue that allows us to assign tags and key words to video clips or any media, for that matter, so weaken, sort and organize our media just by giving it a name or or a title or, you know, just keywords associated with content, so this is a picture of this is one of my editors, axel we're gonna get to see my whole crew represented in some of this footage it's kind of fun this is actually taking a water gun shot to the face and if I wanted to say ok, this is actual like you just type in the name axel here and it will sign that to the clip that I've selected actually had another wrong clip there, but basically we'll get into this more detail, but this is the key word tag window you can toggle that by clicking, get on and off or buy keyboard shortcut command. Kay ok, all right, moving right along down here next to the keyword command, we have editing options thes three buttons all allow us different ways to bring media from our event browser down onto the project timeline. All right, we'll get into the functions of these later on, but these three buttons will allow you to do that. There's also options in here to bring down both video and audio together video on lee or audio only and when we get into bringing clips down onto our timeline for editing, we'll get into that as well. Okay, this little zoom icon right here is actually not just assume icon if I open this panel, these air, all the tools that we have at our disposal to work within the project timeline or anywhere actually in the event browsers well, lots of different tools were going to go over each of them in detail later on here in the middle there's actually three things happening in this window this is the background tasks window it's also way timecode representation and there's some audio meters in here with three different things happening. The first one on the left hand side is a background tasks window toggle this little progress meter here will actually give you a representation of what final cut pro tem is doing in the background all right, so it's rendering video or if it's importing footage that you've asked it to import or bitch trans coding media from one format to another you're going to get a visual representation that right here in the background tasks window if I click it, you'll see we have several different options with several different displays in here one for transporting an analysis, importing media media management rendering and sharing all kinds of stuff happens in the background a final cut pro ten that's where that will be shown in represented in the middle here we have a duration timeline or time code display this allows this shows me where I am in my timeline if I were to open up one of these timelines like I had before, you'll see that as I skin my play head through this footage is giving me a time numeral the designation of where I am in the timeline this is also pretty powerful because I could just type in a time here by typing oh six one five it's going to bring me to that point the timeline if I type in o one o it'll bring me the one second so this is great if you have a client you've delivered a video too right? And they say you know what eight seconds is the problem walking this type o eight o go to that and I'll bring the right to that point all right pretty powerful stuff pretty standard for video editing programs nothing new to the world of video editing right there. All right, the last thing in this middle window our audio meters if I were to play back the clip that has some audio these do not have audio so let me go out to a clip that actually has some audio you know I'll just play something back from right here you can kind of see you'll notice that has this place back she still is you're seeing an audiovisual representative representation of small wouldn't want with that foreign actually sound mix lookit it's gonna open up a bigger representation right again the way ok enough with the water balloon stuff all right so that's the middle part of the tool bar over here on the right hand side we have a lot of different stuff happening over here and I'm gonna close my audio meters so we don't have those in the way all right? So each of these performs a different function and I'm just gonna kind of breeze through these this little magic wand tool with a little rainbow pixie dust this these are our automated features that final cut pro ten includes monaco pro ten will color balance for you it'll match color from one clip to another it'll match audio from one clip to another it'll do all these great things matching clips to other clips in all these magical things the problem is half of them don't work very well okay um so you do have these options for balancing color match color so let's say you have video clips that are really poorly color balanced you can click, you can select them and quick balance color and final couple actually balance the color for you it'll be up to you to decide whether or not you're happy with the result. Okay, generally a lot of the times I'm not so I don't do a whole I do a lot of my color grading and stuff manually so we'll get into that on day three but these are the option to do that here we have this show color board option here if I click this they're going to notice something happened over here on the right hand side this color board has now opened this is where we do all of our color correcting and color affecting and final cup per ten really powerful stuff. We're going to get into it in much depth, but I'm just gonna talk all that off for now. Also in here, we have auto hands, audio and show audio enhancements. If I click that window it's going to show me all the audio tools that we have to work with forgiven audio clip. All right, moving on this window right here. This panel is our re time panel. This panel will give us options for slowing down and speeding up video clips. Lots of different things happening here. We can make clips playing reverse, weaken speed, ramp them so they go from slow to fast too fast. Too slow. Lots of different things happening here will touch on this a little bit later on and then these seven windows here. Okay, these seven icons are all part of one conglomerate called the media browser. Okay, lots of different things happening here. We have an effects panel if I click this first one it's going to show us all the built in and plugging effects that we've installed both audio and video in final cut pretend this next window is our photo browser. And it likes to you know, this is an apple product so it likes to work with all the ai programs I photo I movie, you know? So itunes so what it's doing here showing me all the photos that are in my itunes library all right or anything that might have been taken with a photo booth. So any photos that you have and if you're using the eye format of organization you can you can browse in here little musical icon will take us to itunes so we want to import media the music directly from itunes or video directly from my tunes in the movies weaken import them right from there this is a transitions dialogue all the building a lot of these are cheesy transitions transitions built into final cut pro ten can be found right here in this media browser there all broken down into categories as well we have a titles browser final cup pretence pretty cool it gives you a lot of can titles sort of custom or, you know, just template titles that we can work with and customize however we want we want and these were all found in the titles browser and we could just drag me down to our timeline and work with him later on the next head is our generators browser and this has some really useful features to it which will probably explore a little later on final couple ten comes with an extensive library of video generators and sound effects and all this kind of stuff, which, by the way, sound effects could be found in the media in the music browser under sound effects. There's a couple different libraries in there, but our generators browser has some great things that we want to create shape masks and solids and he's a little bit more advanced features, but they are useful nonetheless, and I like the generators browser because it has a lot of useful features in the last little tab in our media browser conglomerate is called the the themes browser themes are all different types of graphics and full page graphics, lower thirds things that are meant to give things and overall theme. So if you wanted you wanted your video, have all a theme of, I don't know this envelope here, it's got all different graphics that are related to that you could tie into that I don't use any of this stuff. To be honest, I don't use any of the themes that sort of I can look it's, not what I'm looking, you know, that's, not what I'm going for, but there there nonetheless, and if you happen to click on it, that's, what you're going to see if you open that. This little light so when we first open the program, this window was not visible but I'm gonna tell I'd wait for you right now because it's a very key window that we're gonna be using a lot called the inspector all right? Our inspector window is the information source of everything that we're going to be working with final cut per ten is a monumental piece of panel in the program and we could just talk going on and off by clicking the inspector window. What it's going to do in the inspector windows? Show me any information related to anything that I click anywhere in my events or anything. So if I click on this one clip right here, for example, it's going to show me a video tab on audio tab in information tab and a share tab in the video tab it's going to show me information related to video parameters color anything I've done to it if I click one of these clips down here on my timeline it's going to give me an option to open our color board it's going to have options for transforming the clip, moving its position, scaling it up and down all these different things air accomplished right here in the inspector window is also crop stabilization distort, rolling shutter all these different things that we can do to our video clips can be found in the inspector window we also have an audio tab that deals with volume channel configuration any audio effects that we may apply to our video clip or audio clips khun b dealt with and changed the have the parameter set here in the inspector window. One of the most powerful things about the inspector window is its ability to showyou metadata if I click on any given clip in our event browser and I click on info it's going to give me a world of information about that video clip and there's so many different views that we can choose to get this much information as we need when you record a video clip on the any using any camcorder dslr camera it's going to embed metadata and metadata is just information that's attached to the clip that gives you information about that video clip. Well, the inspector window is going to tell you everything you need to know it's gonna tell you the duration the kodak in which it was encoded at its going to tell you if you assigned a camera name to it. What the camera name was information about audio it's going to tell you what format the video clip is in? We haven't really talked about trans coded media yet we're going to do that in the next segment, but it gives you information about that it's going to tell you what clip what you what ventura clip is associated with so if we have video clips down here on the timeline, we want to know what event that clip is stored in because maybe we have multiple events like we do here if I just click on this it's going to tell me this video clip, rob is associated with the color correct and grade event, all right, really powerful stuff, and I use the inspector window for most of the feature most of the functionality that I worked with in final cut pro tem so that's the inspector window, I want pause because I just bombarded people with information, you know? We're gonna have two different types of audiences right now, audiences that no one they're familiar with all this stuff in there it's going to get to the next section and then ones that where that was just a crazy amount of information, uh, to grasp it are going to probably going to rewatch that, but, yeah, yeah, now we're probably a good time to pause for a question from joey bordelon about fusion drives says what is rob's thought on fusion drives? Should you break the drives apart to have two separate drives? Are leaved infused that's all personal preference man he's, talking about rate configurations and drives that are linked for speed or redundancy? I like to read zero ora raid five configuration if you're not following me, don't worry basically just you can configure hard drives that have, like let's say you have enclosure and has multiple hard drives in it you can strike them toe act either as one fast, faster drive or as a drive that will back up data to it. So if one of the drives fails, you have exact mirror back up it's all personal preference I prefer read zero red five for speed so I'm getting more speed off my drives because I have things stored and backed up elsewhere, but if you have one dr let's say you're doing a same day edit on a wedding you'll one drive and that's the only copy of that footage you might wanna let that dr b a red one so it's redundant and this way god forbid it goes down, you still have all the data, personal preference, a lot of things that were going to cover in this course really come down to personal preference I'm going to show you my methods and what I do, but give me a lot people go, why do it this way? Is there any benefit or oh our dinner condo that you know, it just all depends situation, but we'll try toe to address those again, which again is a reiteration that head to the chat rooms, creative live dot com forward, slash chat and just chat about your different methods. There are a million ways to interpret I think this program and we know that you guys are out there and have your own opinion, so you can chat about it. Frank p s when I have a lot of events showing in the top left window, is there a good way to get rid of them from that window without moving to the trash? So I don't lose them for good, okay, that's a good that is a very, very good question, okay? So over here in the event library, you'll see that I have six of it or five events each of these of of events are pertinent to the program I want teaching you hear over the next three days if one of these were not let's say one of them were a event it's just a project I'm working on in my studio for a client. I didn't really want to air their dirty laundry or their video clips here on online, I could hide that event using a program called the event manager. Okay, good downloaded in the app store it does cost I think it's like five bucks or something like that, but what event manager will do? And I don't have a copy of the program on this consistent, but it'll allow you to hide the events you don't want to see on your hard drive because remember any hard drive that I plug in while final cuts running? Or, you know, if I opened monica it's going to show me all of those hard drives and any events that are on him, it's not going to be discriminatory is going to say, well, which events do you want to see it's just going to slide out? Show me everything that's on there that could get messy and confusing, so event manager will allow you to hide them temporarily, but if you let's say you do use event manager to hide certain events and then you unplugged that drive from your computer and then go put it on my computer and I don't have a event manager installed, I'm not going to be able to re show I'm not going to be able to enable those hidden. I'm not going to see those those events that I've hidden. So while it's good, you want to make sure that if you're moving your media drives from terminal two, terminal thatyou have event manager installed on all three great um and this was from a little bit earlier this morning photographic elements asked what do you do when the heat it is too big to render a project? I've been moving stuff out, but they said I think you just said not to do that not sure I quite follow he's saying that the project is too big to render is that what you say you're rendering is the whole thing we're going to get into what I would say at this point is check your system configuration I mean faster systems going tto handle rendering a lot differently. One of the quick fixes I find is if I run into render issues or a final cut pro ten is giving me bad renders or for whatever reason, there was a dialogue, but if I select the project here in my project library and let's say I have rendered files and see I've rendered video in this project they're stored in the final cut events are velicka projects folder all of those rendered files, every frame of video becomes a render file. Basically we're a part of a render file on does things get corrupted fairly easily? So if you wanted to just restart without losing your work, obviously, you know, not backtracking any of your editing, but if you just wanna wipe out those render files and let final cut redo it to maybe iron out any problems I can come up here to my file window go down to delete project render files and it'll wipe out the render files and then I could go back in and let it rear ender and that's sometimes solve some problem so yeah, I've heard a lot of people say that if they have really long timelines like two hours, three hours, four hours and they're trying to render it all out there running the problems I would say go with a faster system go with a beef here system that can handle that much more data remember I mean final cut pro is an application it's not a supercomputer it's all it's going to be limited as to what it can do so the more resource you give it to work with meaning more ram and more processing power the more success you're gonna have with problems like that I have a question from one of the students yeah, yeah I was just wondering for people who might have the option of multiple screens is there a way to yusup that's a great question and this is a great time to actually go up into our preferences menu appearing follow copper tin man that's a good segue way thank you like alec questions that leaving segways if I just come up here to my final cut pro tab within the application click on preferences this is a place to optimize your system even further to make it perform maybe a little bit better for you, there's four distinct tabs appear at the top of our preferences panel the first this editing on going to get to your question the second. So the first thing we have here is time display. This is going to display our time units in hours, minutes, seconds in frames, which is standard for video editing. We have two options here for timelines are project timelines. We can either show detailed trimming feedback, which means when I trim clips on my timeline again, something we're gonna get into the very near future. It'll give me more information about the time and just detailed information their position play head after edit operation. We'll get to that inspector units. We're looking when I look over here in my inspector window and I move a video clip it's going to give me a range of pixels or ah, readout of pixels like you're gonna move this, how many pixels air? You know what range of pictures you want to move it that's where we set that audio weaken display, whether or not we want to show a reference wave forms meaning on our video clips that we want to see the way forms there or not uh, still images if we import a still image into the program, how long do we want that still image to be by default? If I drop it down on my timeline? Four seconds is the fault transitioning between two clips if I put a dissolve from one club to another one second is the default there? Okay, so playback your question wasn't going to skip down in the bottom here to answer your question if you have an external monitor that you want to hook up to your system so you have a dual monitor configuration of multiple monitors come down here to a v output, and if you have something connected via thunderbolts or usb or however else serial port it should detected in this menu and the model of that display should show up here and then you can, you can select that, and what it will do is give you options to move some of your windows over to that you could do like a extended desktop view or you could just drag one window over like I would drag over. When I worked with multiple monitor set up, I would bring over my project viewer this window here and dragged it over make it full screen, and I can watch what I'm doing full screen I think the program by the fault will actually put this over there for you, so all right cool so here were in the playback tab and I just kind of explained the a v output this is a really key thing here up the tops is rendering background render if I have this option checked anything I do in my projects any effects that I apply or any changes I make that require rendering final cut pro ten will do it in a while you know when the programme I stopped working final cut will start rendering basically it's background rendering but it really only does it when you stop and pause for a second so if I'm working in the timeline and I stop for a second to take a drink of water it's going to start rendering if I walk away to go use the bathroom come back it's rendering okay so it's doing its use it's maximizing my downtime to do things that I would have to eventually do later on in legacy versions of final cut so that's really powerful there are times you may want to turn it off and this is how you do it okay? You can use it you can designate okay after five or six seconds when you can start we're going to get into trance code this stuff this playback transport stuff in a future segment because that's really important by default though if you are new to final cut pretend this is the first time you're using it you're gonna want to set your playback quality to better performance, okay, we don't need to see while we're editing our clips in one hundred percent high quality okay, later on, if you want to check the quality of something, you can switch over to this but it's going to slow your system down considerably if you're trying to do all of your edit operations and playback real time in high quality, so switch that over to better performance that's a key thing? All right, we're going to get into these other ones. Also, one thing I would suggest if you're on an older system on and you're not sure whether or not final cut pro tennis playing your video back optimally, check these two boxes, warn when dropping frames during playback and warn when frames airdrop, do the hard disk performance this so if you play back something down here in your project timeline and it's, stuttering and it's not playing back smooth, if you're dropping frames meaning the video card and the processor is not keeping up with the real time playback, it'll warn you. Hey, you know what? I just wanna let you know we're dropping frames where the program might say, hey, we think that you might have a hard drive issue. And that's. Why the second box is checked it out. And if you play back and it's chopping, it drops frames, and the program analyzes it and thinks that thinks that it's, because the hard drive can't keep up. Remember, your hard drive spins unless it's a solid state. It'll tell you how you might have a hard drive issue so that's. Good. If you're if you're a little unsure about your system, check those two boxes.
Class Materials
bonus material with purchase
Ratings and Reviews
Crispino Dourado
I've been using FCP since 2013 or so I thought! Until I went through the lessons here and boy was I hooked on! I've learned a ton of stuff that I can use from this course! Really awesome course for beginners to professionals and a must for wedding cinematographers! I loved every bit of this course! Thank you.
Ryan Pierson
Rob Adams and Vanessa Joy are incredible speakers and thoughtful educators. In three days, they take you through the basics of editing theory and explain everything you need to know to dive into FCP X. Rob even details how to do advanced color grading at a pace that is clear and easy to understand. Without a doubt, this course has done more to improve my personal and professional use of FCP X than five years of experience working with video and audio. A+ great course.
Charlie
Simply brilliant! I had no idea where to start with FCP and even though I am now using an updated version... this course has been invaluable!!! Thank you Rob and Vanessa!
Student Work
Related Classes
Final Cut Pro X