Lessons
Class Introduction
07:18 2Create Backgrounds with Render Filters
28:19 3Autumn Background with Render Filters
08:56 4Create Fabric & Hair with Flame Render & Plug-in
12:08 5Using Mextures for Color Tone & Textures
15:44 6Build Water Scene
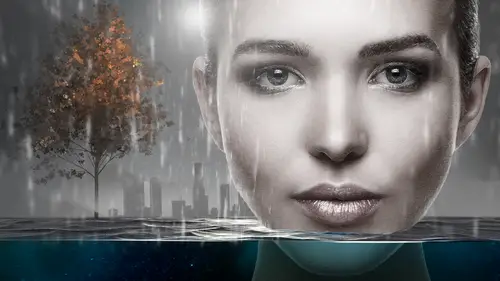
24:41 7Use Filters & Plug-in for Rain
15:16 8Gradient Maps & Motion Blur for Photographs
05:51Lens Flare with Filters
15:34 10Smart Objects Overview
12:56 11Oil Paint Filters
17:17 12Snap Art Overview
13:32 13Camera Raw Processing
13:46 14Alien Skin Software Processing
10:29 15Adding Rimlight & Glowing Edges
11:08 16Alien Skin Software Backlit Plug-in
17:07 17Filigree with Alien Skin Software
12:11 18Type with Alien Skin Software
15:04 19Create Environment with Alien Skin Software
08:46 20Logos with Alien Skin Software
06:54 21Bokeh & Details with Alien Skin Software
15:21Lesson Info
Alien Skin Software Backlit Plug-in
So, great, now we're gonna talk about some little more high dollar wow, little extra bits we put on top of things and some backlit. I love your backlit thing. Aw, thank you darlin. It's gonna be really great. And we're gonna investigate a little more on ParticleShop and then we're gonna talk about some third party stuff that you have not seen, we're not really gonna show, but we're gonna show you where to go get it and talk about work flow and buying some other things that might help that are cheap as chips. So, I think we get right into it. What do you say, you wanna start off? Yeah, yeah, yeah. Alien Skin, we're back to Alien Skin. They have a plugin called Backlight. Backlit. Backlit, that's right. We, like it. Yeah we like it a lot. So, let's... bring up... So, the idea with this is if you had a light behind your subject and took a picture of it it would, you would get all these light rays and to draw when it's drawn and drawn well, it's awesome. I remember there was a ...
fellow down at Paramount, did a comp and I was like, "How'd he do that?" He showed me and I was like, "I'll never learn to be that good." But with this filter you can just kinda plug-n-play. Well, I think that's how you get good, isn't it? It's when you don't, like you may not have the rendering skills but if you know where to get it, like which plumber to call... Yeah That's being good. Or if you know what you wanna do. So he showed me what I wanted to do and I just learned a different way of doin it, really. Bingo. So, am I as good? The end result is, yeah, it's as good, I just us different tools. Instead of doin' it Bingo by hand, I use this tool, which kinda does quite a bit for me. Started off with this ballerina shot and masked her out. I needed a selection. I'm gonna make a new layer... New... for backlight. And I'll load this holdin' down "command" and it'll give me that "marchin ants" selection. And under my "Filter", "Alien Skin"... "Eye Candy". You have this whole panel of choices. Backlight is the one I like. So, we'll check out 'Bevel', check out 'Chrome'. You showed em 'Shadow'? Yeah, yeah. Backlight's the one we're gonna have a look at now and I believe I just went with the stray dot here. You go basic model, the numbers are all over here. If you wanna re-create it, take a screen grab here. I believe you can start saving off if you have a favorite of yours that you've got just right and you wanna use it on a different selection, different file even, a different character, then I have gotten into that in the past, but for right now, this is good enough and then I can effect it afterwards too. Hit 'okay'... Now, one of the things, I wanna call attention to that's a little different how you're using it, so you made a selection first? Yes. That's the biggest difference, is he made a selection rather than working actually on an existing layer. I believe it's chewin away at that. This is when, I'm gonna tell a story about ya for a second, Larry. Tell em a story about me. This is when he became known as 'Filter Guy'. It was all about the backlit and logos and he was doing all this and we didn't know how he was doing it because he's in that back room with the rock 'n' roll music playing and this is how... You guys wouldn't come in. You were afraid of me. Nah, we were afraid. What? Yes. (audience laughs) So we have this backlight. Good enough as it is, I believe... I went in... And I just masked out this bottom. So it kinda, the light, stayed up on the floor and just stayed with her and then we also went back in, Lisa and took out, masked out some of the backlight so you can actually see the figurine. That helped it read a bit more as well. One of the comments I wanna make about this that I found for me, with a lot of the plugins, is if it didn't come out of the chute perfect, I'd freak out a little and go, "Ah, it didn't work.", and then instead of, "Well, honey, relax, mask it out a little." "You're fine, everything else is good.", I'd just mask the bottom tail in, yeah. [Guest] So, as I was, yeah this was a starting position and wasn't as big as I like nor was it as smooth as I like. So, I added two radial blurs to it as well. And what that did was smooth it out even further. Yeah, that was a good call. It expanded it, so radial blur is, what would you call it, zoom blur? On a camera, you would... Yes. change the focus. Now again, I'm gonna give ya props for this cause it wouldn't have occurred to me. What I would've done on this project is, I would've tried to change that backlit and argued with it to make it, make the rays the way you got it here and he's like, "Eh, it's fine, just change it a different way." Yeah So it's good to be flexible. So, on these "smart objects", these are all "smart filters". We can go back and revisit and change em again. You can also stack em, so I didn't stop at "Eye Candy". I said, "Let's take Eye Candy and do a radial blur." A hundred is the biggest number you're allowed... added a second one. Once I got to that... Again, it doesn't occur to me, right? So, "Oh a hundred, alright, well I was gonna, okay." Or maybe I would've blurred it or something by hand or smudged it and he's like, "No, just put another smart filter on it, you silly goose." Once that first backlight was happenin', I still had some empty space between her fingertips and the top of her skirt, so I duplicated everything and just transformed it. So, you can see where... "Command T" is your friend. So, all I did was just ultra-graft it, so I left the width the same and just changed the top and bottom. That was so nice, I did it twice. [Lisa Laughs] There was a third and then a fourth again and at this point I was sittin back there just gigglin and lookin into the corner and that's when Lisa said, "That's too much, let's mask some back in." Well, and also, so if you notice, this is a good point now, you can get a little excited. Just because you can, doesn't mean you should and folks... I've heard that You have. And often you can get a little overboard with your effects, which is cool, which is totally cool. Can you put that back on your low mask? Yes, of course. The only point here is to be cognizant of clients. So I walked in and said, "Well, yeah, it's nice, but you can't even see her." So, you can, he just put the... original back on top. So, instead of going through and trying to re-mask everything, sometimes the right answer is not going in and masking everything down here. It's, just put it on top and paint it back in. Don't panic, it's all good. So again, we silhouetted, well let's just do it. We started with our original... loaded that selection, floated it up, "Command J" for duplicate. Let's write in "duplicate". And he spells. That's 12 years of Catholic school right there. (audience laughs) So this and this are now the same and then Lisa chose this masking. Go ahead and load that, that selection will touch this mask down here. These are the two that are the same. Get rid of that one... Backlight, and there's our original girl. Oh, I think that's a different mask. No, she's on top, honey, that's the mask. Yeah. Just turn her on, that's good enough. Okay. Cool. Now, once I got to this, it was lookin a little too, just monochromatic, just too white. So, I did a couple more colors back there. So, I picked up the teals and then went from teal to green and then the other way from teal to purple. And how did you do that? That one, I believe I just loaded, I made a selection of the backlight. So, the green one was to the right and then I just rotated it to give colored rays to come off as well. Wow, that's a good idea. So, started with her, loaded the selection, made a backlight... radial blurred that backlight out more... did it again... copied it four times... so now I have all that, all those rays goin on, added a couple different colors in and about and then masked in the proper girl, the original girl, back in so you could read her. And how'd you make those color adjustments? These color adjustments are hue saturation. This is a colorizing. Easy peasy. And I picked a magenta, this much saturation and not blown, just some, but not too much. And I noticed, I'm gonna stop him right there. Do you notice how he brought his whites down on the colorize, he darkened it? Can you slide your slider there? Yeah, so... See, if it were to.. You can't see it there. You gotta darken it down to give the color somewhere to exist. If it's blownin all out you're just gonna get some whispy, not-so-colorful, not deep saturated colors. So, I'm gonna stop him there. So again, as far as showing an alternate work flow, I never use hue saturation colorize on white because you can't colorize white. He does 'cause he lightens it. I mean, excuse me, he darkens his light. It's brilliant, it's easy to do, it just never occurred to me, just slide your whites down. Your value down, and then the other ones, you just? So here's fore-coloring, I name my layers, so... Here's this one's hue saturation, because it is a heat saturation adjustment layer. Coloring, so I know it's doing all kinds of coloring. And then I name each one, here's the purple one, the green one's there, blue one's there. That way when I'm rippin through here, "Live and In-Person with Lisa Carney", and I get all befuddled, I just look down and say, "Ah, I want the green one." The green one's right there cause it's called 'green.' It's really handy to label. So, while we're looking at this file, I wanna talk a little bit about your work flow. So, what's goin on down here, why do you have a shot of her, there's a regular pixel based mask and a vector based mask? 'Cause this is really, again, I think we touched on this just a tiny bit early in the day and this is an excellent work production thing that I'd like to call attention to. This is the original. The only thing we're seein' is a copy, a duplicate of the original. So, the background layer underneath it is exactly the same? Yeah. Okay. Then, we have her silhouetted so that she would... Here we'll put a new gray... Color, overlay. So, do you remember when I said he uses the "Eye Candy", the difference between him and me is I'm usually using it on pixel layer, he made a selection. So, that's your stored selection, is it not? Yeah. Yeah. Now, if that one's on, it's also on linear light, so before we got to bringin back the original, I had used it to brighten up the dress. That was on but if it was still an option and someone decided not to use it, they might have trouble when they're like, "Where's all that extra white comin from that dress?" So, then I added a second vector mask so I keep my alpha channel mask, but then I have a vector mask on and that one turns it off, so you have to intentionally want it, intentionally make the decision to find it, and turn it on. So, it's not gonna be on and get ya in trouble. It's there if you want it but it's not gonna... And this is really important. So, also, if you could just show under your layer, where the vector mask, where you can find that, under your menu bar, that'd be awesome. So, why this is such an excellent production sample is, so he's got his gal, he's got her masked out if he needs her or not, which he ended up needing her, and how fast is that, to copy her and paint her back on top? It's two seconds, because he stored this. So, while he's doing what we used to call the "dog and pony show"... The "dog and pony show" is when you're sitting and the client is sitting literally over your shoulder and saying, "Oh, well, can't you, just paint her back in?" He doesn't have to go, "Oh, let me put all these in a folder and I can mask it once." Or, "Oh, let me mask her out real fast." Because he had already prepared the file all he has to do is "command click" on it, move her up top in a copy, put it in quickly and easily and it takes two seconds, but he knows someone may or may not wanna use it, so to be safe he turns it off. It's brilliant and it's actually really good work. Well, thank you. It's just knowin your options and keepin' things... Not doin the work twice. If you already did the work once, put it somewhere. You tend to take this and safe it off in a different file. You have it, just not live right there. And that's a really good point to the way I tend to work is, anything that's not on and we're not using, get rid off it. I don't want it in there, I don't want it anywhere in the house and I know where to grab it, but what that does is if someone else picks up the file later, they may have to ask me for it or they have to look for it and that's problematic, so I will give you total credos on that. This is a better work flow; keep it in your file but make sure it's turned off. And what he's goin up there is you can actually see where, I don't think people use vector masks very often. So vector masks, what they do is allow you to turn off and on a layer but using vector technologies as opposed to pixel based, so it takes zero memory. There is no memory added or taken away by using a vector mask, so it's a really handy tool. It's a rare day you'll actually see it used like this, but it's really handy. And then this'll be if you're lookin to get your files down smaller if things get outta control and won't save, this'll be the first thing to go. Save it off like we were talkin' about earlier. Save it off into a folder on your desk top so it's not tied into this file. This'll make the file smaller. And those will be the first kind of things you're lookin' for to get rid of, so once things get unmanageable, throw your little cheat tools away. Now, I'm gonna give another slightly off-topic work production that this relates to. Let's say, for example, you're doing a composite and you have fifteen originals in there and they're masked out, you can actually leave them in the base of your file with a vector mask which is hide all, on the bottom and then as the file goes to production, everyone has full access to everything. But it's not actually gonna get turned on, they don't have to worry about a folder, because the mask is there, the vector mask. It will increase your file if you have stock photography in there, but for many of you that won't be an issue. And then, easily you have, no one's gonna make a mistake, you have access to it and if it looks a little messy for house keeping, you can put it in a layer set. Just simply grab all your originals and stick em in the layer set and call em originals, and again, a vector mask on em to keep em. Yeah, I mask things out so when someone else grabs these files or they turn everything on or turn everything off, they don't have to look through... Some of these files we get are hundreds of layers. So, if you're scrollin through hundreds of layers to figure out which one you turned on accidentally, that can cut into your... That walking dead file, how many curves were there? There were 1,130 curve adjustment layers. One file. Just curves. One file, could you imagine? Not levels. Not heat saturations, not characters, just curves. Right. It was massive. Right. So, on a work production thing, what was I gonna say about keeping your originals in there?... Okay, just as a basis for good production skill, if he and I could do the exact same file, the end result looks exactly the same, if my file means that someone has to spend two hours sorting through it to make an extension or give it to someone else, or break downs. Do you remember, we talked earlier about social media? Like, "Oh, you gotta do banners, oh wait." Instagram, wait, "What size is the Istagram?" "Oh, we have to do the... Facebook or... LinkedIn." Everything's a different size. Netflix, what is it now, 37 different sizes? I may be slightly off on this, but if you do a job for Netflix there is something like 37 different panel sizes you have to give em for the exact same show. Because you know how when you look at it on your Apple TV or your phone or your laptop, it all shows up? Well, guess who is delivering these files. Now, I'm gonna be honest here, they don't wanna pay our rates to get those different files, so they're gonna hire a lower end re-toucher or designer to do that. If our files are a pain in the butt to sort through because we didn't construct em well, they're not gonna call me again because I'm too expensive. Does that make sense? So, these kinda work habits are really good for longevity in the industry.
Class Materials
Bonus Materials with Purchase
Free Bonus Material
Bonus Materials with RSVP
Ratings and Reviews
user-3b9448
Oh my word! this must be the best money I have spent in years on my photoshop education. This class is amazing, just so very informative and I have only watched 2 lessons! Finally understand what the jargon around brushes means and how to adjust the settings to get what the gurus can do with brushes. Love this class - thank you Lisa and love: "Don't panic" :-). If you like photoshop and spend loads of money on other people's actions and overlays and "stuff", you need this class. Brilliant.
Pat Saizan
This is one of the best courses I have taken on Creative Live. Just amazing. This is geared towards intermediate to advanced Photoshop users. So happy to see an advanced class!! Very happy to see Alien Skin being used as a part of this course. Highly recommend this course.
a Creativelive Student
I can't say enough about this class. I am looking forward to watching this again and applying all I have learned at my leisure. Lisa Carney is am amazing instructor and I loved Simon as well, they did an awesome job! Just the handouts alone are well worth the price of the class. Thanks for another class filled with excellent content and lots of laughter. I own all of her classes and will certainly purchase any other's she instructs. Way to go Lisa! Well done and Exceptional!