Lessons
Class Introduction
07:18 2Create Backgrounds with Render Filters
28:19 3Autumn Background with Render Filters
08:56 4Create Fabric & Hair with Flame Render & Plug-in
12:08 5Using Mextures for Color Tone & Textures
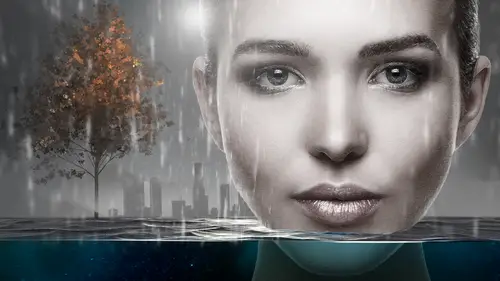
15:44 6Build Water Scene
24:41 7Use Filters & Plug-in for Rain
15:16 8Gradient Maps & Motion Blur for Photographs
05:51Lens Flare with Filters
15:34 10Smart Objects Overview
12:56 11Oil Paint Filters
17:17 12Snap Art Overview
13:32 13Camera Raw Processing
13:46 14Alien Skin Software Processing
10:29 15Adding Rimlight & Glowing Edges
11:08 16Alien Skin Software Backlit Plug-in
17:07 17Filigree with Alien Skin Software
12:11 18Type with Alien Skin Software
15:04 19Create Environment with Alien Skin Software
08:46 20Logos with Alien Skin Software
06:54 21Bokeh & Details with Alien Skin Software
15:21Lesson Info
Adding Rimlight & Glowing Edges
I would like to talk about glowing edges. So this is reminiscent perhaps of some current-looking movie-type illustration that we do and oftentimes what happens with these files, we have to make an illustrated look. We call it a rimlight, we have to put a rim around it. So I'm gonna turn this on and off, and we have illustrators who are really good at this. We have retouchers who are really good at this and it can take awhile to do. You have to hand paint them and hand do it? No we don't. We're gonna use something called glowing edges. So glowing edges, I'm gonna throw this mask away for just a second. And I'm going to turn this mode, once again we're talking about layer modes, layer modes for the day. I'm gonna put this on normal. Glowing edges is a filter that you find in Photoshop. Turn this off. Here's the original man. I'm gonna make a copy of him, Command + J. I'm gonna merge him, Command + E, my computer's gonna catch up with me. So here's a man copy. Copy of a man. I'm gonna mak...
e him a smart object. Why am I doing that is because I'm not the final decider and someone is gonna make this decision besides me but I'm gonna get it started and I'm gonna go to my filter and I'm gonna go to stylized, actually I'm not gonna go to stylized. I restarted, sorry, my computer's doing its thing. Okay. Do you remember I said that when you at the beginning some of your filters are gonna show up in your filter menu? And some are not, this is exact illustration of that. We had a little crash and my computer restarted so now none of my filters are showing up where they showed up before. It's not a problem, I didn't panic. I knew to go under the filter gallery and I've gone to glowing edges. So glowing edges, I love me some glowing edges. And what it does is it makes a negative of your image and it allows you to do this edge width, edge brightness, smoothness, smoothness is gonna take out the glow a little bit, chunkier, a little bit fatter. And then if you've learned anything today you have learned that blending modes are your friend and if you put that on screen mode, all you're gonna get are the highlights. Now he looks like he's a little bit of a burn victim right now and that's not a problem because you just put a black mask on that, you get a paintbrush, and you hope you're painting with white. There we go. And you can paint this in as you need it. And I don't know about you but some of you folks have to be as kind of lame at drawing as I am and it just allows you to go in and paint a rimlight lickity-split. I mean I'm, look at this, it's nothing. It's a hack job of a mask because you don't have to be super accurate because the filter did all the job for you. I'm gonna turn my color corrections on 'cause it might look a little better if you see it with the color corrections and what's nice about this process is so can you imagine if you've got a client who you're trying to, and I'm sorry, did we mention that we work with these clients? It's not one person. How many times has a receptionist been called in to make a call? I love receptionists, I don't mean anything against a receptionist but everybody in their mother gets to come in and make a decision about, wait, is that enough rimlight, should you do a little less, should you do a little more? Everybody, everyone gets to make a decision so this way I'm just painting in a little rimlight, lickity-split and I don't have to be accurate, I don't have to spend hours doing it and if they say more, they say less, you paint in more, you paint in less, it's two seconds, it's nothing, it's the best filter and then in addition because that is a filter gallery on a smart object, I can double click on it, I can make it more intense, less intense, I can come back in two weeks and redo it, and I can also blur it. So let's say I wanna just add a gaussian blur, let's say they wanted a little glowier. I think glowier is word, is it not? Alright, let's bring it down a little. So yeah, let's say I want it to be a little more scarlet, you could also change the mode. You can do it to something crazy, I'm not gonna suggest this, to like linear dodge, but you could if you wanted a more intense look. Not gonna suggest it for this. So that's a filter called glowing edges. I use this all the time, I use it to bring out details, to make something look more illustrated, and I think it's really fun, it's again, I don't draw. I don't draw very much and this just lets me get to it. I'd like to show you a variation on this, if I might. So that was glowing edges. There's another filter in the filter house, I'm gonna throw this away, and that is called finding edges. And it's very similar to glowing edges only it finds your edges, and all that means for you guys really is that it is a hard edge. So glowing edges are hard, excuse me, glowing edges are glowing, find edge is straight up. So here's the, I'm gonna turn this man off, this man, we've seen him before and then I'm using the find edge filter. Now the find edge filter, filter, stylize, find edge, has no adjustments. So do you know in the glowing edges, we did the edge, the brightness, the smoothness, find edges is either you're finding your edges or you're not finding edges, it's on or it's off. And it does the exact opposite. Do you remember on glowing edges it made it dark with light? This is light with dark. So it's the same thing only the opposite, so all that means for you guys is you need to invert it and you guys know that you have an adjustment layer down here called invert and all you have to do is invert it, then you put it onscreen, and you mask it in, and it's the same idea only it's gonna be hard edged. Coolio? Two of the same things? But with slightly different flavors. And then we just have some adjustment layers on top. So cool, so hopefully you guys will find a use for some of these more painterly looks. I understand that I'm not a huge fan of the filter gallery and the canned versions of what do you call it, painterly effects in Photoshop but the good news is you've got some alternatives. So we've got Snap Art which is 100% amazing. It's just deep and we have Camera Raw which you can play with, and we have Exposure. I don't put Exposure and Snap Art in the same category. Keep in mind Snap Art is more painterly and Exposure is more effects. And then there's a way to do some illustration on top with glowing edges or find edges. I did get a question that was kind of a generic Photoshop question but since we have time, the question is how do you res up? Excellent, alright. And no two Photoshop people will tell you the same thing, I guarantee you that. So let's just flatten this dude just for, for the sake of clarity. So there are third-party programs you can buy up, buy up, third party programs you can buy to do resolution change. Basically, you're effectively changing your image size. So how you do that is you are resampling up how do you choose to do it, do you do it in increments, do you do it, and there's different theories on this. I find for most of the stuff I work on, it doesn't really matter. I just change it so if it's 150 DPI file I'll make it a 300 DPI file and there is this whole section here by cubic sharpening, preserve details, preserve details to, I need to talk to you about that, one second, that's a 2018 addition, I'm gonna show you that. There's nearest neighbor. I have to tell you in all honesty, I really don't find a ton of detail. I tend to leave everything at preserve details right here, and in Photoshop and let's see if I am brilliant and I can find this for you, under preferences, what? Look at this, this is not in your handout. So pay attention. There is something called technology previews. There is a new resing up engine if you will in Photoshop 2018 and it's called enable preserve details 2.0 upscale. It's newest, latest and greatest in Photoshop, I have not had an opportunity to really experiment with this. And we talked about this briefly before when someone asked a question about file size, and working on a file size and if you have to res it up later, like this file size is small, it's 33 megs. Let's say for example I'm delivering this and I'm gonna resample, please make sure you put resample, and I'm gonna up this to 300 DPI. What I am then gonna do and I do this without fail, is I almost without fail, always, image, other, high pass, we talked about this a second ago, I sharpen, step number one. High pass we had talked about putting it on linear light, the most ubiquitous way of doing it is putting it on overlay. So once I've ressed up, I sharpen, and then I grain. So let's label this so you can see it, high pass, high pass sharpen, high pass sharpen once again you do it on overlay or you can do it on linear light. If you do it on linear light, be careful, it's gonna get crunchy. So linear light, it's a rare day I leave it at 100%. Linear light I will often put it at 50%. It is definitely harder than overlay, and then without fail, I add grain. So we did this a few times, brand new layer, add 50% gray, add some noise. How much, it's up to you, it's probably not gonna be a ton, color not color up to you, if there's skin tones, you know how I feel about it. Makes them green, so there's overlay. So res up, sharpen, add some grain. Great, awesome. Don't forget to turn that technology preview on, I think you might enjoy the results on that, 2018 only.
Class Materials
Bonus Materials with Purchase
Free Bonus Material
Bonus Materials with RSVP
Ratings and Reviews
user-3b9448
Oh my word! this must be the best money I have spent in years on my photoshop education. This class is amazing, just so very informative and I have only watched 2 lessons! Finally understand what the jargon around brushes means and how to adjust the settings to get what the gurus can do with brushes. Love this class - thank you Lisa and love: "Don't panic" :-). If you like photoshop and spend loads of money on other people's actions and overlays and "stuff", you need this class. Brilliant.
Pat Saizan
This is one of the best courses I have taken on Creative Live. Just amazing. This is geared towards intermediate to advanced Photoshop users. So happy to see an advanced class!! Very happy to see Alien Skin being used as a part of this course. Highly recommend this course.
a Creativelive Student
I can't say enough about this class. I am looking forward to watching this again and applying all I have learned at my leisure. Lisa Carney is am amazing instructor and I loved Simon as well, they did an awesome job! Just the handouts alone are well worth the price of the class. Thanks for another class filled with excellent content and lots of laughter. I own all of her classes and will certainly purchase any other's she instructs. Way to go Lisa! Well done and Exceptional!