Lessons
9:00 am - Class Overview
20:45 29:30 am - Top Buttons, Left Side
24:09 310:00 am - Top Buttons, Right Side
31:24 410:30 am - Back and Accessories
31:29 511:15 am - Front Side
23:15 611:45 am - Displays
22:26 71:00 pm - Shooting Menu Tabs 1 and 2
24:17 81:15 pm - Shooting Menu Tabs 3 and 4
23:25Lesson Info
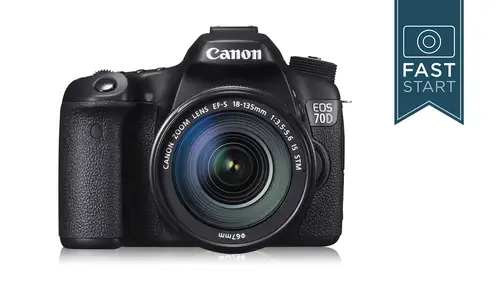
10:00 am - Top Buttons, Right Side
Okay, So back to the camera, we're gonna be moving over to the right hand side of the camera, and we have a bunch of buttons up here before we talk about the first. But let me just explain. The button pressing system on canon is very different than on Nikon and on other cameras. And so on this particular camera, the way that you work the camera is you press the button, the whatever button we're talking about, and then you have six seconds in which to get over to the motor dial and make a change. If you don't make any change in that six seconds, it turns off and goes back to the regular shooting mode. And so don't dilly dally. Press the button, get over to the main dial, start turning the dialling. You'll see those options. If you want to get Iraq back to the shooting mode quicker than six seconds, just press down on the shutter release halfway and will kick you back out of that mode. You might say so. Press down on the focusing and turn the main dial, and you will see that you have thr...
ee options. The options are one shot AI Focus. AI stands for artificial intelligence Focus and A I servo, which is for moving subjects. And so this is one of the most important setups of your camera controlling the focusing system. So let's talk about this in a little bit more detail. When you press halfway down on your camera, just the way it comes out of the box. It's in the one shot mode. This is basic photography, and what happens here is the camera will focus on a subject, and then it will stop. As soon as it figures it out, it stops focusing, and this allows you to recompose the photograph. And so, for slightly more interesting composition in a I servo mode, it is for continuous subjects that are moving and so sports photography, any sort of action photography. You'll press halfway down and it will track the subject. And as you press all the way down, it will continue to fire the shutter and track the subject as it moves in. And so very important key distinction between these two. Most of the time, I think a lot of photographers they're gonna have their camera in the one shot mode. Any time you're doing sports, you're gonna want to have it in the A. I serve a moat. Now they do have one other mode, just artificial intelligence. Focus. The AI focus and what this does is it looks to see if your subject is movie, and if your subject is not moving, it goes to the one shot. If it is moving, it goes to the ice ai servo. The problem that I and many photographers have with AI Focus is that it is somewhat inconsistent if you are dealing with a subject that is constantly moving. I coach a cross country team and I was photographing the end of a race like you see on screen here, and I had the camera accidentally in a I focus and the camera was tracking the runners in pretty well. But every once in a while it would lock onto the grass and remain locked on the grass as the runners ran out of focus. As they got closer towards me when I had a moment to check the camera, I realized that I had the wrong setting in and I quickly changed it over and so I think it's a pretty easy question. Are you shooting sports or not? If you are shooting sports, you want a I servo. If you're not, you probably want one shot. There's a few rare cases where AI focus might work, but most photographers don't like it because it is inconsistent about what it chooses and photographers hate inconsistency. Now the camera has a number of auto food, autofocus, customization modes. We will be going through that in the menu setting, but they're under custom function Group number two. There are about eight different settings on how to fine tune the focusing system on your camera. So if you do a lot of sports photography, there is some tweaking that you could do that we will get into at the very tail end of this class. And so that is the auto focus button. Let's dive into the next button. They've put these buttons on the top so that they're easy access because these are the controls that you go into on a regular basis. If you were shooting sports, the first thing I would do is I would change to a I servo that we talked just talked about, but then I would come over here to the drive mode, and I would put the camera in one of the continuous were the continuous high modes, so that when I pressed down on the shutter release, the camera would take one picture right after the other without me re pressing down on the button. Now we do have a lot of different modes. Normally, I take a lot of different types of pictures, and I just leave my camera in the single shot mode. Most of the time When there is action and I want a large series of shots, I go into the continuous mode or, more likely, the continuous high mode, which is what the little ages for. The differences is three frames per second and seven frames per second in the high mode, and so set accordingly to your needs. Now there is also a silent mode in a continuous silent mode, and what happens here is that the camera slows down some of the action of the mirror in the camera, moving up and down, and that will quiet the camera a little bit. It's not truly silent. It's a little bit quieter, and for anyone who doesn't have the camera. Let me give you just one example. So let me just put this over to manual because I like manual. So here's what a normal shutter sounds like, and I'll put it right up next to the mic. Oh, and I hate that beef, but we'll deal with that later, and I will put it now into the silent mode. And so if you were taking pictures in the theater or some other place where you just wanted to be super Super quiet, it's a little bit quieter. Maybe about half half the noise of the regular sounding cheddar question for me, John. Sure, I feel really quite understood. Silent mode, like is, Is there any reason why you wouldn't always keep it in? Silent motor is it does slow down the operation of the camera. Thank you. That's grand. So if I try to shoot rapidly, yeah, it's a little bit slower than if I went and I put it into the single shot. Okay, cool. And so it slows it down a bit. But for general shooting, you could just put it in a quiet mode if you don't need that extra speed. Yeah, great. Thank you. The other question that I don't know and don't ask me ok is whether it puts more strain or less strain on the Mir. I would love to know from the cannon technicians if it's more likely to wear out or less likely to where, frankly, I don't think there's been any test, and I have never seen anyone do any results on that. But that could be an interesting thing. Maybe you get double the shutter life if you use it in slow, and it's not any slower focusing. It shouldn't know. Focusing is exactly this exactly same. Great, thank you. So the final two options in here are kind of a combined self timer and or remote. There is an optional remote, which you'll see on screen here the R C six, which sells for around $25. If you want to fire your camera from a distance not too great a distance. We're talking about 20 feet or so. You can fire the camera either using the 12th self timer or a two second self timer using this remote. And so for anyone who doesn't want to bump their camera on a tripod or they want to do a self timer shot and they want to have more than 10 seconds. It's one of these very simple little remote that you can pick up from any good camera store for around $25. So that's the drive button. Next up, we're going to the I S O button. I s o just for quick reference stands for International Standards Organisation and basically means it's the sensitivity of the light sensor. It's the same as I S Owen icons and Sony's and everything else is out there now this cameras Best quality images will be gotten if you have your eyes so set toe eso 100. It's the native resolution of the sensor. It's what it was designed to be worked at to be used for best quality images. When you set the sensor toe, I s 0 200 less light will be coming into the sensor. It amplifies the signal and it produces a very good quality image. And you may not. If you're flipping through your dials right now, you may not be able to get up to that high one setting up 25,600 because in order to do that, you do need to go in to your menu settings and allow your camera to shoot at these very, very high settings. There's they kind of put a little governor on there so that you can't get there under normal circumstances. And I'm gonna recommend turning that off when we get into the menus heading. And so you would set this as generally the parameters for this is you want to set it as low as possible and keep it as low as possible. And so I try to leave my camera, and I so 100 as frequently as possible when I'm in a situation where I'm not getting the shutter speed that I want. If I'm shooting a sports event and it's getting a little bit dark out and I need a faster shutter speed, I will bump up my I s O. And I'm gonna show you some test results here. This isn't a review class, but I always like to, you know, do a quick little test to see how good the camera is. I kind of throw it on the same little test subject all the time. And this camera has very very clean results that I s 0 100 204 108 100. Not even worthy showing you. And for those of you who are maybe watching on the small screen that don't see this really clearly, 25, is a bit grainy. Okay, It looks like sandpaper. It would be something you would only want to use in a the most dire of emergencies in order of getting a shot. If quality is important to you, you want to avoid the two highest settings. Everything from down looks pretty good. In fact, you could shoot it 6400. And if you were producing small web images, most people would never know. But if you do want to make larger size images, larger prints, you're gonna want to keep that I s OAS lowest possible. And so between 1632 and 64 they just keep getting better. The lower you get in there and for best quality, I'm always trying to leave it at 100 I'll go up as far as necessary to get the picture because I would rather have a little bit of grain than too much blur in a photograph. So very good results on this. If you want to compare it with other cameras, there's other great websites that go do analytical tests between the two, but it's pretty good up to 6400. I would prefer to be a 1600 or below, though, and so that's the Isil said. You know, we do also have an auto eso and this is if you are unsure what I s o you want or you want to have the camera pick it for you. There are some situations where this could be a very handy tool where you know it's going to pick it within a certain range. In fact, one of the things that you can do in that I s o speed settings in shooting number three that will get into in the menu is that you can control what the camera will choose in the autumn oats that say, for instance, you didn't like the way the camera looked at 6400. It just did not meet your standards. You could say auto can go up to 3200 but no further than that. And so That's one of the I s a limits that you could set that we will talk more about later on. But for most photographers who wanna learn photography who want to practice the best settings on their camera, you're gonna want to set this individually as you shoot pictures in kind of frantic, hectic situations that auto I so can be kind of handy if you don't want to dive in and get that figured out in every situation. So that is I s o Next up, we're gonna be talking about the media ring system on the camera, and some photographers never change this at all. There are some photographers that, like using different metering systems, and they're constantly bouncing back and forth between the different options that we have. And that's why they put the button on the top of the camera. So for most people, the evaluative metering is going to be the safest, easiest metering system. What it's doing is it's looking at 315 different zones within the frame lines and comparing the brightness and contrast and difference between the zones and coming up with one very good average score for your shutter speed aperture combination. And I can tell you from many years of using the canon cameras it's really good. Very rarely do I have to make an adjustment or delete a photograph because it's because of bad exposure. And I use evaluative probably 99% of the time. And so that's a good safe mode to leave it. Traditional cameras had center weighted metering, which is this kind of big area towards the middle, doesn't really look off to the sides. They keep it on here, kind of for historical reasons and for legacy of people who did like that system. And then there are other slightly variables of spots. They have the spot metering, which is a very precise meter, which would be my second favorite meter because you can measure the light in a very particular area now. This is something you want to be very careful with. You need to be very precise about where you pointed it. You don't want to leave it in this mode when you start doing other types of photography because it is like a very sharp knife. It's very good at what it does, but you can you can hurt yourself with bad exposures. If you forget that your cameras in the spot meter there is also a partial meter, which is kind of a fat spot, you might say just a different size circle. And so we don't have time in this class to go into how to use all these different meters. But I can easily tell you that the evaluate to metering is a good safe place for general picture taking. Next step on this the shutter release. We've talked about this a little bit, but one weight that the camera manufacturers kind of term. How durable their cameras are is by how Maney shutter cycles the camera is expected to last, and this camera is at 100,000. And so to put that in reference, a lot of film cameras I recall had a 50,000 shut, her life expectancy to it, and so 100 thousands pretty good. The Canon seven D, which is thes slightly big brother to this one, I believe if I'm recalling correctly, is at 150,000 and the top of the line Canon and Nikon cameras are in the 250 to 400,000 cycle rage. And so it's not something that you would likely wear out. And just because you reach 100,000 shutter firings doesn't mean the camera's gonna break down. It's just like a car that has 100, miles. You could get many, many, many more good miles and shots out of the camera just depends on some variables, but that's how long it's expected to last. Next up, a little tiny button with a light symbol next to it. And what this is here for is just toe light up the top deck LCD. So if you're working under low light conditions or nighttime and you want to see what camera settings are in your camera, just tap that little button and it'll turn a light on for a few seconds, about six seconds. We have our top LCD, which I particularly like. I think this is one of the best on the market, in the sense that those buttons that we just went through a f Dr eso and metering. The buttons are aligned up with the LCD information. So when you set something on the button, it's right next to it that you see your city, so you don't have to look someplace else in there. The rest of the information in there is pretty obvious or will become quite obvious after we go through the display section. In this class, there's a little tiny, funny mark. It kind of looks a little like a Saturn symbol or maybe a UFO. This is the focal plane of your camera. If for some reason and I could see maybe in macro photography, or maybe with a very shallow depth of field lens and maybe doing some cinematography type work. If you've ever seen a measure of the different distance from the subject's face to the camera, this is the mark. They're measuring two on the camera cause that is exactly where the sensor is on the inside of the cameras. For us, the depth in the camera. This is one of the first cameras from Canon to have stereo microphones, which are those little holes on the side of the hot shoe and out in the front of the camera is this other little mystery button that I passed by earlier, and it's got these three little dots in the top of one little dot down below. This is known as the A F area selection button, and this button on its own doesn't do anything. What you have to do first is you have to press this button on the back of the camera, which deals with the A F points. And so what you'll do is you'll press the button on the back of the camera, and then you will That will activate the front buttons. So then you compress the front button, and this changes the focusing system on the camera. And this camera has a much more sophisticated system for anyone that owns the 60 D camera. And so this is where this one departs into seven D territory. So let's get in and talk about the auto focus area on this camera. So the first step to adjusting it is to press this what I call the thumb button because it's on that back corner of the camera that you would use your right hand thumb wet, and then you would press the button on the front of the camera and it would cycle through some of the different modes. Some of the modes allow you to move the focusing point left right up and down, and you could use any of the other controls on the camera, the dials or the touch pad on the back of the camera to move the focusing points left, right or up or down. So let's talk about three different modes that you have on this camera. We have single point zone and 19 a. M, so if you choose a single point, you will be able to choose any one of the 19 focusing options in the camera. And so the center is nice. It's good for many different reasons, but sometimes when you want to compose off to the side for a regular basis and you don't want to do focus lock, you would set your subject up off to the left or to the right hand side er, to any one of the 19. They're all quite good. We'll talk how good they are in just a moment. Next up is Zone A F, which is a block of either four or nine boxes. This is my favorite mode for shooting sports photography. Sports photography is very difficult, with just a single point. It's just too small of area to keep on a subject that's randomly moving around. And so the nine point is just a little bit bigger of a target and is where I do most all of my sports photography. I think it works very good for that and for wildlife. When you're really not sure where your subjects going to be or it covers a very wide territory, you can use all 19 points. The downside with just leaving it in 19 points all the time is that the standard program built into these cameras, including this one, is all 19 focusing points are looking for something to focus on, and what they lock onto is whatever is closest to the camera. And so if you're gonna photograph your small child and your small child is holding up a toy right in front of you, well, it's gonna focus on that toy and not their face. And so, if you know specifically what you want to focus on, I would choose single point for action. I would choose zone and for very general purpose, just quick focusing. Then I would use the 19 F points when you're just very, very quick and you don't have time to move things around. And there's not that situation where you're worried about things in the foreground. And so once again, you would press the thumb button on the back of the camera, the focusing point selection. You would tap the button on the front of the camera, and as you look through the viewfinder, you would see these different symbols come up that explain which mode that you are in now. I do want to talk a little bit more technical. Can I get a little geeky with you? Just a little geeky. All right way. No, there's some nerds out there is a geeky or nerdy I'm not sure, all right, so the camera uses what's called a phase detection autofocus system. It's also known as a beam splitter, and what it's doing is it's looking for lines. Your camera loves to focus on lines, and so if a line is only going through one of these little beam splitters, it doesn't understand. And so some of this sensors in cameras air Onley looking for horizontal lines, and they don't understand vertical lines, so a doorway or a tree makes no sense to them. They're looking specifically for a horizontal line, and if it's out of focus, it knows what direction to turn the lens to get it into focus. Some sensors in some cameras air Onley looking for vertical lines, and if they're not in a single line, they know how to turn the lens to get it in focus. And so one of the things you want to make sure when you're pointing your camera at something to focus is that there is a line going through those little boxes in the do you find out where those focusing points are now, on some cameras, you need a lens of 2.8 aperture or faster in order for these sensors to work. In some cases, you need a aperture of F four to get certain types of sensors to work in the camera. And this is not particular to this camera. This is more just general photography. How SLR is work with this type of focusing system and F 56 cross type sensor would be the best of these because pretty much all lenses or 56 or faster and across type sensor would look for both vertical and horizontal lines. So let's take a look now at what this camera has in it. Fortunately, one of the great things about it is that all 19 points are cross type A F points. So they're looking for vertical and horizontal lines, and they work with 56 lenses or faster, which is the entire collection of canon lenses. However, the centre focusing point is a little bit special. It has what is known as a high precision vertical, a F point, and what happens when you have a lens of to eight speed or faster? So in F 14 and F 2.0, enough 2.8 lens, this one has a little extra something in it. We're not gonna get into the technical what, but it's got a little extra system in it for proceed. Forgetting the focus exactly. Right on with focusing. There's two things important speed and accuracy, and there is a bit of compromise. If you want something really fast, it's not as accurate. If you want something really accurate, it might be a little bit slower and focusing it so this one has a little extra umph when it comes to getting that precision. You know that generally is only necessary with 28 lenses because they have a shallower depth of field. And so it comes in right when you need it. And so, uh, this is one reason why I really like lenses that go down to 2. and why I really like using the centre focusing point on this camera. It's the best of all the other sensors, all of the other focusing brackets. All right, so in review on you're focusing area, you're gonna hit the thumb button to kind of activate it. You're gonna press the A F mode button on the front of the camera. Just tap tap tap, and you'll cycle through the three different options on the camera. If you're working with single point or zone, you can use the main dial, the back dial or the little touch pad in the back of the camera to move those brackets left right up and down into whatever grouping that you want. So a lot of stuff with on on the auto focus, let's check and see if maybe there's a quick question or two about we do so are rats would like to know is, does this camera have the ability to do any back button focusing. And if so, could you maybe talk a little bit about? Sure, I will talk more about that later on. Oh, great. But I will mention that it does have back button focusing, cause there is a button for and further for those of you who do not know what we're talking about. Normally you press down on the shutter release to focus. But we have a button in the back where we can focus and separate, taking pictures and focusing, which is something that I highly recommend for the intermediate, intermediate and advanced level users. The beginning for photographers. It's sometimes a little too much button pressing, but this camera can do it and does it very well. Okay, fantastic. Thank you, John. And then l rookie from De Bronx wants to know when you are in a V or TV. Does the eso get set automatically as well as the shutter speed? The I S O is set independently of those modes and so you could have automatic I S O or manual is so it's up to your choice and how you set things in the I s o settings. And so there's a lot of completely independent systems on this camera. For instance, the Modi A. Whether you're in manual shutter priority aperture priority doesn't matter what focusing you could be in any focusing mode. And so all of those air completely independent. Cool. And you were talking about that special feature for the 2.0, or faster lenses 0. lens, right? You're right to 0.8. Is that just always on? Or is that some sort of feature you have tow? Tell it it's built into the to this built in. It's not something you really turn on or off Great, just in their perfect thank you. Okay, all right. So moving on past the focusing system, as we saw earlier. This camera does have a built in flash. If you want to pop the flash up, there is a button over on the left hand side of the camera. We also have our hot shoe, where we can add on additional light to the camera. So let's talk a little bit about flash. First off, Flash has a limited distance. How good is it? Well, it depends on exactly how powerful your flashes but in general it's good for things that are directly in front of you. So in this photograph, yes, we can illuminate the penguins, but we're not going to illuminate the mountains in the background. And so just be very aware of how far your subjects are in front of you. The most beneficial reason for using the flash for most people is people photography. So if you want to take a picture of a person on the left, we have your cloudy day standard portrait, and we can add in a little bit of fill flash, which adds just a little bit more light into the eye sockets and in on the face and can often help out in many portrait situations. One of the best times to use flash is under bright sunlight, because under bright sunlight you get very deep shadows, and when you add light, we call it fill flash because we're filling in the shadows with additional light. And so there's a lot of other great ways to improve the lighting on your camera. But just simply popping the flash up for some of those portrait's can be a very, very good system. Now this camera has many different flash modes that you can turn off and kind of special situations. We have a red eye reduction mode, which will help reduce red eyes. And as much as I hate red eyes, I hate the red eye reduction mode. And I'll tell you why I'm gonna tell you when and where to turn it off. Fill flash. We talked about just filling in the shadows. Slow sink allows you to use a slower shutter speed so that you can get maybe a blurry background with the flash stopping the action of your subject. We have a second curtain sink, and if you recall back to the kind of fundamentals about the camera, we have the first curtain and the second curtain. This synchronizes the flash with the trailing shutter curtain, which causes well. It looks like a streak of light out of the back side of a subject as it's moving through the frame, and the camera can also connect up and control multiple off camera strobes. Now this class is not going to get in and how to set up six different canon radio remote flashes. There are, I think we do have some other classes here creativelive that do that. But this camera can do that. In order to do a lot of these types of changes, we're gonna come back and cover this. When we get into the menu setting under flash control, there's a whole lot of controls. Turning all of the stuff on and off is kind of buried in the menu, setting a little bit and just kind of the one little quick side. Note the cameras. Top shutter speed when you are using flash is 1 to 50th of a second. So if you pop the flash up and you're trying to change your center speeds, the camera will block you from setting anything higher. So nothing wrong with the camera. That's just the limitations of where it's at 1 2/50 of a second is very, very good. It's a professional level flash, you might say, as far as synchronization speed. If you do want to add more flash than the built in flash, which is only good for about 10 feet, Canon makes a number of flashes, and the 1st 2 that you see on screen here the 90 e x and the 2 70 e X. I can't say that I recommend simply because they're not much more powerful than what you have already built into your camera. If you want a little bit more power than 3 20 E X is starting to add a bit more power, and it does add a video hot light. So if you do plan to shoot video, there is a light that will stay continuously on. But they warn you it's not very powerful, and it's only gonna illuminate subjects that are just a few feet in front of the lens. Probably the main flash that I would recommend for this camera. It is the main flash I would recommend for this camera is the 4 30 e X to This is just a good intermediate level flash. It's gonna sell for around 300 bucks. The 3 20 is going to sell for around $210 just for reference. And the 4 30 is nice because it does have they're a bit more power. You can bounce the flash up and down into the sides against wall, so it becomes much more versatile than some of the lower in flashes and has much more power. It's not Canon stop of the line. The top of the line is the 600 e x r T. Artie stands for radio triggering. If you do want to hook up multiple flashes, this provides the most convenient system for hooking up T TL flashes that are automatically controlled through the camera. They do get a little pricey. These run about 550 bucks apiece. And if you were trying to set up a nice little miniature studio, you're gonna want at least two, maybe three or four of these. And at that price, you might just look at some regular old lighting equipment, cause I think you could do ah lot mawr with regular lighting equipment. But these air small, their automatic, and so there are certain advantages with them. With any of these, external flash is kind of an necessary accessory. That I think will help out, is the off shoe Court three. This is going to sell for about $70 it allows you to keep full hardwire communication between the camera and the flash while the flash is away from the camera. Now granted, it's only good for about three feet it works good for hand held photography. For instance, if you're doing macro photography and you want to get the light positioned correctly for a close up subject, or if you're going to use a flash bracket for anyone who does wedding type work or corporate type gigs where you go into some sort of social situation, a party situation and you have a flash on the bracket, it allows you to turn the camera vertically while keeping the flash in exactly the same position. And this keeps a nice hardwire of connection as cool as wireless sounds. Ah, lot of photographers like a hardwire because it's very, very consistent and steady, and there's nothing that interferes with it. So it's a good little system to have for that now to control a lot of the flash features that I talked about. Once again, you're going to dive into the menu setting under shooting menu number two. There's gonna be a section called Flash Control. We're going to go through it in pretty good detail later on in the class
Class Materials
bonus material with purchase
Ratings and Reviews
a Creativelive Student
The good news is that this Canon 70D class is outstanding. John Greengo does an amazing job. I have bought several DVD's on the 70D but this class is superior. The bad news is that Creative Live Keeps putting out misleading information on their courses. In this E Mail it says: "If you're still watching, you can always go back to your My Classes Page to pick up where you left off." After several communications with their support I found out that they mean that you can go back to the course but not the place in the 30 minute course or whatever, a "bookmark" as their tech support called it. As an example, lets' consider an airport that has several giant parking lots. They could say that they have a system where if you lose your ticket they will get you back to your car. Sounds wonderful but all they will do is let you know which lot you parked in, not your actual spot. For the sake of clear communication they should drop that claim.
user-a98d6a
This was a wonderful class. John is a wonderful teacher. I originally bought the camera to do video work and it wasn't as helpful in that arena as I would have liked (but he fully admits to this being geared to photographers). I came back to it as a photographer and I feel much more comfortable and excited about using my camera.
a Creativelive Student
I agree with the other reviews. I was fortunate enough to receive this class free through the Adorama VIP program. After watching this series of videos, I would have been very happy to have paid the course fee. I had purchased a Canon 70D for a documentary project I am creating. This is my first DLSR and with all of the buttons and all the menus, it can be a pretty intimidating camera. I have shot film for many years and have had several Canon point-n-shoots so I am pretty familiar with photography basics. I will have to commend the demo on how aperture and depth of field. Very simple and concise way John explained this part of photography demonstrates what an effective teacher he really is. Just this part alone has made me want to watch his class on photography. The PDF that comes with this kit is great! There is one page that beaks down the menu system. This one is laminated and is in my camera bag. There are also a couple of pages on how to set the camera for shooting different types of events. I laminated these sheets back to back and these are also in my camera bag. Highly recommend this for anyone that owns a Canon 70D.
Student Work
Related Classes
Camera Guides