Lesson Info
23. Smart Sharpen
Lessons
How To Open Files
01:10 2Using The Home Screen
01:49 3Exploring The Interface
02:36 4Understanding Workspaces
03:04 5Tools and The Options Bar
01:56 6Finding Hidden Tools
02:31 7How to See What You’re Working On
06:19 8Selecting Things
07:06More Selection Tools
10:34 10Testing the Magic Wand and Quick Selection Tools
03:55 11The History Palette – Undoing Things
02:47 12Menu and Item Shortcut Keys
02:28 13Non-Destructive Editing
02:14 14Working with Layers
09:11 15Groovy 3 Exercise
10:38 16Layer Effects and Styles
04:25 17Layer Masks – Karen on Beans
06:41 18Using Adjustment Layers
04:36 19Using Filters
03:06 20Advanced Compositing Using Layers
07:42 21Non-Destructive Editing Techniques
03:17 22Understanding Smart Objects
05:16 23Smart Sharpen
04:36 24Understanding Histogram
04:08 25Adjusting Curves
03:46 26The Healing Brush Tools
07:28 27The Clone Stamp Tool
05:24 28The Burn and Dodge Tools
03:41 29Neural Filters
07:52Lesson Info
Smart Sharpen
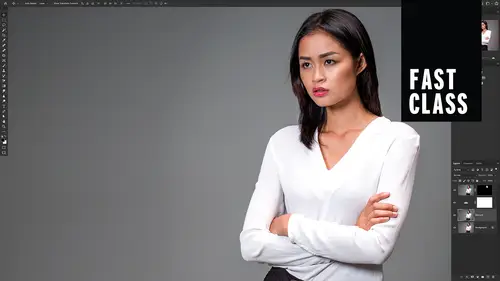
Now this file has all kinds of issues with contrast and color and all kinds of things. And we can fix that in a later episode. But what we wanna do now is we wanna sharpen this image. So the first thing we wanna do is go to the background layer, click on the lock to convert that to a normal layer. Now the other thing we wanna do when we're sharpening things normally we do that at the very last the very last thing you do to an image cause you wanna make sure you get all of the details on the resolution. Everything set first. Sharpening is generally done at the very last. We also wanna do sharpening at 100% zoom in so we can see exactly what's happening. You can't really see this if you're not at a hundred percent. So the very first thing I'm gonna do is I'm gonna click on my magnifying glass and say 100%. I wanna see this at 100%. And then I wanna go in here and I wanna look at Sandy's eyes and her eyelashes. And so make sure you do this on your own computer because these fine details g...
enerally don't translate very well to video. So you might not see what I'm doing in the video that you're watching right now do this on your own computer, on your own screen at home. And you'll see how this really pops and the difference that this makes. Okay. So now that we have this image at 100% What we're going to do is we're going to go to filter, sharpen, and you can see that there's all kinds of different sharpens here. So, smart sharpen is fantastic because it's generally the best of these sharpens to use. And so un-sharp mask used to be the favorite but smart sharpen is the newest. So we're gonna click on that. And then this is gonna bring up a new dialogue box. Now notice this dialogue box has a preview window and it by default opens at 100%. We want that because we want to be able to see what's going on in our image at 100%. So I'm gonna put her eye in this window so you can see the eye right here. If I unclick preview what's going to happen is I will see in this window what's happening, but I won't see in the big window what's happening. I like to see what's happening in the big window. And so I'm gonna click preview. Now what you can do here is you can go in and choose a preset. So that is something that has been created by you to be used for later. And so I haven't saved any presets. I haven't done any of these because generally, I like to do this per image. So I'm gonna keep this at custom. The first little slider you see here is the amount. How much sharpening do you want? So how much contrast do you wanna put between those little pixels there? So let me over sharpen. So I'm gonna do this way over here at 500%. And what you'll see is on your screen, you'll see that you start getting some halos and things around areas. You don't want that. You don't wanna see this to be too sharp and so you'll get all kinds of weirdness if you over sharpen something and we can really see that if we change the radius. Now the radius, remember we're changing the contrast. We're taking the dark areas, making them darker making the light areas, making it a little bit lighter but how far out from that boundary should we go? That's the radius. And so if I take this radius from one pixel so we're just taking just this pixel and this pixel and we're changing them. If I take that to let's say 20 pixels, wow. Now you're really seeing some nastiness. And so you can see here when we look at the eyebrows and stuff, that the eyebrows are very very dark and then everything around the eyebrows are very, very light. Cause we increased the radius. That's too much. This makes her look like she's got some very bad skin damage from the sun. So we can take this radius down to maybe 0.9 pixels. Generally speaking, you're gonna be working in the range of one to two or maybe three pixels, even at 2.3 pixels see how her skin looks all shiny. It looks like she's got a bright light. That's too much. We need to take that down. We need to take it down a little bit more. Take it down a little bit more. Let's take it down to maybe one pixel. That's a good area. And then the amount we can take that down to something that's more reasonable maybe a hundred percent or 70% something like that until you see this really popping but not to a point where you see noticeable effects of that contrast change.
Class Materials
Bonus Materials with Purchase